We’re thrilled to announce that Restaurant for WooCommerce v2.0.5 is now available, giving you new features and upgrades like tipping, cart suggestions, holiday calendars, and more.
Here is a look at what’s new in Restaurant for WooCommerce v2.0.5:
Add a Tip:
- Admin can allow customers to add a tip to their orders.
Cart Suggestion:
- Admin can choose to display recommended products in the cart.
Order Limit:
- Admin can limit orders per time slot.
Holiday Calendar:
- Admin has the option to mark specific days as holidays.
Admin Can Allow Tipping on Orders
Admin can allow tipping on orders and add a label and amount of Tips. Multiple tips can be created; it’s also possible to enable custom tips. This field will appear on the front end, and the user can set a custom Tipping amount.
- To set up Tip Option, Navigate to RMS Menu → Settings → Tipping.

- Tipping can be Enabled/Disabled using the Radio Button.

- Tipping Options feature two options, Label and Amount, which can be specified on the checkout page.
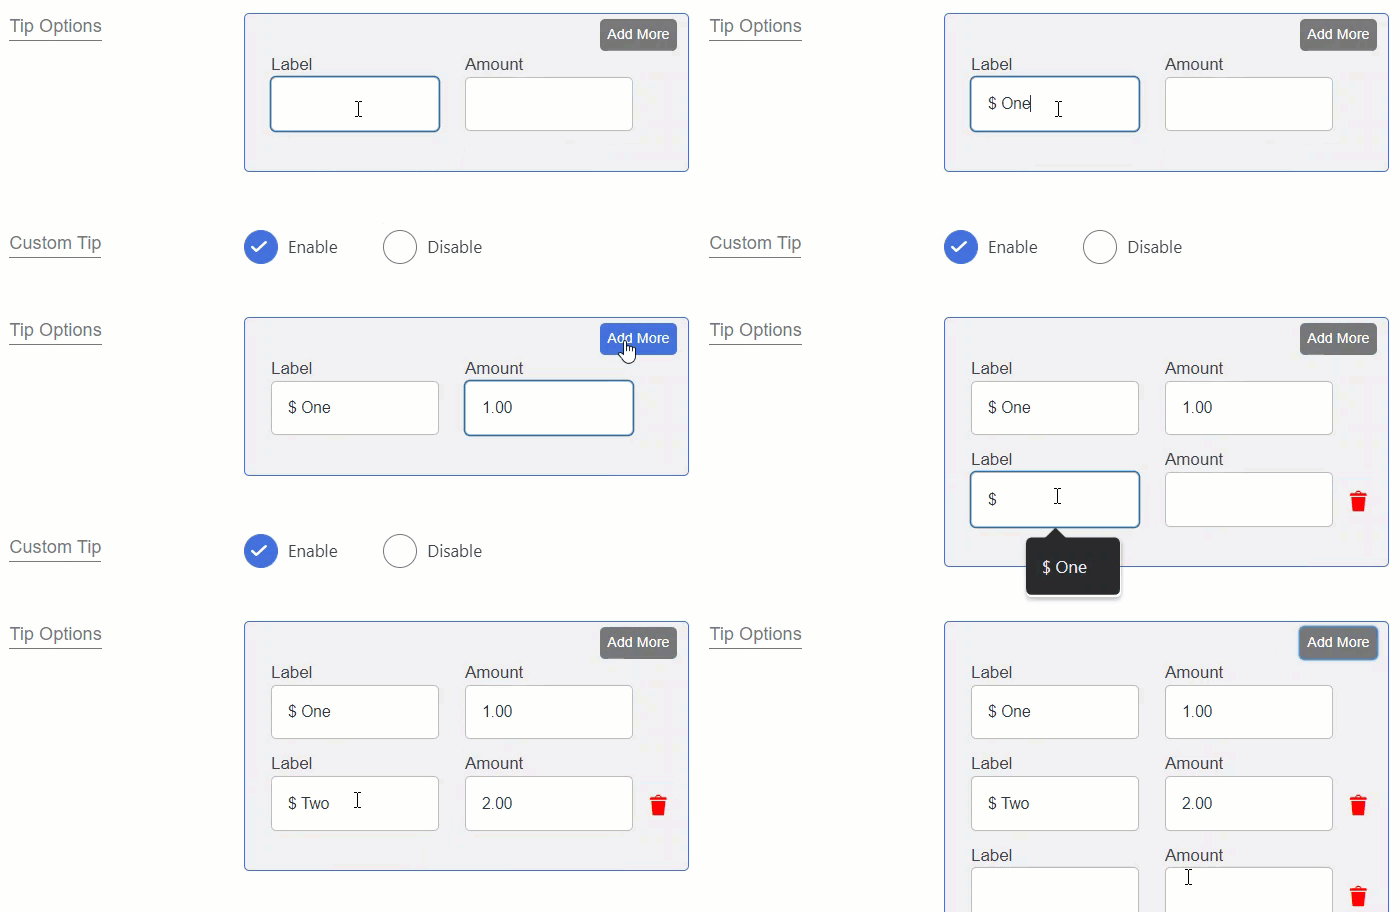
- Custom Tip can be Enabled/Disabled using the Radio Button. Custom Tip allows users to select Tipping Amount on the Checkout page.

- Users can set the Custom Tip Label button text to select a custom tip.

- Now click the Save Button.
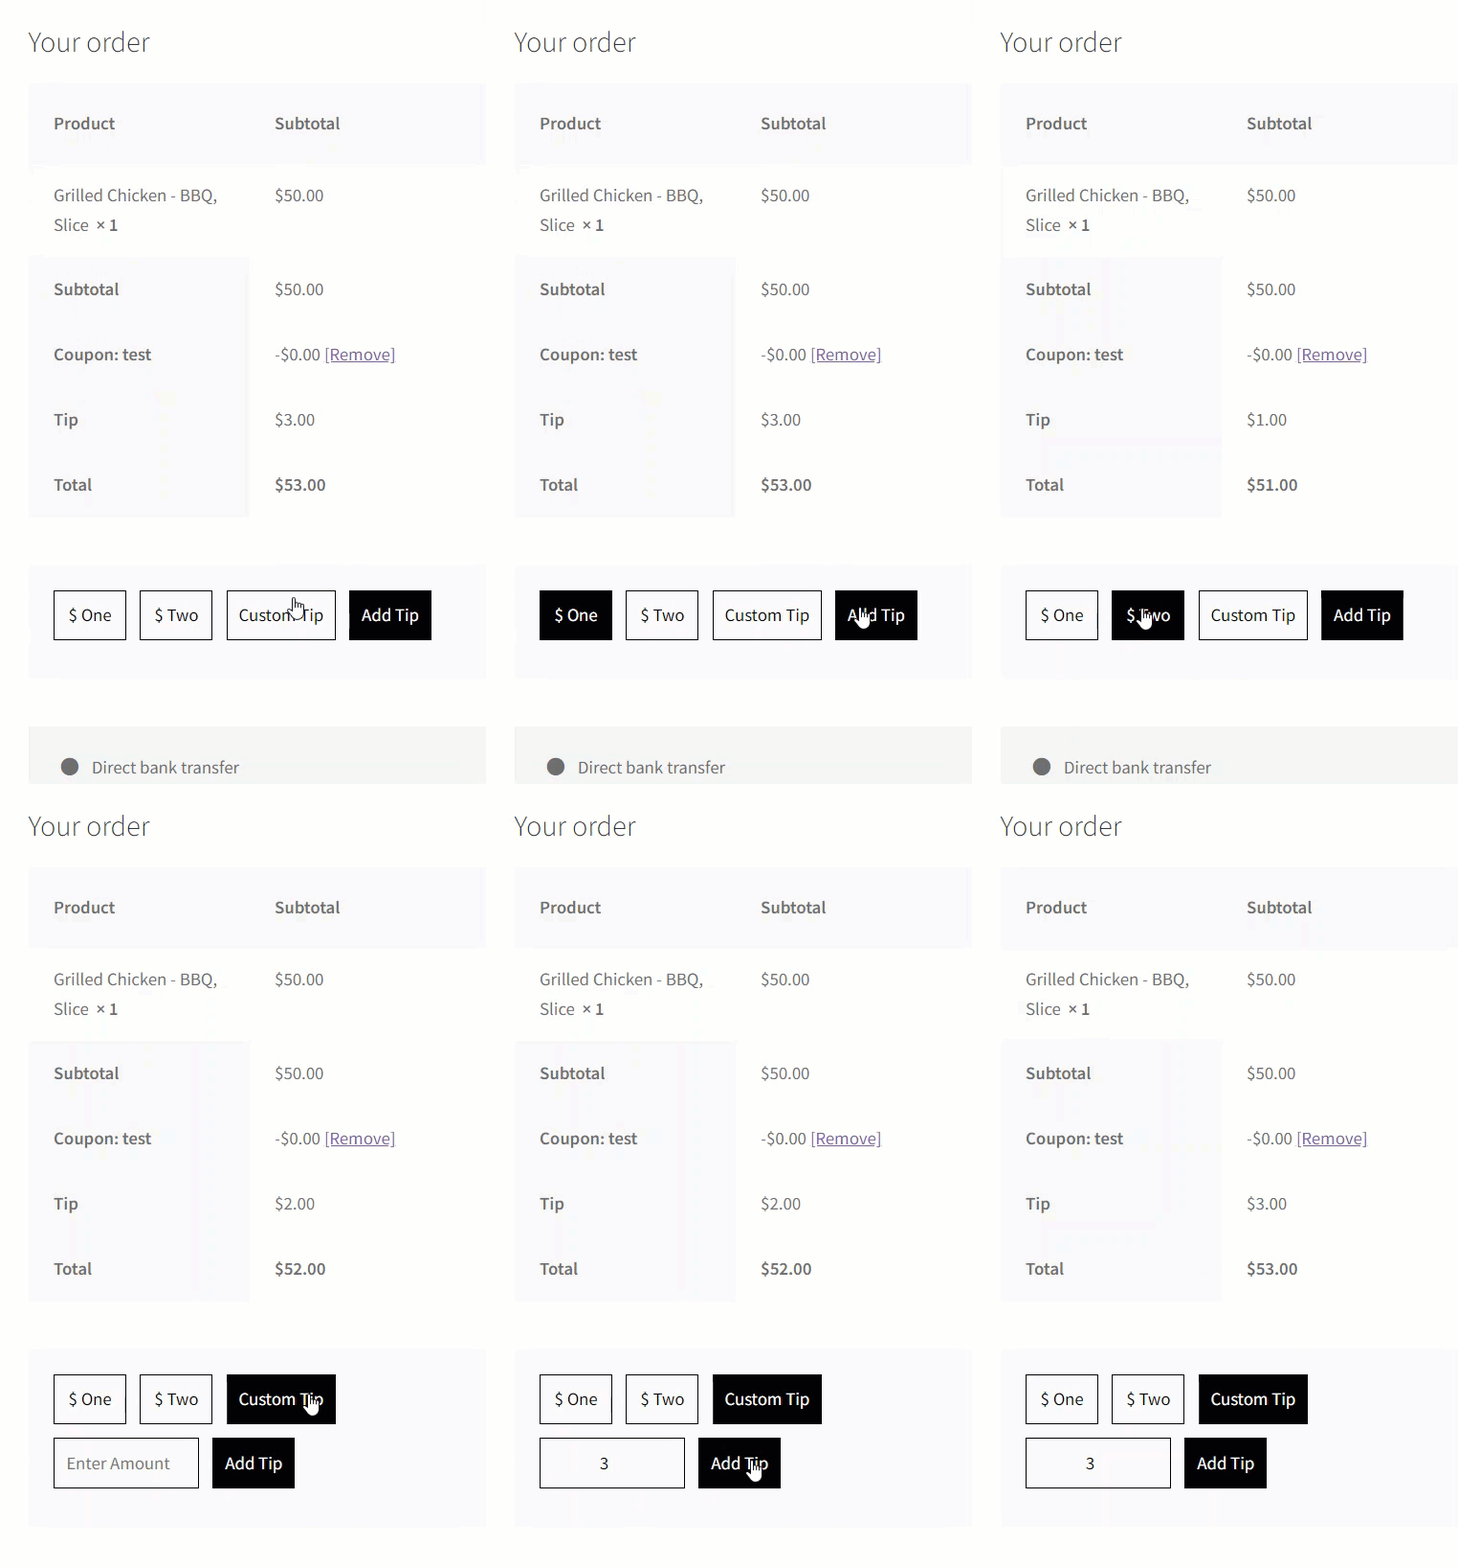
Admin Can Show Cross-Sells In the Cart
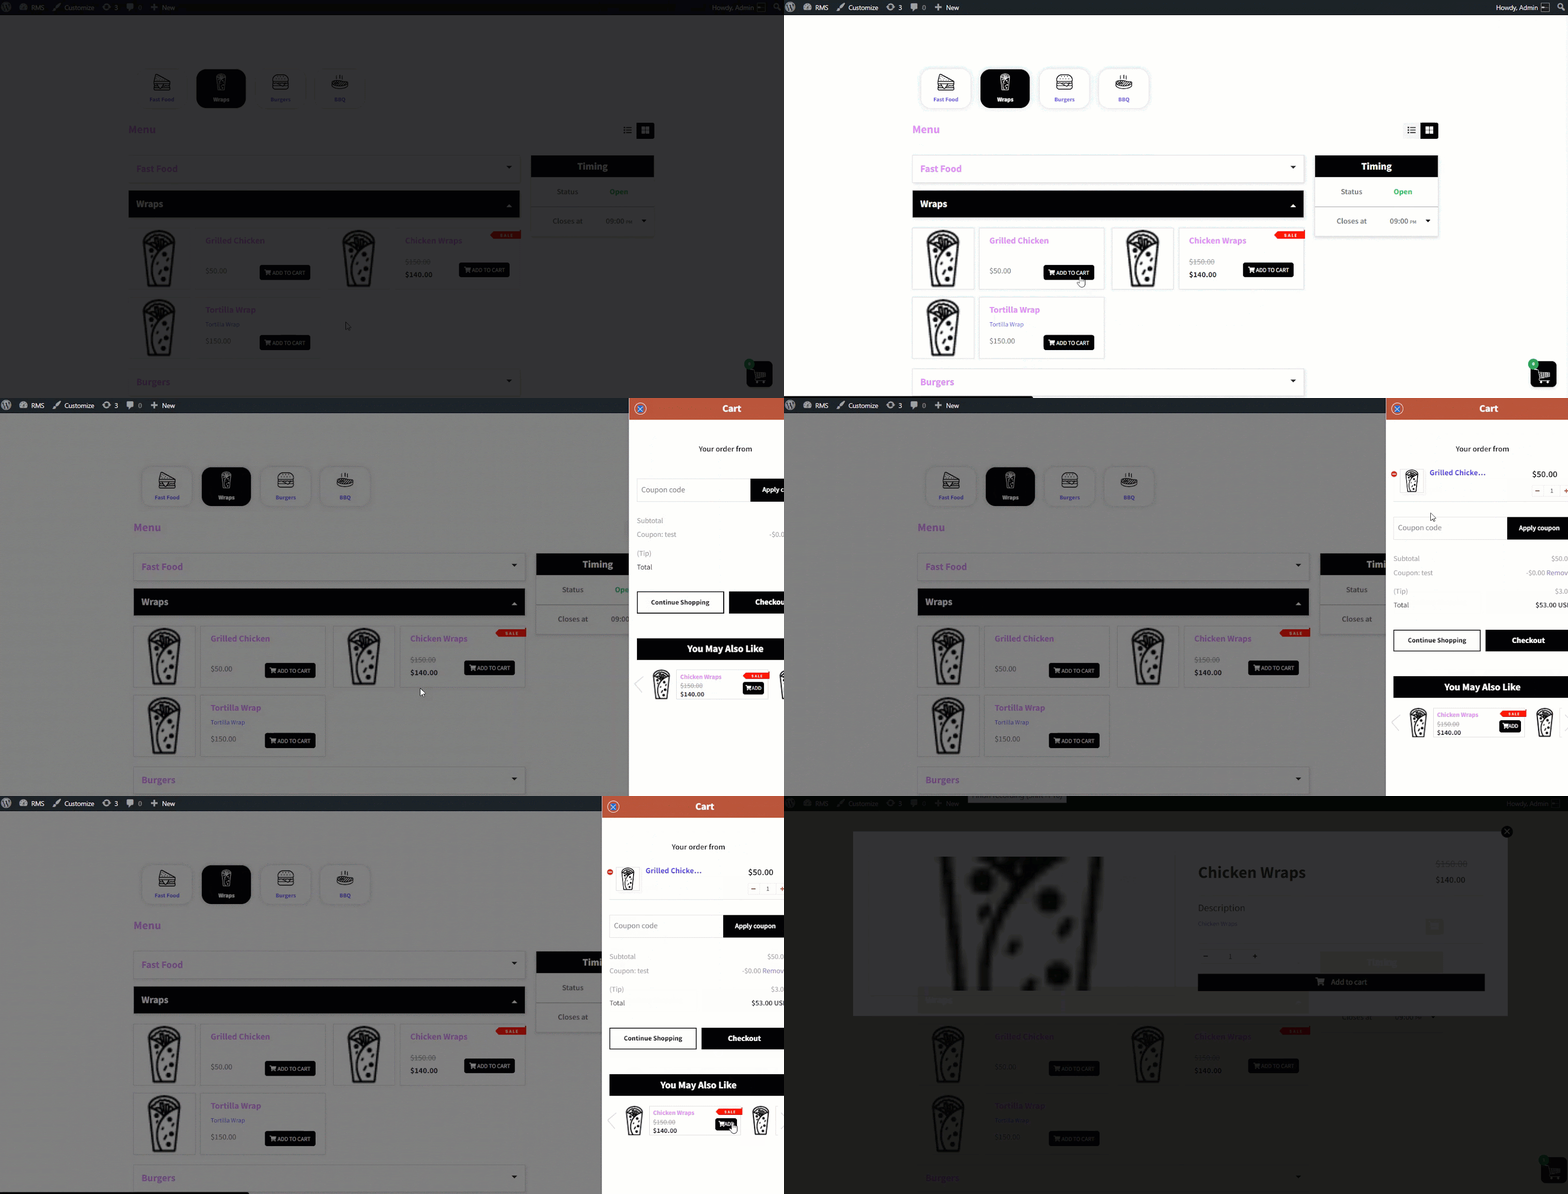
When a user adds the main product to the cart, the products chosen in the cross-sells box will be displayed in the cart’s suggested area.
- To set up Cart Suggestion, Navigate to RMS Menu → Settings → Labels.

- Add → Suggested Item Title

- Next, the user must add the cross-sell product to the Sliding cart.
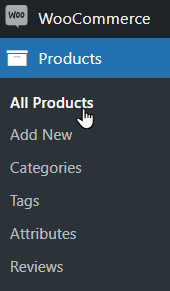
- To add cross-sell products, navigate to WooCommerce → Products → All Products.
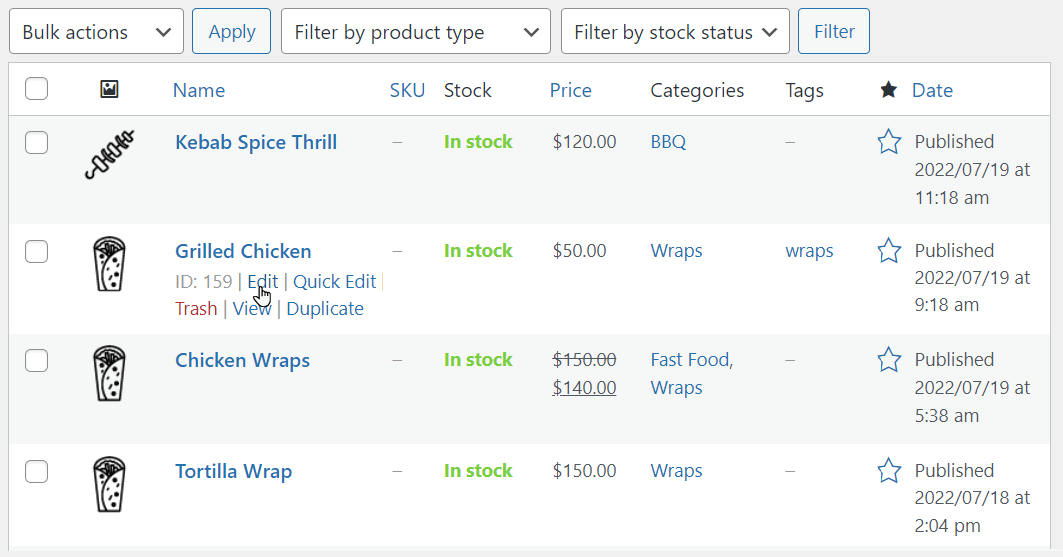
- Now, Click the edit button to select the desired product.
- Now, under Product data, select Linked Product.
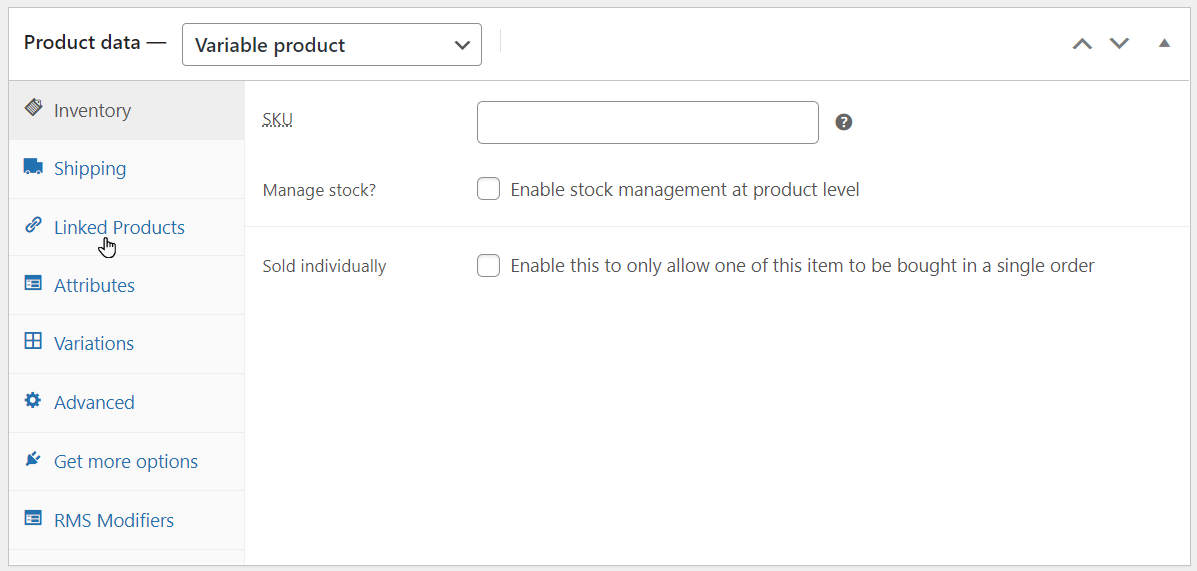
- Then, search and select the product in the Cross-Sells textbox.

NOTE: The related product options apply to both simple and variable items. If numerous products are selected in the cross-sells section, the portion of the suggested item in the cart will appear as a carousel for consumers to swipe.
- Now click the Save Button.
Admin Can Set a Maximum Number of Orders Per Time Slot
- To set up the Max Orders Option, Navigate to RMS Menu → Settings → Timings.

- In the right pane, a new window will open labeled RMS Menu Settings.
- Select the Timings section.

- Add the desired Max Order Message in the text box.

NOTE: If this field is left blank by default, a Maximum order reached message will be displayed.
- Now, under the Opening & Closing Time section, in the Timings pane, enter the desired Max Order limit.

NOTE: A popup notification will appear if the restaurant’s frontend orders surpass the maximum limit for that time slot.
- Now click the Save Button.
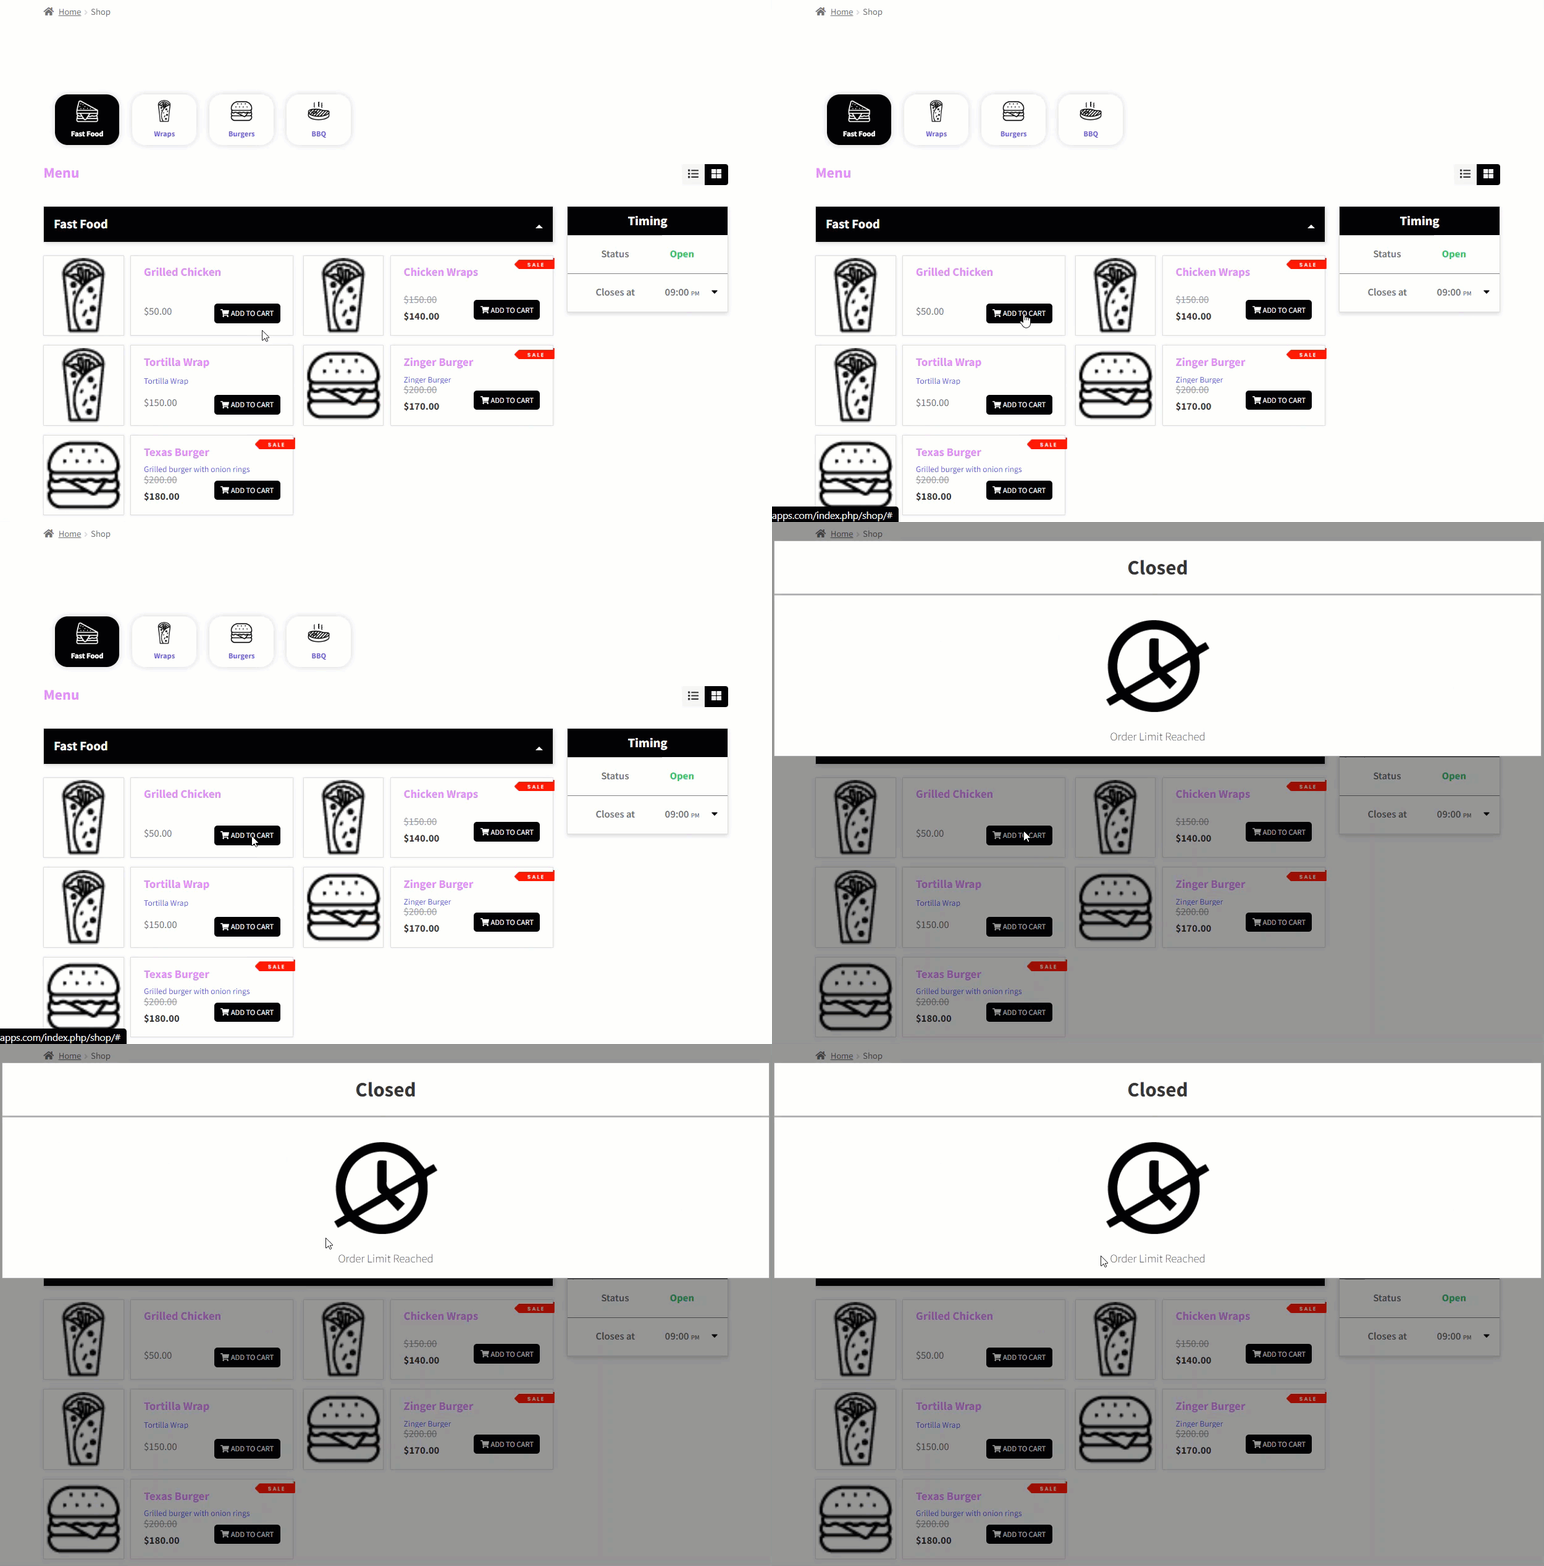
NOTE: Max Orders only work for delivery. Admin can receive any number of orders if the Max Order option is blank.
Admin Can Define Specific Days as Holidays
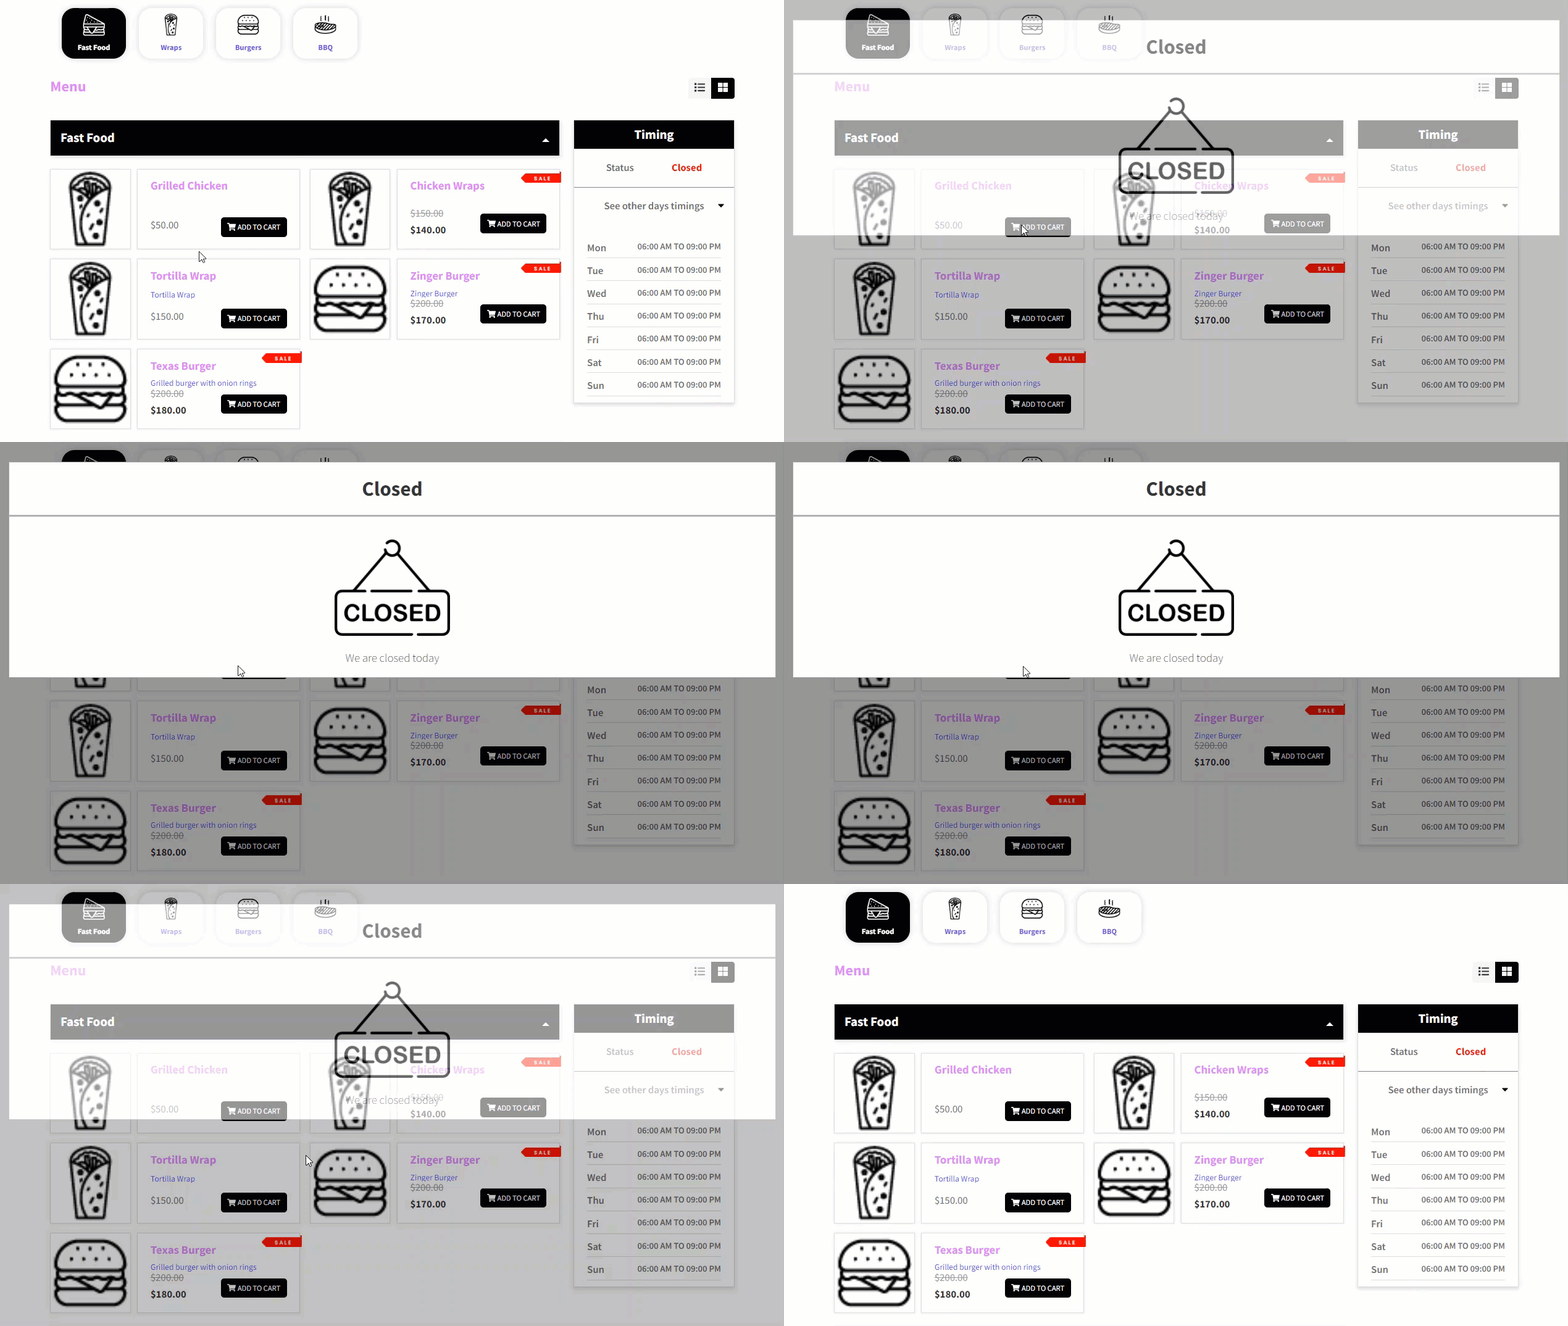
Admin can set holidays. On these days, the restaurant will be closed regardless of the hours. Holidays might be one day or longer. The admin can add holiday dates and set the holiday message to display on holidays.
- To set the Holidays option, navigate to RMS Menu → Settings → Timings.
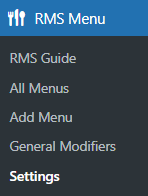
- Under the Timings section, navigate to the Add Holiday option.

- Admin can now Add A Holiday for a single or a series of days.
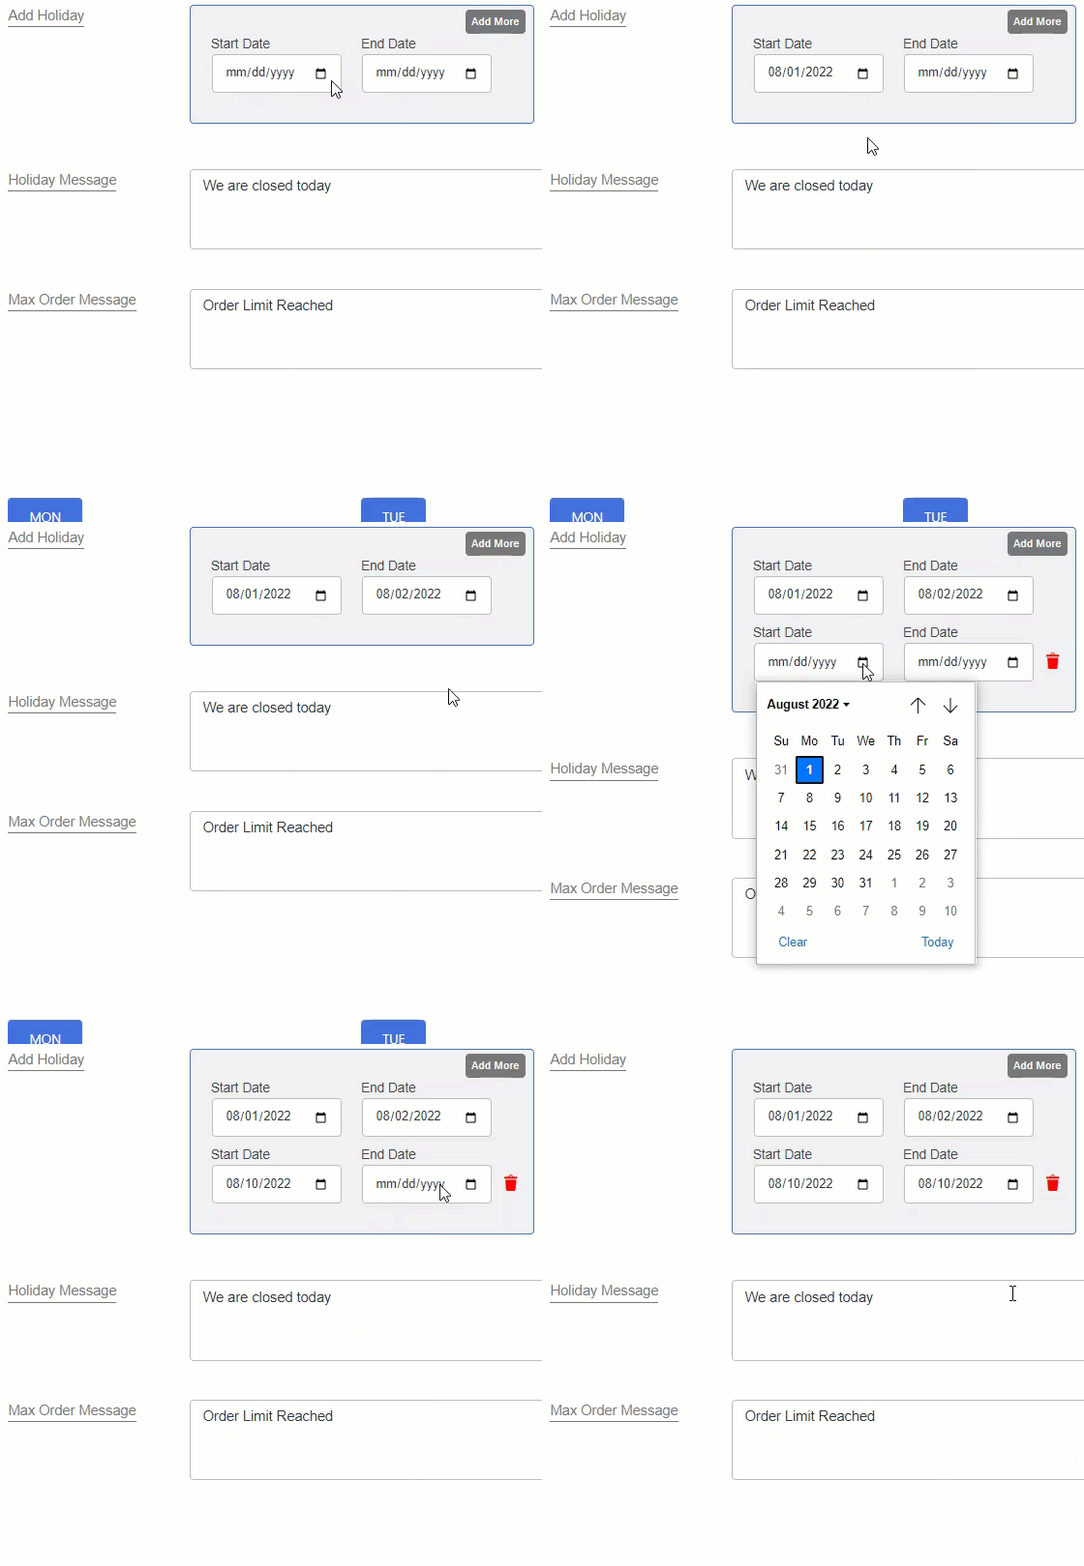
NOTE: The holiday start date and end date must be stated; one cannot be left blank.
- Admin can also enter the desired Holiday Message.

NOTE: When the Restaurant is closed, it will appear as a popup.
- Now click the Save Button.
We would really appreciate it if you could give us some comments on Restaurant for WooCommerce v2.0.5 and how we can make it even better in the future.
For more information, please visit our technical documentation. You can also contact our support team for any questions or queries.