

Are you looking to integrate an appointment booking system into your WordPress site? Gravity Forms booking provides the flexibility to design the user experience according to your preferences. While the plugin previously lacked an interactive multi-booking appointment form, Gravity Booking now addresses this limitation.
This blog post will discuss the advantages of using Bookings for Gravity Forms. Also, we will guide you through the setup process and demonstrate creating an appointment booking for your WordPress site.
Gravity Forms Booking: Why You Should Use Gravity Forms to Create Online Appointment
While many other online appointment booking options exist, they all force you to conform to their predetermined workflow. This is acceptable if your use case perfectly matches theirs, but you need to compromise frequently.
We adore Gravity Forms because it is simple and may be easily configured to handle details that other solutions cannot support or do in an uncoordinated manner. Gravity Forms is highly versatile, supports a variety of payment gateways and third-party applications, and submissions can be easily exported to a CSV file. It is also extremely developer-friendly, allowing for close integration with other functions as needed.
“Furthermore, Gravity Forms is compatible with any WordPress theme. For instance, if you have to create a Google two-way sync, you do not need to know an intense level of coding.”
We could have employed any form builder because we are totally independent of Gravity Forms. However, after evaluating numerous options, we chose Gravity Forms due to its seamless functionality. Since then, we have discovered that they are an extremely professional company to collaborate with.
Why You Should Integrate Gravity Booking into Your WordPress Site
Adding an appointment booking system to your WordPress website is a convenient way for web visitors to schedule time with you or attend your events, regardless of their status as regular visitors, existing customers, or new people.
You can set up an appointment booking form through Gravity Forms Booking for a variety of reasons, including:
- Appointment to use gym facilities
- Cab booking
- Ticket booking
- Law consultancy
- Customer support
- Spa and salon appointments and more.
“For a group coaching session, you could use a simple, open-ended form that accepts registrations and notifies guests of the event details. For a one-on-one session like a clinical appointment, you can create an appointment booking form system that syncs with Google Calendar using Gravity Booking.”
The best part of a Gravity Forms booking system is that it’s always available, operating 24/7 to accommodate your visitors’ scheduling needs. This eliminates the need to speak to you to set up an appointment, keeping the relationship moving forward.
Additionally, using Gravity Forms bookings eliminates the need for a separate plugin or application to schedule appointments. You can do everything from your form’s plugin, which offers a variety of other applications for your business.
Gravity Forms Booking: Creating an Appointment Form Using Gravity Booking
In this guide, we will walk you through how to set up your Gravity Forms booking system on your WordPress website.
Step 1: Install Gravity Forms
To create a form through Gravity Forms bookings, first install the Gravity Forms plugin. For installing plugins the first time, follow their guide.
Also, install the Gravity Booking plugin now. You’ll need it later to track bookings.
Step 2: Installing Gravity Booking
- Log in to your WordPress Admin Panel.
- Navigate to the WordPress Admin Dashboard → Plugins → Add New.
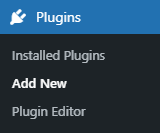
- Click the Upload Plugin button on the top left corner.
- Now, click “Choose file”.
- Select the zip file that you have downloaded and upload it.
- Click on the Activate Plugin button.
Step 3: Creating an Appointment Booking Form
- Navigate to the form on the front end.
- Go to the Bookings Form section.
- Select the Location, Service, and Staff.
- Now select the date on the calendar accordingly.
- Now select the slot on that specific date.
- The total amount will appear in the Total section.
- Once done, click on the Submit button.
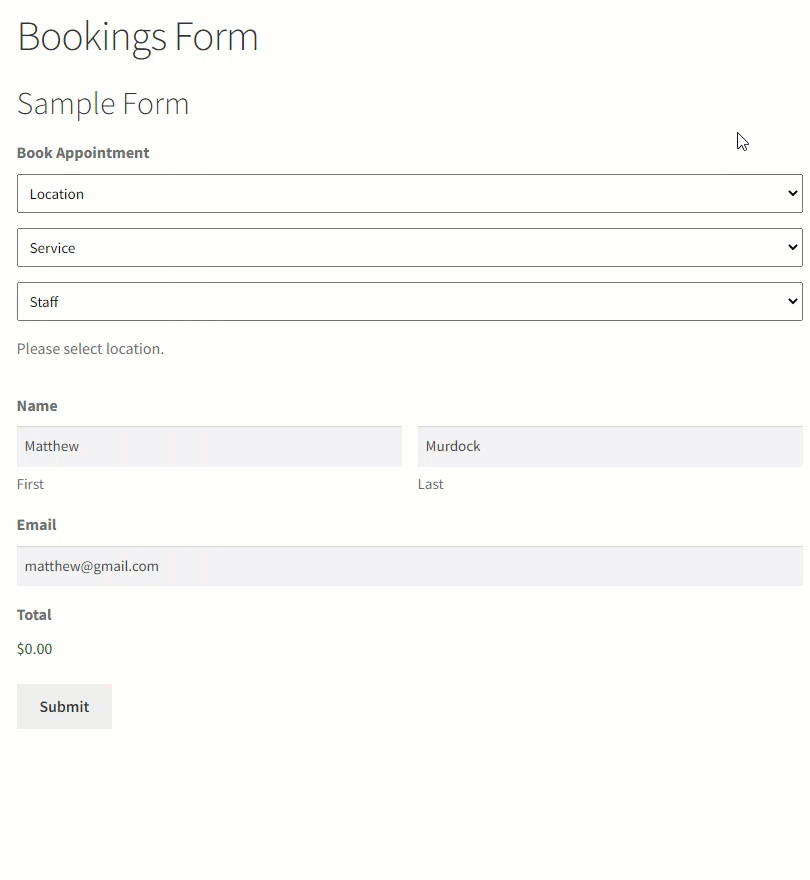
Once the Booking is successful, a message will appear on the form page.

Step 4: Go For Multiple Bookings
It is possible now to book multiple appointments in a day or for multiple days. All you need is to:
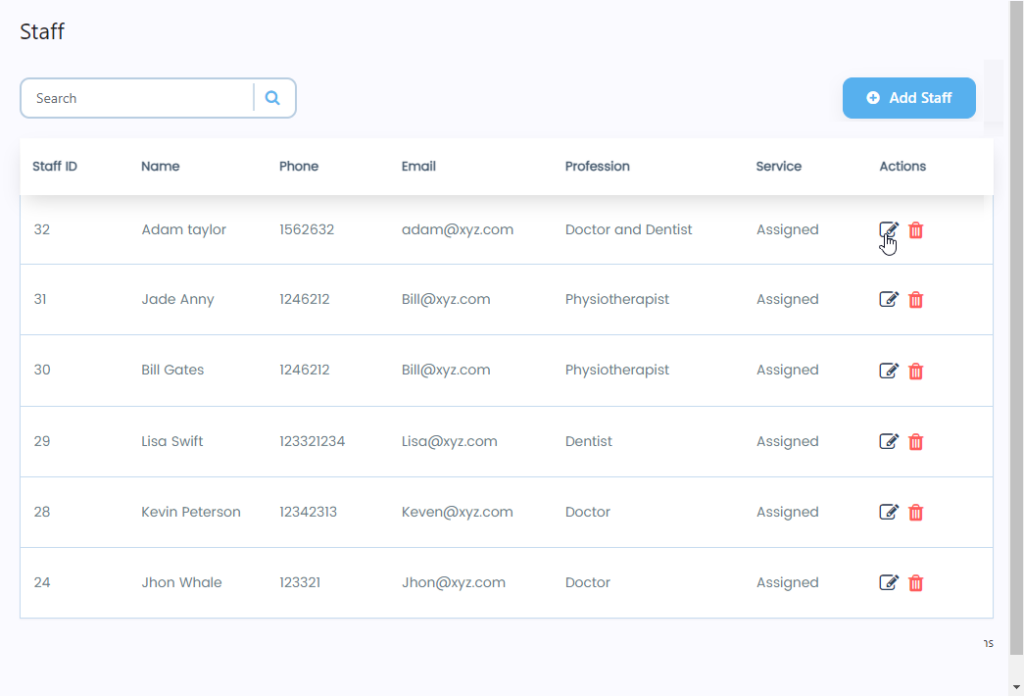
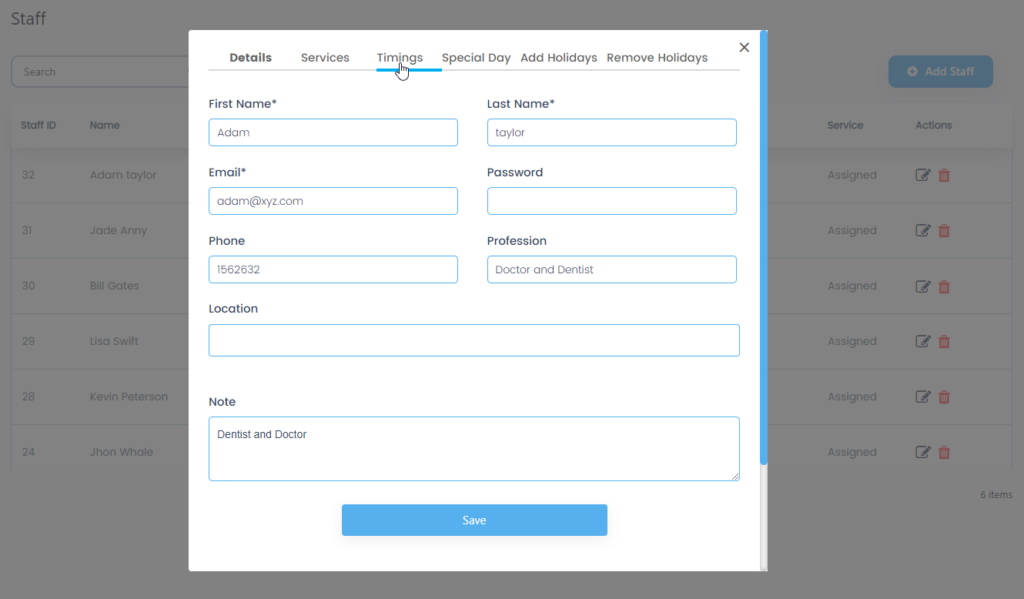
Navigate to WordPress Admin Dashboard → Gravity booking → Staffs.
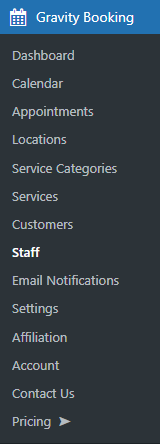
Click “Edit” next to Staff.
A popup will appear.
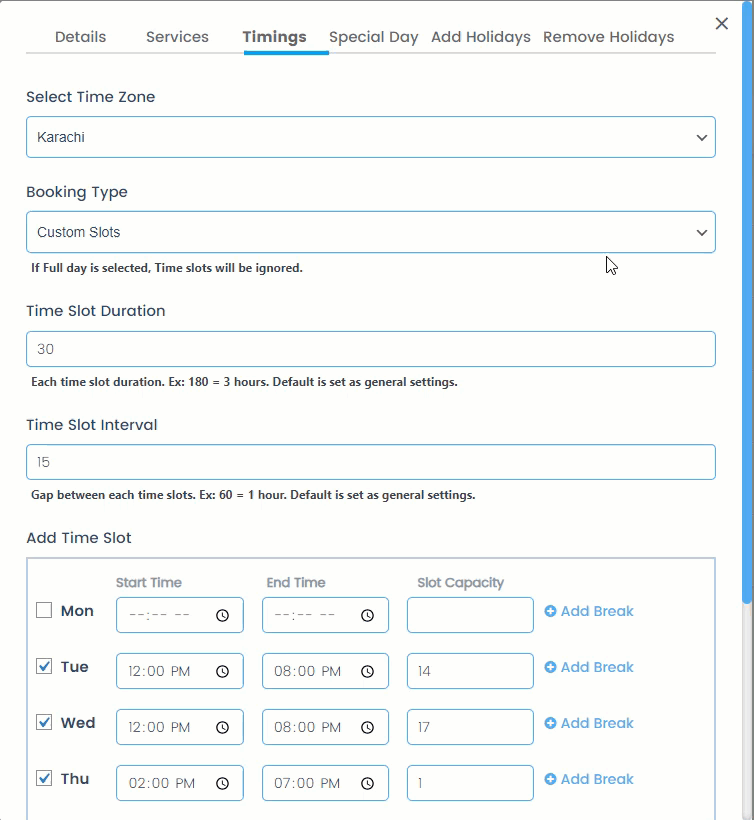
Now, navigate to the Timings tab.
Under “Booking Type,” select the Full Day option from the dropdown menu.
Once “Booking Type” is elected as Full day, a label will appear named Multiple Booking.
Select the “Enable radio” button under the “Multiple Booking” label.
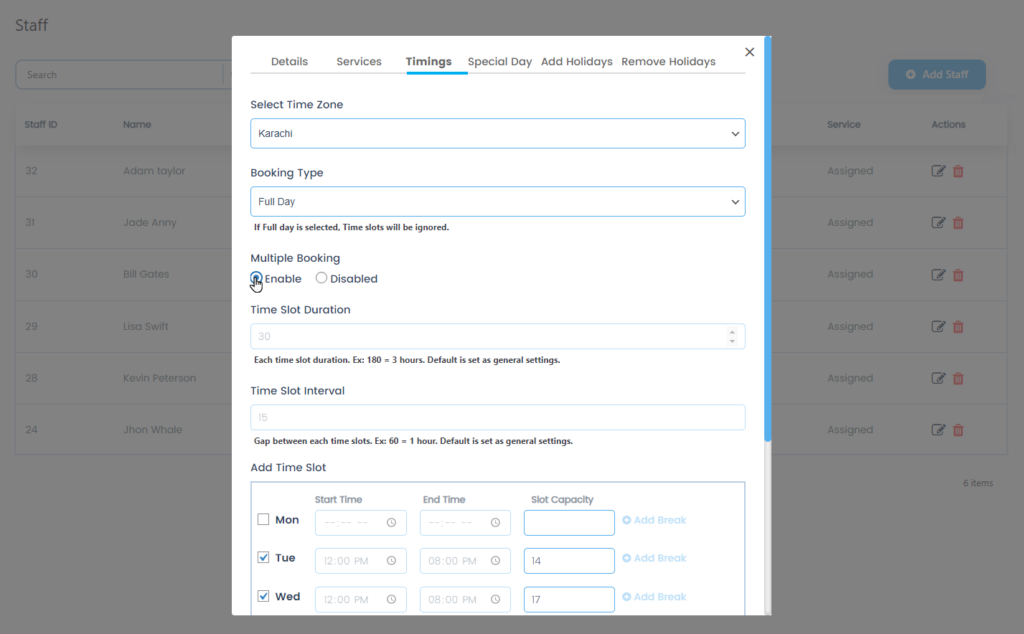
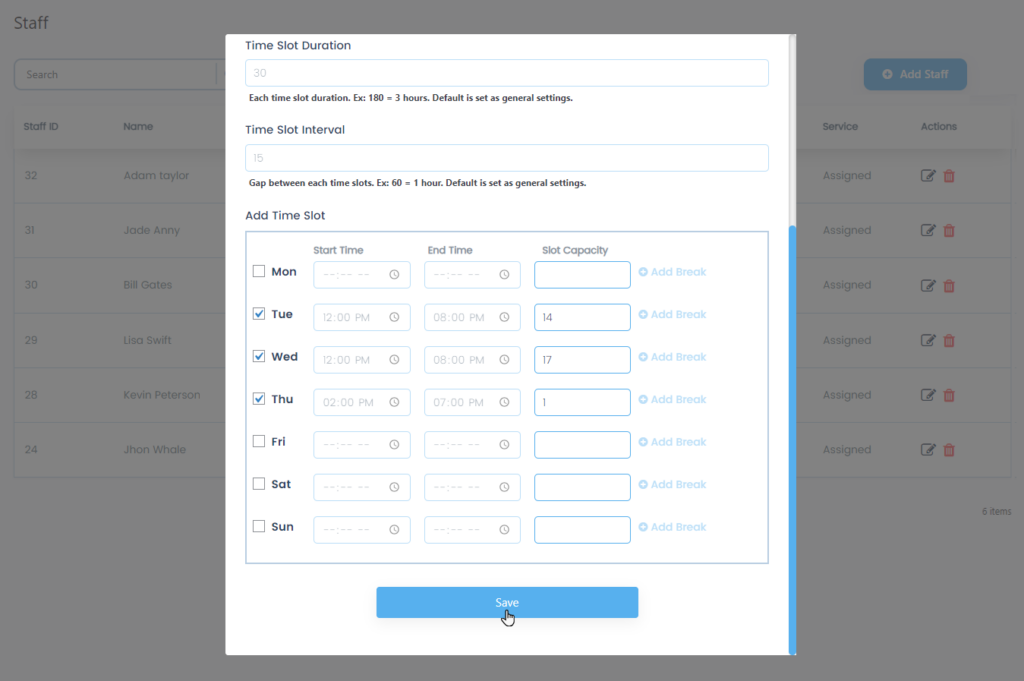
Once enabled, click save.
Step 5: Integration With Microsoft Outlook 365 Calendar
Microsoft Outlook 365 Calendar is a powerful and versatile scheduling tool that helps individuals and teams manage their appointments, meetings, and events. It offers a wide range of features to streamline your schedule and stay organized. The best part! You can integrate it with Gravity Booking. Here is how:
Navigate to WordPress Admin Dashboard → Gravity booking → Settings.
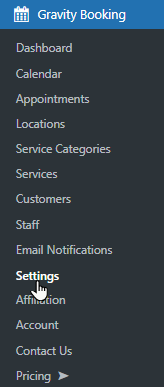
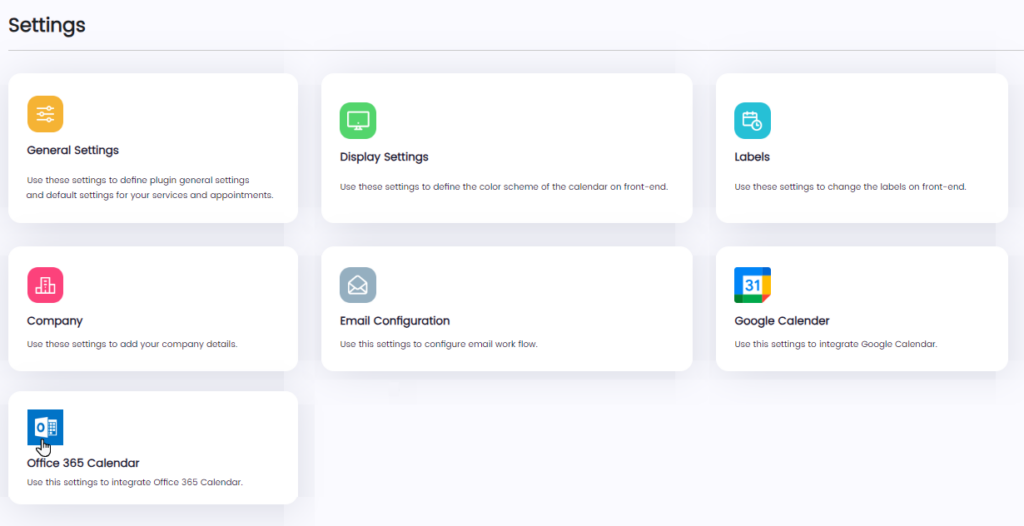
Now, click on the Office 365 Calendar under “Settings”.
You will see a sidebar when the admin clicks on the Office 365 Calendar. Enable Office 365 Calendar through the checkbox.
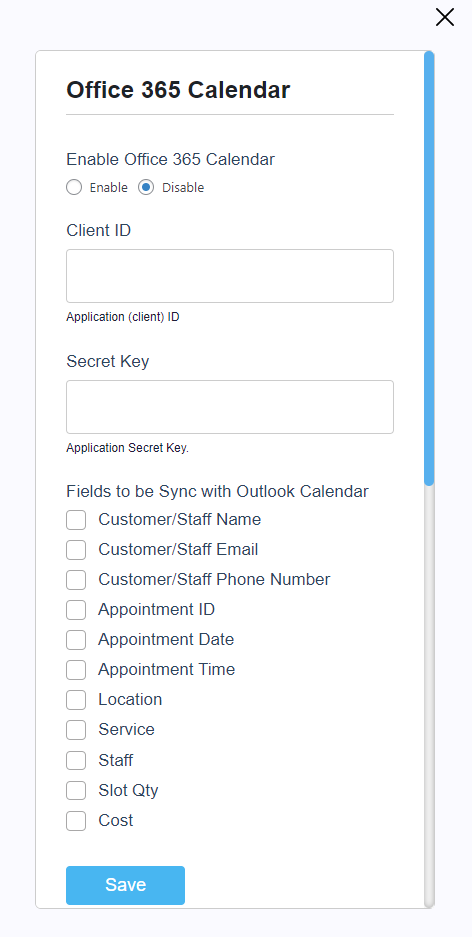
Enable Office 365 Calendar through the checkbox.
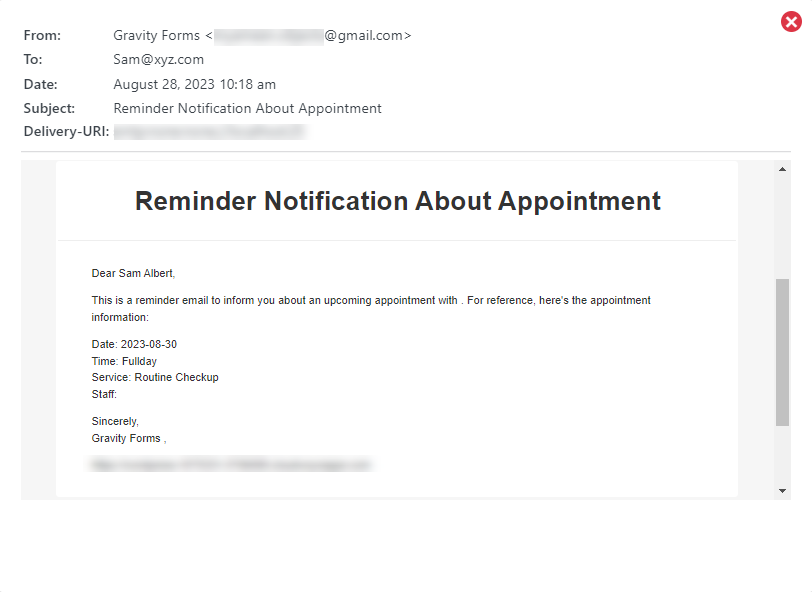
Step 6: Email Reminders
Set email reminders for appointments. What does that mean?
Through Gravity Booking, you can send reminder emails to the clients who have booked their appointments. You can even set up your own email template. Here is how you can send an email reminder to the customer about his appointment:
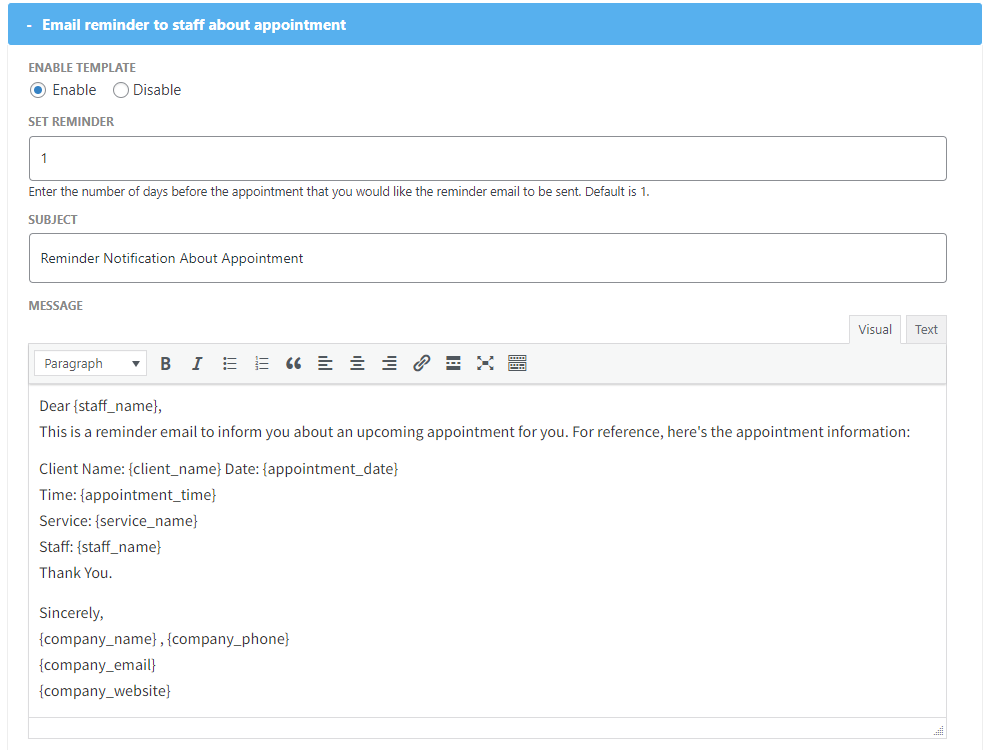
Here is the front-end vision:
Wrap Up
So, this is it! You can use Gravity Forms in combination with Gravity Forms Booking or Gravity Booking to make your appointment booking process seamless. This was just a glimpse of how you can drastically improve your business performance by installing this WordPress plugin. The plugin also gives you options like payment integration, multiple appointment bookings, Google two-way sync, and much more.


