You’ve probably seen those “Clone this website” buttons while browsing the web. It’s a tempting proposition, but do you know what goes into cloning a website? In this article, we’ll teach you how to clone a website on WordPress—and what to consider before making your move.

Why You May Want to Clone a Website
There are a number of reasons you may want to clone your website. Maybe you’re expanding your business and need to create a new website to reflect the change. Or perhaps you’re unhappy with your current website and want to start with a fresh design.
Cloning your website is a great way to save time and hassle. It allows you to keep all of your content and settings intact, so you don’t have to spend time recreating them from scratch. And it ensures that your website will look and function exactly how you want it to.
So how do you clone a website on WordPress? It’s relatively easy.
What Is Required to Create a Clone Website
To clone a website, you will need:
- The website you want to clone
- A web hosting account and domain name
- cPanel access
- WordPress installed on your web hosting account
- A plugin to clone your website (there are free and paid options available)
Preparing for the Copy Process
It is always a good idea to prepare your website in advance before making any changes. This will help you ensure that no significant issues occur during the cloning process. So, before you begin, make sure you do the following:
Backup your website:
This is essential in case you need to restore your original website if something goes wrong.
Delete unnecessary files and plugins:
Cloning a WordPress site with too many files and plugins can slow down the process.
Remove sensitive information:
Make sure you remove personal data or login credentials from your website before cloning it.
Test your changes:
Check the cloning process and that everything has been transferred correctly before launching the new website.
These steps will help ensure a successful cloning process, so it’s essential to take the time to do them correctly. With these preparatory steps done, you can start with the actual cloning process knowing everything is already in place for a smooth transition!
Creating an Exact Replica: The Clone Process
You’ll need to install and activate the Duplicator plugin to clone your WordPress site in no time.
Now that you have your host and a cloning plugin installed, you’re ready to create a replica of your website. The process of cloning a website is quite simple and can usually be done in just a few steps.
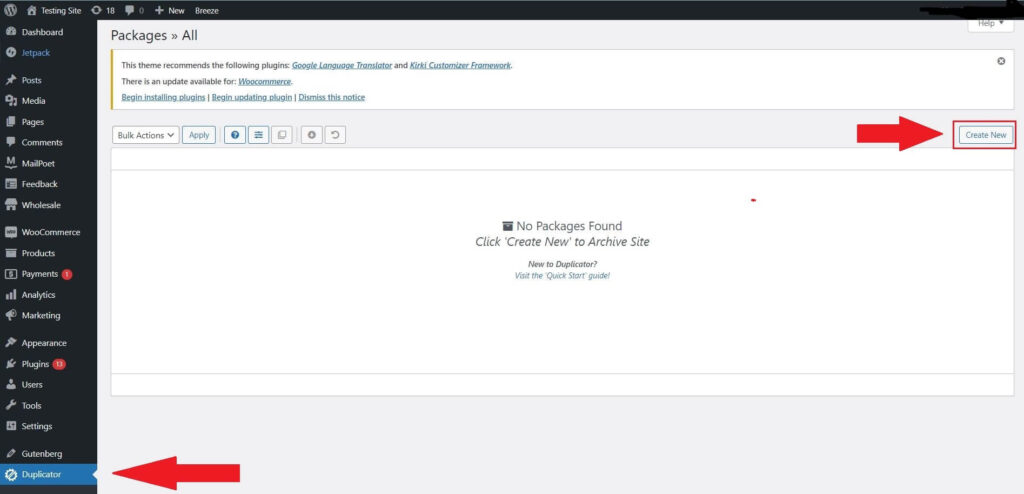
Open your website’s Dashboard, find the new Duplicator tab and click on it. Next, click on “Create New” to begin.

For identification reasons, start by entering your name. Additionally, you may pick archive and database files, alter installation settings, you can select from the many storage alternatives. Whenever you’re satisfied with your decisions, click “Next.”

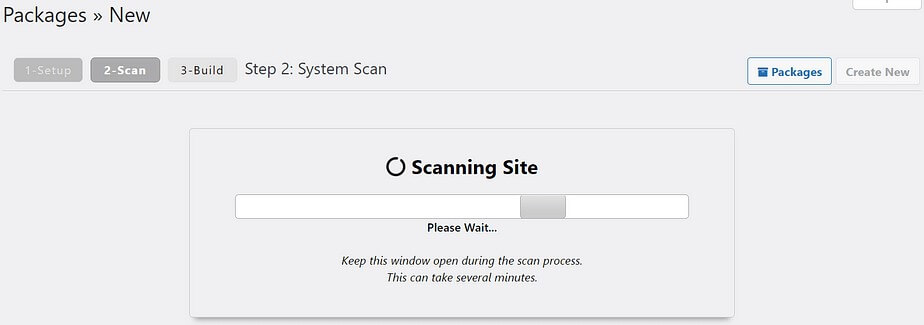
After that, the plugin will scan your website.

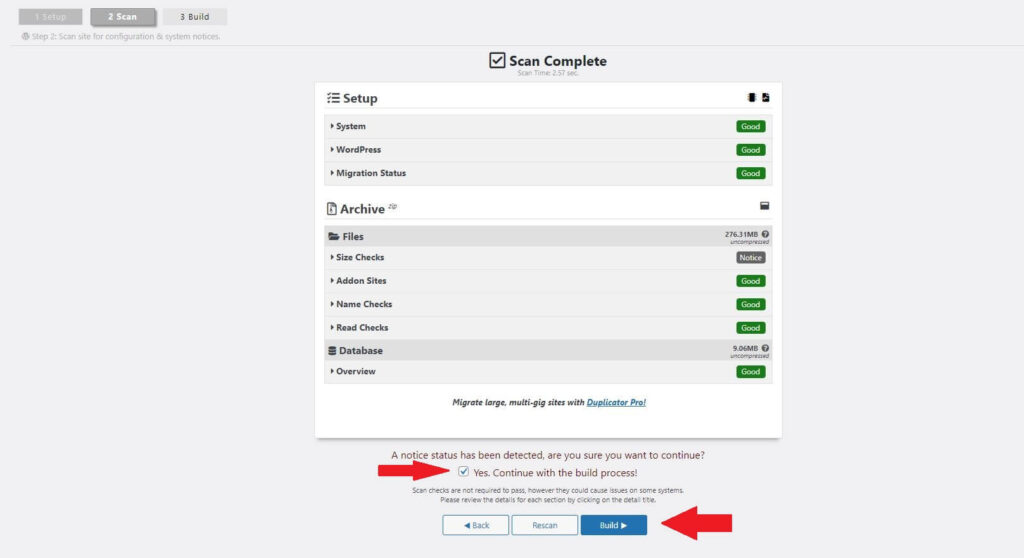
Once the scan is complete, you’ll be able to see the size of your website. Depending on your server and website’s size, a warning or two may appear here. Just tick the box “Yes, Continue with the build process”. Then click on “Build.”

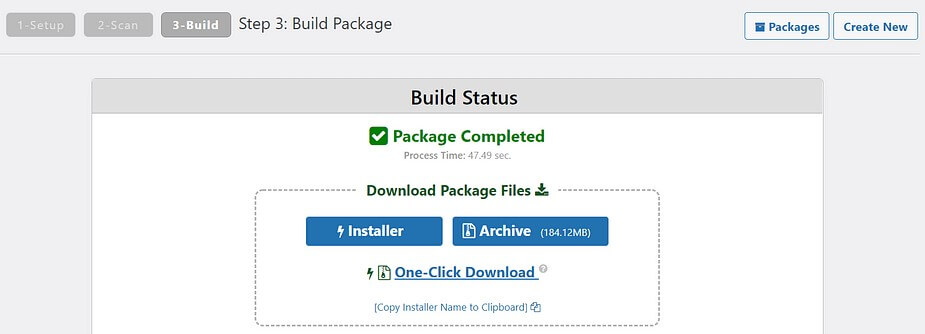
When the process is complete, you’ll be able to download the files.

Save the file on your computer for future use.
Then, you’ll need to upload these files into the host for your clone site. Once that’s done, you’ll need to configure the databases on both sites, setting them up to use the same login credentials so they can access the same information.
Finally, you’ll need to ensure that all of the links on the clone site point to their respective pages on the original site. This is necessary because if they don’t point there, visitors to your clone website won’t have access to your content.
Once this is complete, you should be able to view a replica of your original website!
Troubleshooting Common Issues with Cloning Your Site

If you experience any issues with cloning your website to WordPress, there are a few common issues that you should troubleshoot right away.
The most frequent issue is a result of the cloning process not being correctly set up. If the source and target sites don’t match up, then the clone won’t succeed. To avoid this, ensure you have both sites configured correctly before beginning the cloning process.
Another frequent issue occurs when the size of the source website exceeds the limits of your web hosting plan or server capacity. Try using a hosted solution like Jetpack Site Cloning to handle larger websites, or upgrade your server to increase its capacity for higher data transfer volumes.
Finally, if there are conflicts between theme functions on both sites, it can cause errors in the cloning process. Make sure all plugins and themes used on both sites are compatible with each other and updated to their latest version to avoid these types of conflicts.
Wrap Up
And that’s it! You now know how to clone a website on WordPress. This process can come in handy in a number of situations, like if you want to create a staging site or if you need to migrate your site to a new host.
Keep in mind that cloning a WordPress site does create an exact copy of the original site. This means that any changes you make to the cloned site will also be reflected on the original site. So, if you’re planning on making any significant changes to the cloned site, creating a backup of the original site is a good idea first.


