You may have seen websites with a unique layout for single post pages. The header and footer may be different, or the sidebar is on the opposite side. This look can be achieved by using custom single post templates in WordPress.

This article will teach you how to create a custom single-post template. We’ll start by explaining a single post template and how it works. Then we’ll show you how you can create your own template. Finally, we’ll provide some tips for using your template.
What are Custom Single Post Templates?
A custom single-post template is a file that controls the layout of a single post on your WordPress site. It can be used to customize the appearance of posts on your blog or to create templates for specific types of content, such as products, events, or team members.
When you create a custom single post template, you can control the layout of the entire post, including the header, footer, and content area. You can also use conditional tags to display different content or HTML depending on which page the post is being viewed on.
How to Create a Custom Single Post Template Without a Plugin?
If you are looking for an easy way to create your custom single post template, then you can do so with the default WordPress block editor.
With this block editor, you can use the group block to create a page layout by combining several blocks. Once you are done, you can save, reuse, or edit it whenever you’d like for other posts.
Here’s how you can use a group block to create your custom single post template in WordPress.
1st Step – Create a Post
To begin, create a new post.
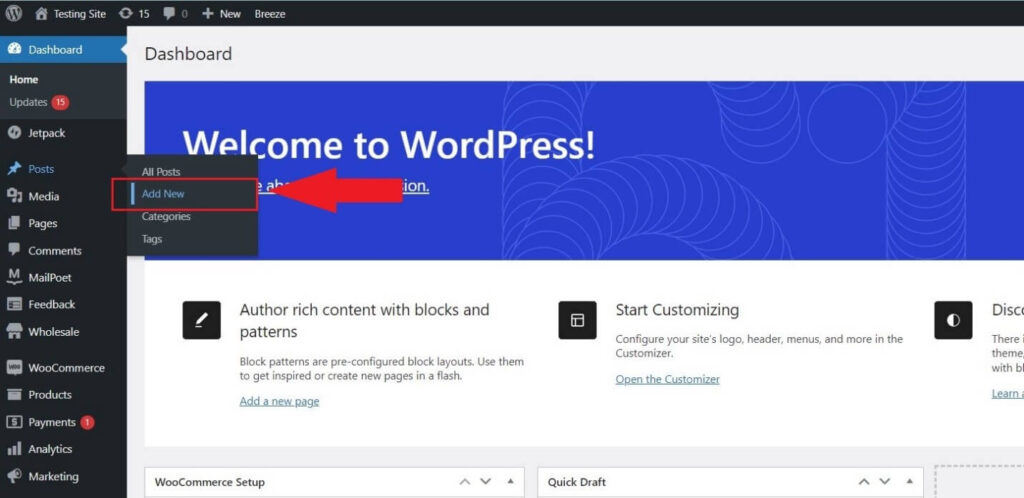
Navigate to the “Posts” tab and click “Add New.”
2nd Step – Add A Group Block
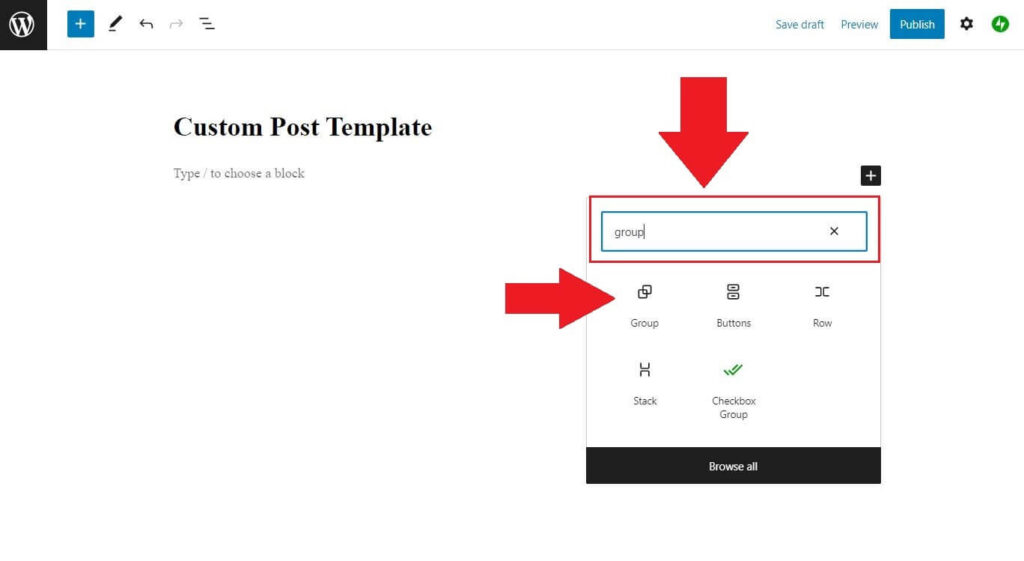
Now you need to add a group block in the post. Simply click “+” and type in “group” for the block to appear.
Click on the “Group” block to add it to the template.
3rd Step – Add Blocks into Group Block
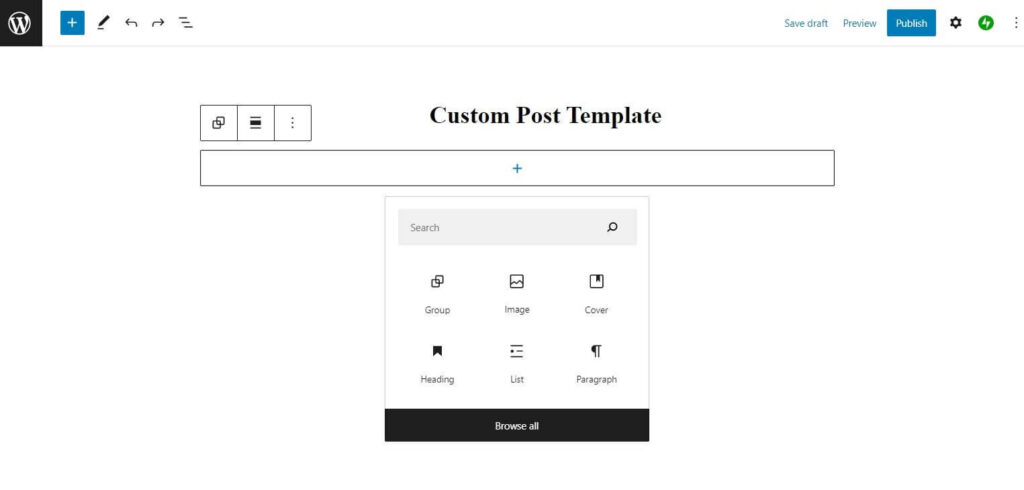
Now add any block that you want in your custom single post template.
4th Step – Save Your Template
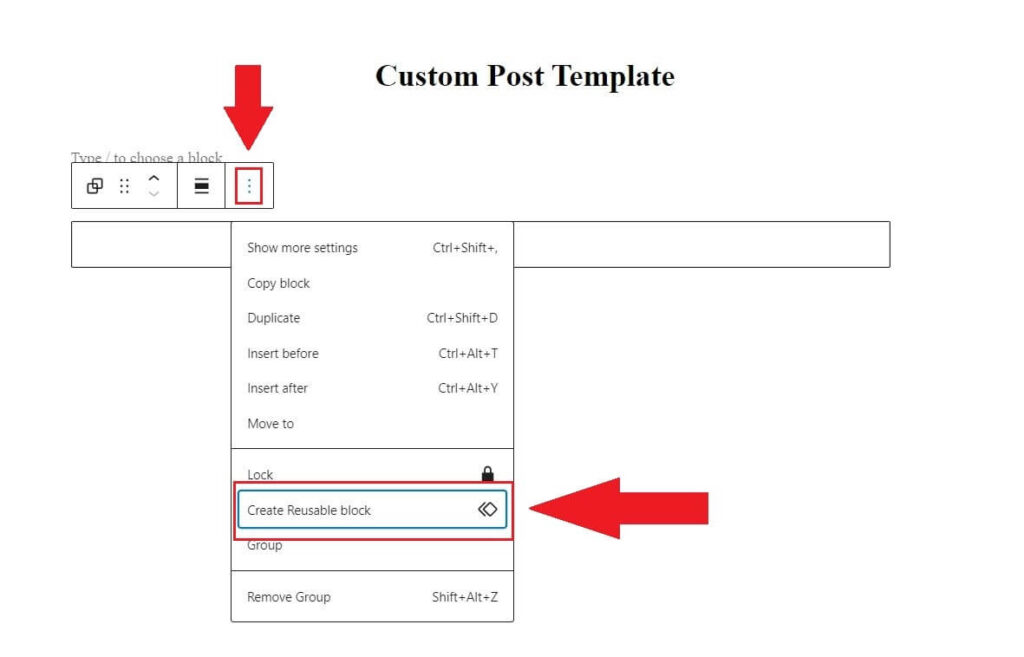
Once you are done, you must select the block again.
Click on the three-dot menu icon, then click “Add to Reusable blocks.”
After that, you need to choose a name for this template.
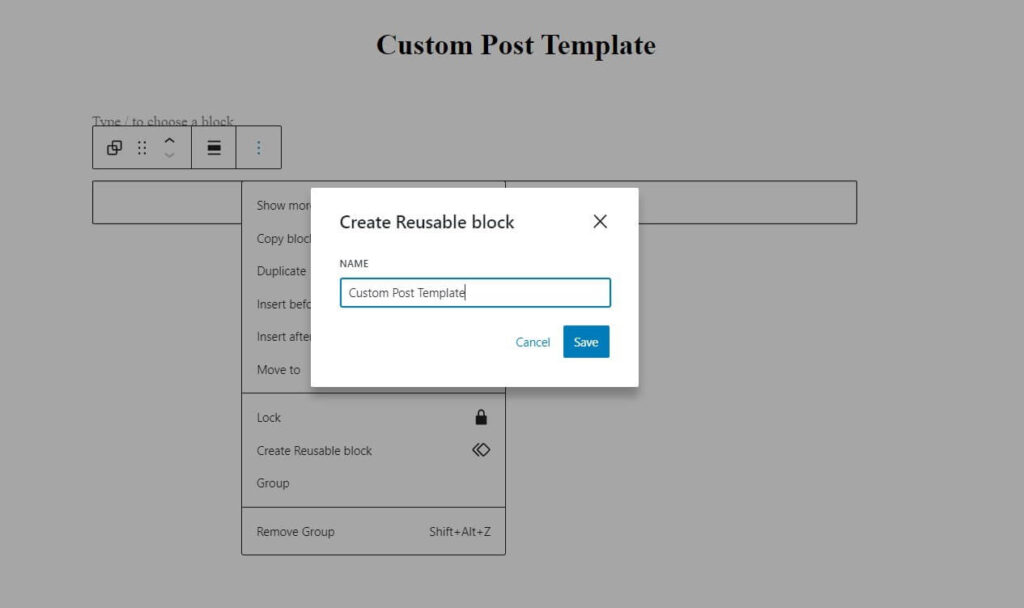
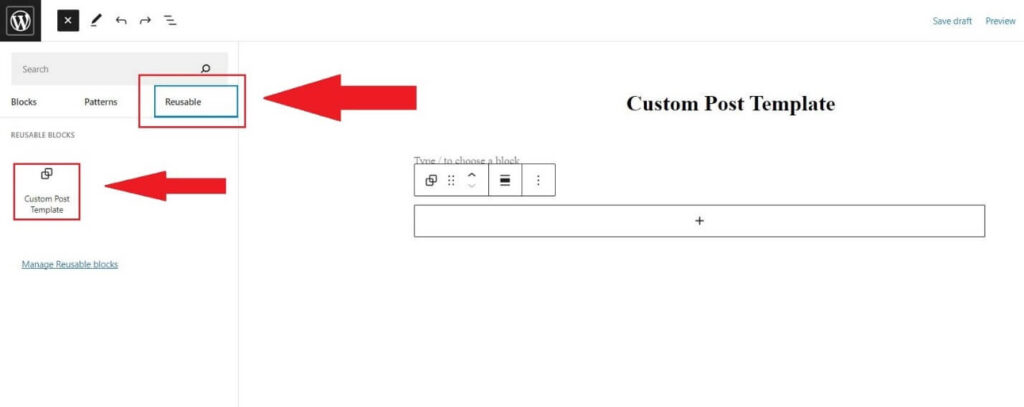
Once you click the save button, this template will be saved so you can use it whenever you want while creating new posts or editing the old ones. You’ll be able to see the saved template when you add a new block under the “Reusable” tab.
Styling and Customizing the Single Post Template
To make your single post template look even more unique, you’ll want to customize it. You can always go into the code and change some HTML, but that’s time-consuming and requires programming knowledge. You can connect with a leading WordPress development agency if you need to become more familiar with coding.
I suggest using a WordPress page builder. A page builder allows you to add elements to your posts using drag-and-drop technology. You can create custom layouts, add text and images, and include dynamic elements like buttons or forms. You can also add custom CSS code to tweak your single post template for something unique.
Once you’ve built your single post template layout, save it as a template and assign it to the specific posts you want. That way, you can create multiple layouts depending on the content of your posts—a great way to add visual interest and keep readers engaged!
Previewing and Publishing the Single Post Template
Once you’ve customized the single post template and everything looks good, it’s time to preview and publish it.
First, make sure to save the template periodically by clicking the “Update” button. This will ensure that your changes are saved should anything happen to your computer.
When you’re ready to preview the template, click on the “Preview Changes” button. This will open a new window with an exact representation of your template’s appearance when it is published. Look around and ensure everything looks good before clicking on the “Publish” button in the top right corner of the page.
And that’s it! You have now successfully created a custom single post template in WordPress. This template will come in handy next time you want to change how your posts look without coding quickly!
Troubleshooting Common Issues with Custom Single Post Templates
Now that you’ve created your custom single post template, it’s time to troubleshoot any common issues you might encounter.
- For starters, check the file path in your code if your single post template isn’t displaying correctly. It’s easy to misspell the name or forget an important character. Also, note that if you’re using a plugin to create your custom single post templates, the plugin might override the template file path and cause issues.
- Another issue that could pop up is code errors. This is especially true if you use a plugin or theme with many custom codes and functions. Check for any typos or syntax errors in your code, as this could prevent it from displaying correctly.
- Finally, if you are having trouble getting certain functions to work with your template, try deactivating the plugins you don’t need and clearing any caches in WordPress. Sometimes these can interfere with how WordPress reads and displays your template file.
Final Words
Overall, using custom single post templates can give you more control over the look and feel of your blog posts. This is the way to go if you want to ensure that each post has a unique look. Follow the instructions carefully, and always back up your site before making any changes.