Need an effortless way to upload plugins to your WordPress site manually? You’re in the right spot—our easy-to-follow guide will have your plugins up and running in just a few clicks!
Manually uploading plugins to your WordPress site is a handy skill, especially when installing custom plugins or those from third-party sources. In this short guide, we’ll walk you through the simple process of manually uploading and installing plugins, ensuring your site stays functional and secure.
How to Manually Upload WordPress Plugins?
Here are the steps to manually upload a Plugin on WordPress
1. Download the Plugin from the WordPress.org Plugin Repository
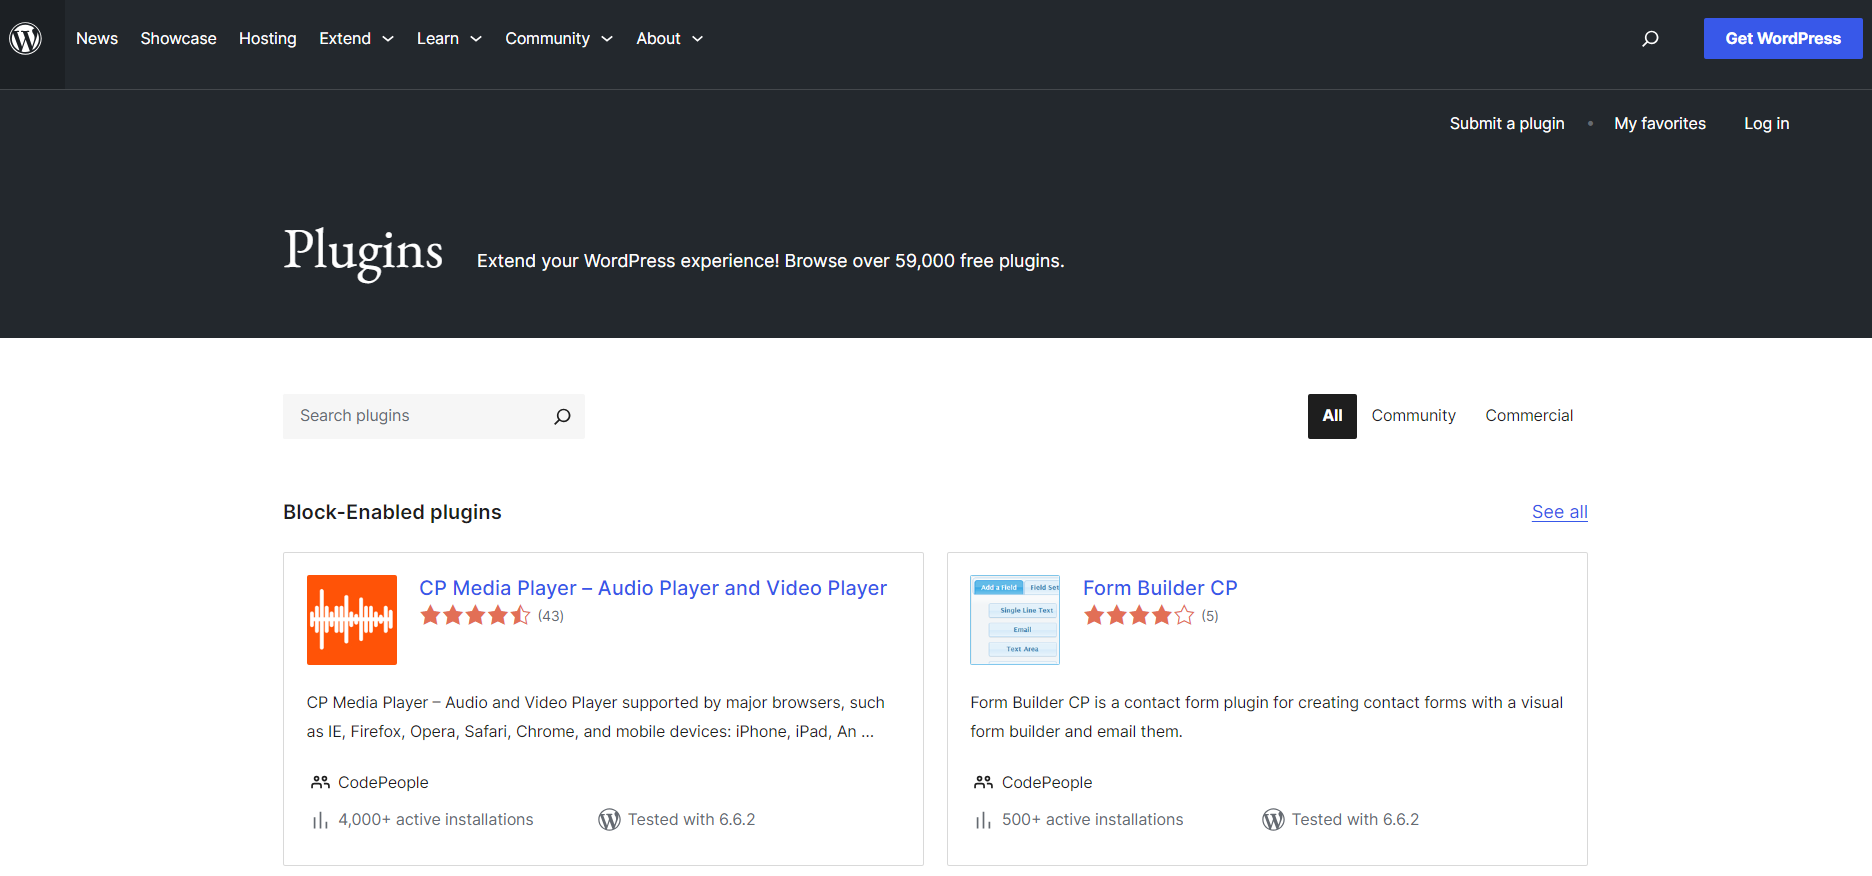
On the WordPress.org repository, use the search bar on their site to find the plugin. You’ll see a Download button on the plugin’s page instead of the typical installation button.
2. Navigate to the Add New Plugin Menu
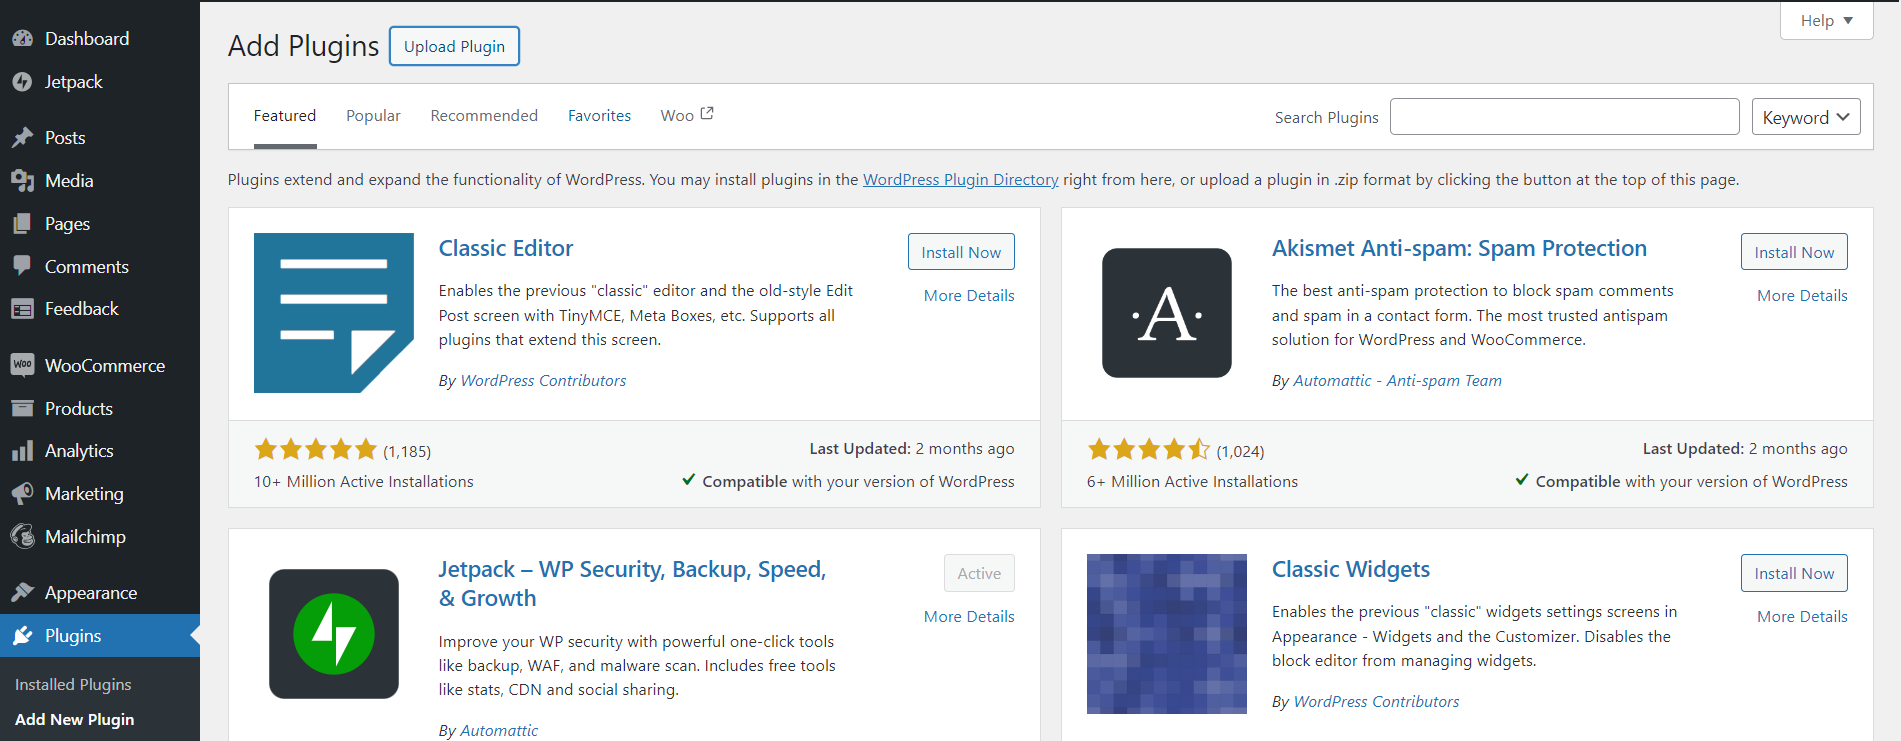
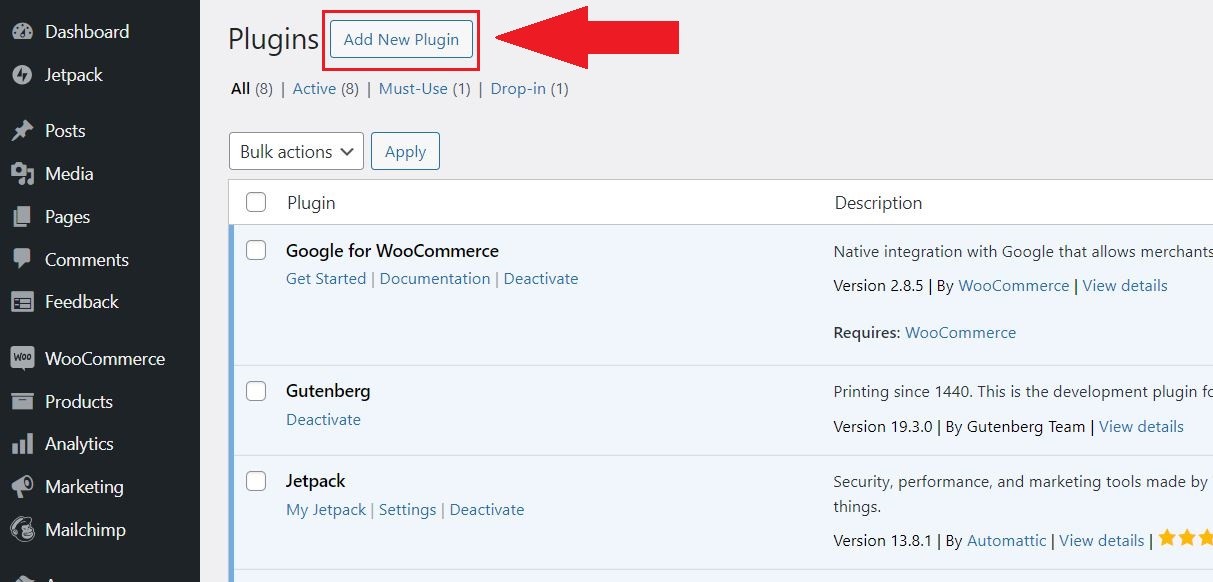
Go to your WordPress dashboard, then navigate to Plugins > Add New. You’ll see a search box along with an Upload Plugin button.
3. Upload the Plugin to WordPress
Click the Upload Plugin button.
A new section will appear with a Choose File button. Click it, find the .zip file on your computer, and then click Install Now. Be sure only to click once to avoid database errors.
4. Activate the Plugin
Once the plugin has been uploaded and installed, you will be prompted to activate it. Simply click Activate Plugin, and it will appear in your plugin list as if you had installed it through the WordPress dashboard search.
By following these steps, you can easily upload plugins manually on your WordPress site.
Also Read: How to Easily Update WordPress Plugins Manually
Final Words
Learning how to upload plugins to your WordPress site manually gives you more flexibility when managing your site’s features. The steps are easy to follow and ensure smooth integration. With this skill in your toolkit, you can confidently enhance your WordPress site without limitations.


