Features #
- Rules-Based Tier Pricing
- Tier Pricing
- Editable Tier Pricing Label
Installation Guide #
- Log in to your WordPress Admin Panel.
- Navigate to the WordPress Admin Dashboard → Plugins → Add New.

- Click the Upload Plugin button on the top left corner of your screen.
- Next, click the Choose file button in the box that appears below.
- Select the zip file that you have downloaded and upload it.
Upgrade Guideline #
- Click on the Activate Plugin button.
- Once Activated, a notification will appear.
- In this notification, we can upgrade the current version of Tiered Pricing for WooCommerce to the new version i.e., Tiered Pricing v1.0.4 to Tiered Pricing v2.0, by clicking on the Upgraded Version button.
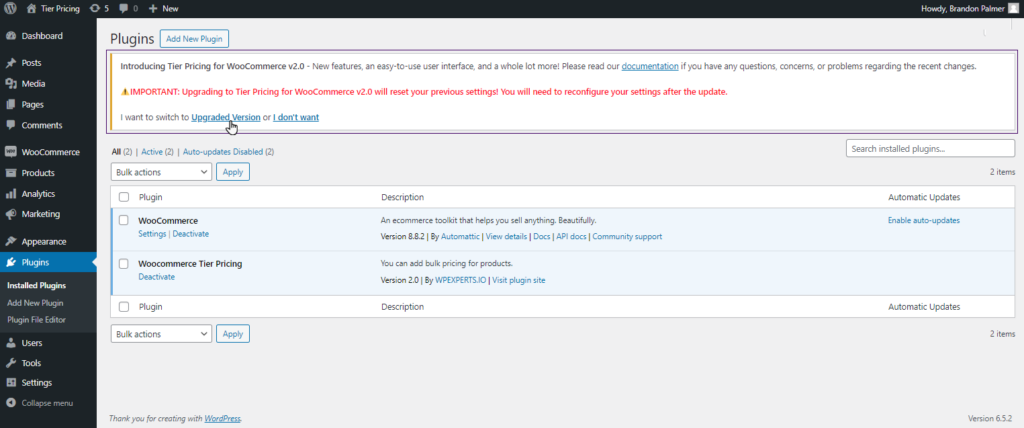
Note: Please note that Upgrading to Tier Pricing v2.0 will completely delete all datasets, including:
- Product Based Pricing.
- Category Based Pricing.
- User Based Pricing.
- Role-Based Pricing.
- After the upgrade, you will need to reconfigure your settings.
- If you don’t want to upgrade, click the I don’t want button.
Getting Started #
Rules-Based Tier Pricing #
- Navigate to WordPress Admin Dashboard > Tier Pricing Rules.
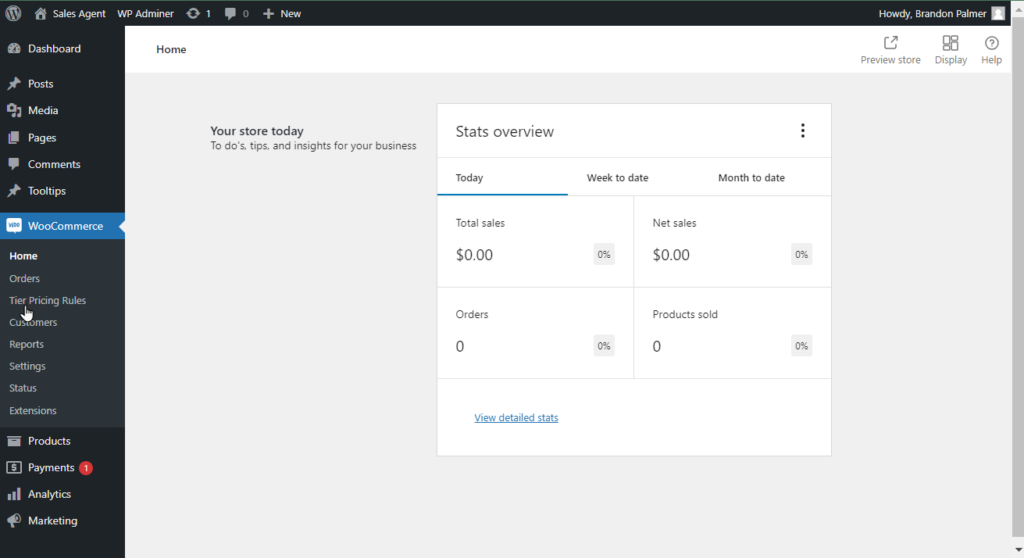
- You are on the Rules Page.
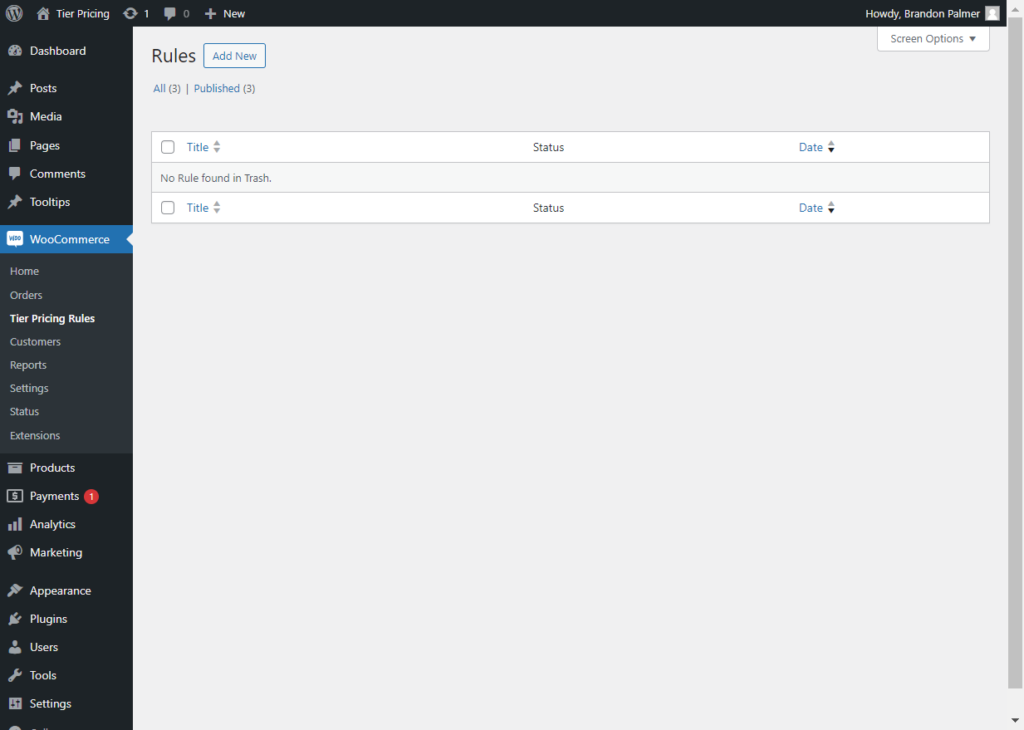
- Once on the Rules Page, click the Add New button to add new rules.

- Once clicked, a Rule page will appear.
- Admin can Define the Title of the Rule.
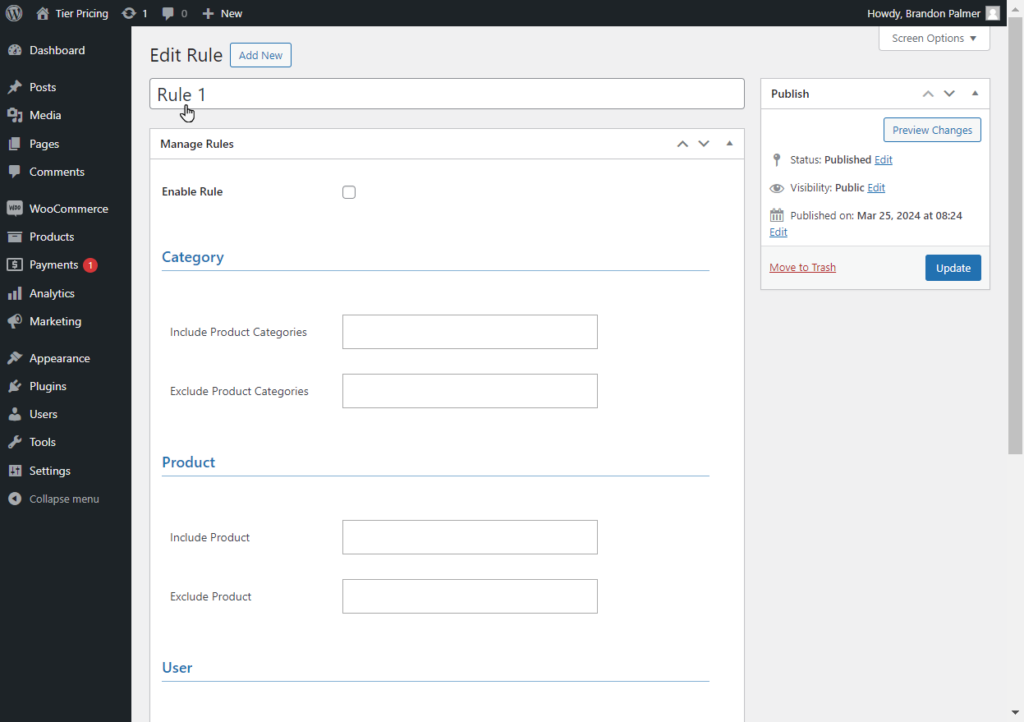
- Admin can define multiple rules according to Product Categories (Include and Exclude), Products (Include and Exclude), Users, and User Roles.
- Admin will have rules under the Manage Rule Section accordingly:
- Include Product Categories.
- Exclude Product Categories.
- Include Products.
- Exclude Products.
- User Roles.
- User.
- All the rules will be multi-select with a dropdown.
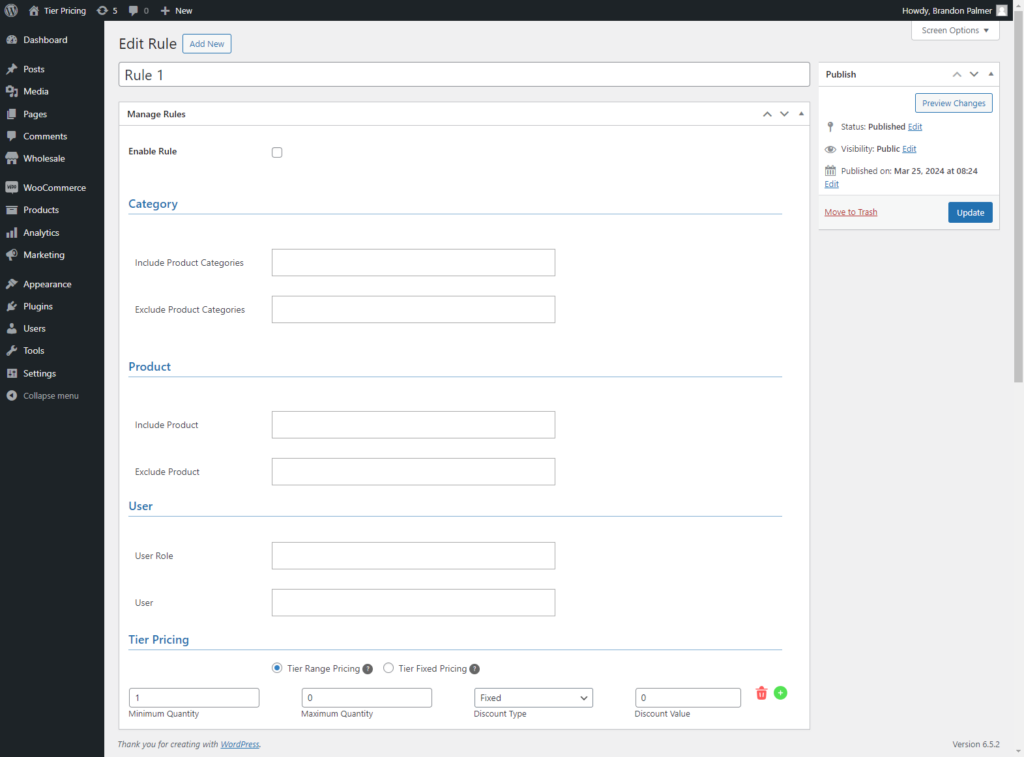
- Admin can enable/disable the rule with the checkbox.
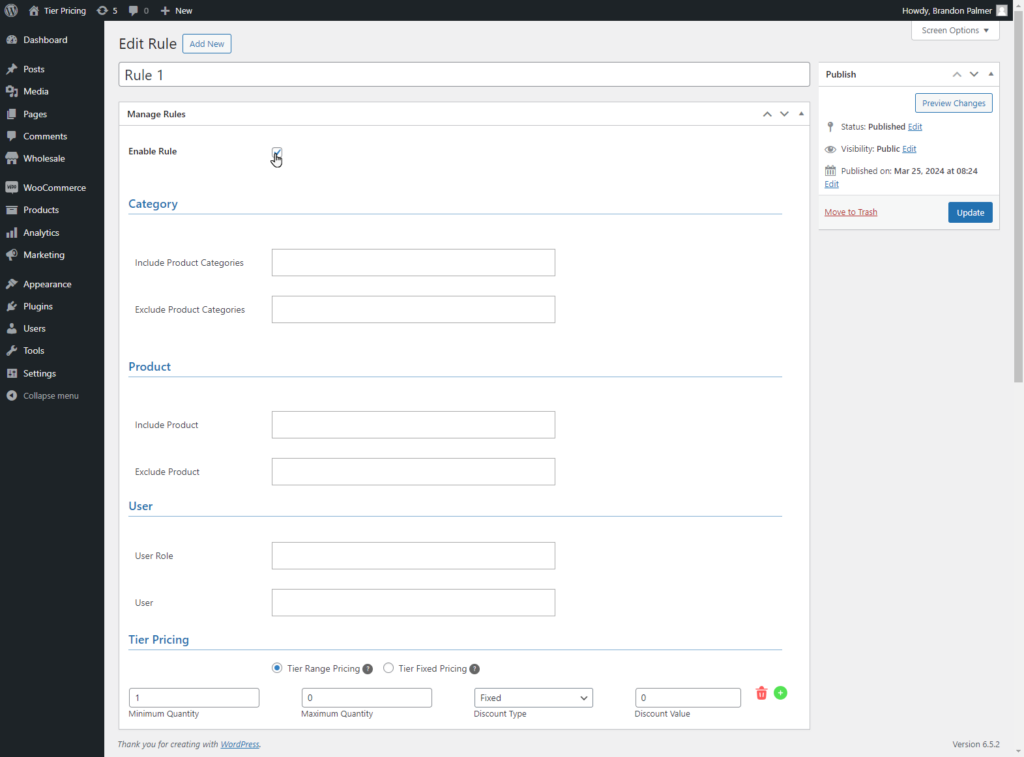
Note: There will be no All option in any Exclude Product Categories
- Similarly, the Admin can Include and Exclude Products.

Note:
- There will be no All option in any Exclude Product.
- If the Category or Product is defined in both Include and Exclude, the Product or Category will be considered as excluded.
- Admin can define the User Role under the User section.

Note: There will be an option of All to select all users and User roles.
- If the tier is defined, click the Publish / Update button.
- After publishing the rules, they will be listed on the Rules Page.
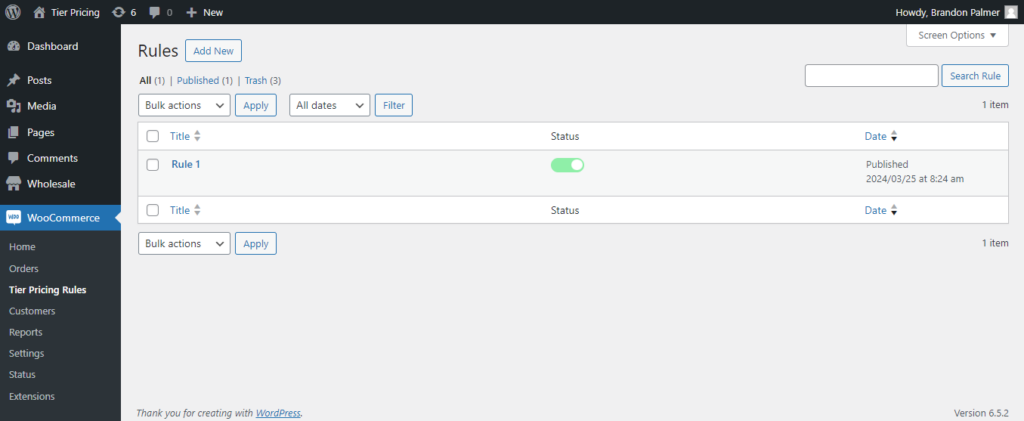
Note: The Last Updated Rule will take effect if it conflicts with other rules.
There will be a toggle button to Enable/Disable rules on the rule listing page.

Tier Pricing #
- Under the rules, we have a Tier Pricing section.
- Here, the admin can select two radio buttons.
- Tier Range Pricing
- Tier Fixed Pricing
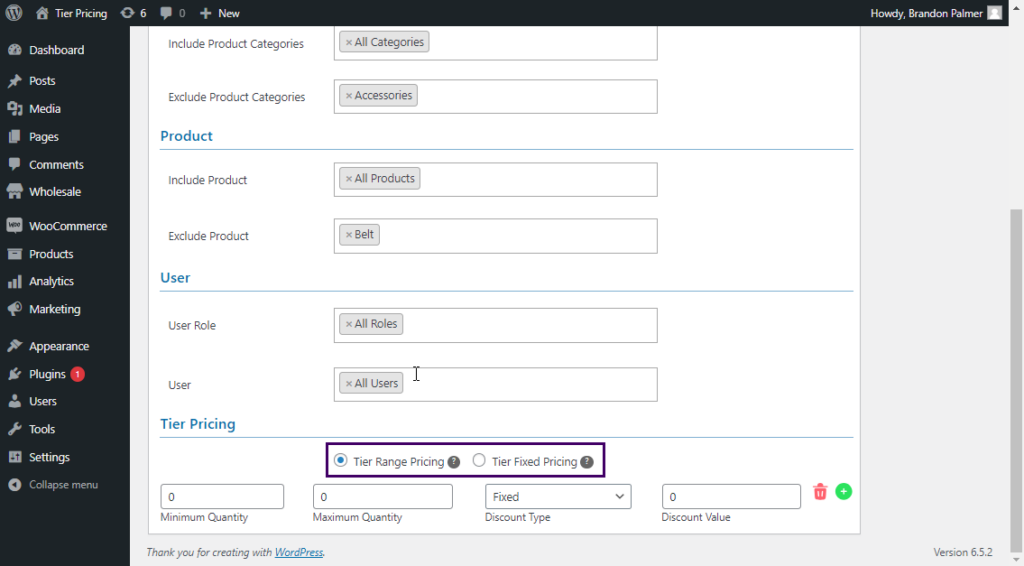
Note: By default, the system will use Tier Range Pricing. With the help text, understand that Tier Range Pricing applies discounts, whereas Tier Fixed Pricing replaces the original value of the products.
Tier Range Pricing #
- If the Admin selects the Tier Range Pricing, Tier functionality will remain the same; only the label is changed to Tier Range Pricing.
- The admin will specify the Minimum Quantity, Maximum Quantity.
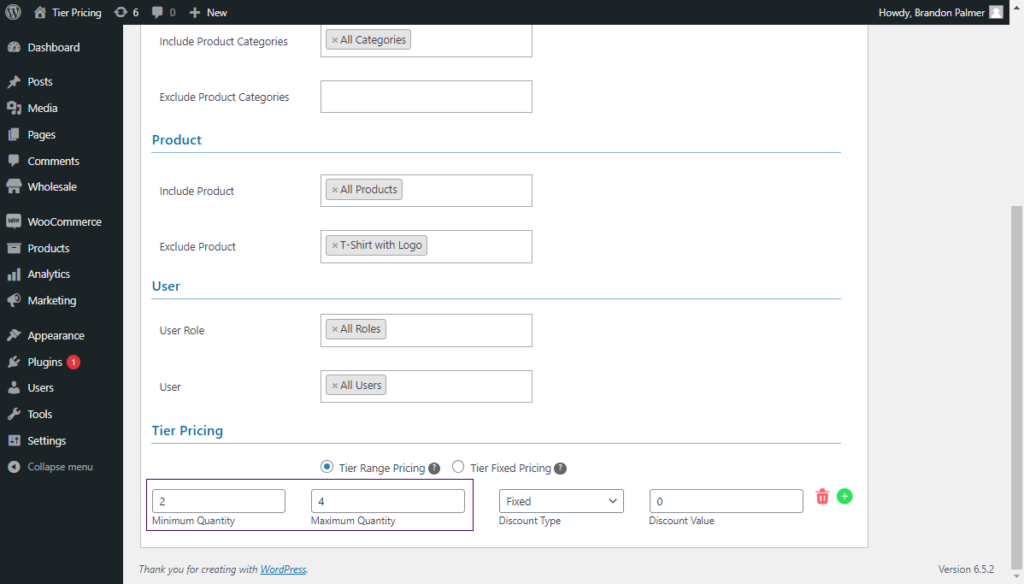
- Select the Discount Type from the dropdown.
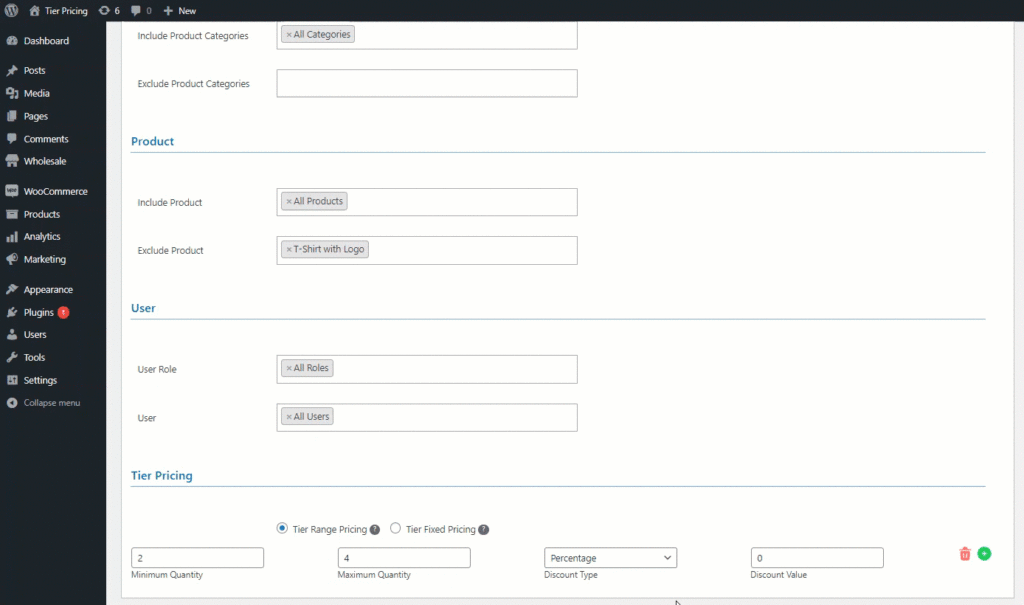
- Set the Discount Value.
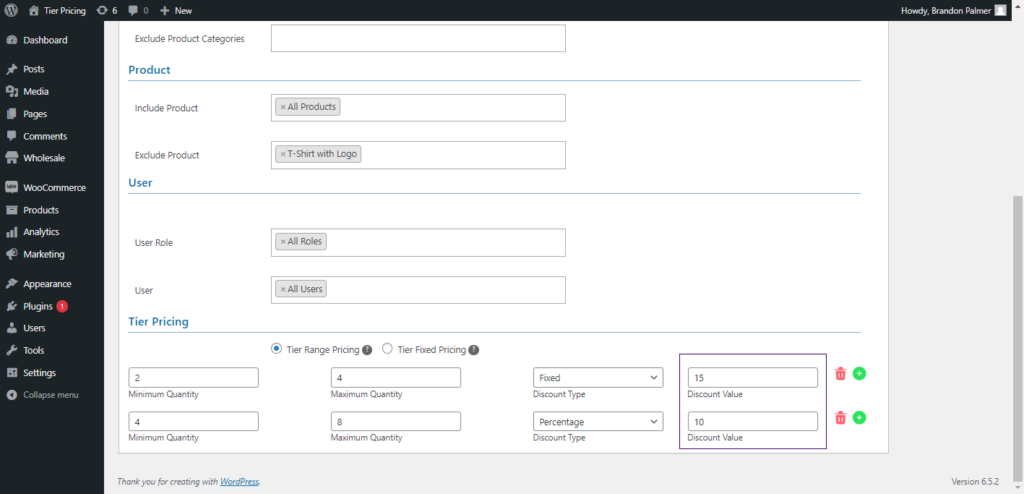
- This is the Default Process of Tier Pricing, which was already working.
- Now, click on the Publish or Update button to save the rules.
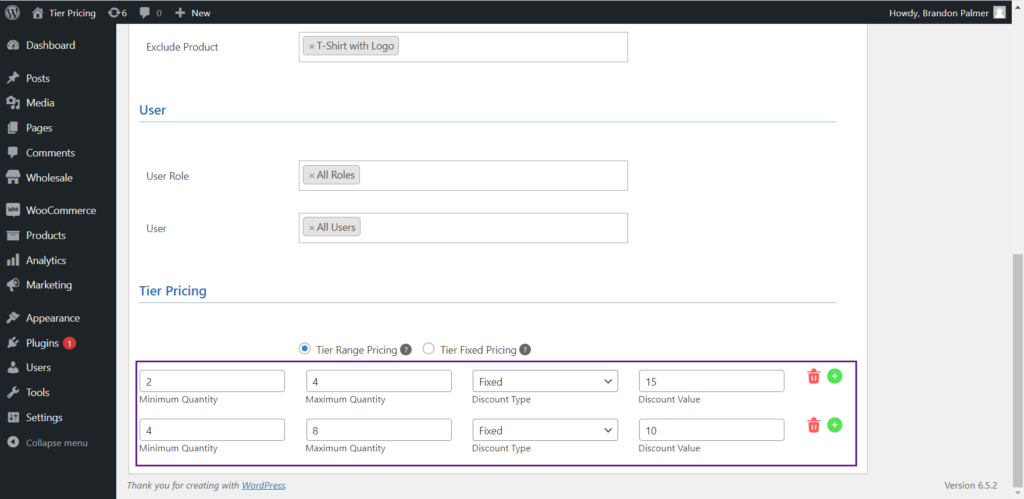
Note: If the last maximum value is set to 0, it will be considered starting from the minimum value and going up to infinity. The Minimum Quantity field must always have a value.
Front-End Impact: #
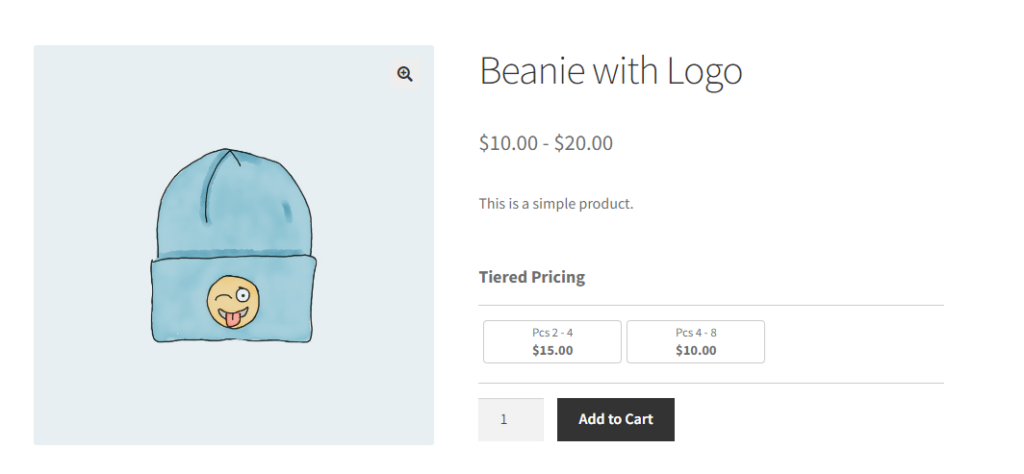
Note: Because the discounted value of this product is $20 each and the 2 – 4 range has a $5 discount, the product will cost $15.
Tier Fixed Pricing #
- Admin can select the Tier Fixed Pricing using the radio button.
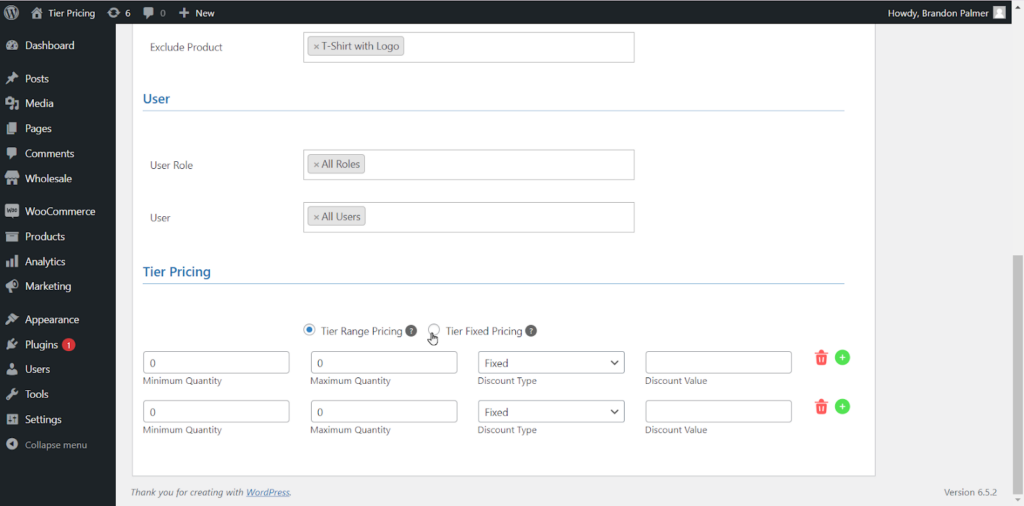
Fixed Discount
- Once the Tier Fixed Pricing radio button is selected, the admin will select Fixed Discount from the dropdown.

- Set the desired Quantity and the Value.
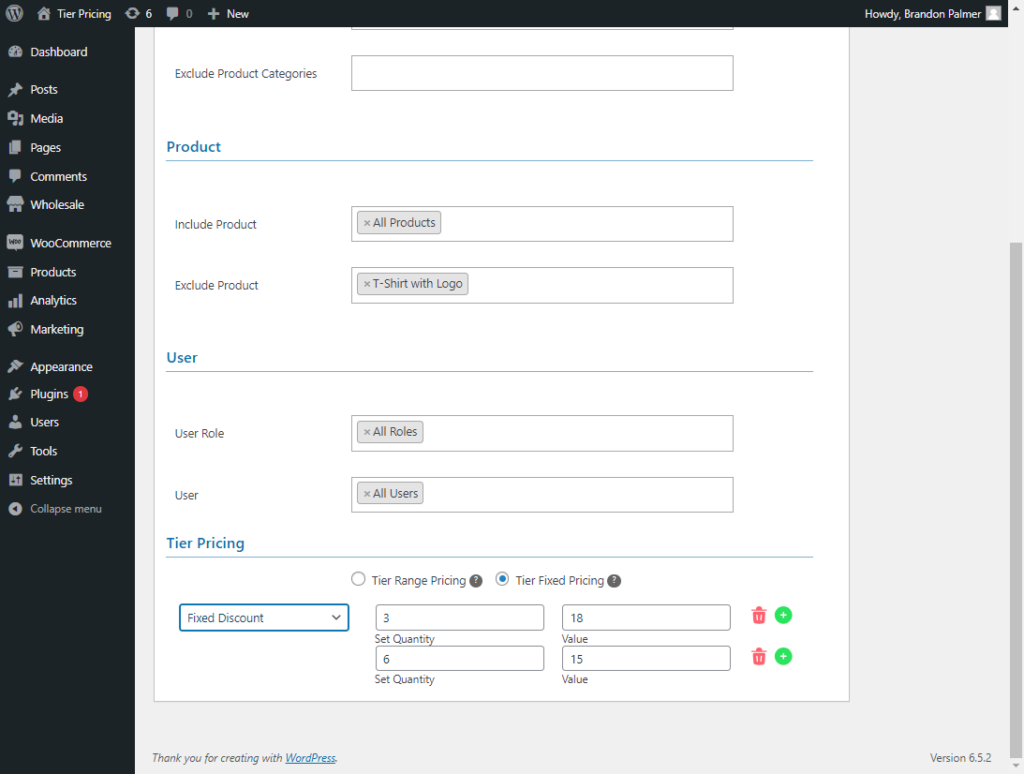
NOTE: The value defined is not a discounted value. The amount specified above will replace the original value of the product depending on the quantity specified.
Front-End Impact:
- Once Fixed Discount is set on the backend, the front end will show that if a user buys 3 pcs, it will cost $18, and if the user buys 6 pcs, it will cost $15.

NOTE: Hence, it does not work on per-product price. It works like purchasing a certain quantity at a certain price.
Quantity Discount
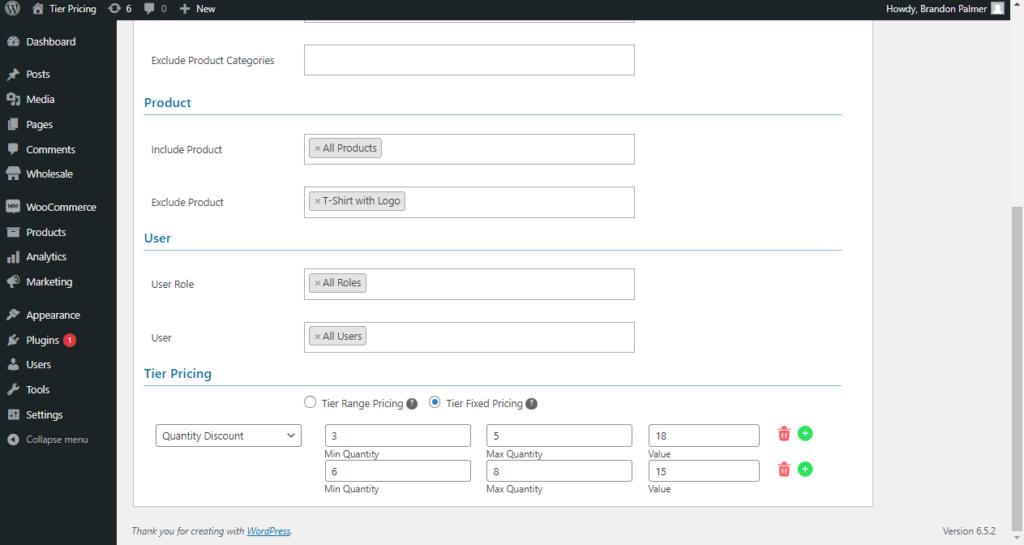
- To select Quantity Discount, select the Quantity Discount from the dropdown.
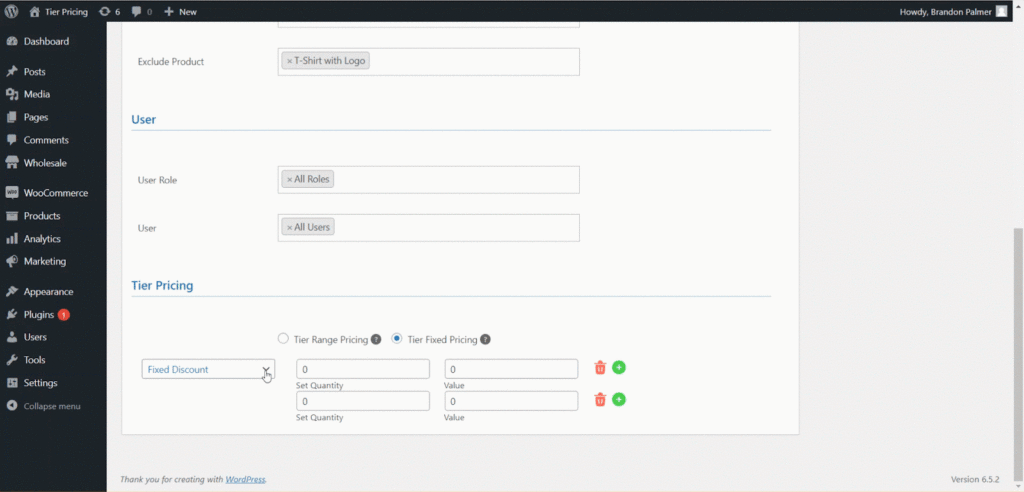
- When the Admin selects Quantity Discount, the Minimum Quantity and Maximum Quantity fields will appear.
- Set the Minimum Quantity, Maximum Quantity, and Value, respectively.
- If the Admin sets the desired Minimum Quantity and Maximum Quantity as 3pcs – 5pcs with value of $18 and 6pcs – 8pcs with the value of $15.
Front-End Impact
- Once Quantity Discount is set on the backend, the frontend will show that if a user buys 3pcs — 5pcs, the whole bundle will cost $18; if the user buys 6pcs — 8pcs, the whole bundle will cost $15.
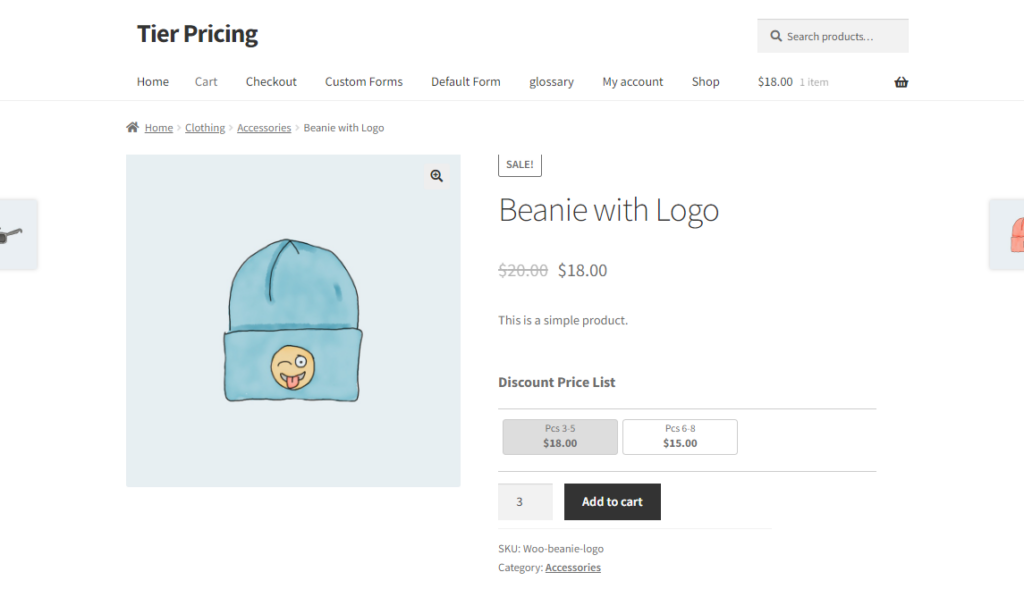
NOTE: Hence, it does not work on per-product price; it works like purchasing a bundle of a certain quantity of a certain product at a certain price.
Editable Tier Pricing Label feature #
- Under the rules, we need to add a Tier Pricing section, and we need to add Tier Pricing Item Text.
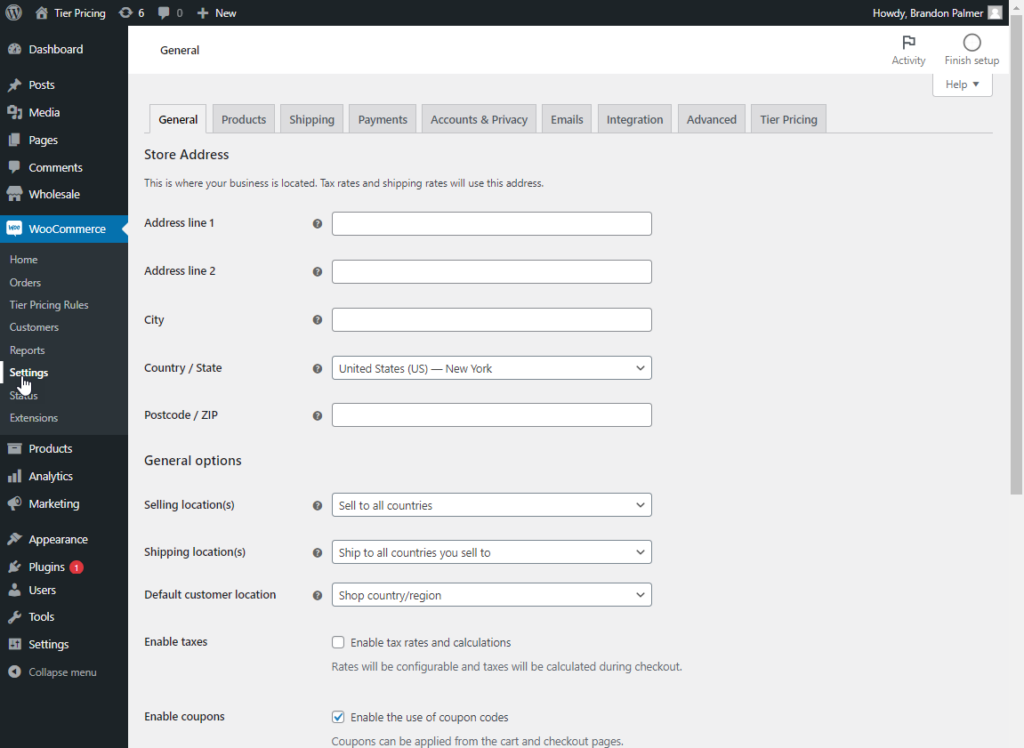
- To do this, navigate to WordPress Admin Dashboard > WooCommerce > Settings.
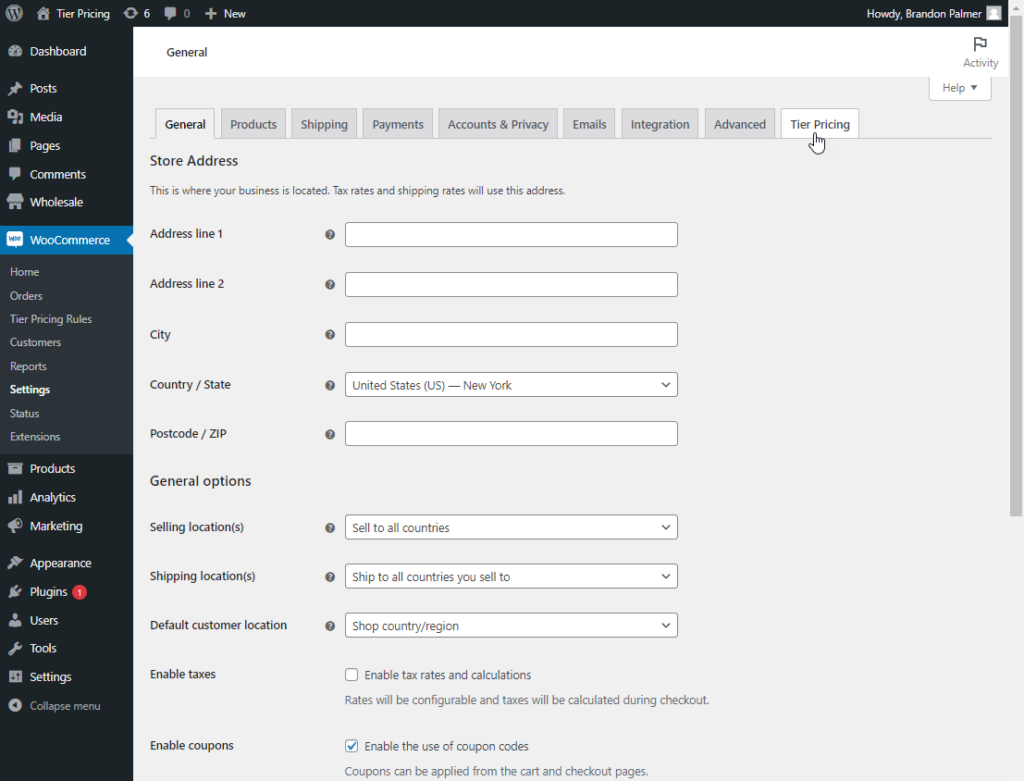
- Select the Tier Pricing tab.
- Now, select the Display Type Settings.
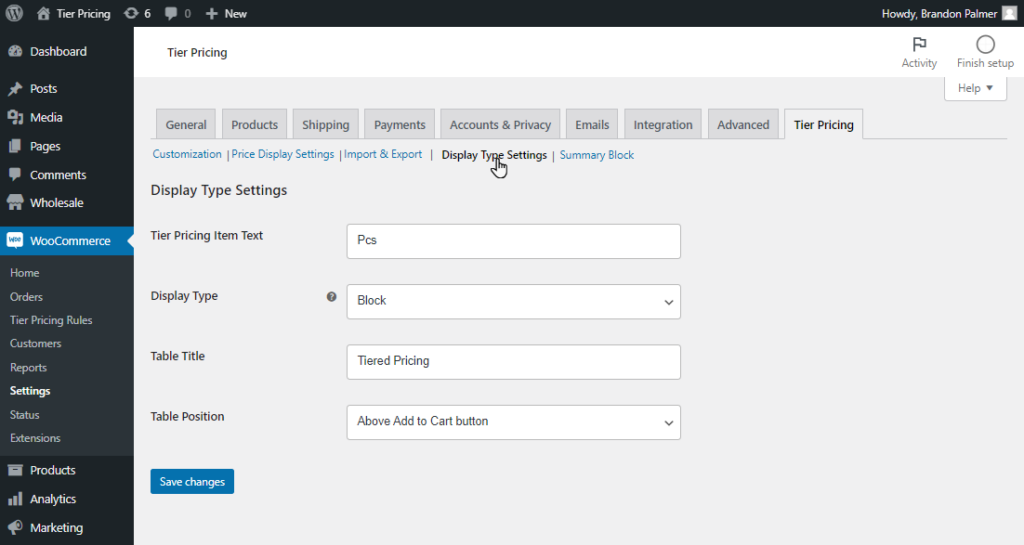
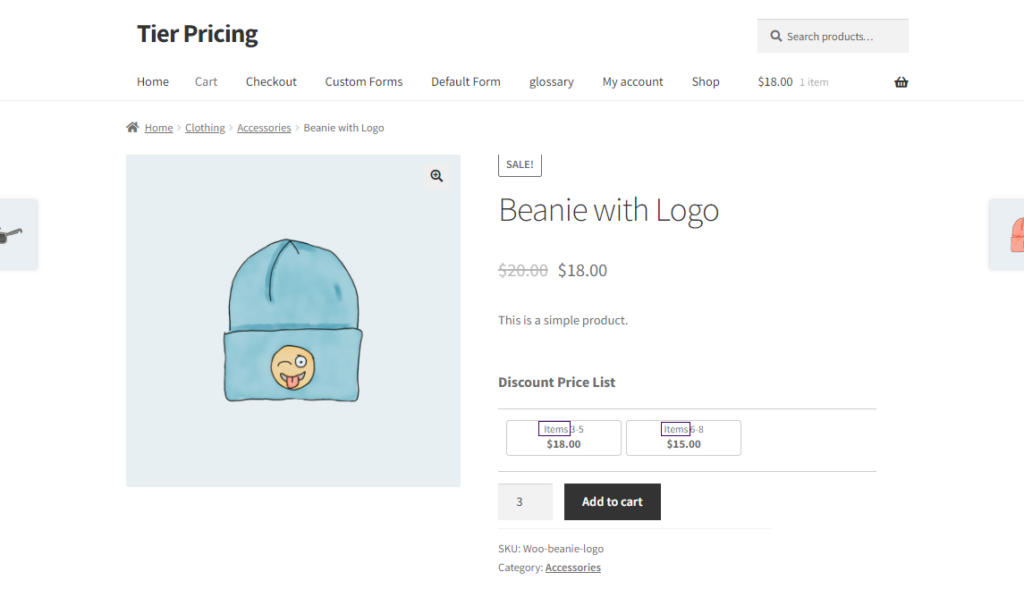
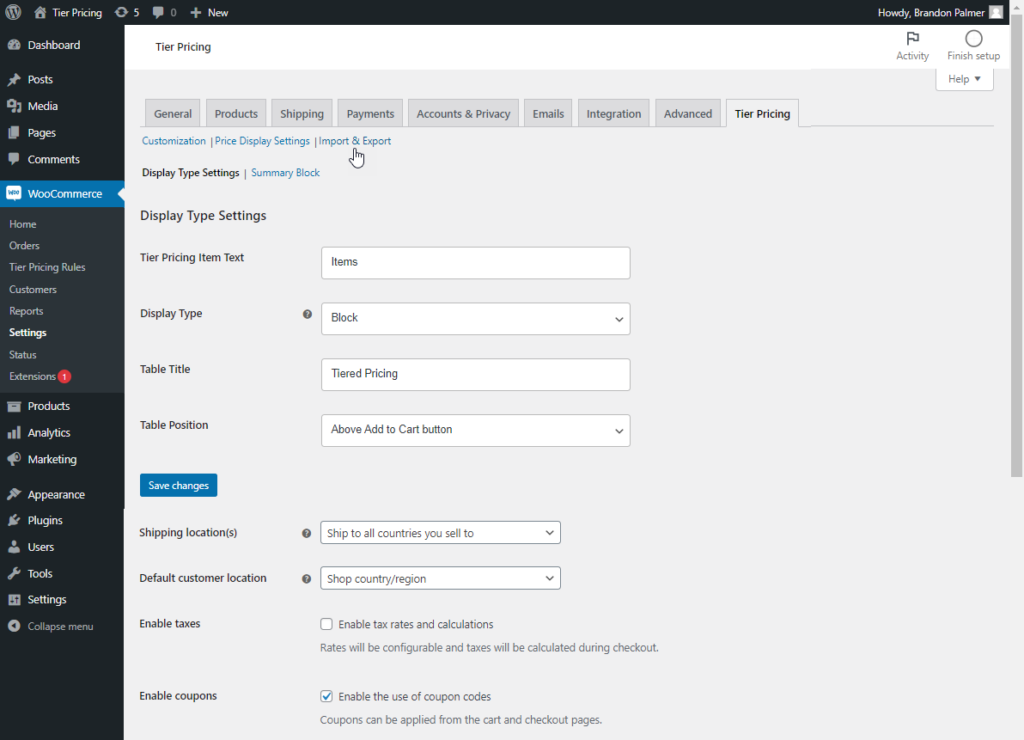
- Under Display Type Settings, the Admin can change the text beside the label Tier Pricing Item Text, which will be reflected on the front end.
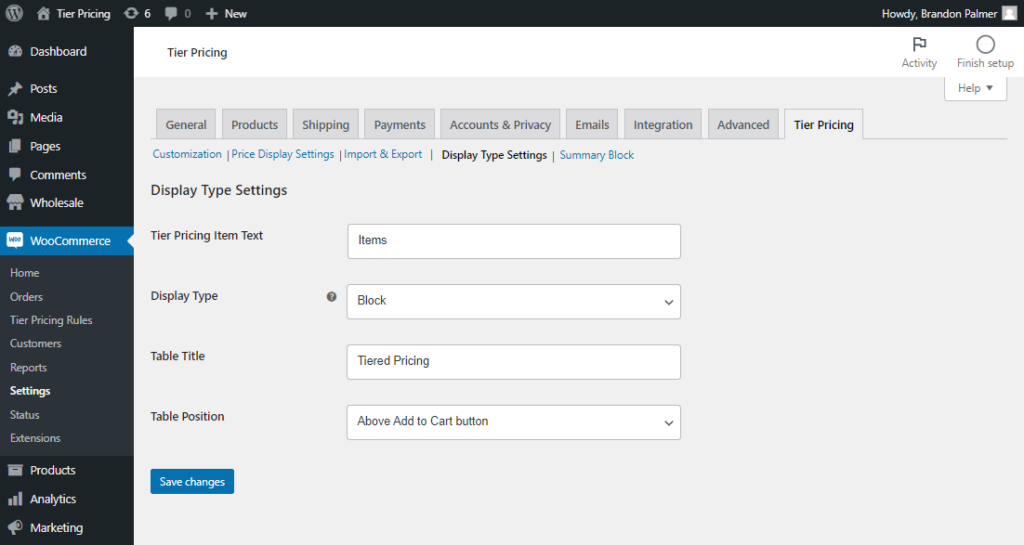
Front-End Impact #
Before
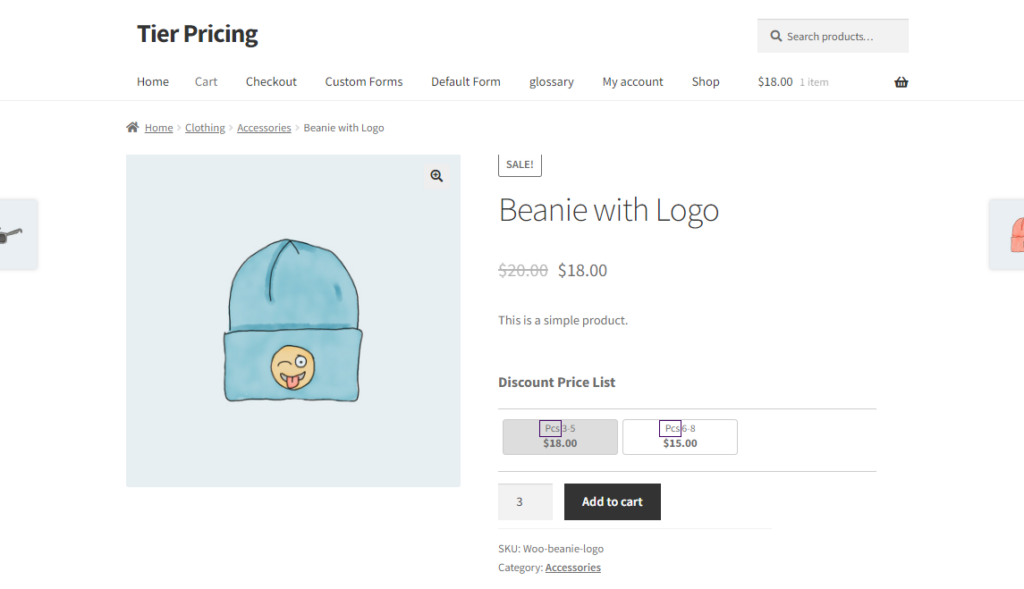
After
Import & Export #
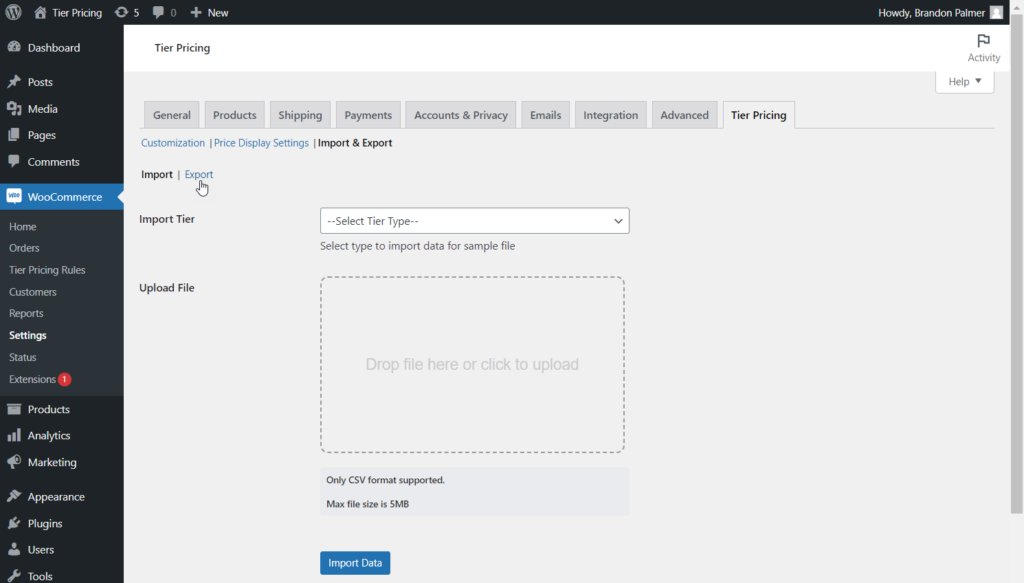
- To Import or Export, Navigate to the Settings.
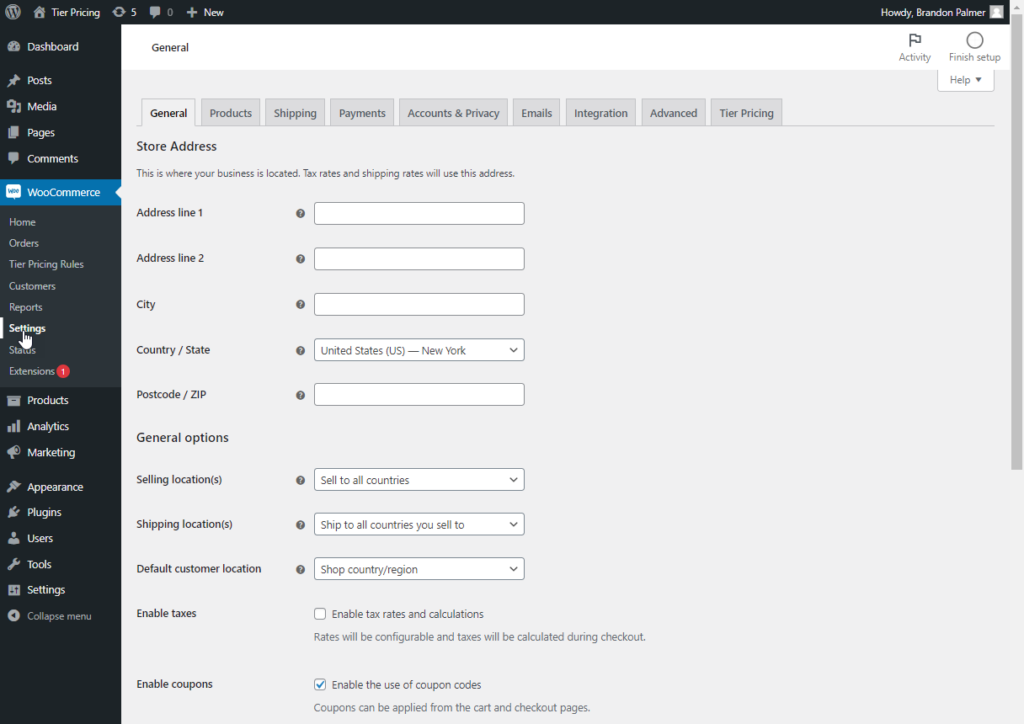
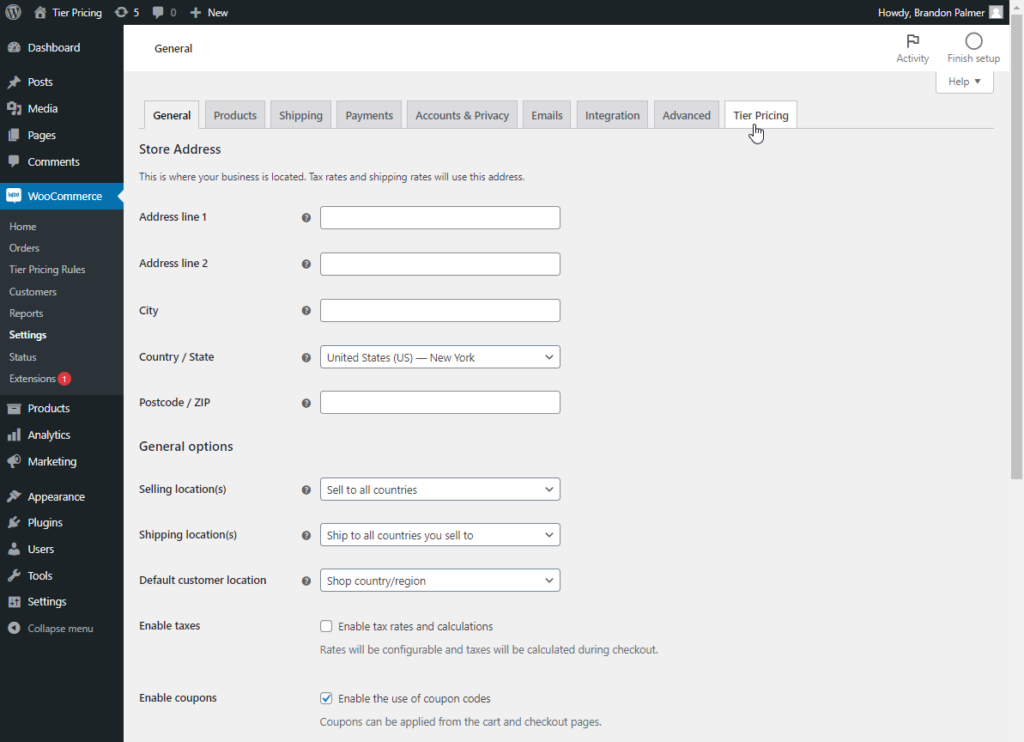
- Click the Tier Pricing tab.
- Select the Import & Export button.
- There are two sections in this sub-tab labeled Import and Export.
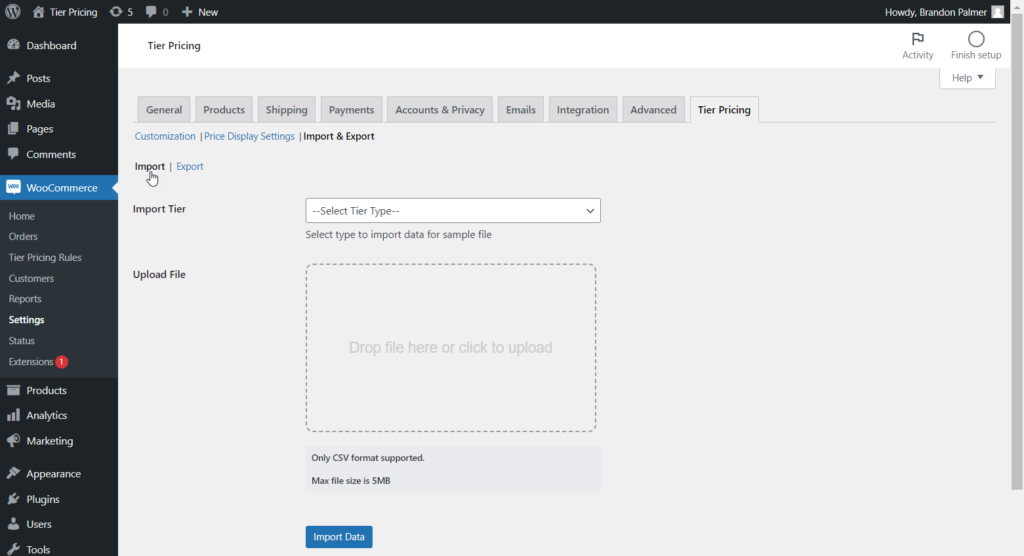
- In the Import section, we have an Import Tier option available to select the Tier Type.
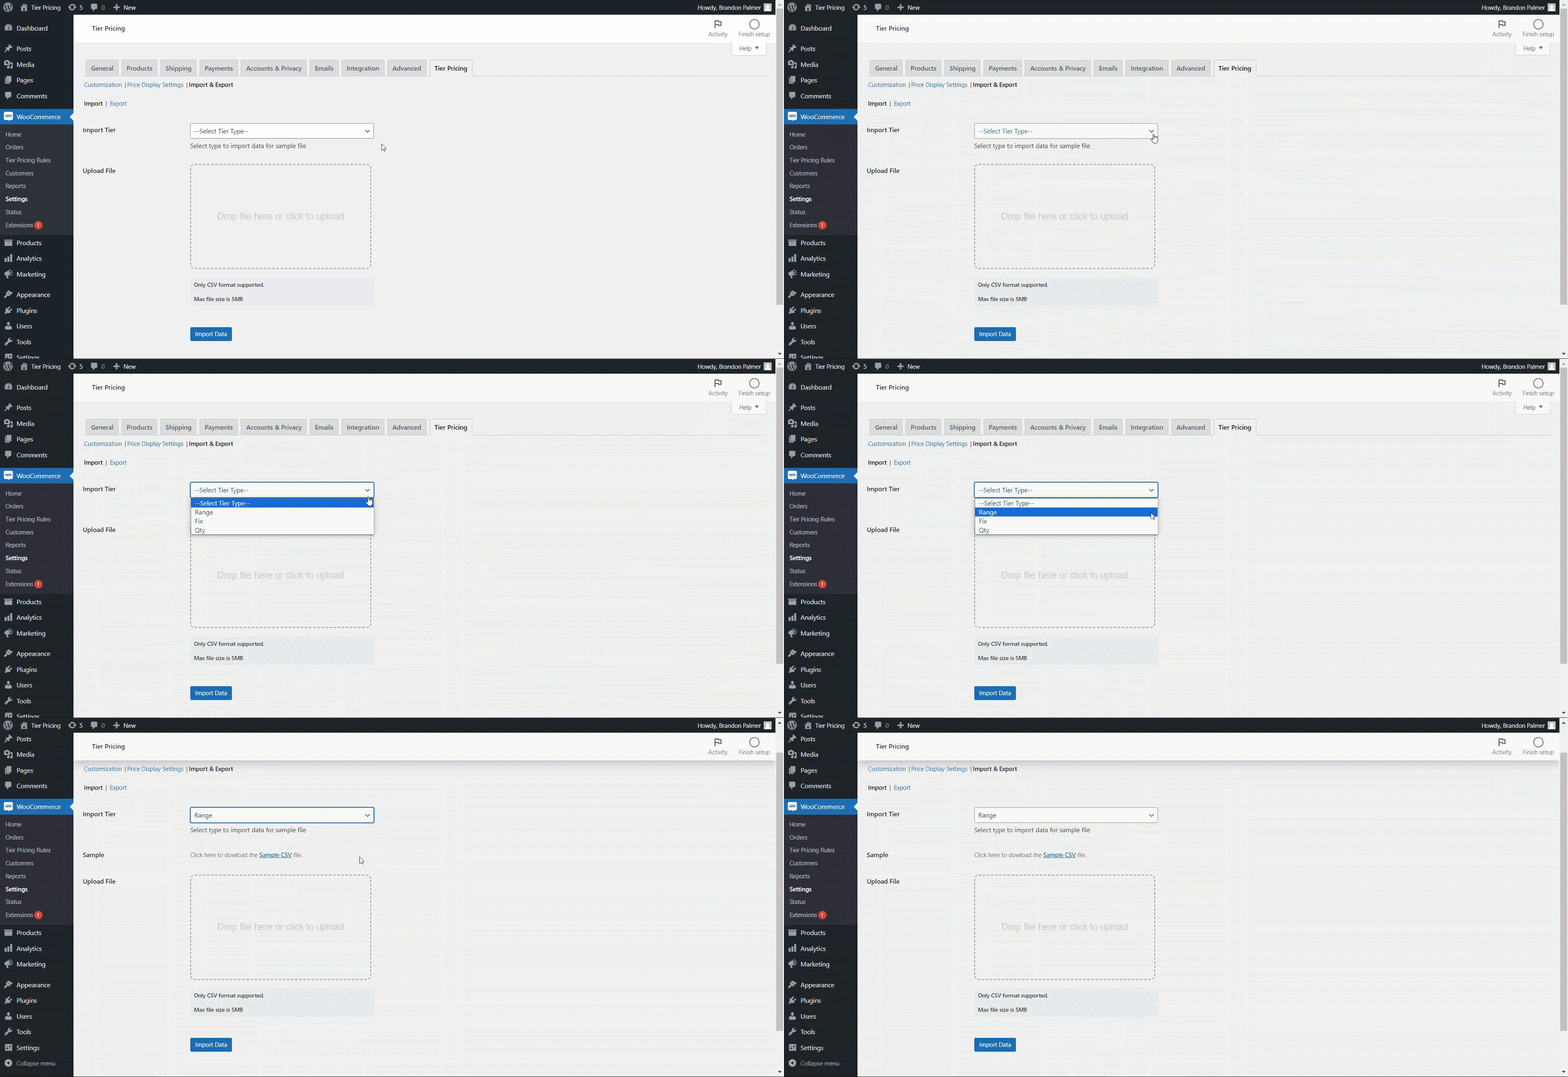
Note: File must match the Tier type selected in the Import Tier option.
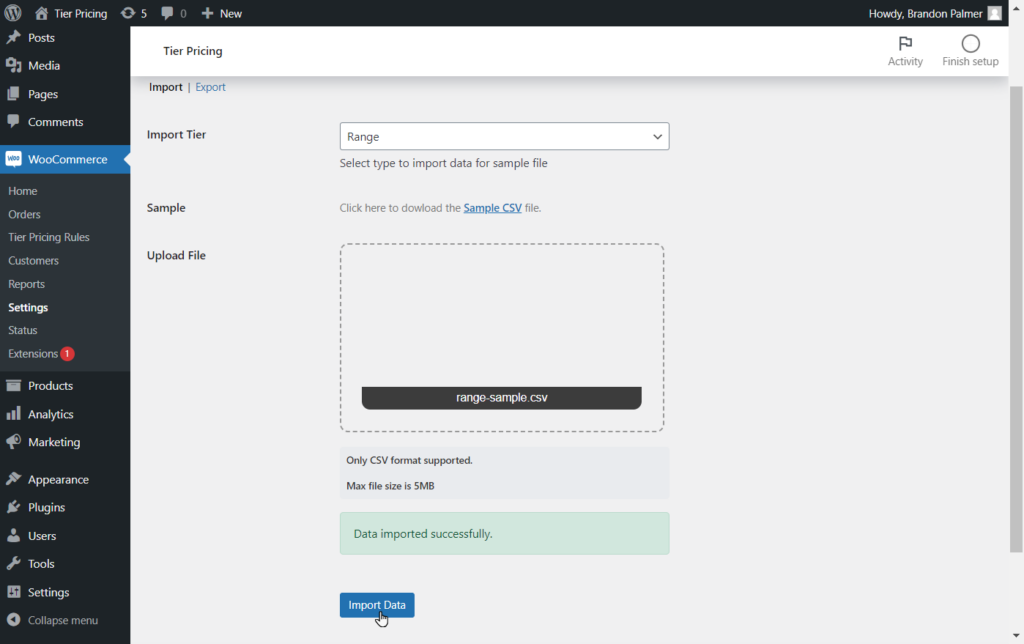
- Then upload the CSV File on the Upload File option and click on the Import Data button.
- The admin can also Export Tier Pricing Rules by clicking the Export option.
- Under the Export option, select the desired Tier Rule and click the Export Data button.


