1.Features #
- Import users & customers from CSV files easily.
- Import WP user’s roles & capabilities via CSV file.
- Export all users of WP with just one click.
- Export users by roles; specific users & can export WP roles & capabilities.
- Extra profile information with the user metadata (your custom field in CSV).
- Just upload the CSV file with a single click.
- All your users will be created/updated with the updated information.
- Filters (for export users) to choose delimiters.
2.Installation Guide #
- Download the plugin zip file from WordPress.
- Navigate to the WordPress Admin Dashboard > Plugins.
- Click on the Add New button in the top left corner.
- Click the Upload plugin button and upload the plugin’s zip file which you downloaded earlier.
3.Overview #
- Download the plugin zip file from WordPress
- Navigate to the WordPress Admin Dashboard > Plugins
- Click on the Add New button in the top left corner.
- Click the Upload plugin button and upload the zip file of the plugin which you have downloaded earlier.
- Click on Users.
- Click on Import/Export
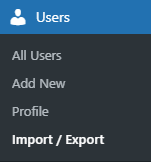
Once done, you’ll be able to view the following tabs,
- Export
- Import
- Settings
4.Export #
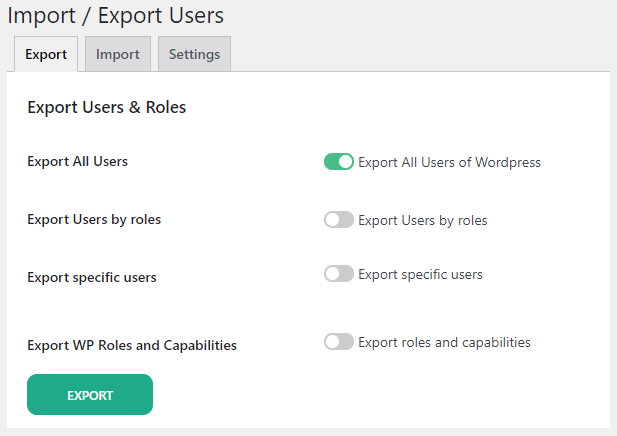
Go to the Export tab (This tab is selected by default when you go to Users > Import / Export). The following sub-options are available in this tab.
- Export All Users
- Export Users by roles
- Export specific users
- Export WP Roles and Capabilities
4.1.Export All Users #
Back-End Configuration
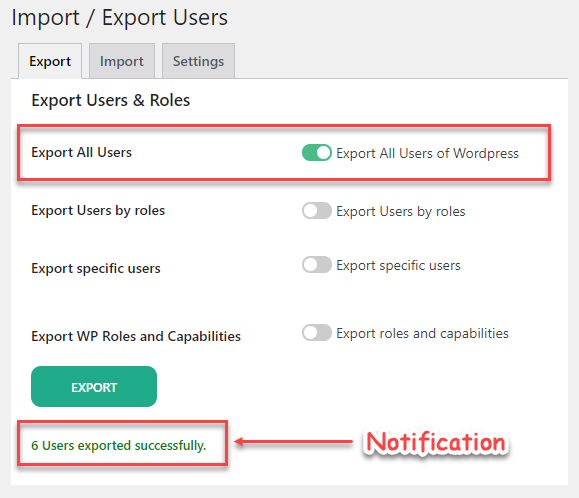
- In the Export tab, Enable the Export All Users option.
- Click on the Export button.
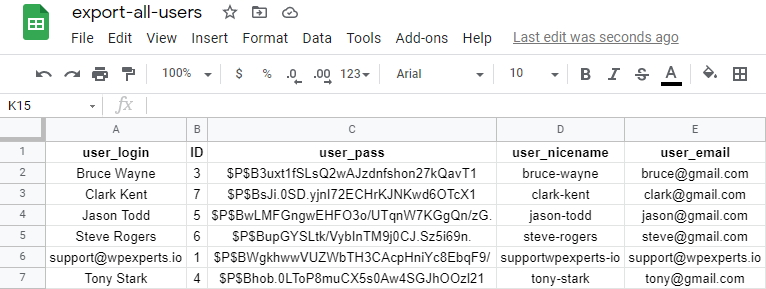
- Once done, you’ll get a notification of the Number of Users Exported Successfully.
Front-End View
- A file would be downloaded to your system in CSV format named export-all-users.csv.
4.2.Export Users by Roles #
Back-End Configuration
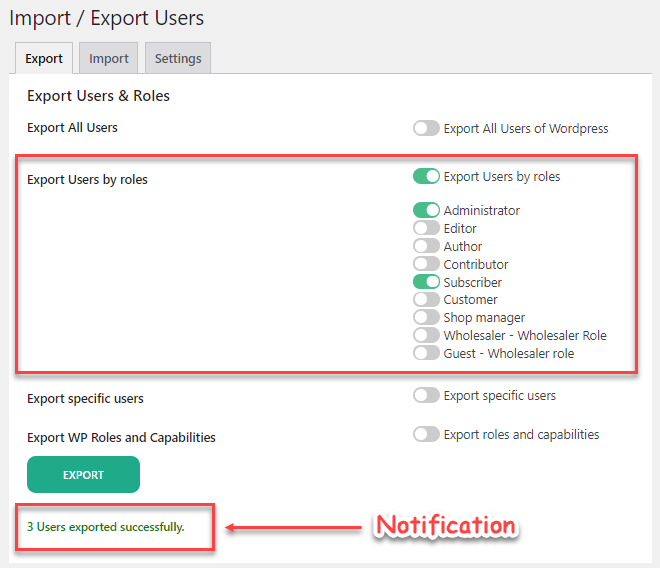
- In the Export tab, Enable the Export Users by roles option.
- Select the user roles which you want to export.
- Click on the Export button.
- Once done, you’ll get a notification of the Number of Users Exported Successfully.
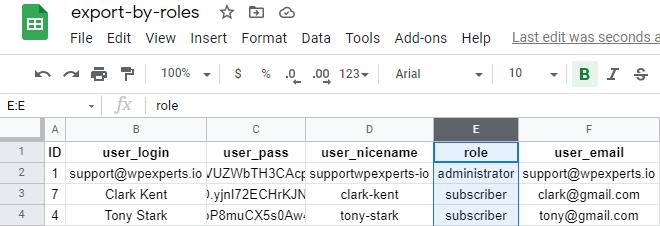
Front-End View
- A file would be downloaded to your system in CSV format named export-all-users.csv.
4.3.Export Specific Users #
Back-End Configuration
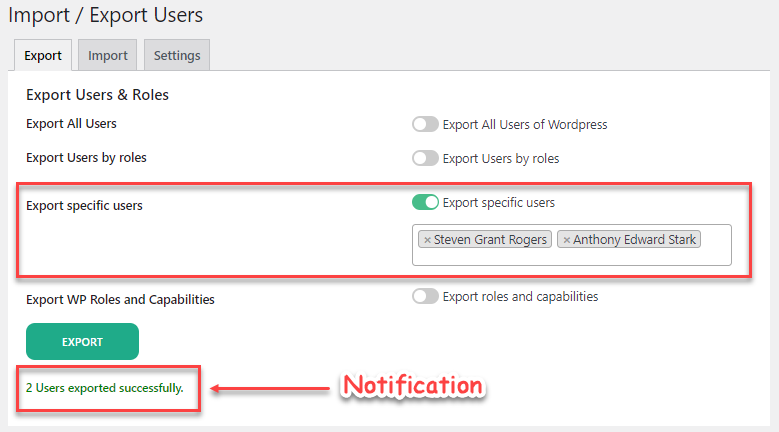
- In the Export tab, Enable the Export Specific Users option.
- Select the users individually that you want to export. You can select multiple users.
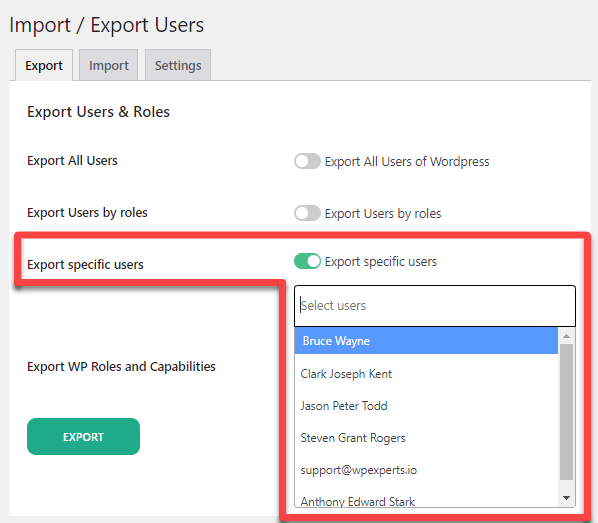
- When you’ve selected the users, click on the Export button.
- Once done, you’ll get a notification of the Number of Users Exported Successfully.
Front-End View
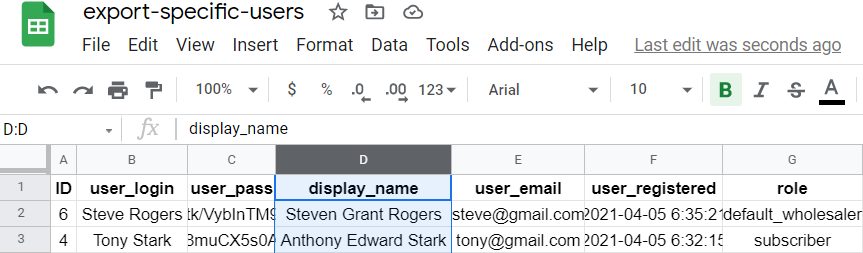
- A file would be downloaded to your system in CSV format named export-specific-users.csv.
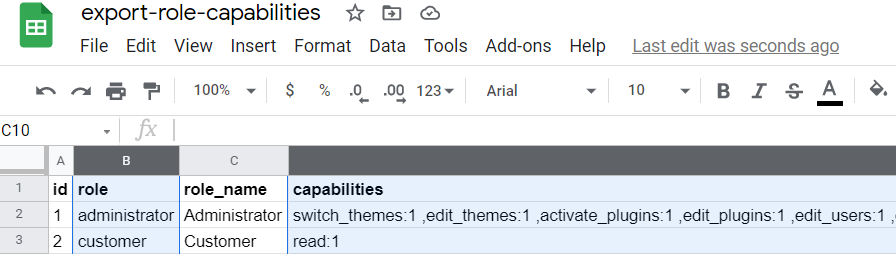
4.4.Export WP Roles and Capabilities #
Back-End Configuration
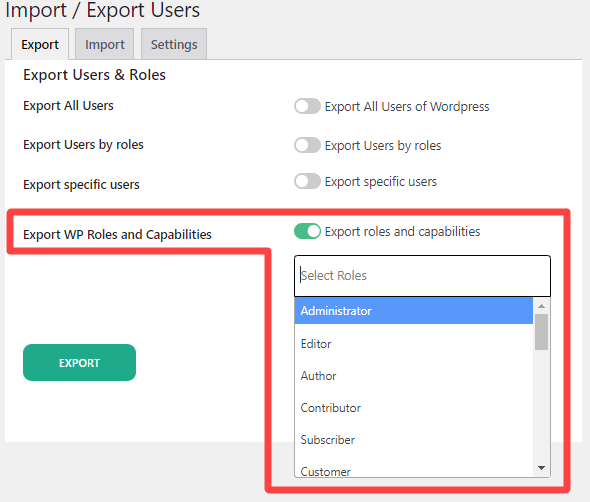
- In the Export tab, Enable the Export WP Roles and Capabilities option.
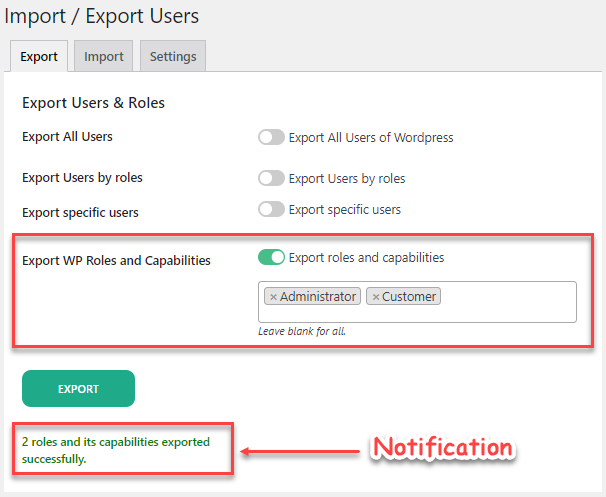
- Select the user roles individually that you want to export. You can select multiple user roles.
- When you’ve selected the user roles, click on the Export button.
- Once done, you’ll get a notification of the Number of Roles and its Capabilities Exported Successfully.
Front-End View
- A file would be downloaded to your system in CSV format named export-role-capabilities.csv.
![]() Was this helpful? Yes NoSuggest edit
Was this helpful? Yes NoSuggest edit
5.Import #
Go to the Import tab. The following sub-options are available in this tab.
- Import WP Users.
- Import WP Roles & Capabilities.
5.1.Import WP Users #
Back-End Configuration
- In the Import tab, Go to the Import WP Users option and Enable the Import Users option.
- You can also Enable the Update Users option.
- Select the file which you want to Import from the Select a file button.
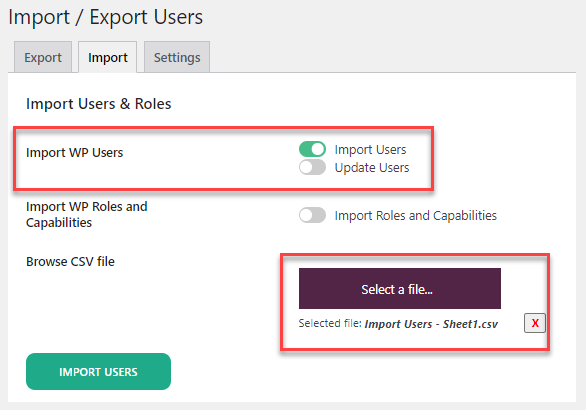
- Click on the Import Users button.
- Once done, you’ll get a notification at the bottom of the page of your import status.

Front-End View
- We created a CSV file, added the following credentials we wanted to import, and saved the file.
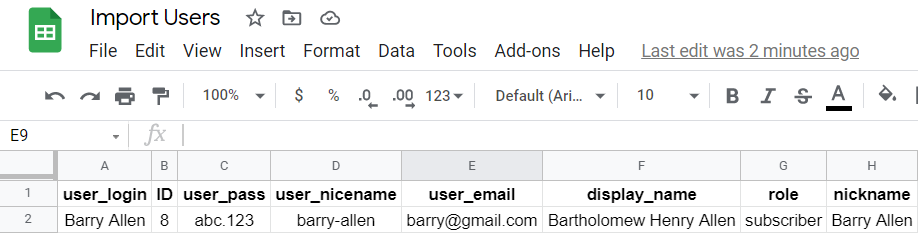
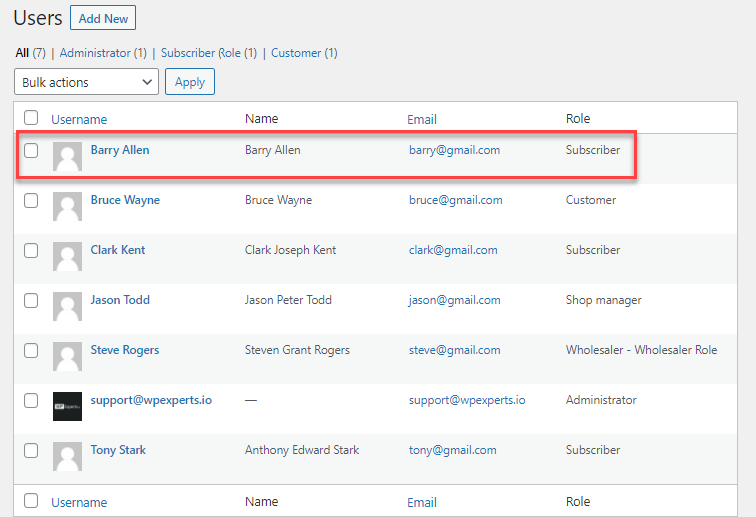
- Now import the file, and once the import is successful, we can go to users and verify the imported user.
5.2.Update Users #
Back-End Configuration
- In the Import tab, Go to the Import WP Users option and Enable the Update Users option.
NOTE: You cannot enable the Update User option directly; the Import User option should enable the Update User option.
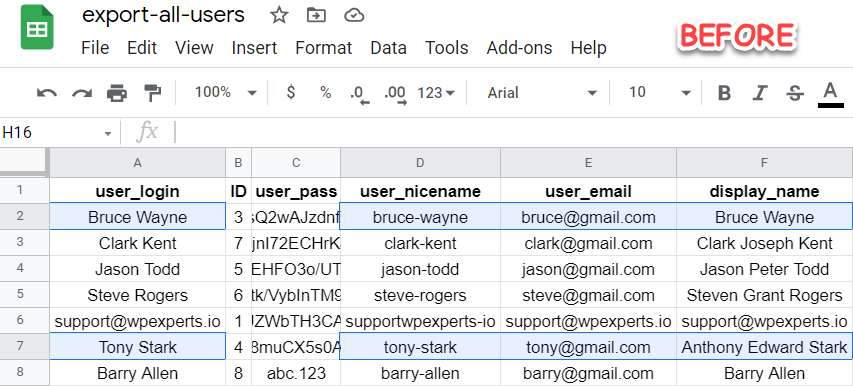
- Export a file.
- Edit it and change the credentials of the users you want to update and then save it.
- Select the file which you want to Import from the Select a file button.
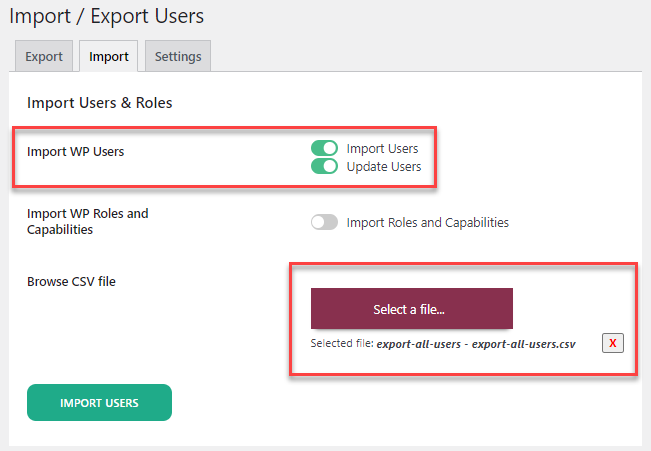
- Click on the Import Users button.
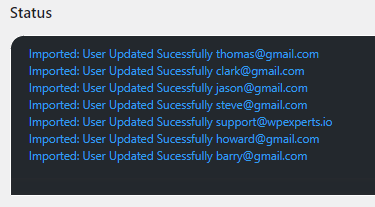
- Once done, you’ll get a notification at the bottom of the page of your import status.
Front-End View
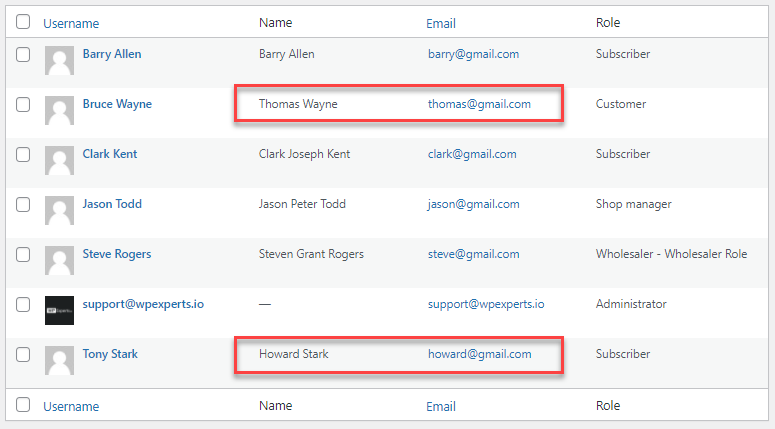
- We edited the CSV file and changed some credentials of the users, and saved the file.
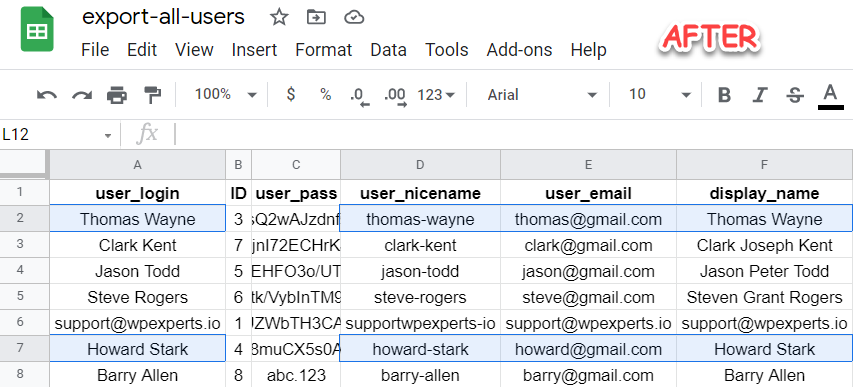
- Now import the file, and once the import is successful, we can go to users and verify the imported user.
NOTE: Username cannot be changed or updated
- Go to Admin Dashboard > Users.
- Select the specific users in which changes were made.
5.3.Import WP Roles and Capabilities #
Back-End Configuration
- In the Import tab, Enable the Import WP Roles and Capabilities option.
- Select the file which you want to Import from the Select a file button.
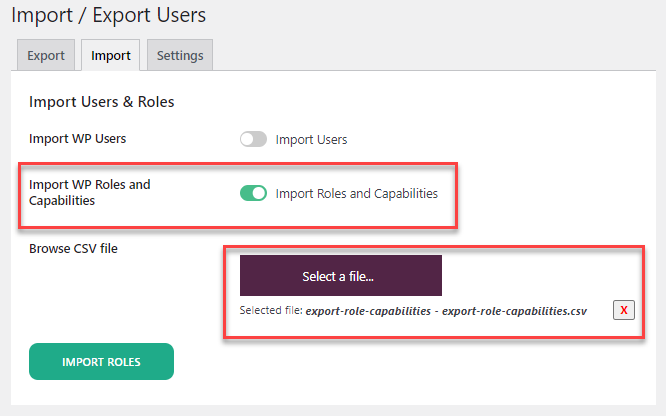
- Click on the Import Users button.
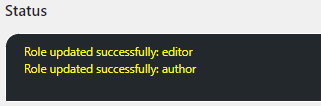
- Once done, you’ll get a notification at the bottom of the page of your import status.
Front-End View
- As we can see that the Editor and Author have multiple capabilities.
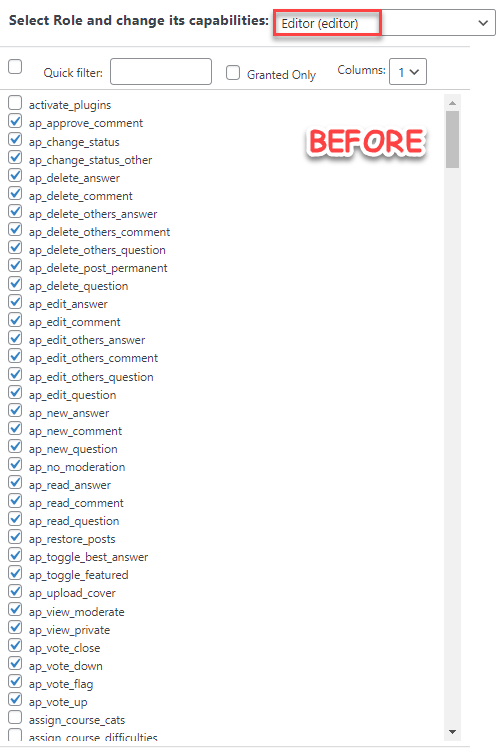
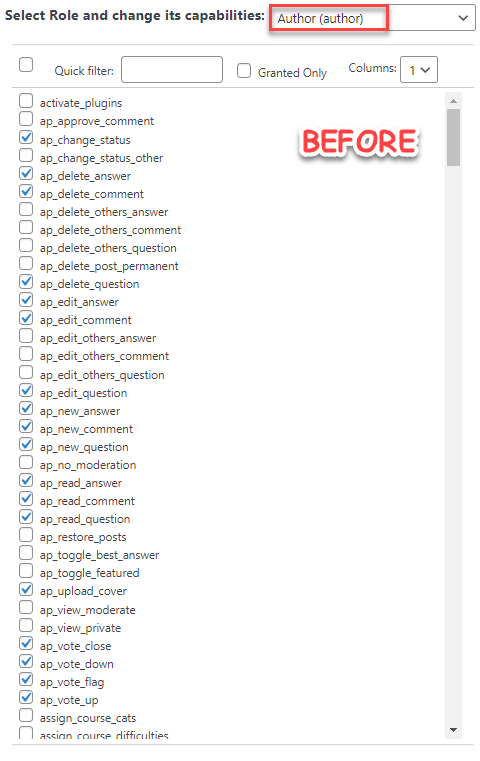
- Export and open the file of their capabilities.

- Now change their capabilities and save the file.
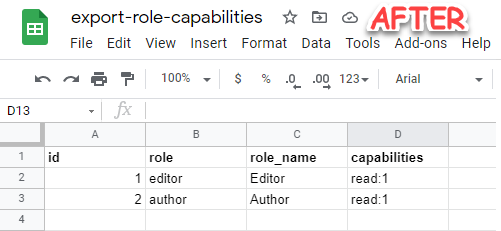
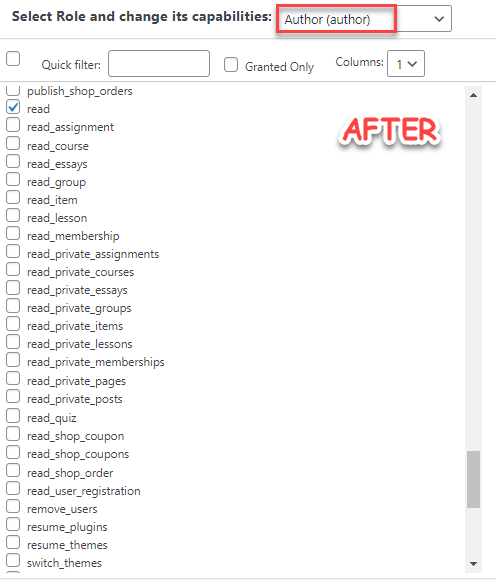
- Now upload the file in which changes were made.

6.Settings #
Go to the Settings tab. The following fields are available.
- USER_ID (Mandatory Field)
- user_login
- user_pass (Encrypted)
- user_nicename
- USER_EMAIL (Mandatory Field)
- user_url
- user_registered
- user_activation_key
- user_status
- display_name
- role (Meta)
- nickname (Meta)
- first_name (Meta)
- last_name (Meta)
- description (Meta)
- rich_editing (Meta)
- syntax_highlighting (Meta)
- comment_shortcuts (Meta)
- use_ssl (Meta)
- admin_color (Meta)
- show_admin_bar_front (Meta)
You can select the above fields for Export purposes by simply enabling it in the Settings tab and then clicking on the Save Changes button. The fields which are enabled will appear in the CSV file when exported.