







































 Usman Hayat
When managing e-commerce stores, businesses should not undermine the importance of a smooth and engaging purchasing process. Therefore, they should consider utilizing Quick Order Forms.
Through these forms, they can enhance the purchasing processes, leading to increased conversions and sales. Quick order forms enable customers to instantly add products to their cart and continue to checkout, making their shopping experience more productive.
That said, not all customers require access to quick order forms. Therefore, businesses of various sizes should allow access to quick order forms to specific customers only.
This blog post describes how to control access to the quick order form based on user role.
How to Control Quick Order Form Access by User Role
Controlling access to the quick order form through user roles enables businesses to assign specific permissions to different users. To control quick order form access by user role, follow the steps below:
- The admin must have set up the WooCommerce store to use the Bulk Order Form for WooCommerce plugin.
- Once you install and activate the bulk order form extension, go to WordPress Admin Dashboard > WooCommerce > Quick Order Form.
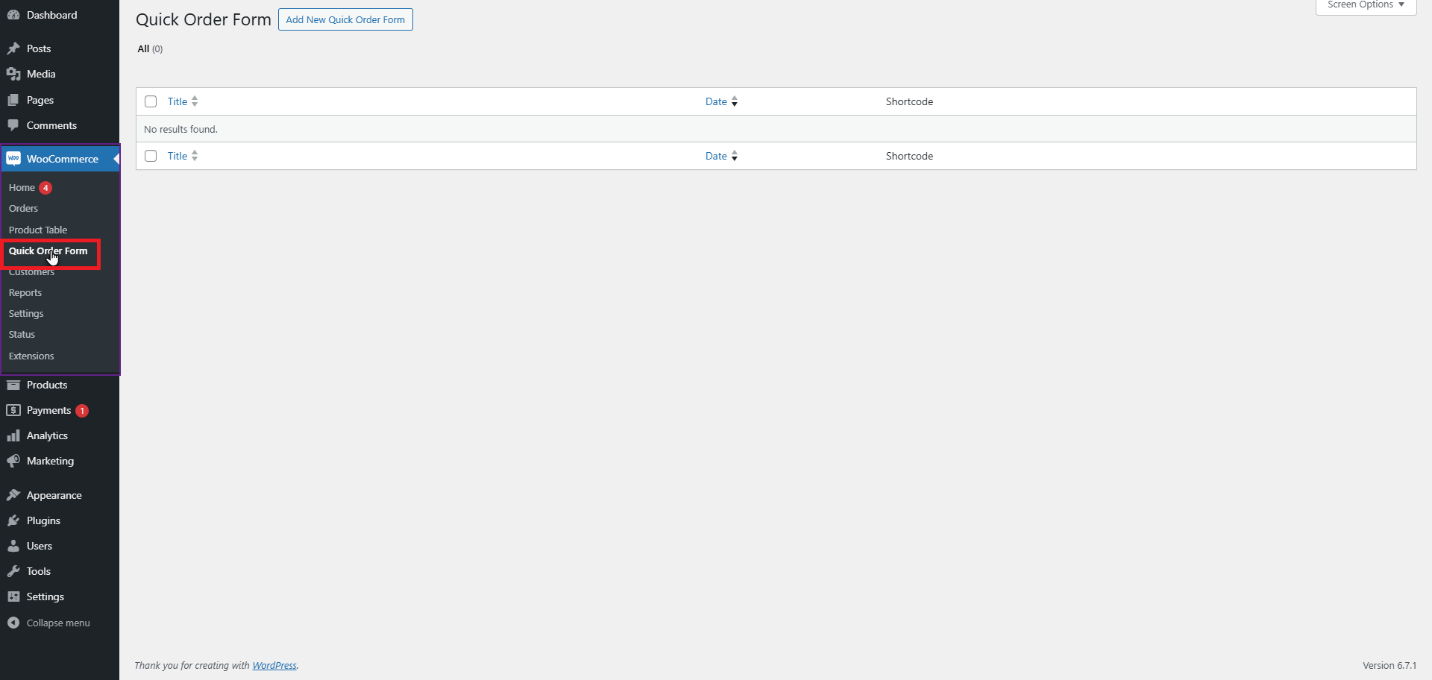
- A new page will appear where the admin can see the list of Order Forms.
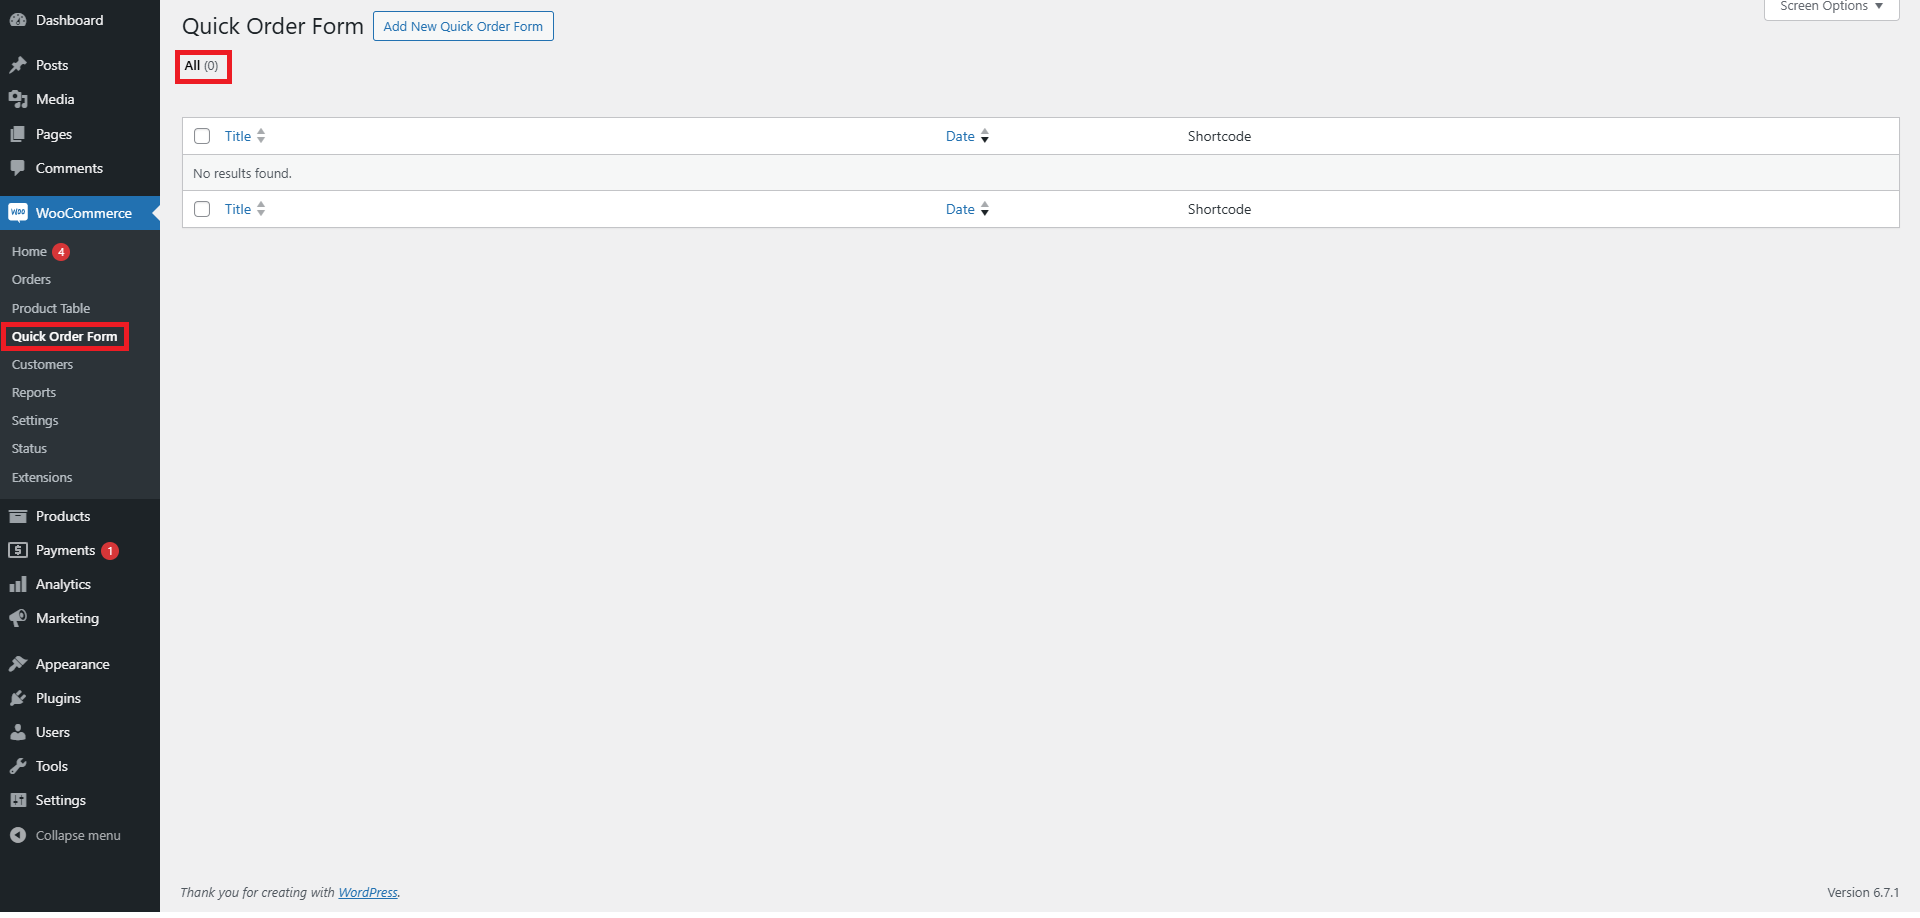
Creating a Quick Order Form
- To develop a Quick Order Form, click on WooCommerce > Quick Order Form > Add New.
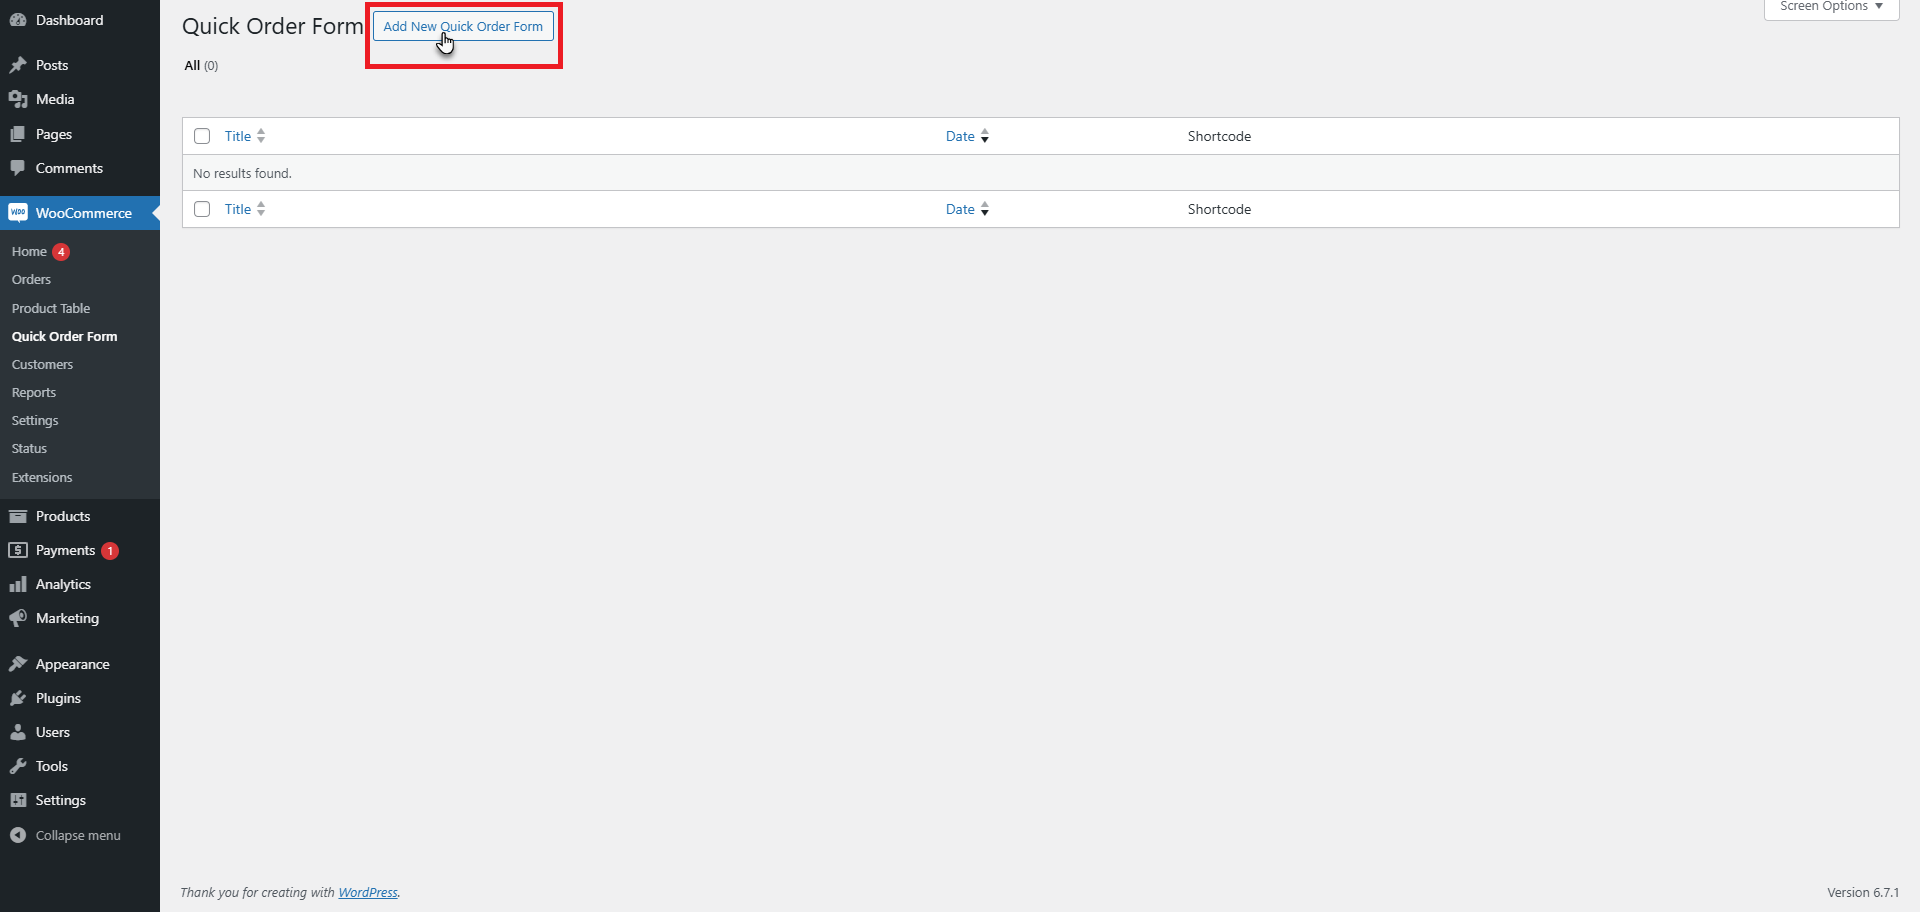
- A new page will be shown that helps the admin add the form details.
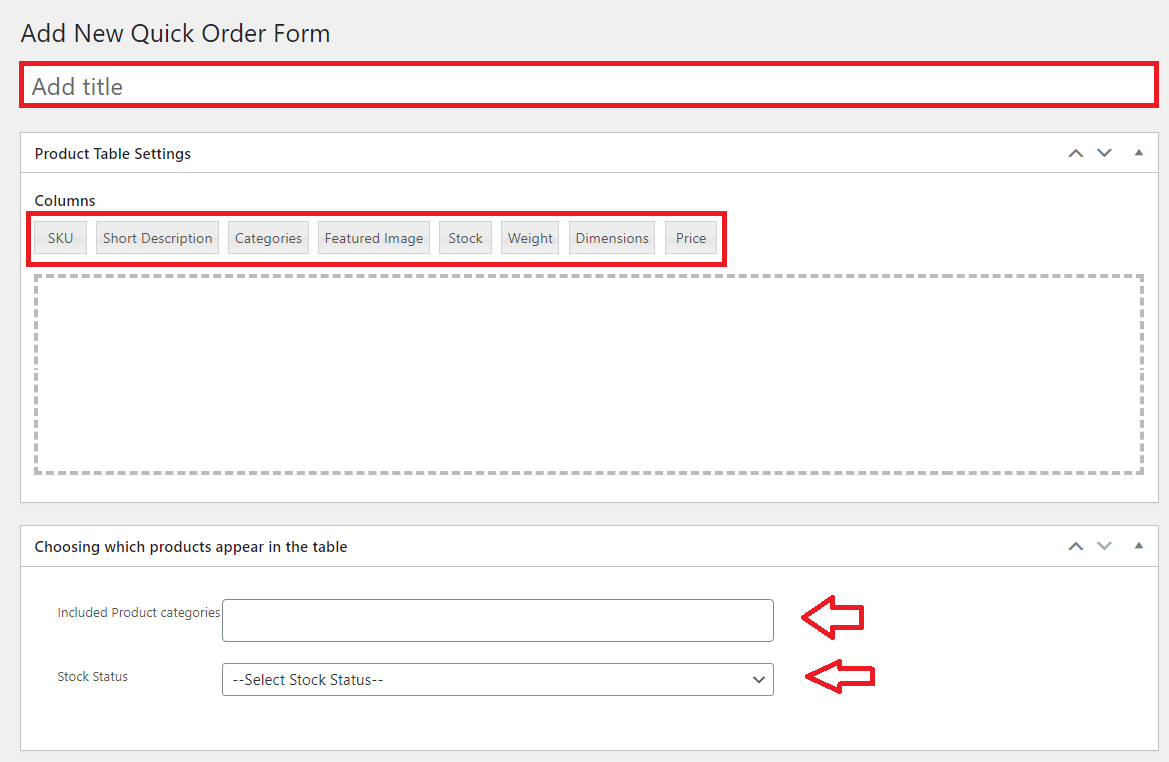
- Admin can easily include the title of the Quick Order Form under the Add title field.
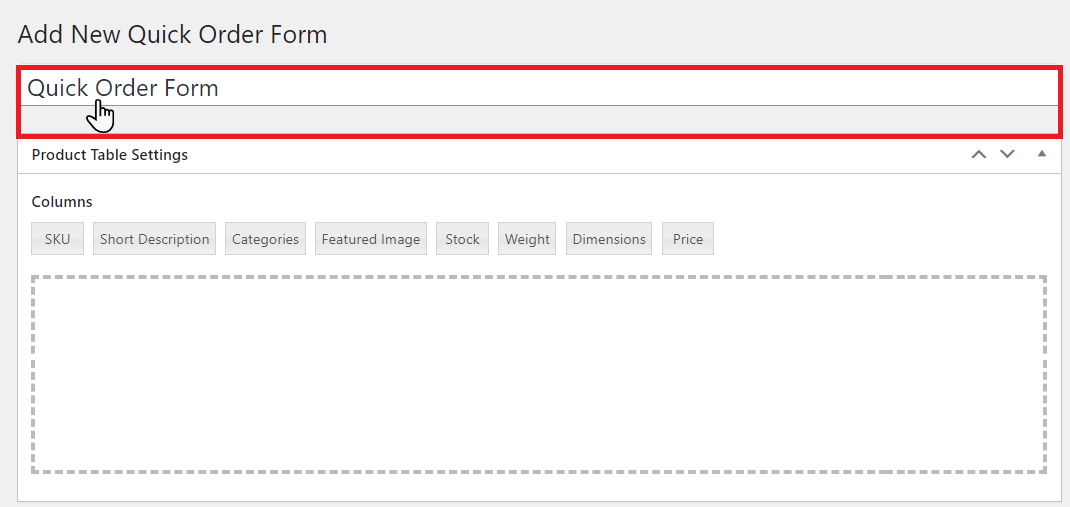
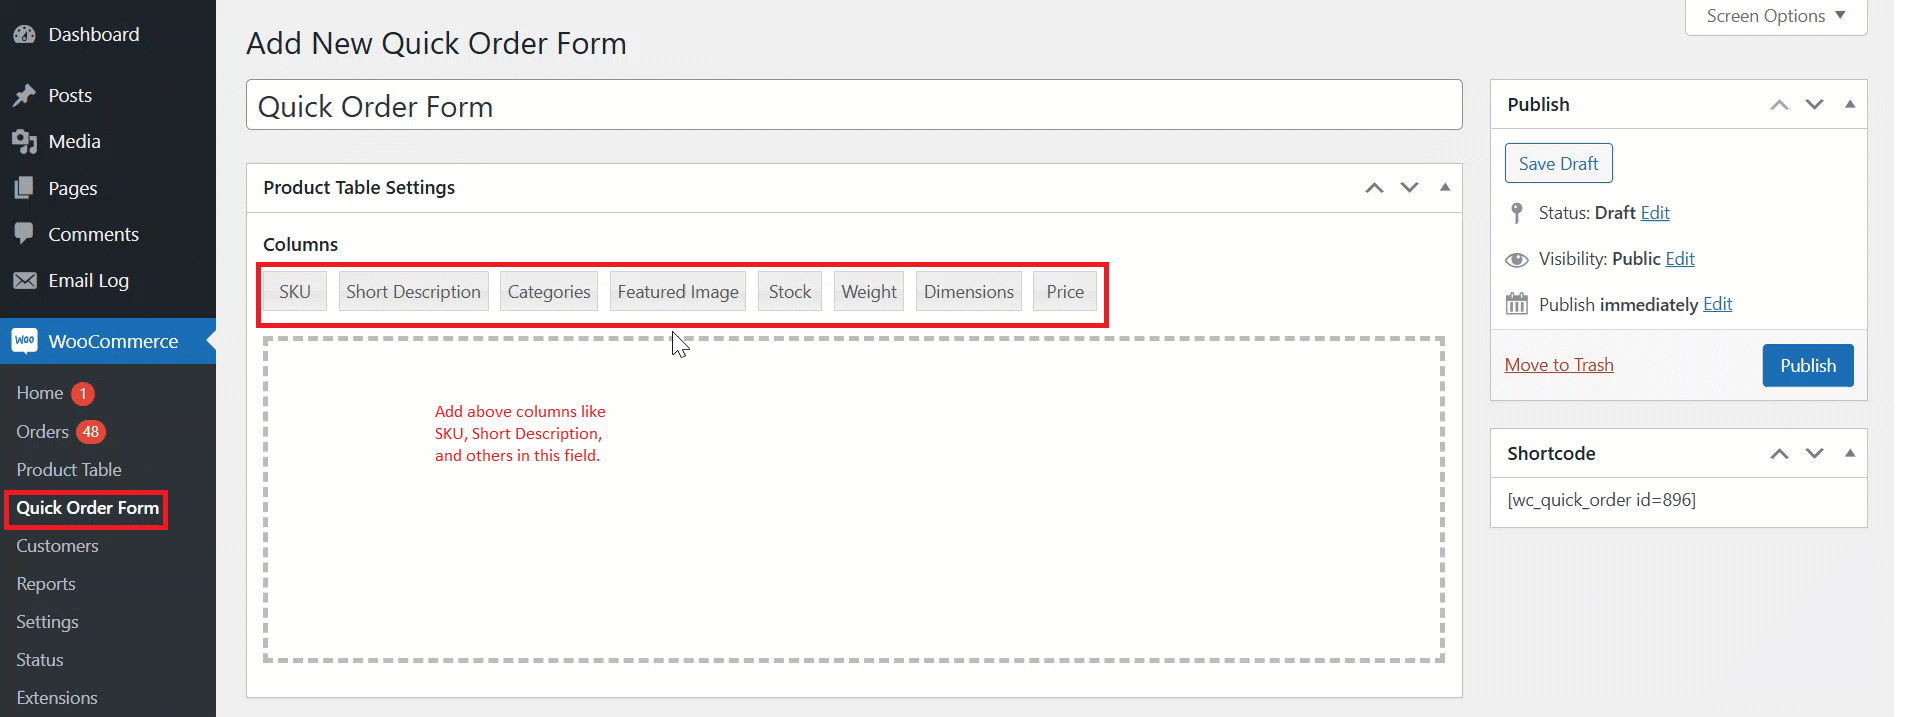
- To include the Product Table column, drag and drop the Columns in the field under the Product Table Settings.
- Fields can be renamed and deleted when needed.
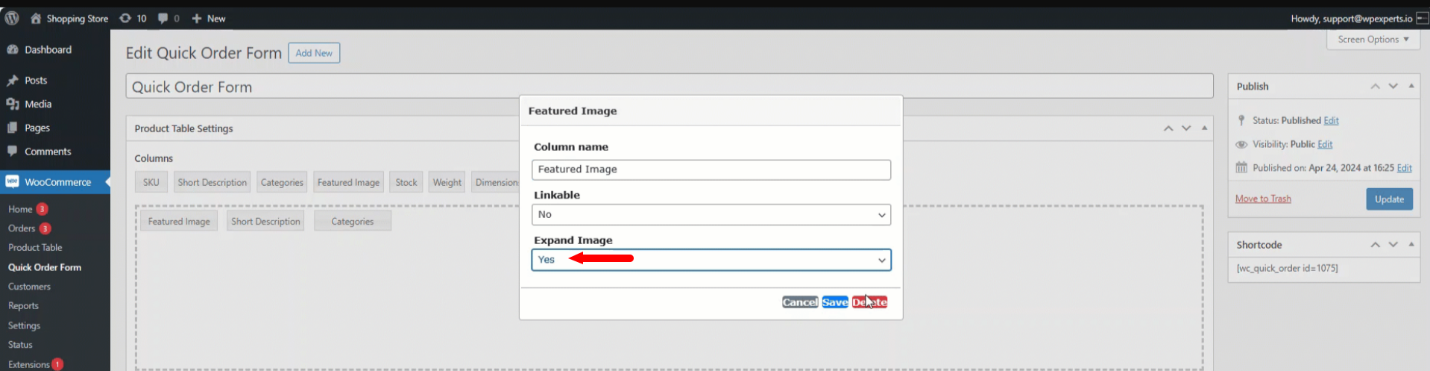
- To rename, press any field to see the pop-up on your screen. Under the Column name, include the desired column name.
- Once you are done, press the Featured Image, and from the Expand Image dropdown option, choose Yes.
- When you are done, choose the Product categories under the header Choosing which product appears in the table.
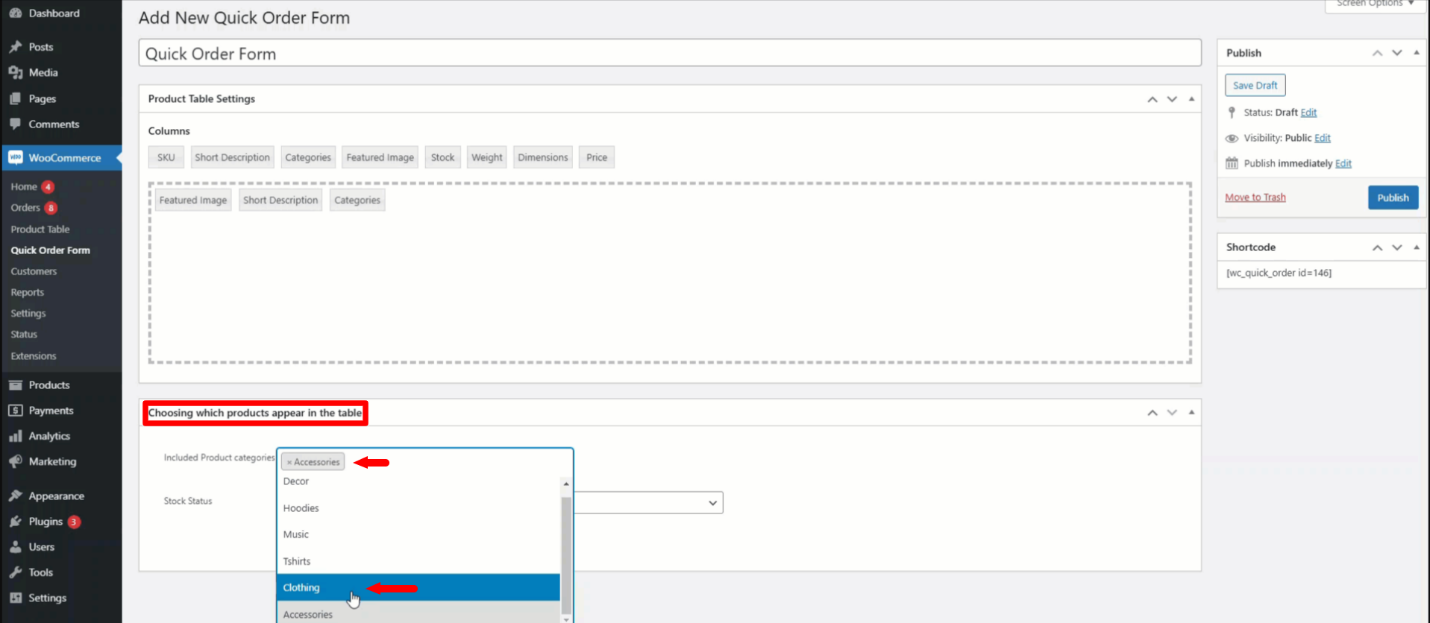
NOTE: Any product other than the selected category cannot be searched from the front end.
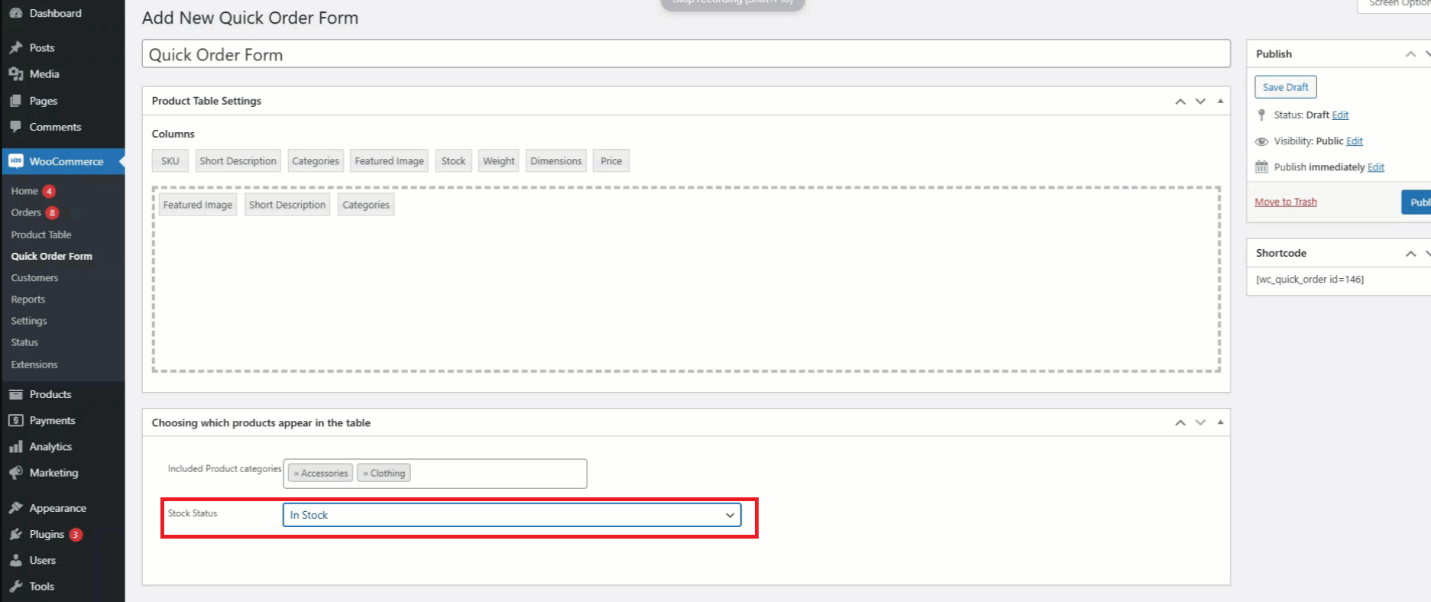
- Admin can set stock status by pressing the dropdown beside the Stock Status label, which will be shown as either Out of Stock products or In stock.
NOTE: If the Stock Status is unselected, it will show all in-stock and out-of-stock products.
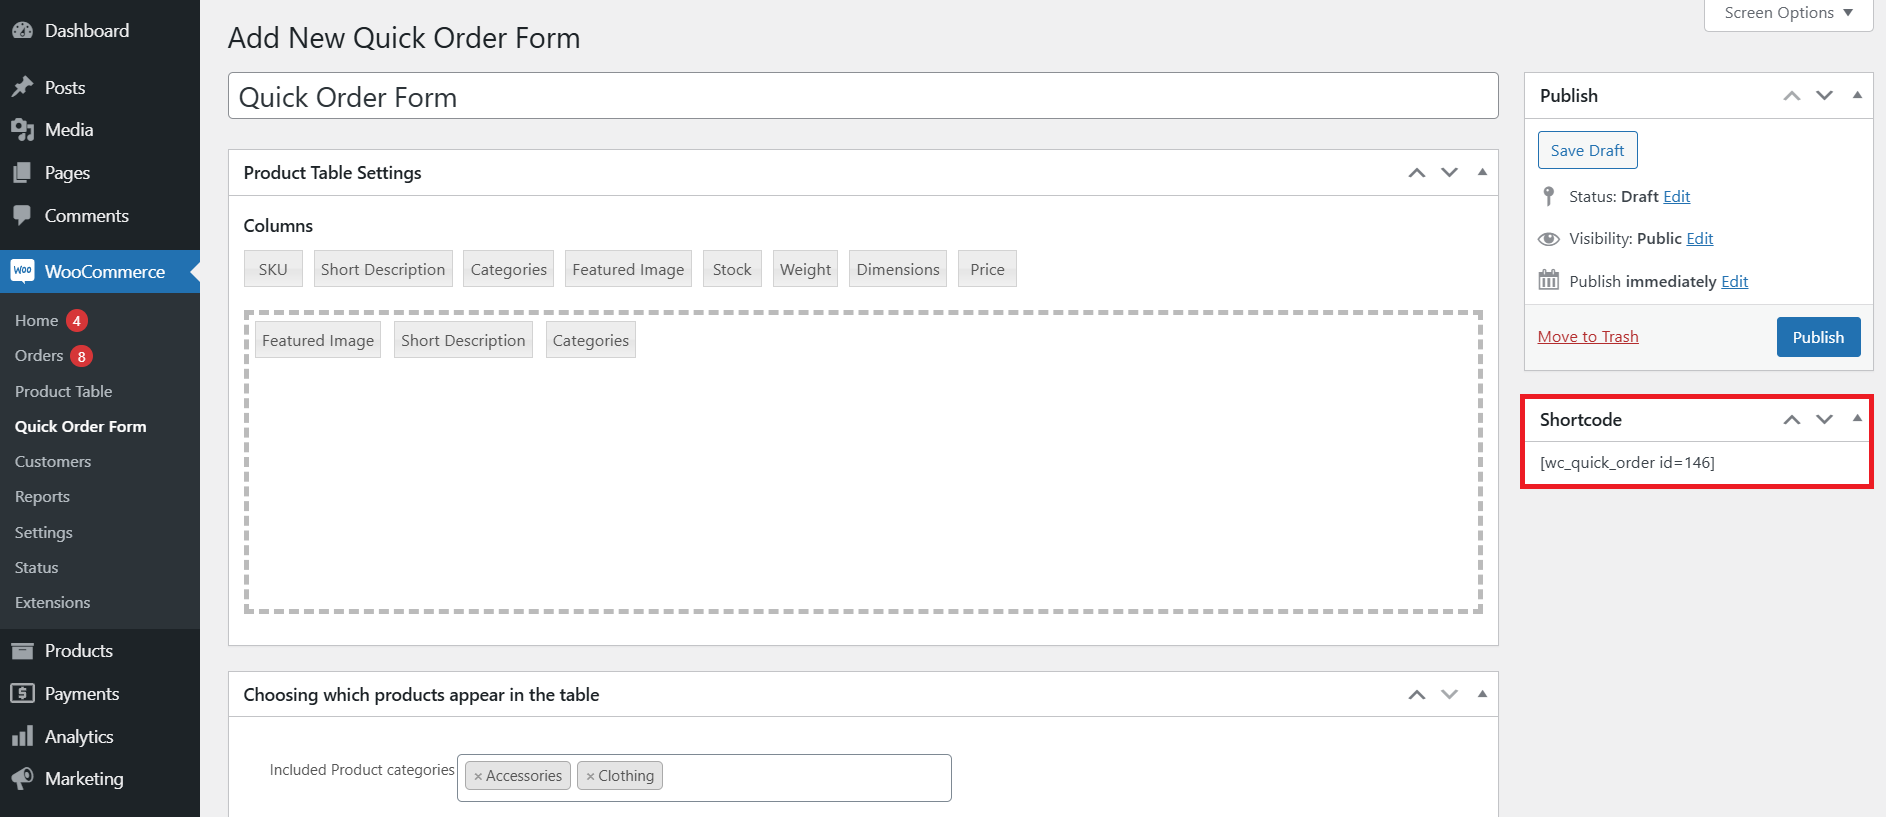
- Once you set all the fields, copy the shortcode that you can paste on the page later to showcase the Quick Order Form.
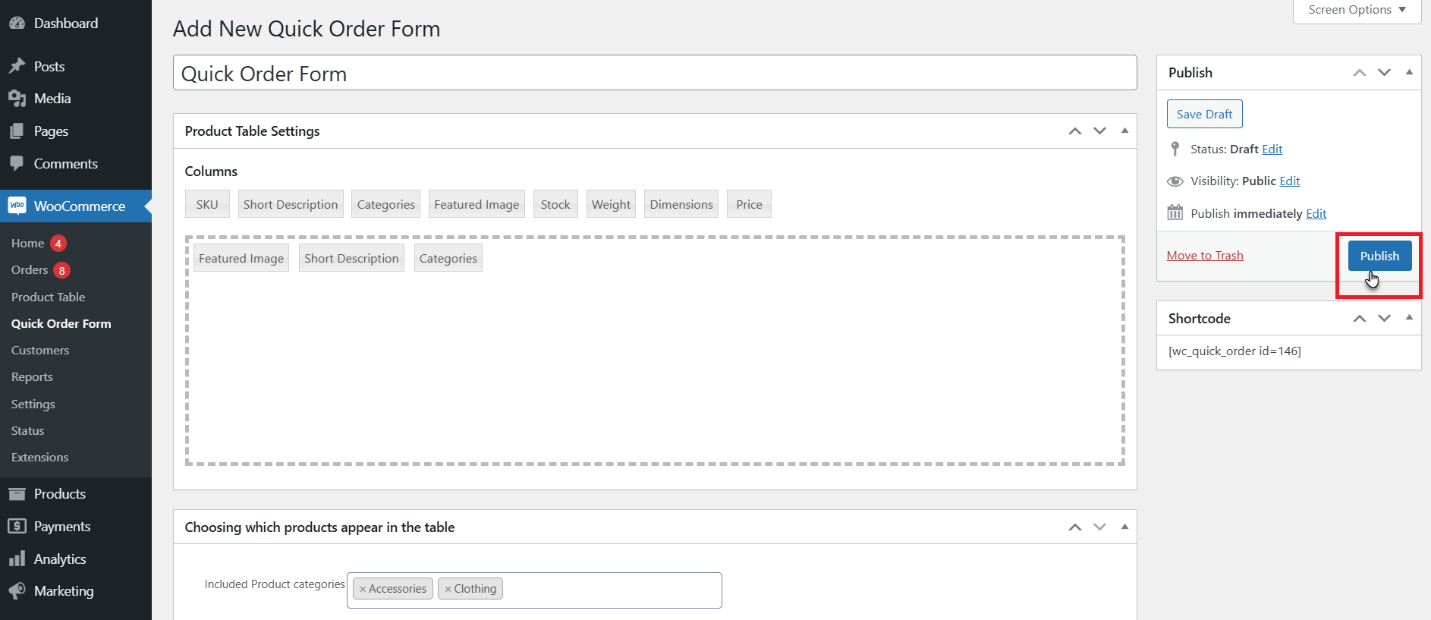
- You should choose the Publish or Update button.
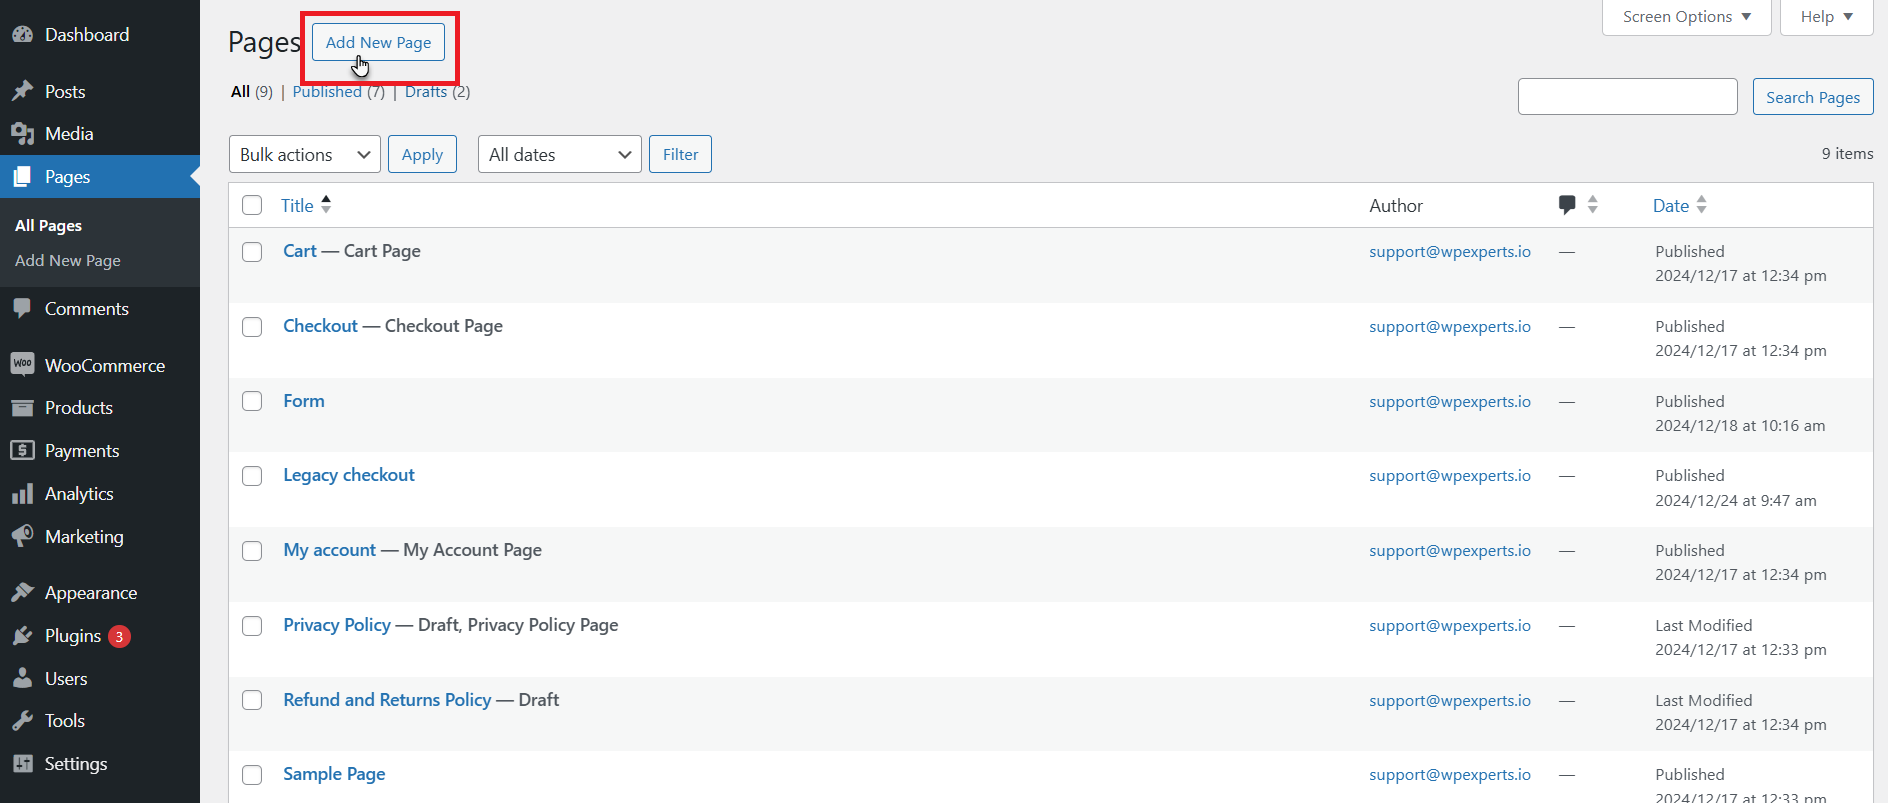
- To showcase the table on the front end, develop a page and go to WordPress Admin Dashboard > Pages.
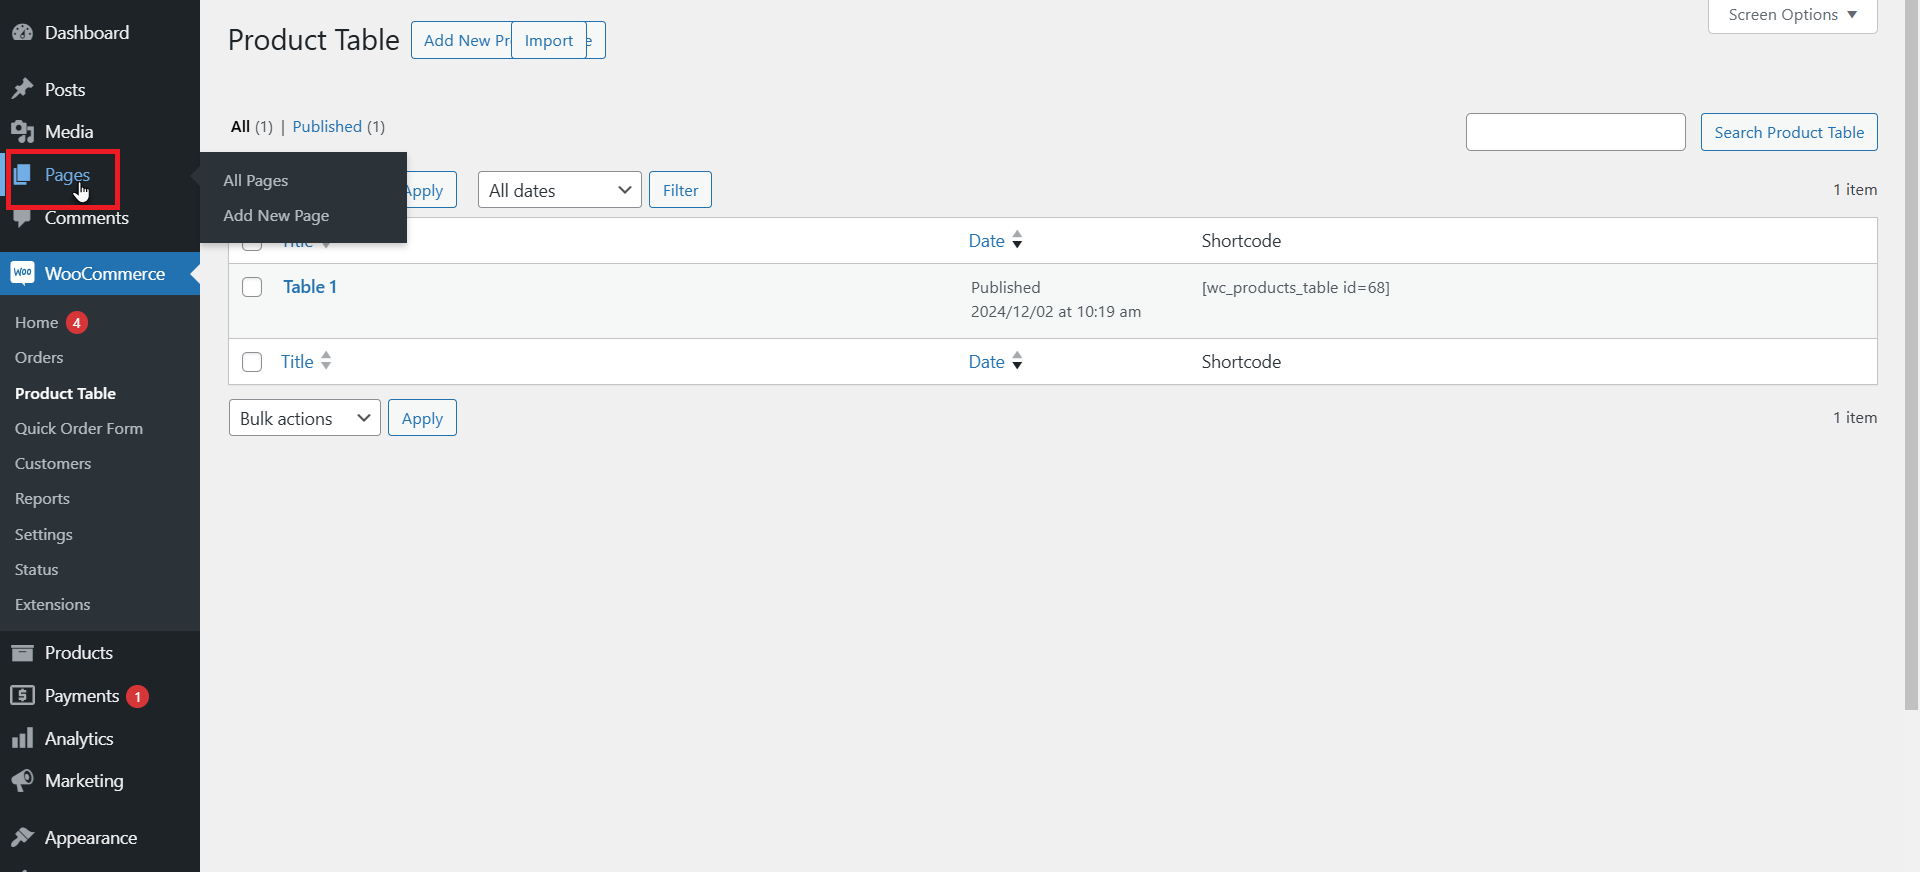
- Press “Add New” and create a new page.
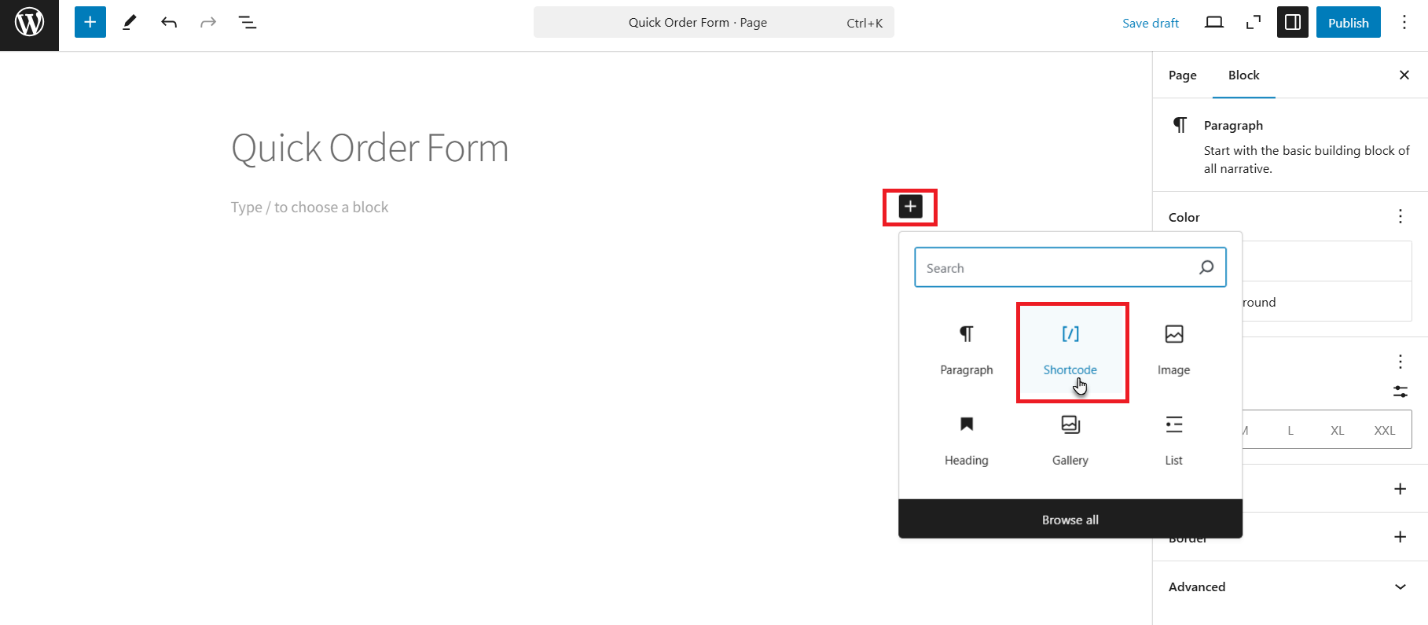
- On the page, choose + and add the shortcode widget.
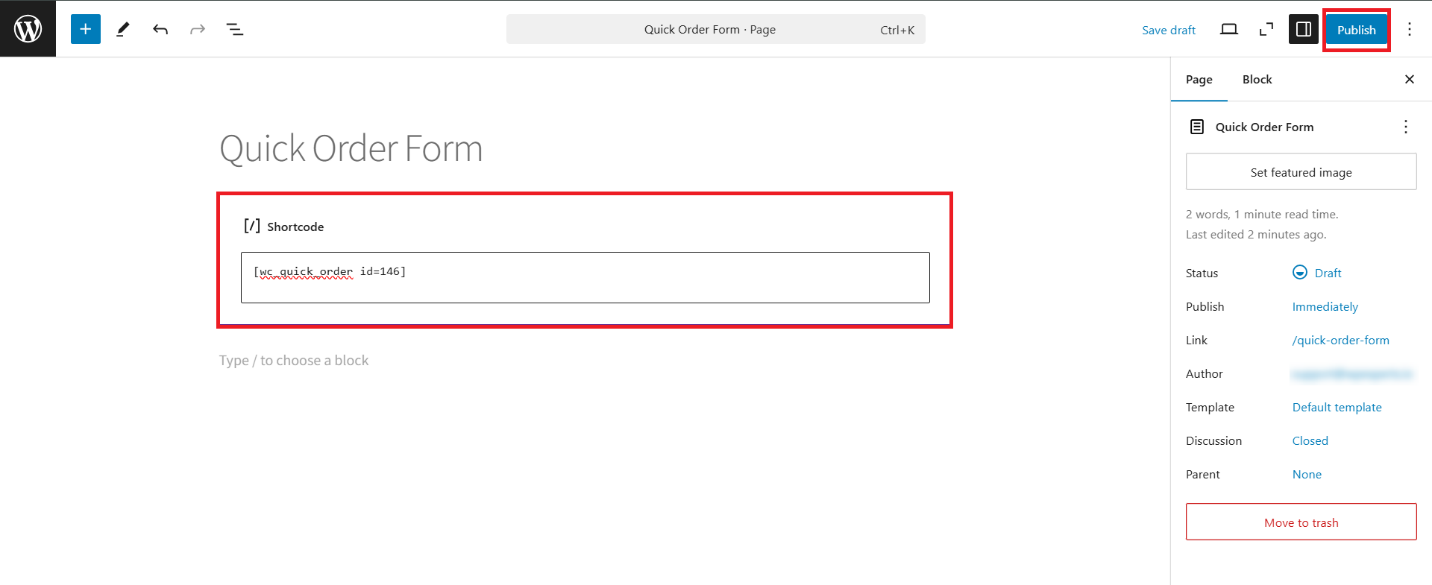
- Paste the shortcode you have copied into the field under the Shortcode label and hit the Publish button.
Front-End Impact
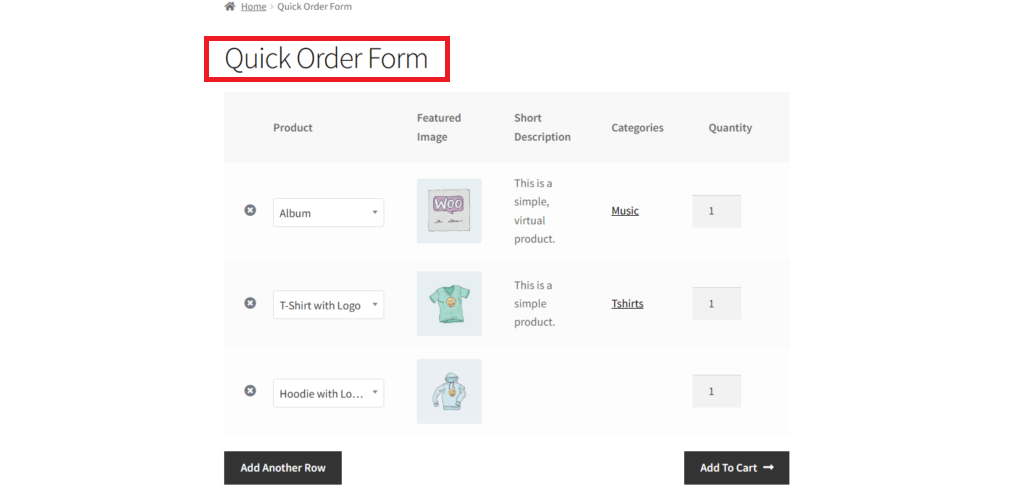
- Quick Order Form will be shown on the front end, depending on the fields set from the back end.
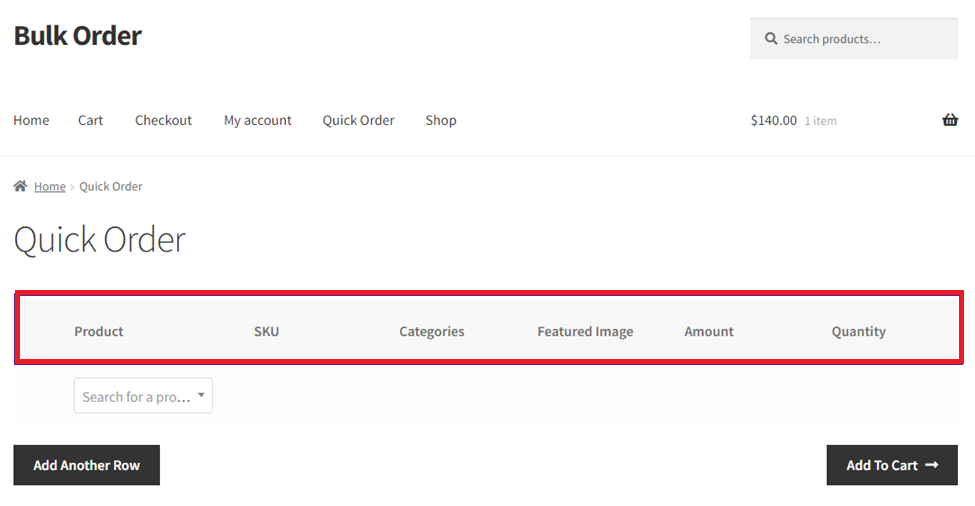
- You can search for the products in the search field. Product details will appear depending on the fields set in the form. You can also set the product quantity, which will be added to the cart.
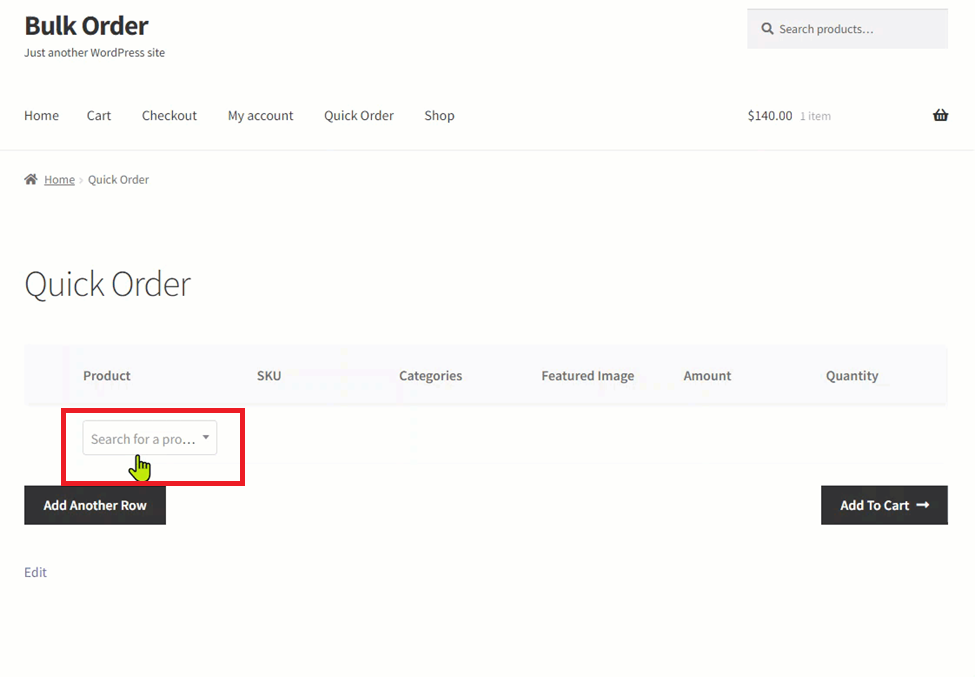
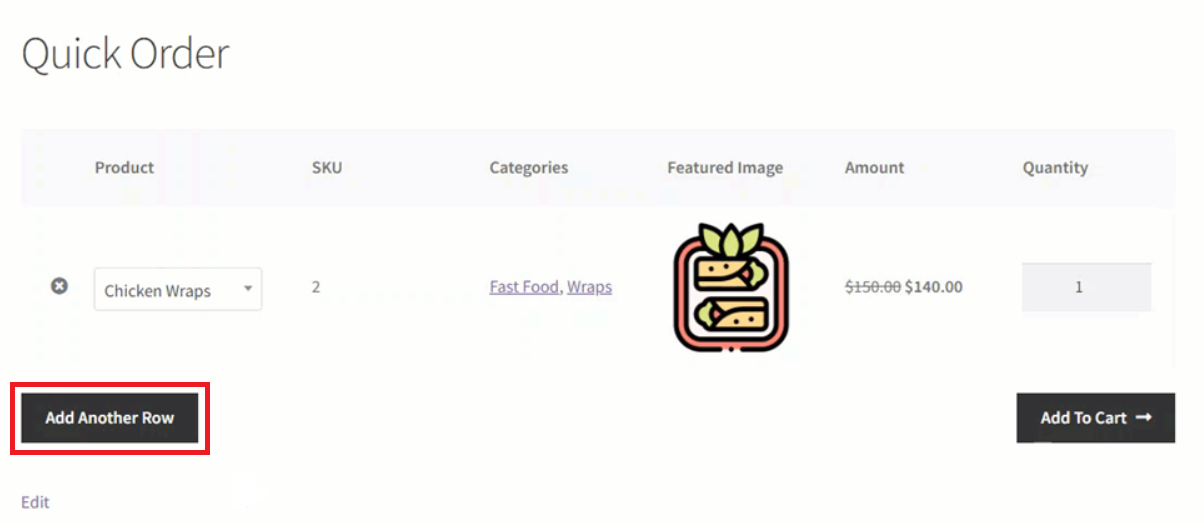
- User can add multiple rows by clicking the ” Add Another Row button.
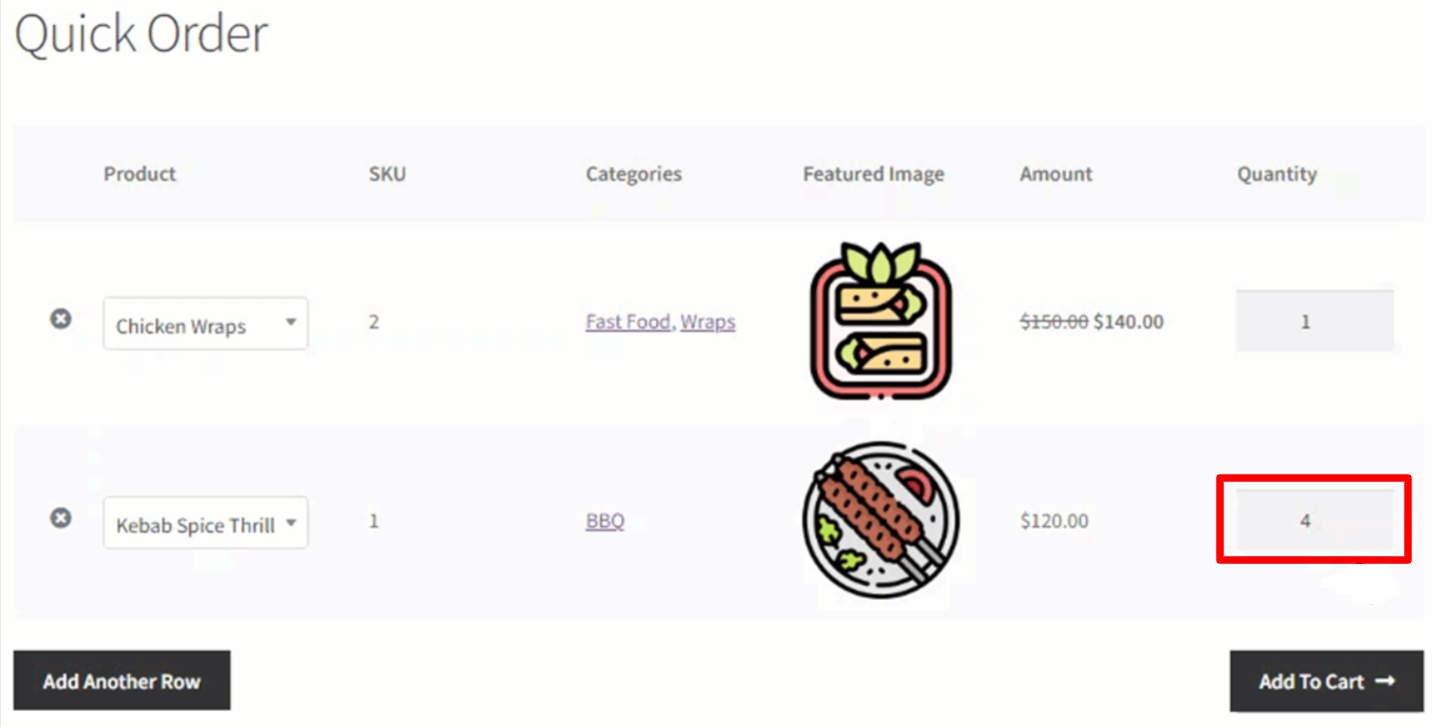
- To change the quantity in the quantity column.
- After adding products, click the Add to Cart button.
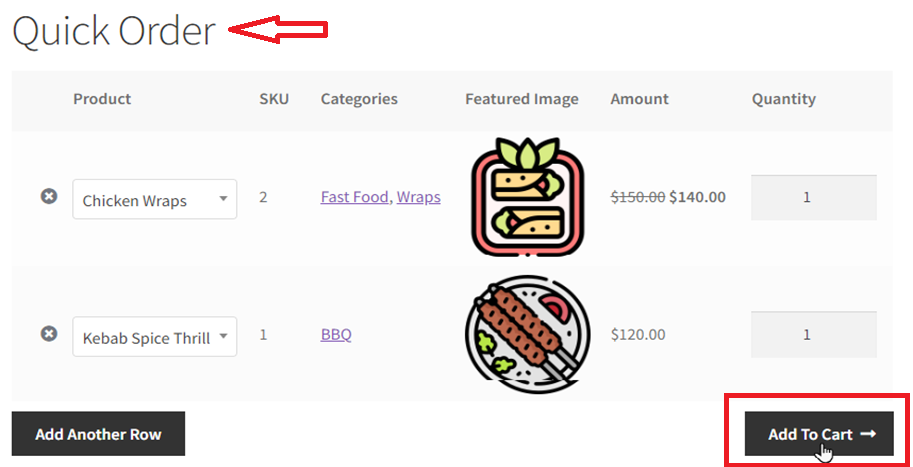
NOTE: Products should be in stock. Otherwise, the out-of-stock product will be discarded.
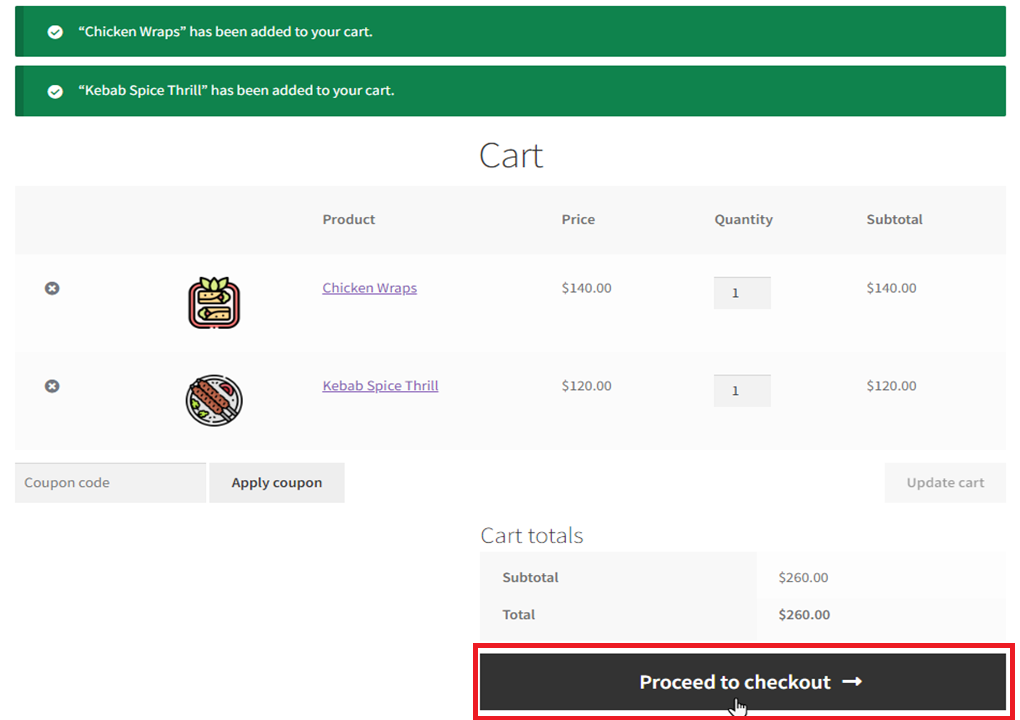
- From the Cart page, hit the Proceed to checkout button.
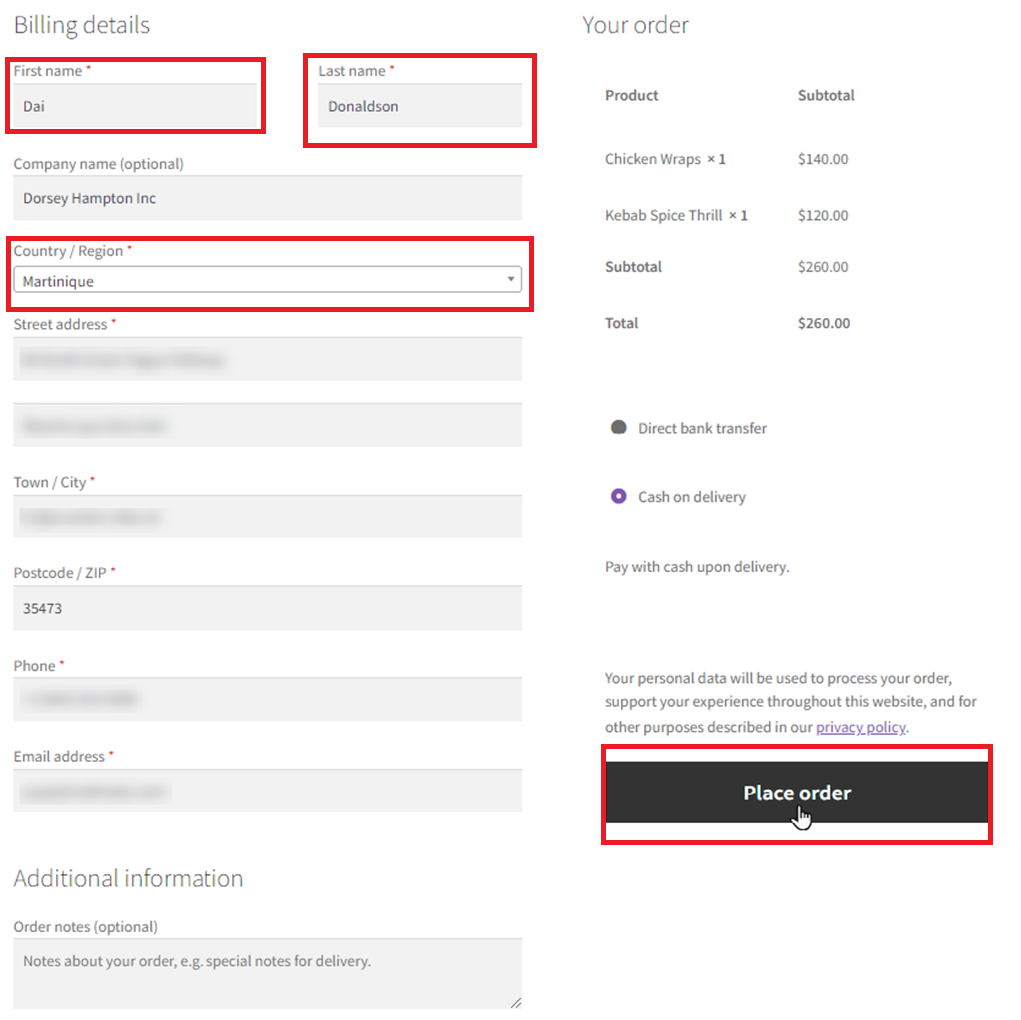
- Enter the details, select the desired payment mode, and click on the Place order button.
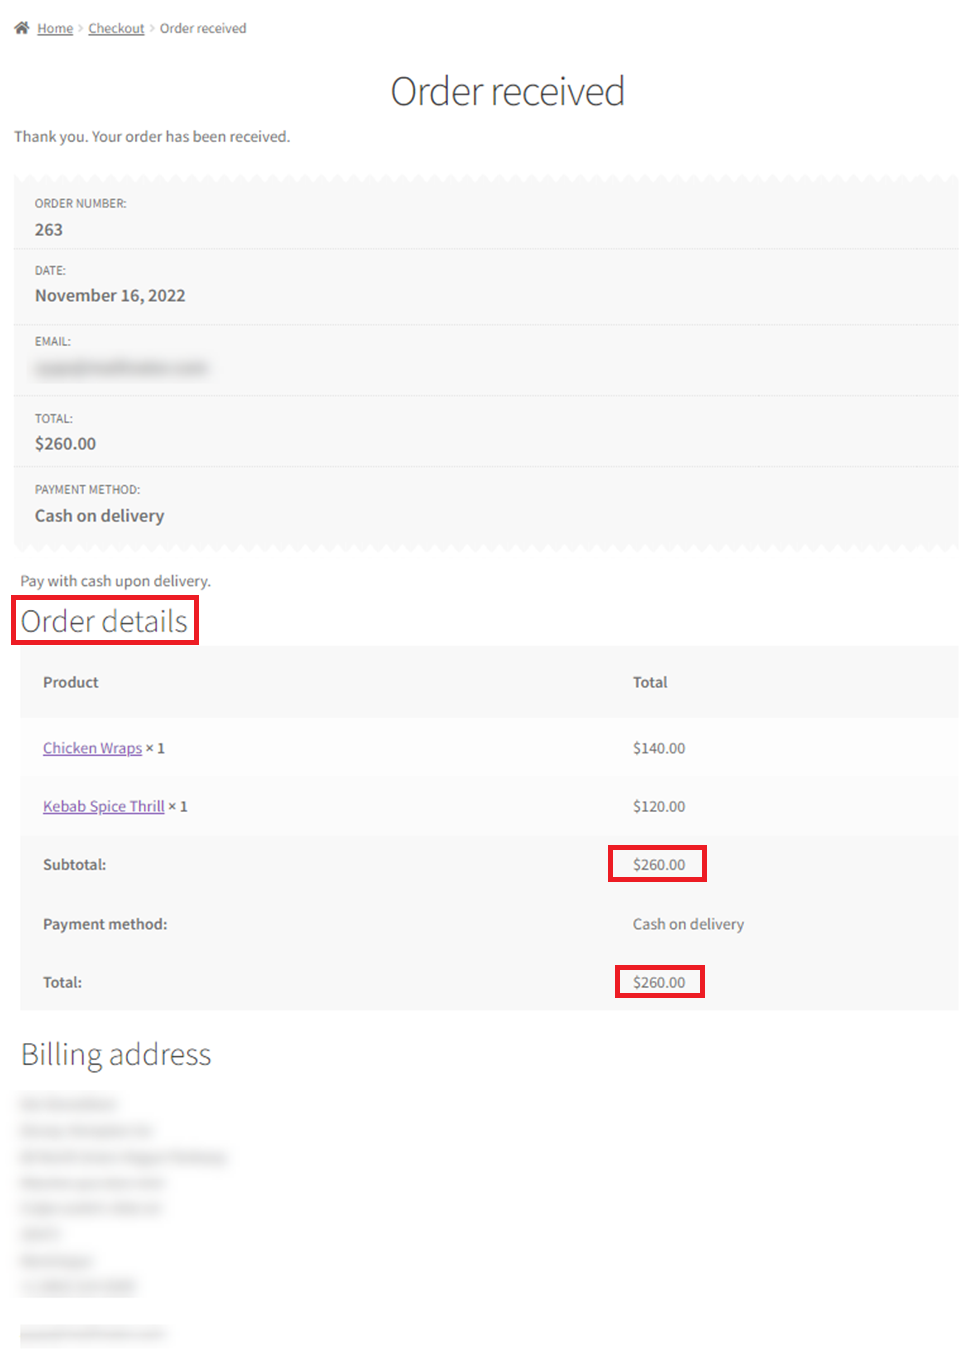
- A new page will be shown, showing the order and personal details for the order to be received.
Front-End Impact
- Visit the site and go to the Quick Order Form page.
- When you hover your cursor over the Featured Image, a Magnify icon will appear. Click on the Magnify icon to zoom in on the image.
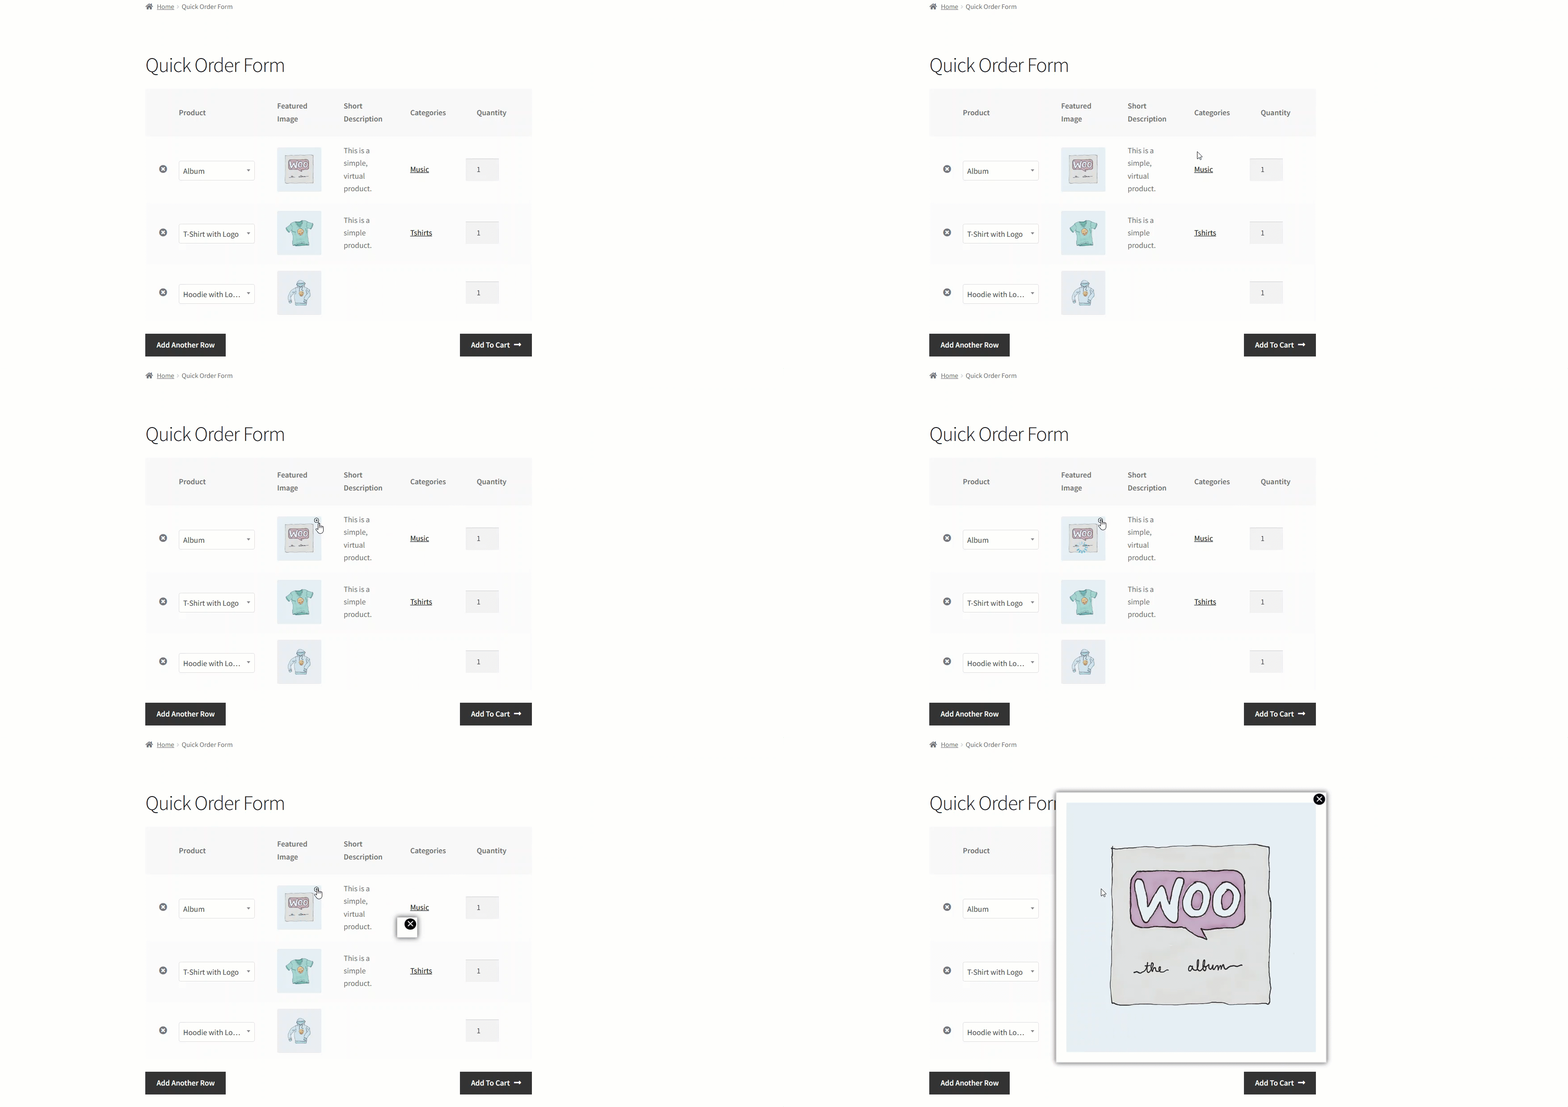
Front-End Impact – Variable Product
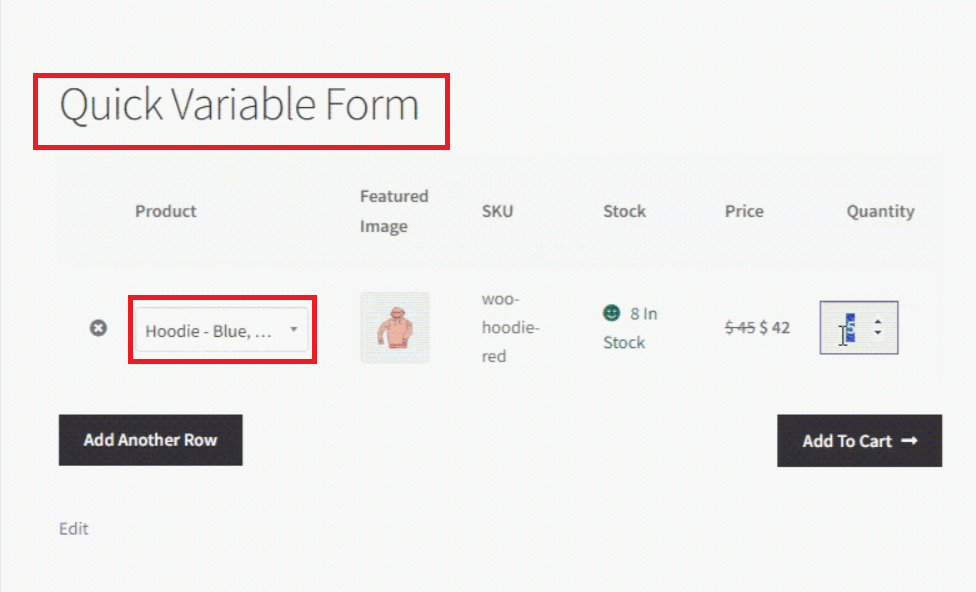
- Visit the Quick Order Form page and add a variable product to the Quick Order Form.
Before
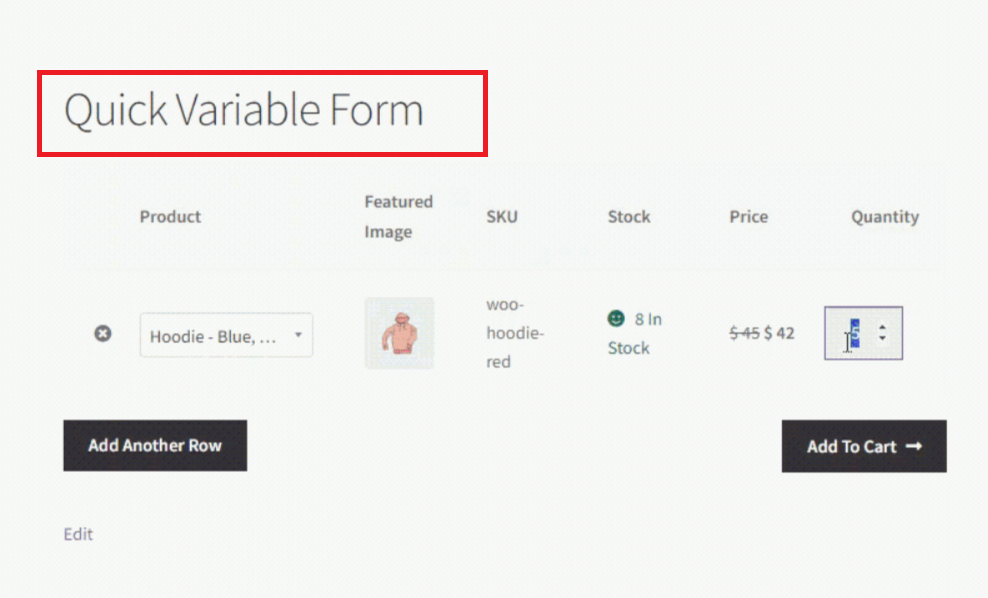
After
Gutenberg Block of Product Table
- Visit the WordPress Admin Dashboard > Pages. Select Add New Page or Edit a current page in which you need to add the Product Table block.
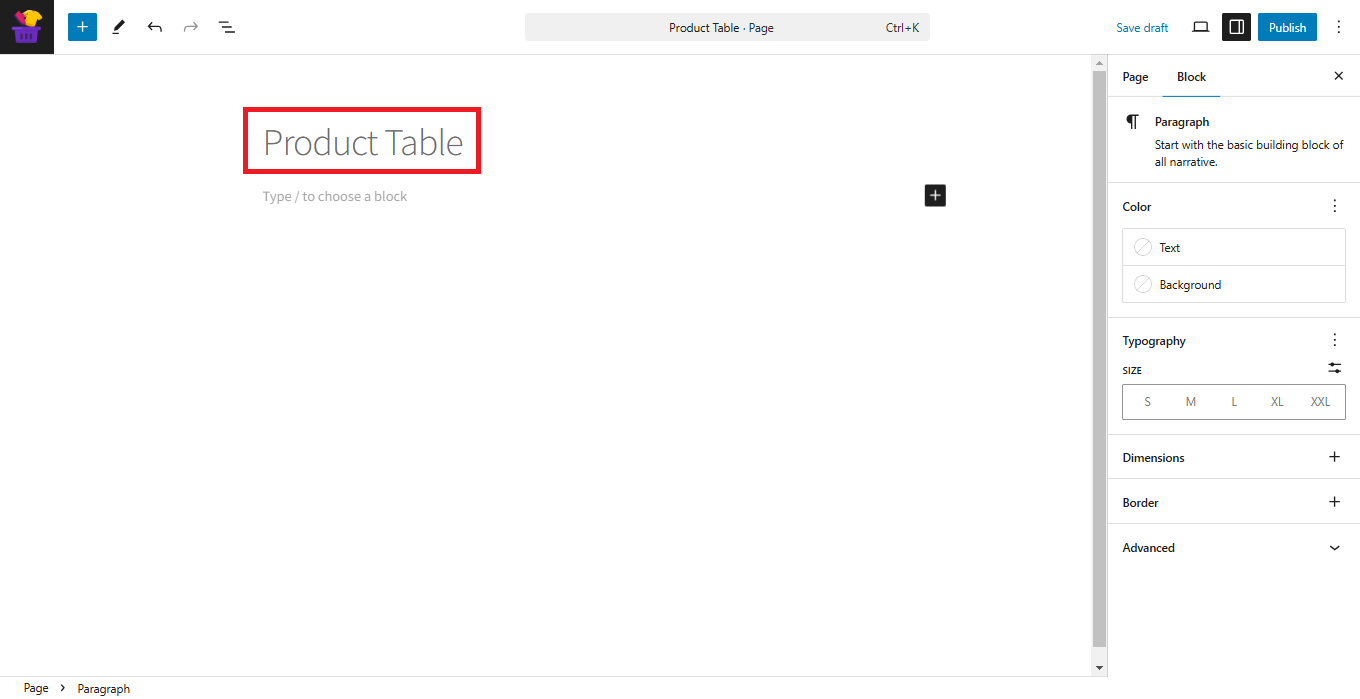
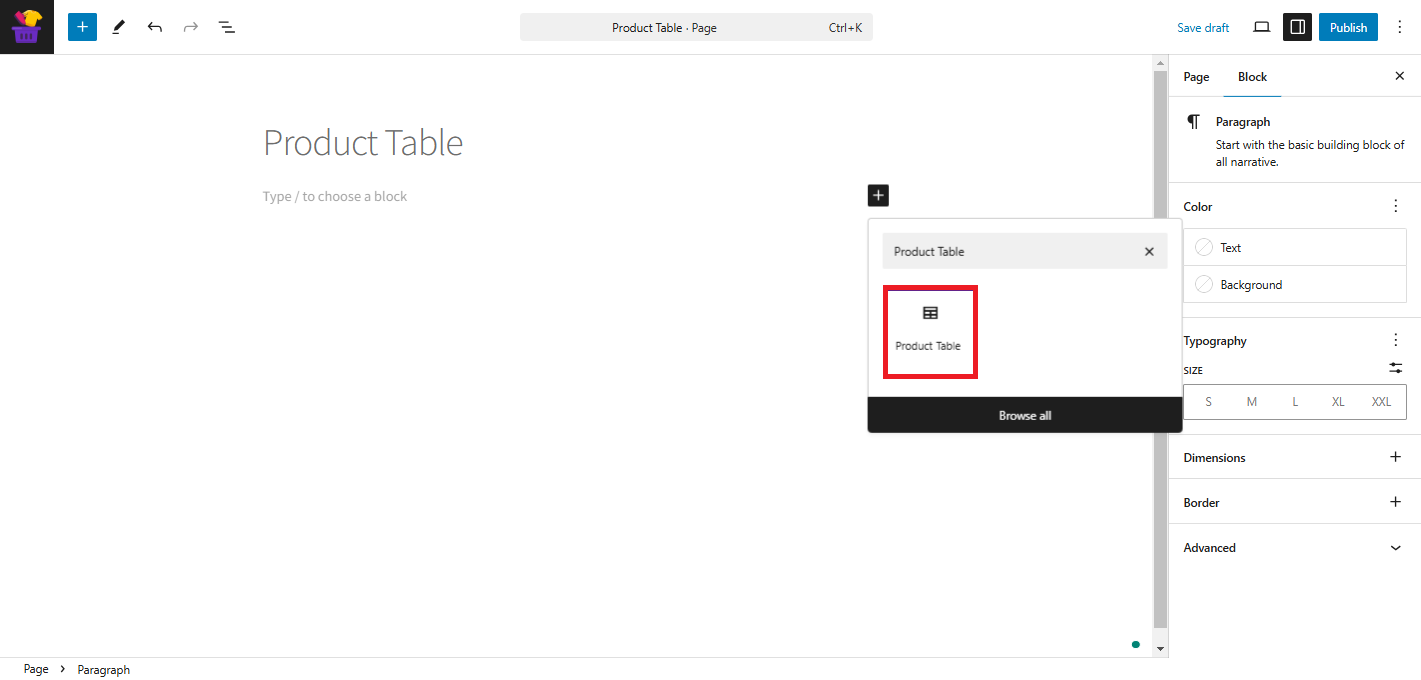
- Hit Blocks and find the Product Table in the search bar. Choose the Product Table block by pressing it.
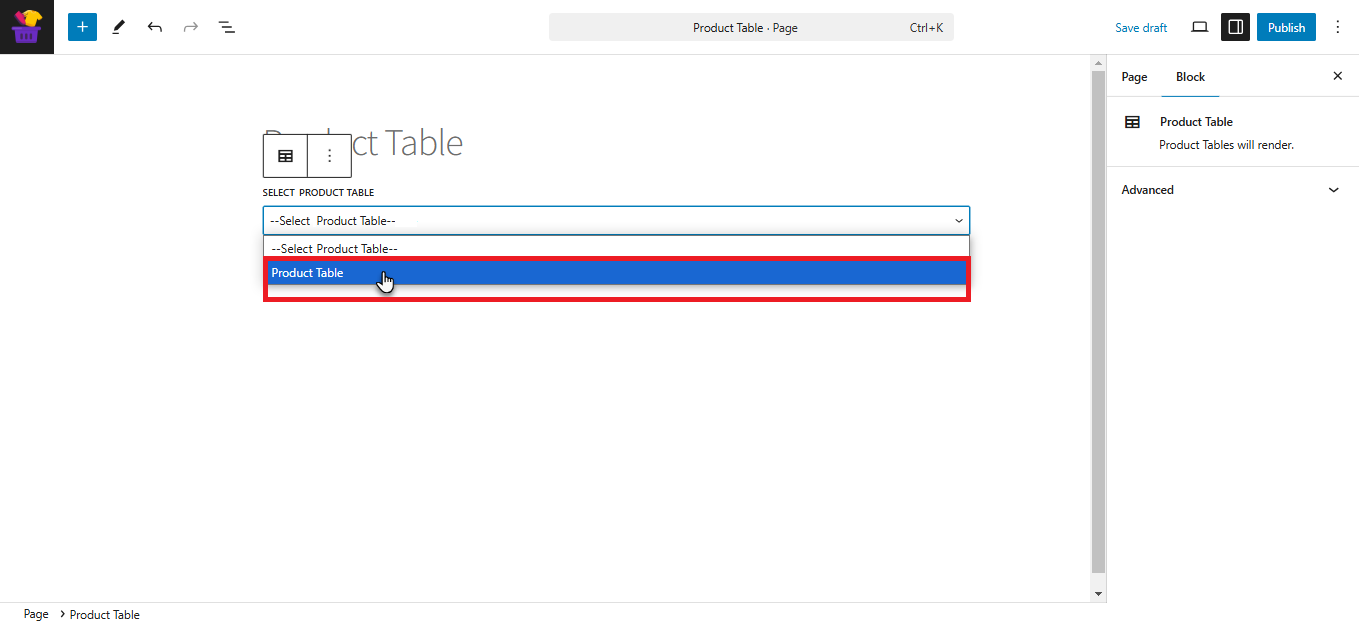
- From the dropdown list, choose the desired Product Table.
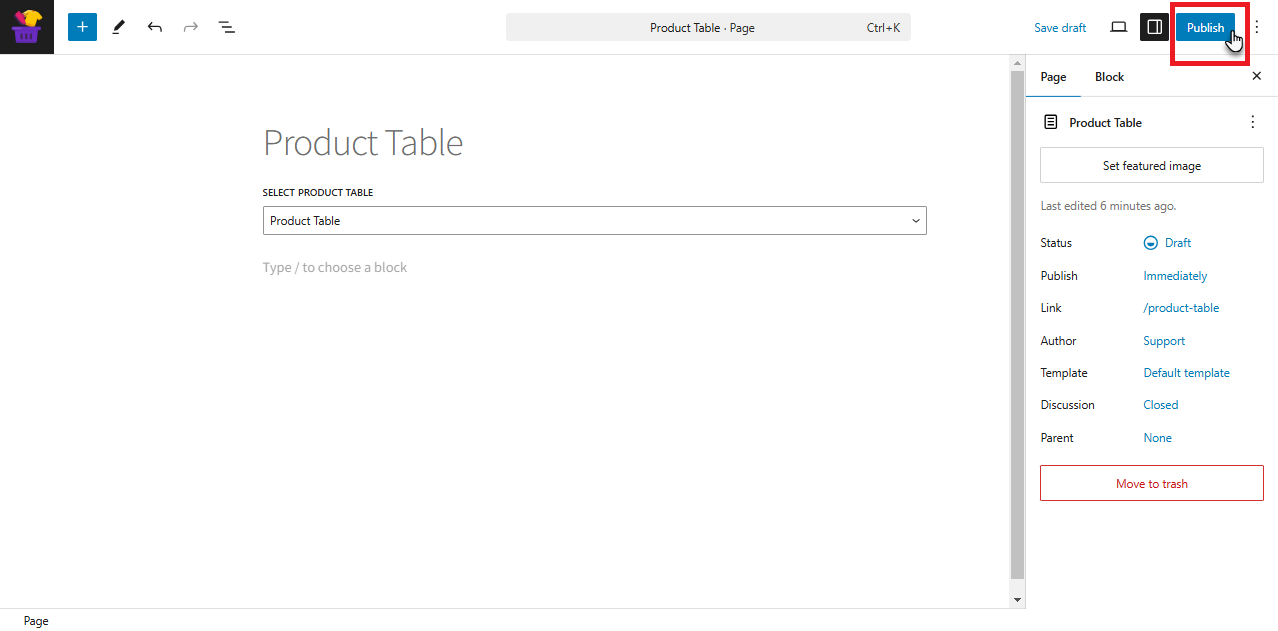
- Hit the Publish button to enable the settings.
Front End Impact
- Log in to your account.
- Go to the Product Table page. The Product table will appear.
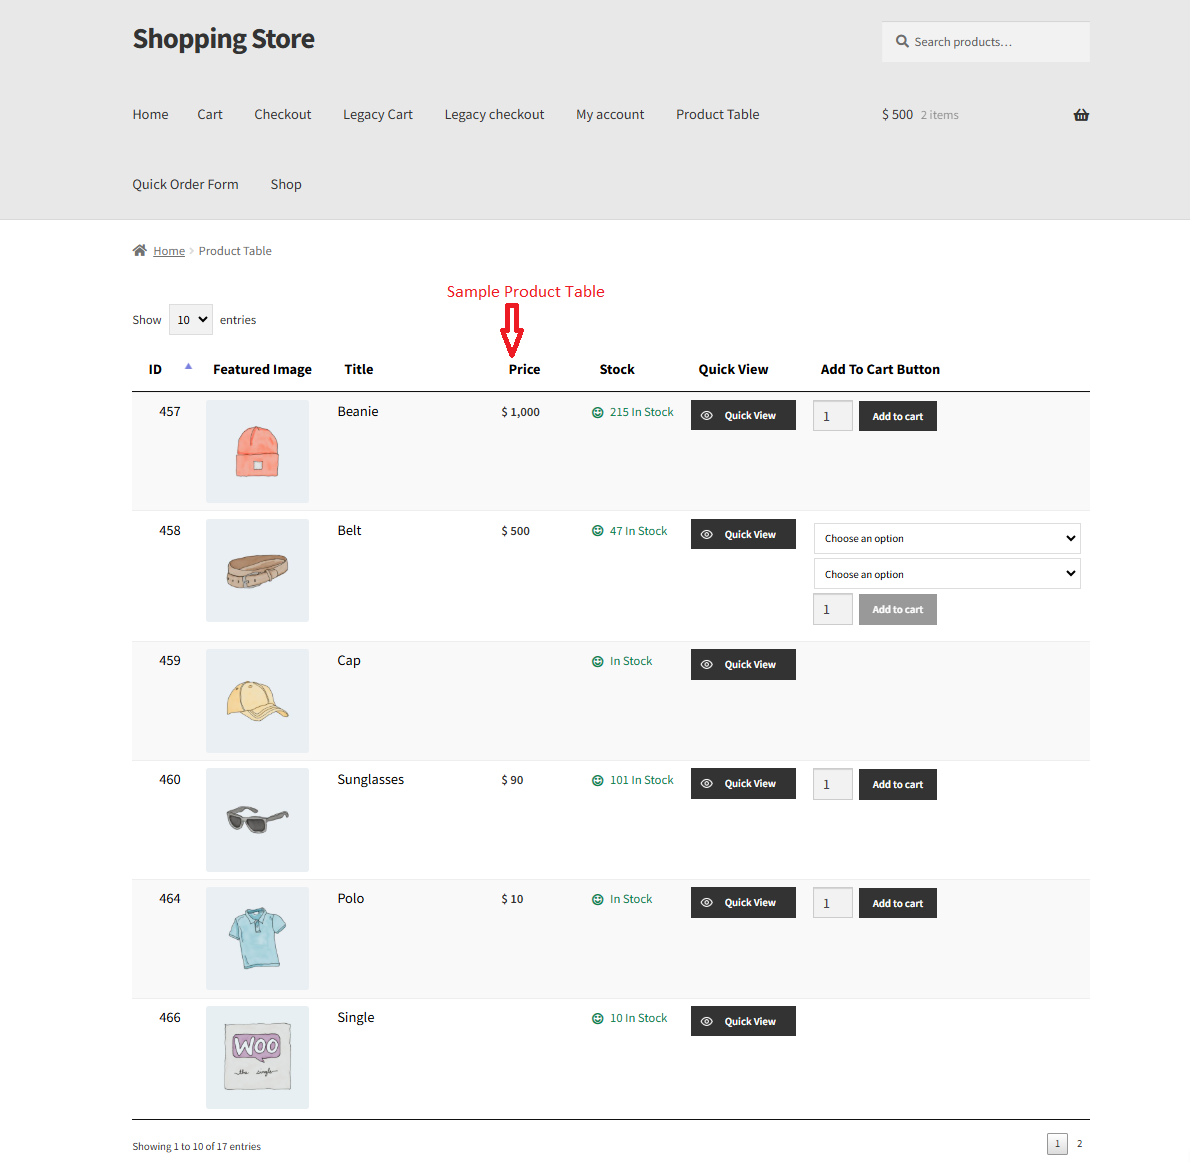
User Role Restriction in Quick Order Form
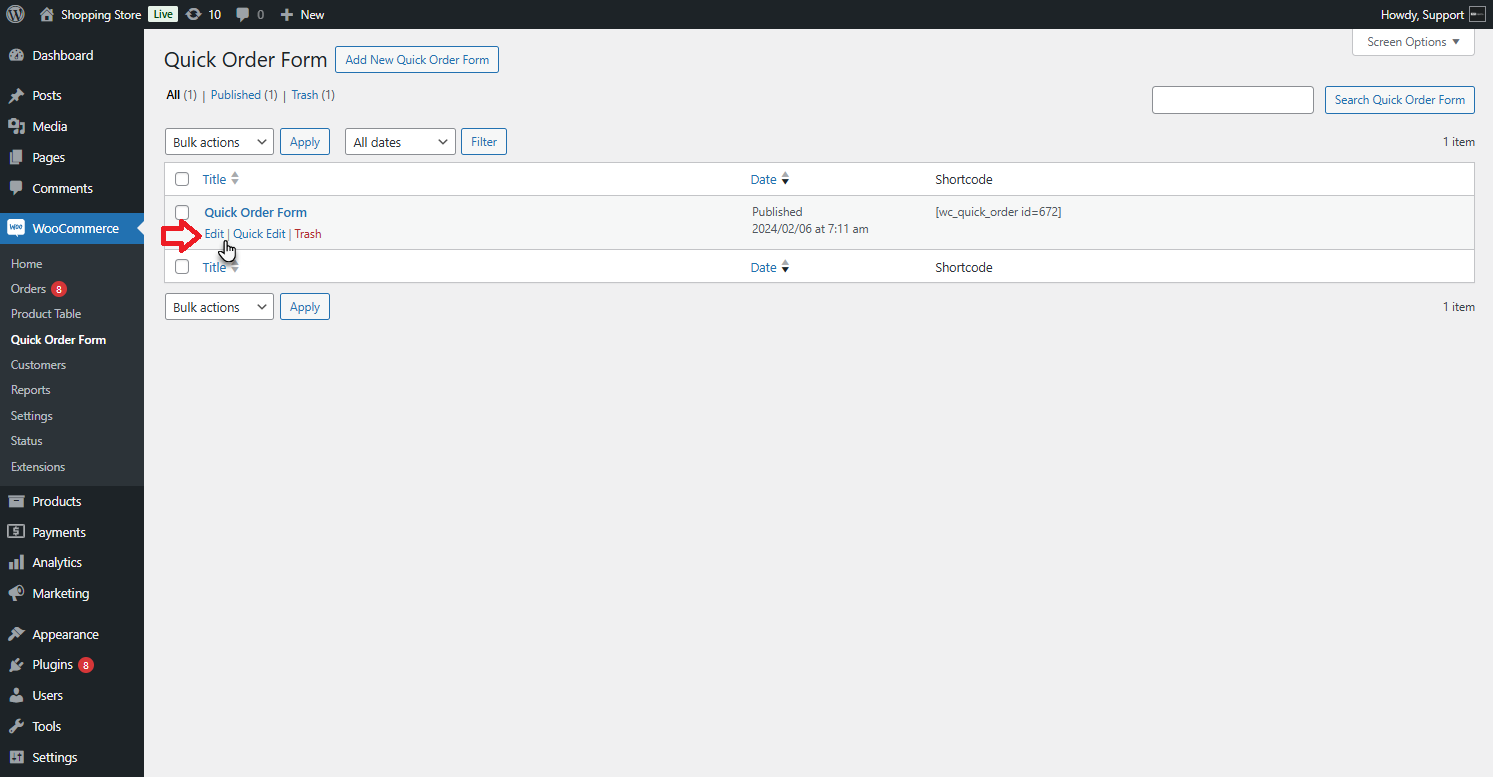
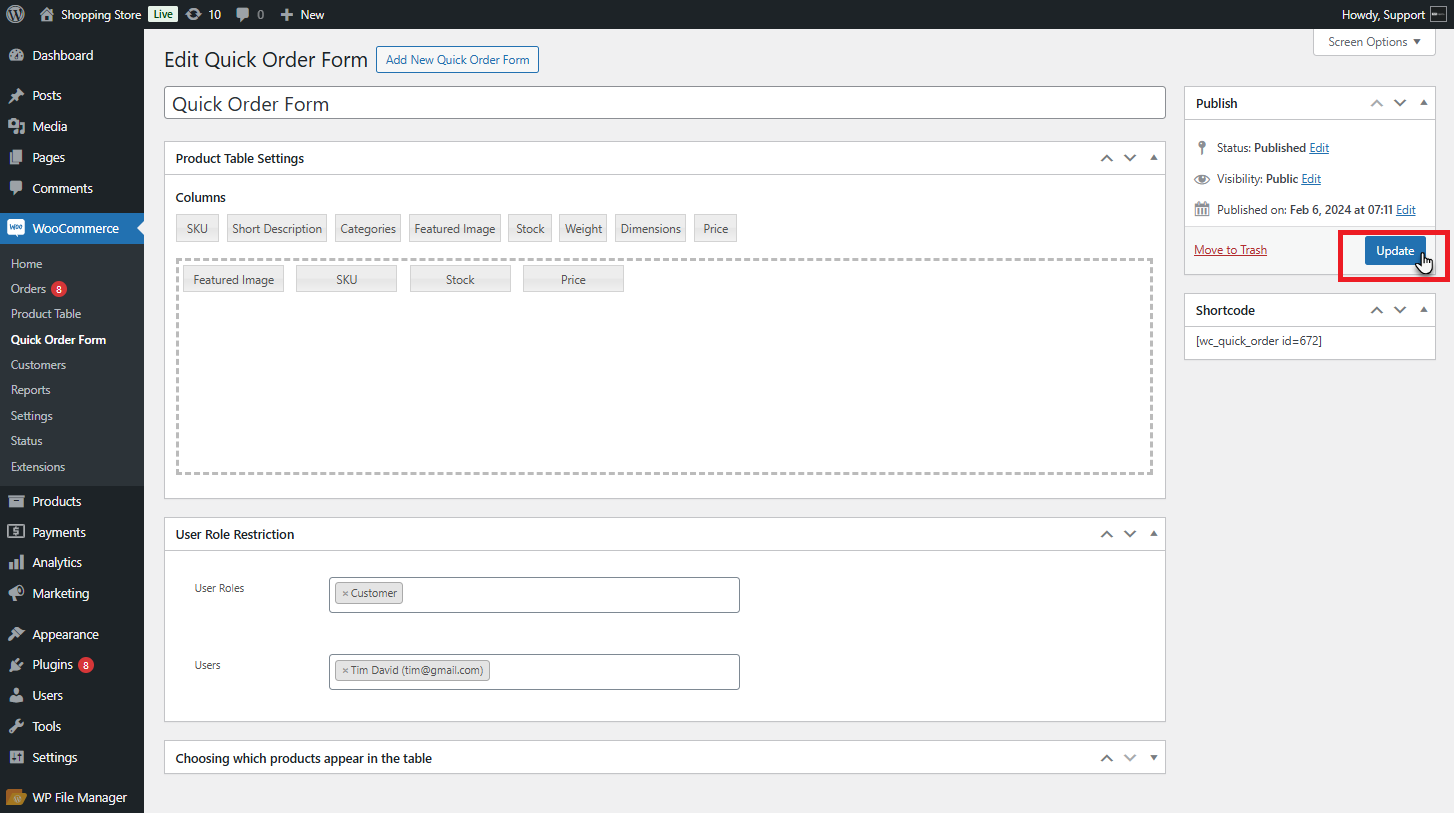
- Go to the WordPress Admin Dashboard > WooCommerce > Quick Order Form > Add New Quick Order Form/Edit Quick Order Form.
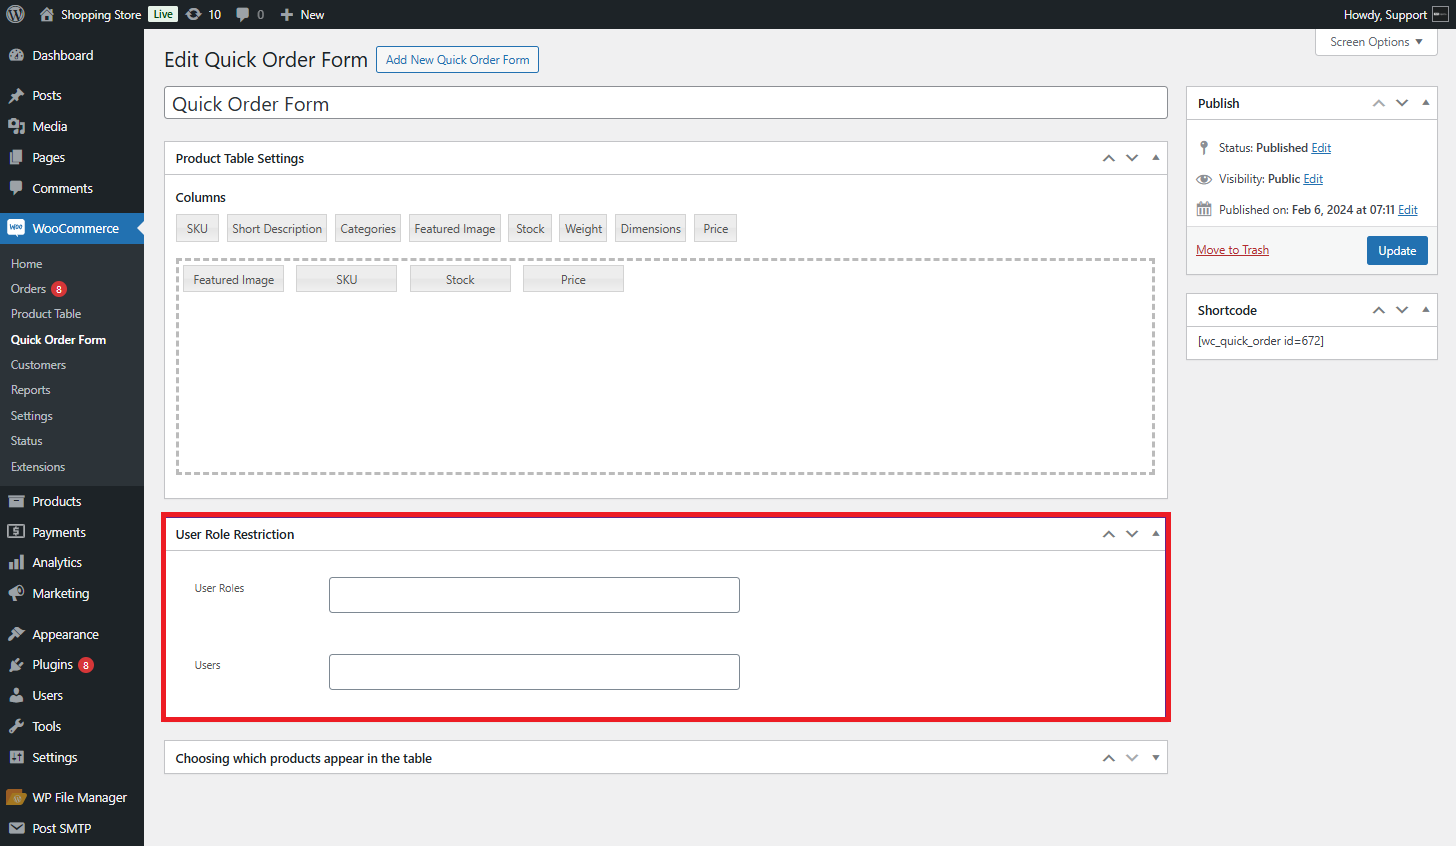
- Detect the User Role Restriction meta box on the Quick Order Form screen.
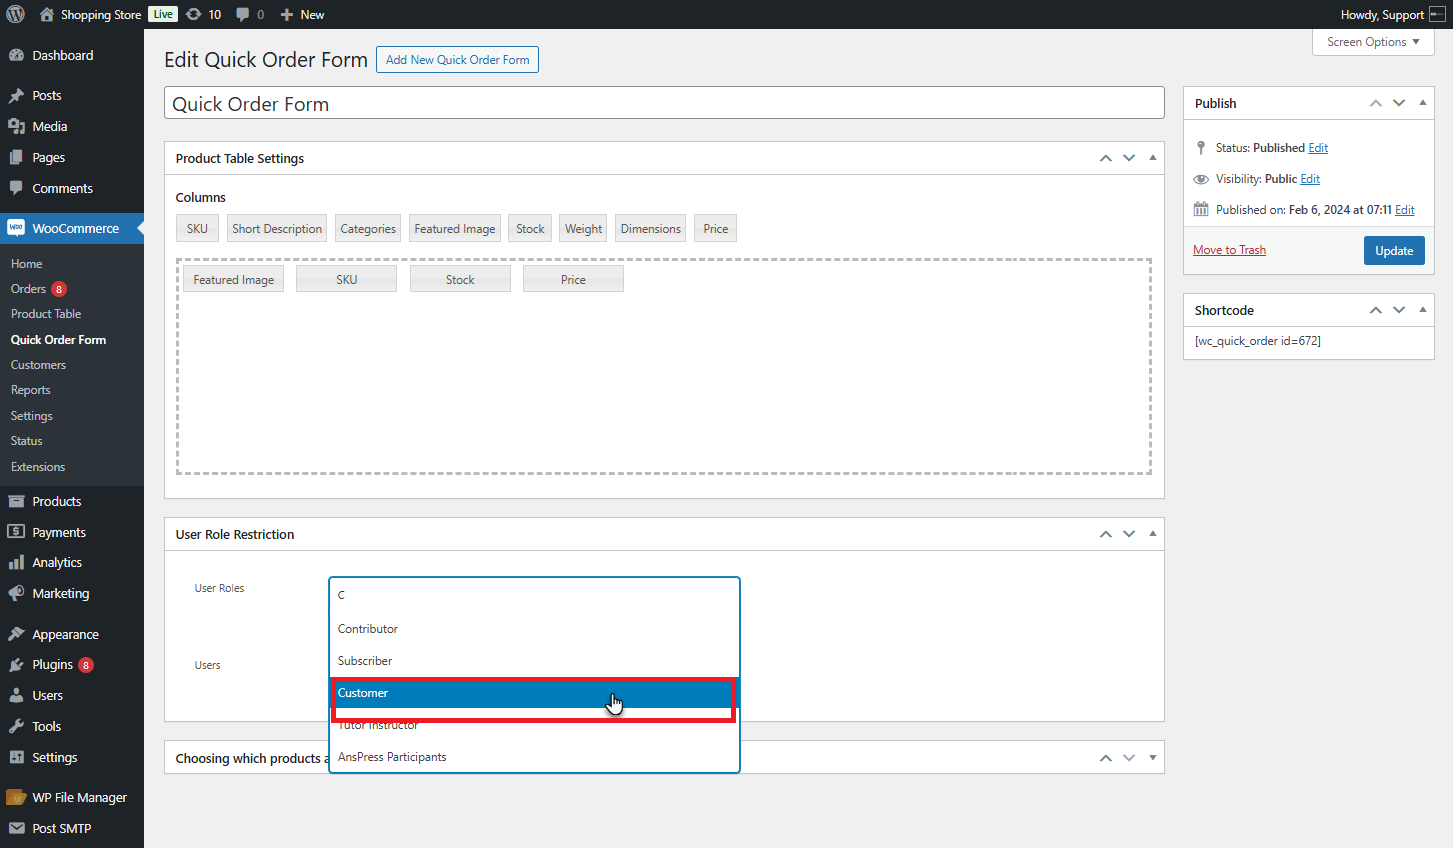
- Through the User Roles dropdown list, choose the User Roles for which the Quick Order Form will be visible.
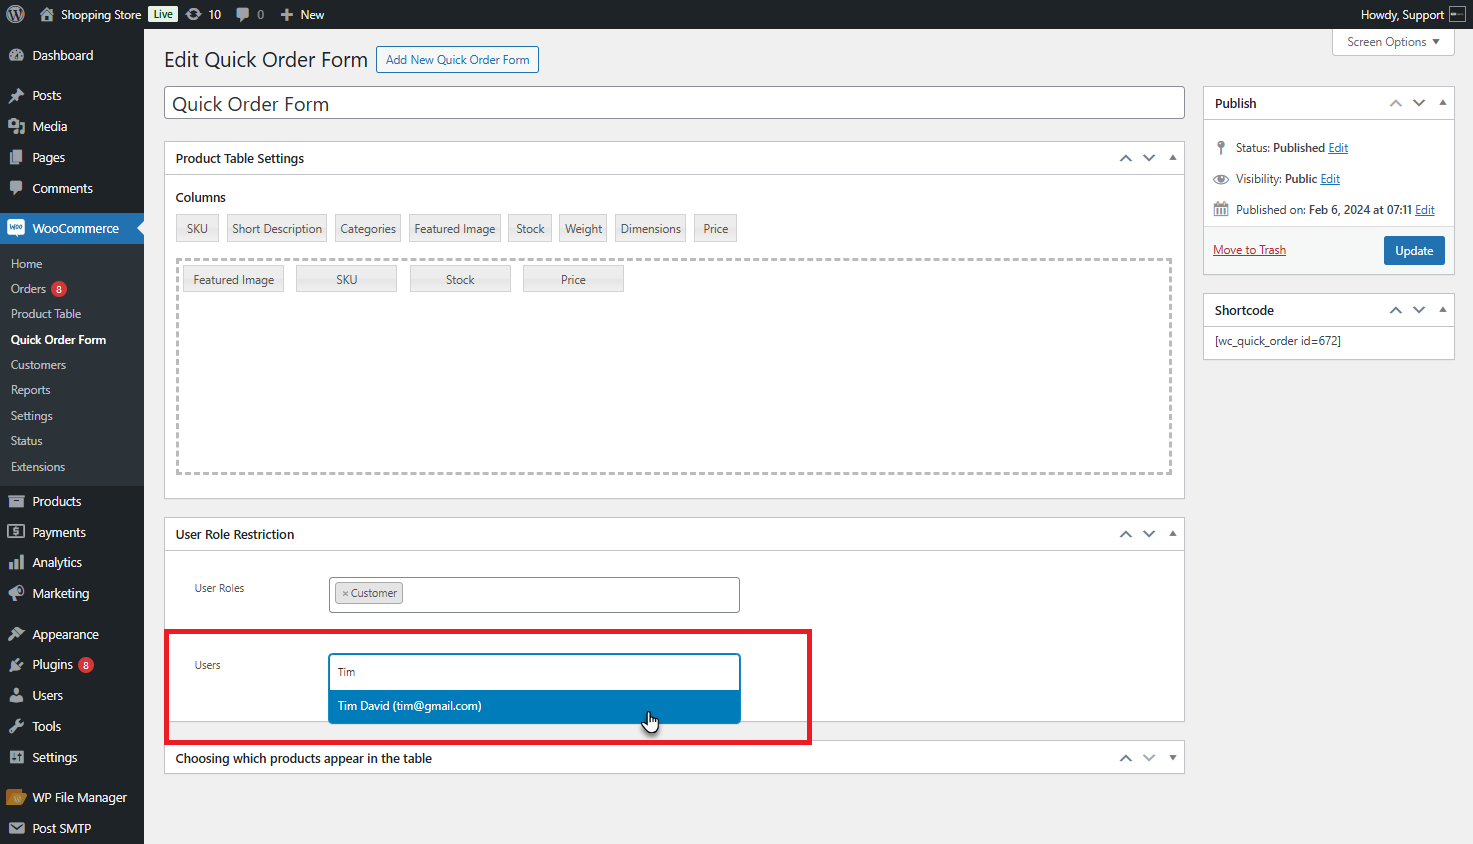
- Through the Users dropdown list, specify individual users for whom the Quick Order Form will be seen.
- Hit the Update button to activate the changes.
Front End Impact
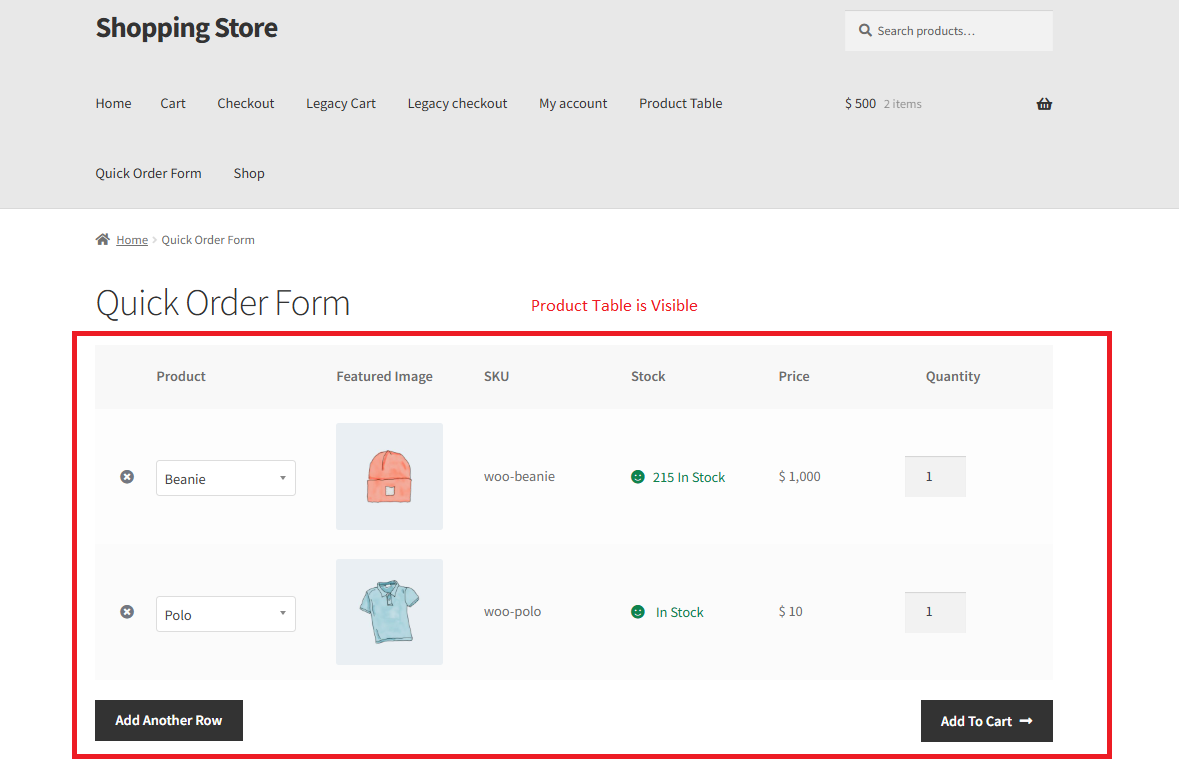
Allowed User Role/User
- When the allowed User Role/User visits the Quick Order Form page, they can see the Quick Order Form.
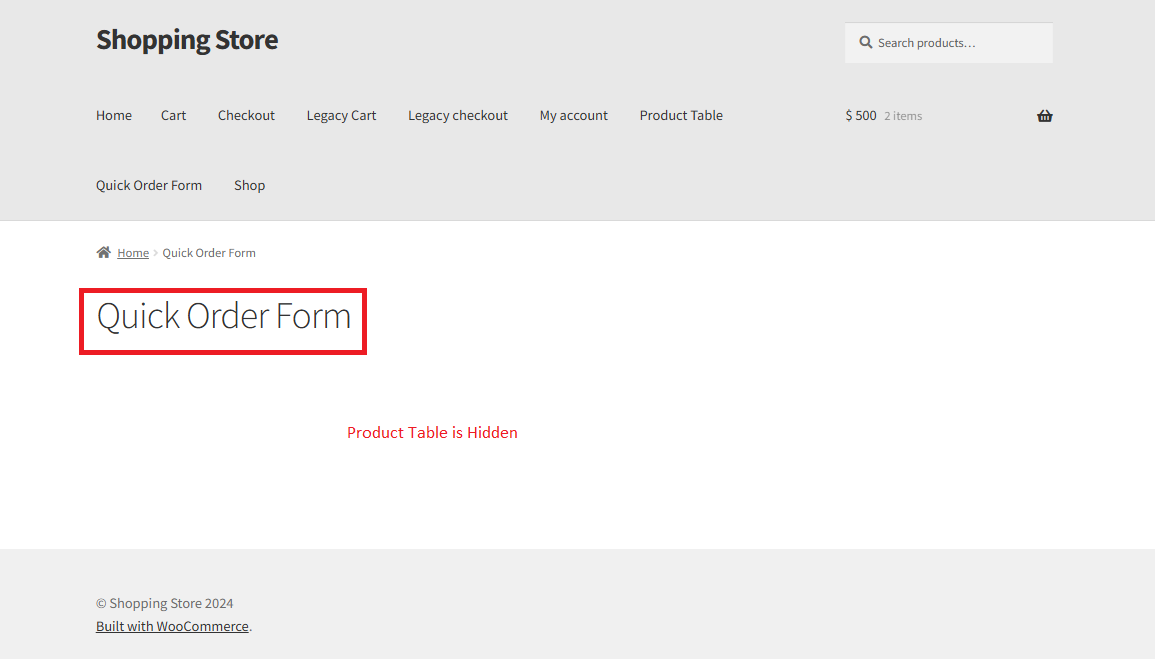
Restricted User Role/User
- When the restricted User Role/User goes to the Quick Order Form page, they cannot see the Product table page, as it will be hidden.
Wrapping Up
WooCommerce store managers or owners should not undermine the significance of controlling quick order form access by user role. This feature, offered by the Bulk Order Form for WooCommerce plugin, helps businesses optimize their customers’ shopping experiences. Similarly, it can allow them to increase conversions and sales drastically.