







































 Usman Hayat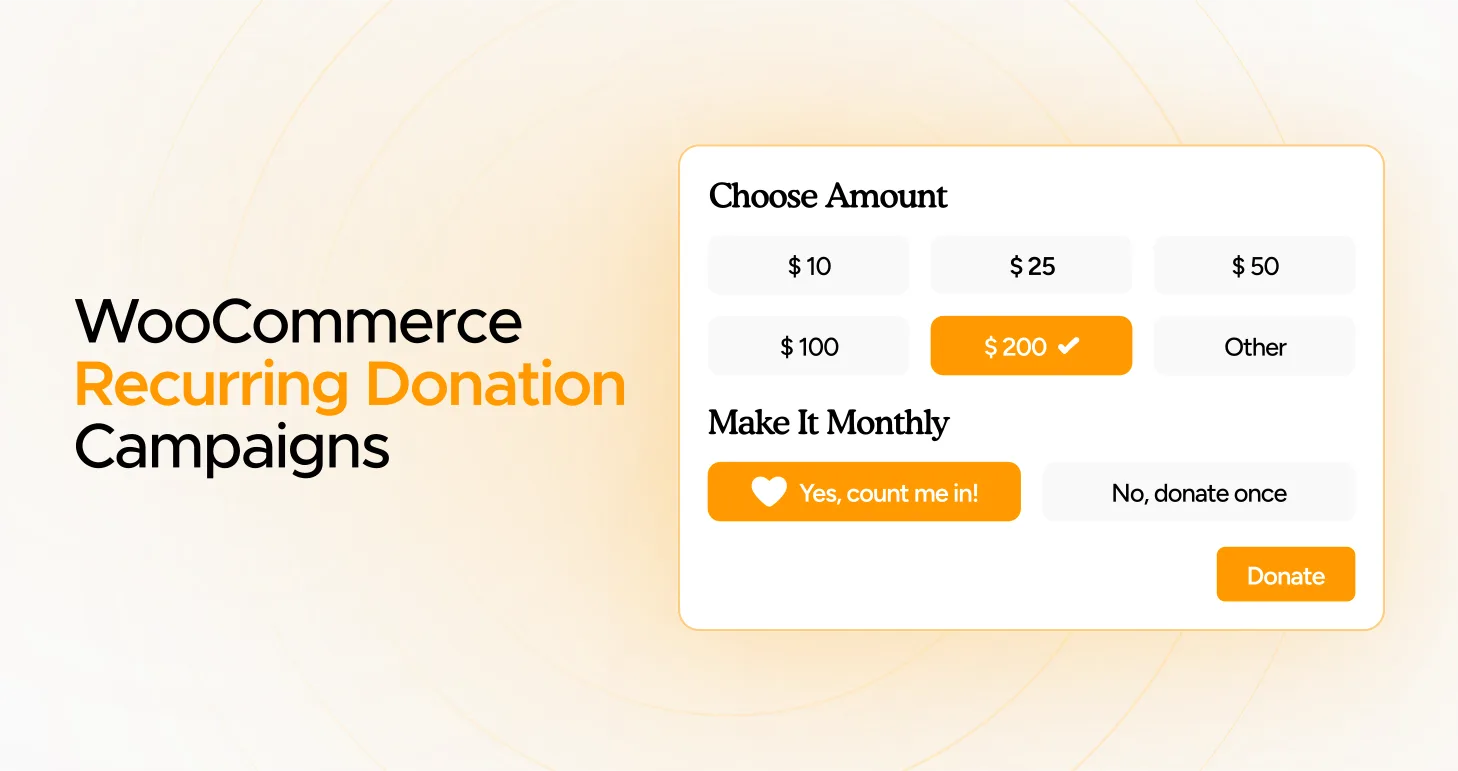
Today’s digital landscape is more favorable to nonprofits and fundraising campaigns, enabling them to leverage e-commerce platforms and collect donations in large numbers. In short, WooCommerce is an ideal solution, and Donation for WooCommerce is an incredible plugin that makes the lives of store owners stress-free, allowing them to add recurring donation campaigns.
[product_banner index=’1′]
Whether you support a personal cause or promote a charity drive, recurring donations help generate a consistent stream of funds over time. This will enable your business to devise and execute its plans in the right direction.
This blog post will help you set up recurring donation campaigns for your WooCommerce store.
Why Are WooCommerce Recurring Donation Campaigns Beneficial for Businesses and Donors?
Recurring donation campaigns are beneficial for both businesses and donors. These campaigns provide them with various benefits, including:
– Improved Engagement
Recurring donation options help keep current and potential donors engaged and interested in different social causes simultaneously. This will also increase their loyalty and dedication, building and enhancing impactful relationships over time.
– Consistent Funding
Recurring or regular donations allow businesses to raise funds that support various causes. Additionally, companies can utilize them to effectively support future fundraising opportunities.
– Increased Donation Probability
The best thing about recurring donors is their consistency, as they likely donate more than occasional donors. As a result, your potential and existing fundraising campaigns may witness a surge in donations from recurring donors.
– Peace of Mind for Donors
Once regular donors set up recurring donations, they can proactively contribute on time based on the schedule they select. For instance, they can contribute monthly or semi-annually, depending on their preferences.
How Does Donation for WooCommerce Help Support Recurring Donation Campaigns?
Donation for WooCommerce is a top-notch fundraising plugin that helps businesses raise funds and support numerous causes without hassle. It offers a valuable feature, recurring donations, which enables donors to contribute and support multiple causes on a regular basis. Additionally, it leverages the effectiveness of another helpful plugin, WooCommerce Subscriptions. As a result, WooCommerce store owners can create various donation plans and activate automatic payments for donors.
How to Add WooCommerce Recurring Donation Campaigns on WooCommerce Stores?
Fortunately, adding WooCommerce recurring donation campaigns to WooCommerce Stores is not as cumbersome as you think. You can incorporate recurring donation campaigns on your WooCommerce store by following two simple methods.
The first method helps add and activate recurring donation campaigns by installing a paid plugin, WooCommerce Subscriptions.
The second method enables recurring donation campaigns by integrating the free plugin, Subscriptions for WooCommerce. As you might be aware, WP Swings is the mastermind behind this plugin.
You must install and activate the Donation for WooCommerce plugin before you start enabling the “Recurring Donations” feature on your WooCommerce site or store.
[product_banner index=’1′]
This section will describe both these methods in detail.
First Method (Using WooCommerce Subscriptions)
Follow the steps below to enable recurring donation campaigns on your WooCommerce store:
- Download and install the WooCommerce Subscriptions. Remember to activate the plugin.
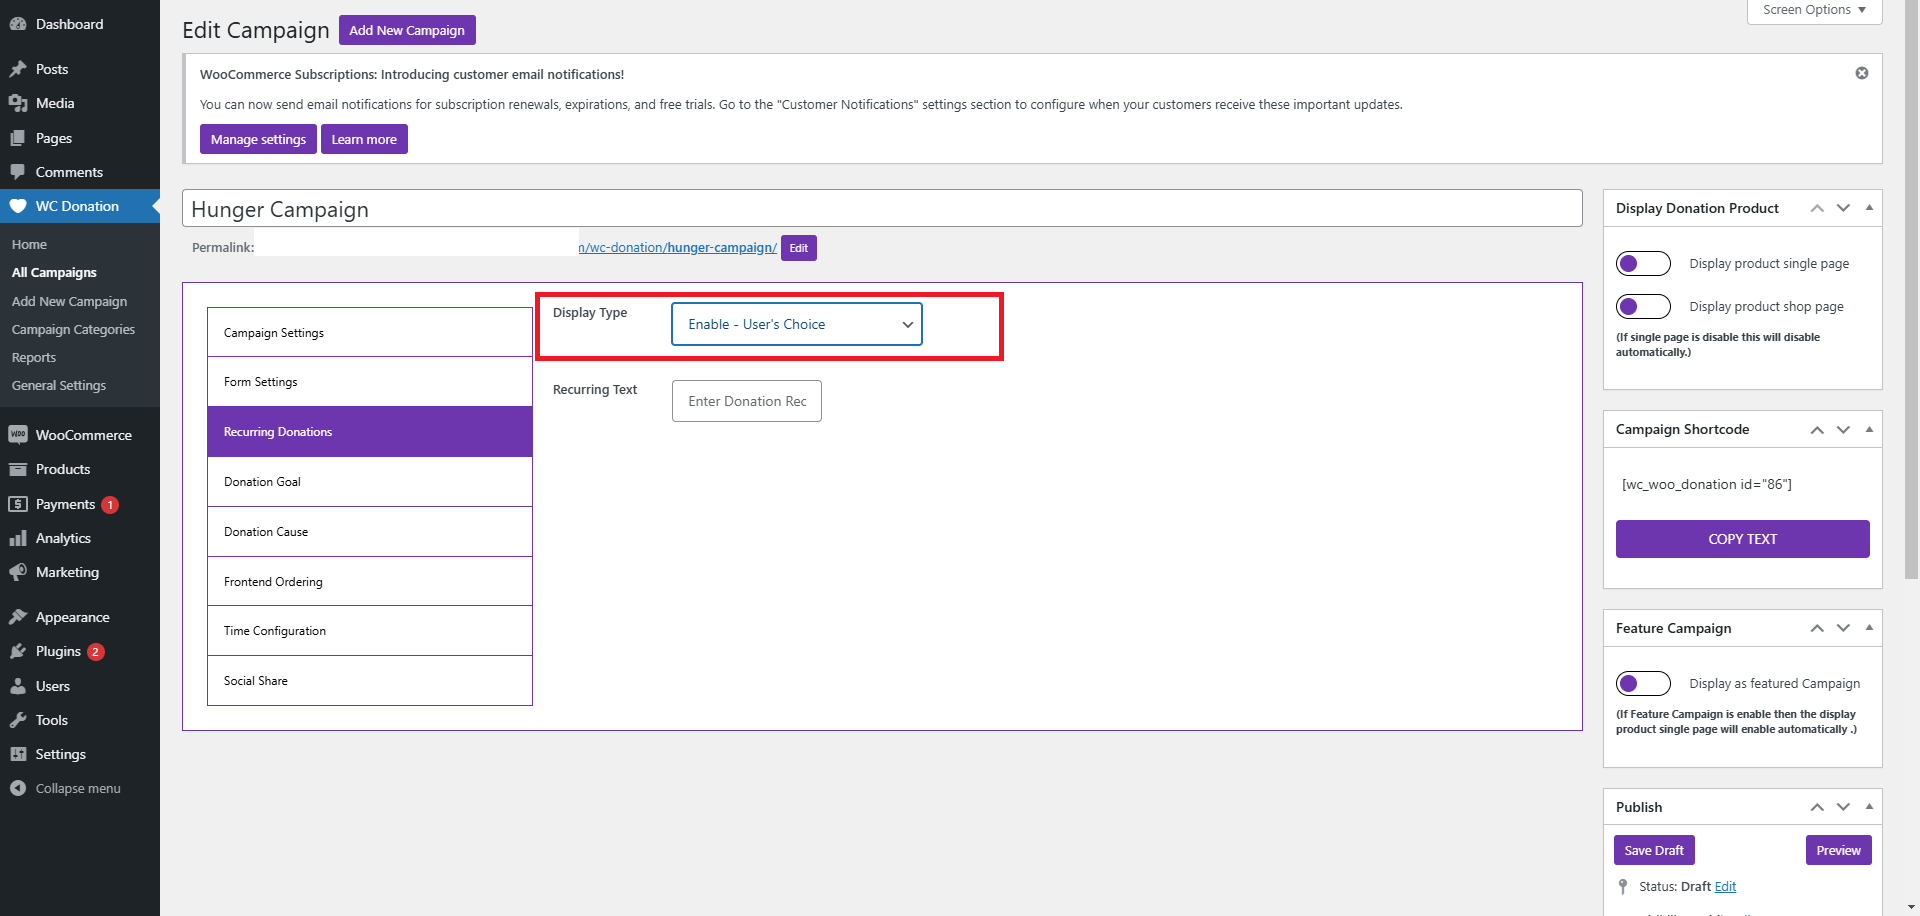
- Go to WordPress Admin Dashboard > WC Donation > A Campaigns > Edit Campaign.
- Through the Edit Campaign tab, press the Recurring Donations option.
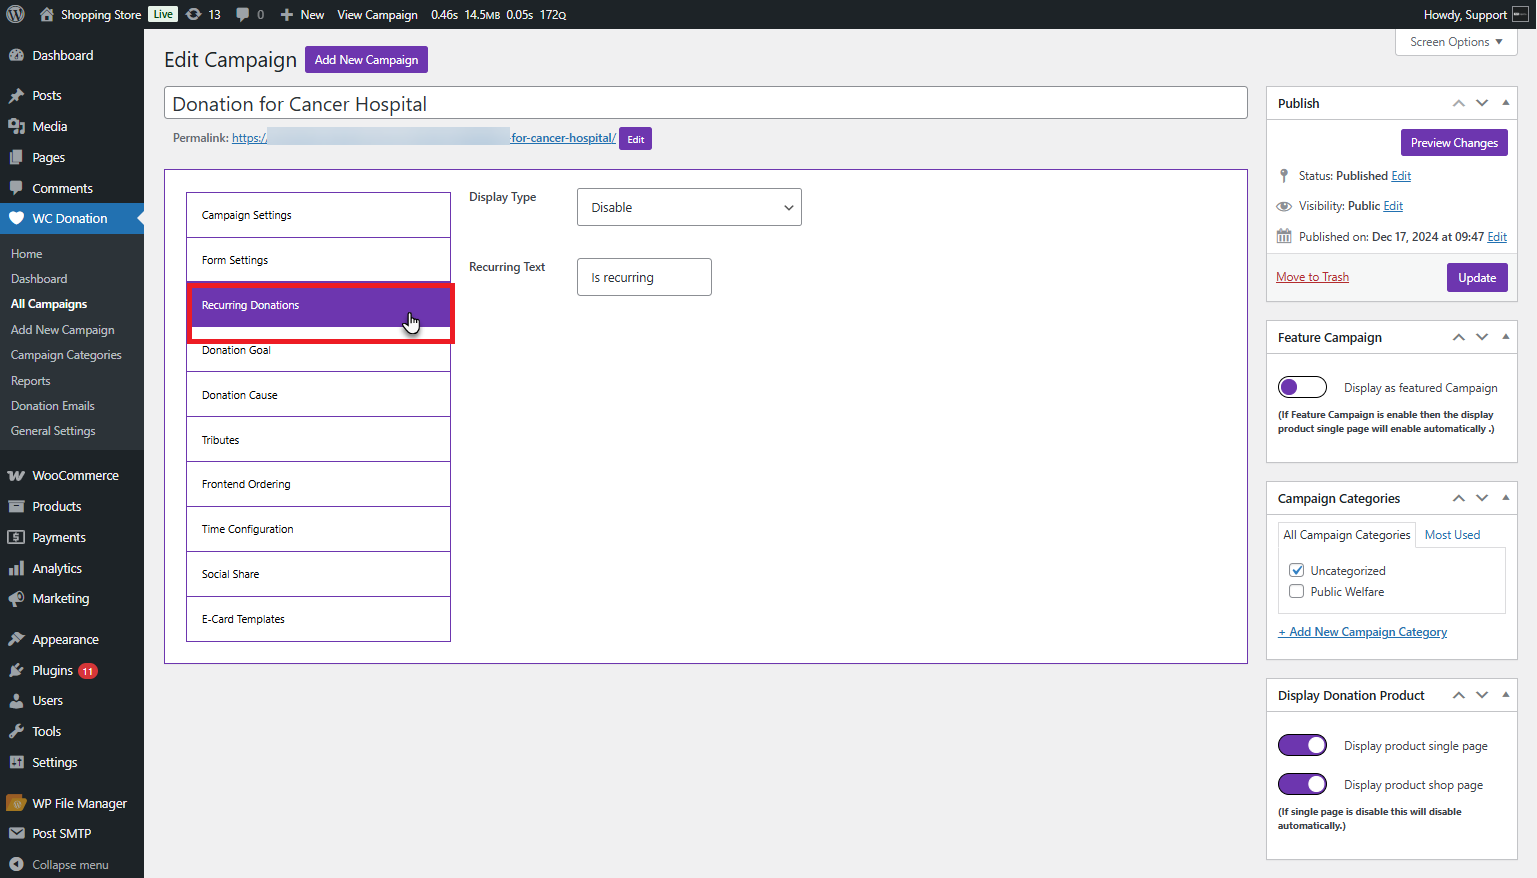
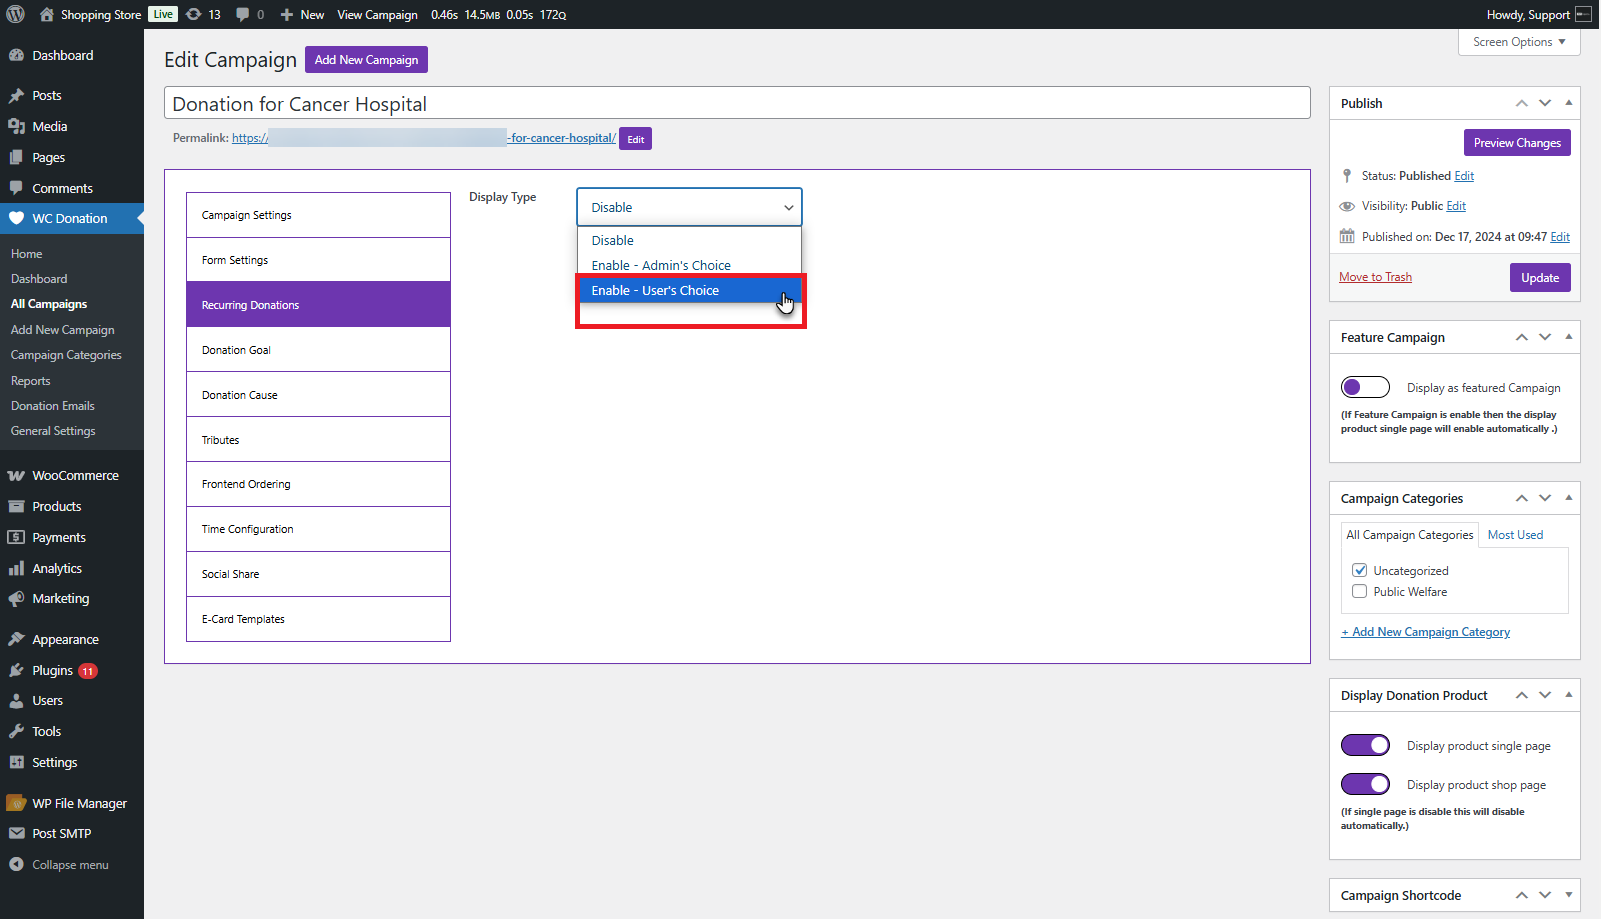
- Using the Display Type dropdown, choose the Enable – User’s Choice option.
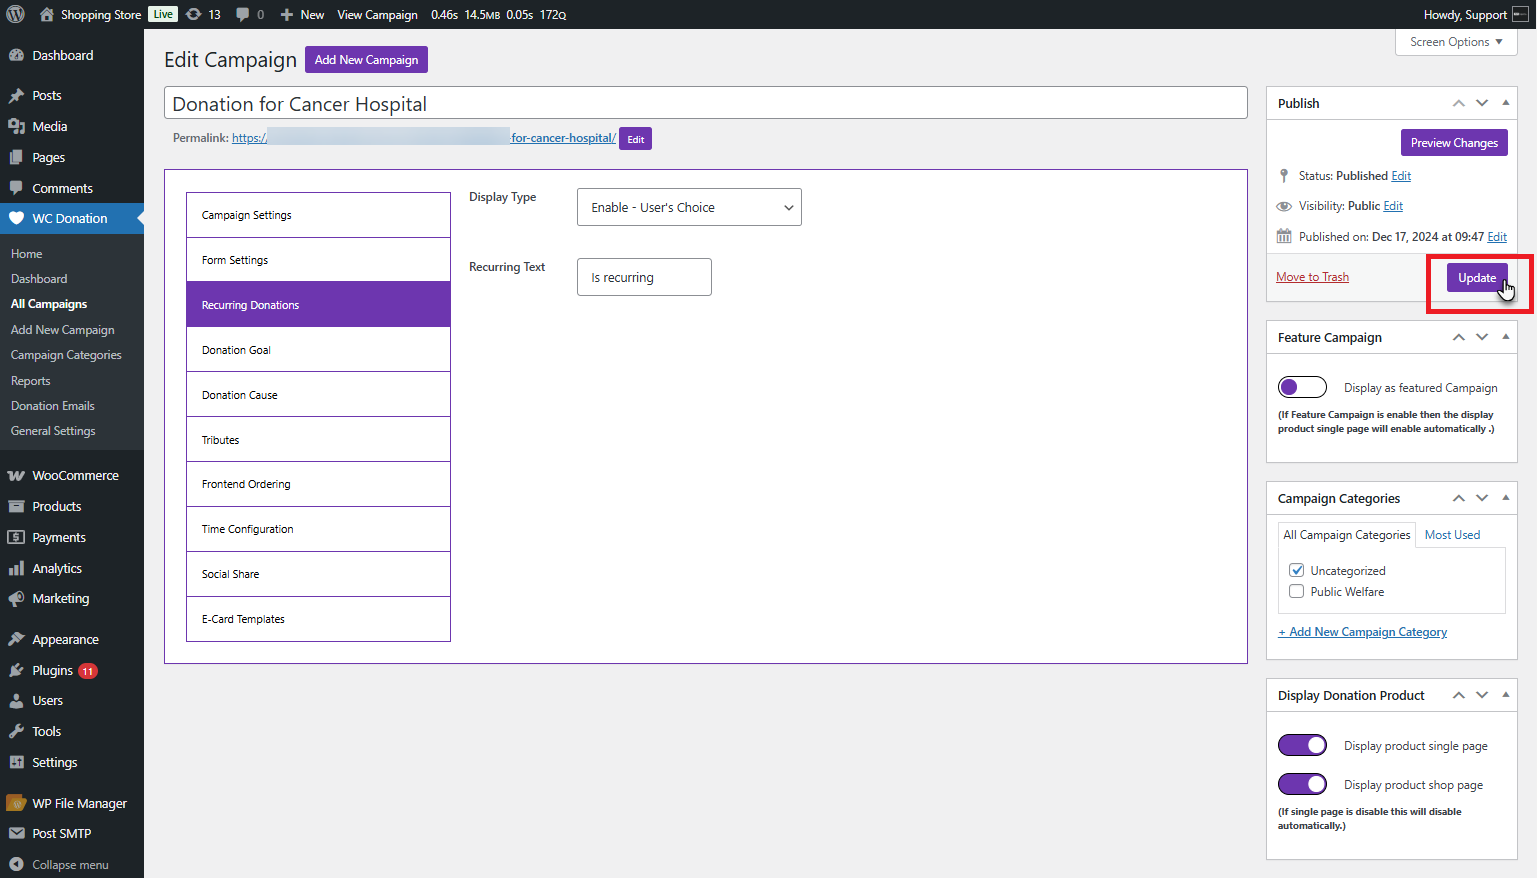
- Press the Update button to enable the changes.
Now, you can see the impact on the front-end:
- Log in to your account.
- Visit the Donation Single Product Page.
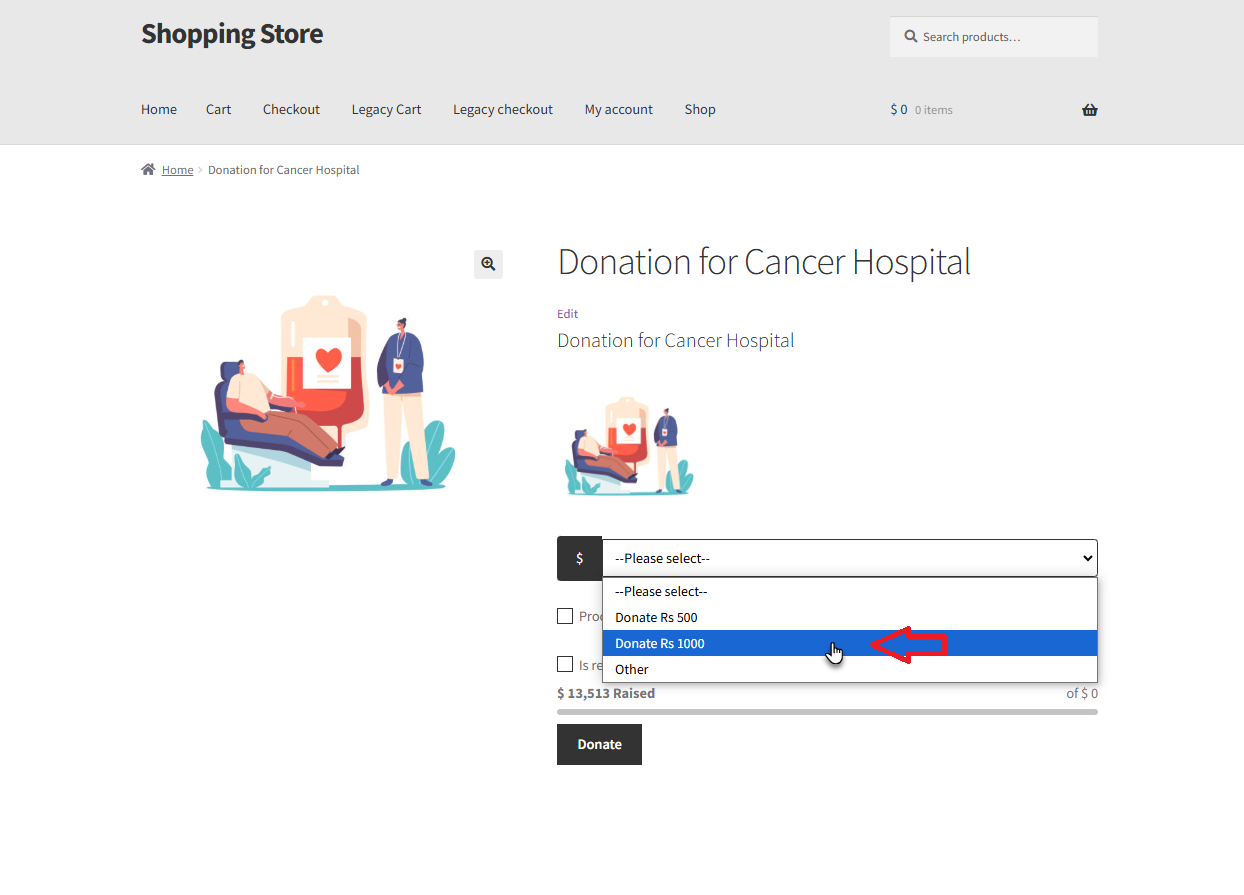
- Choose the Donation amount.
- Check the Is Recurring option.
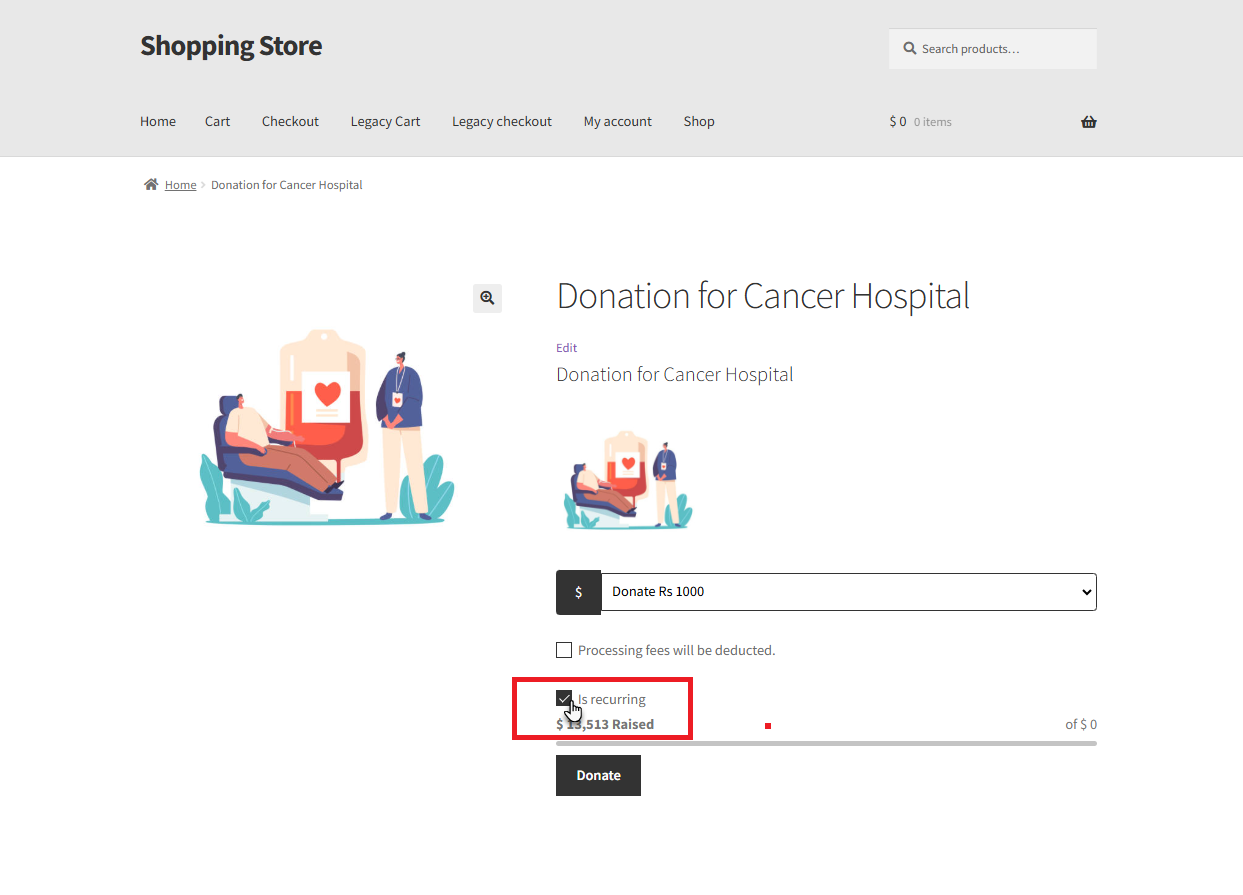
- When you check the Is Recurring option, you will see the interval selection for the recurring donations option.
Display Type
- The Display Type tab has three options, including Disable, Enable – Admin’s Choice, and Enable – User’s Choice.
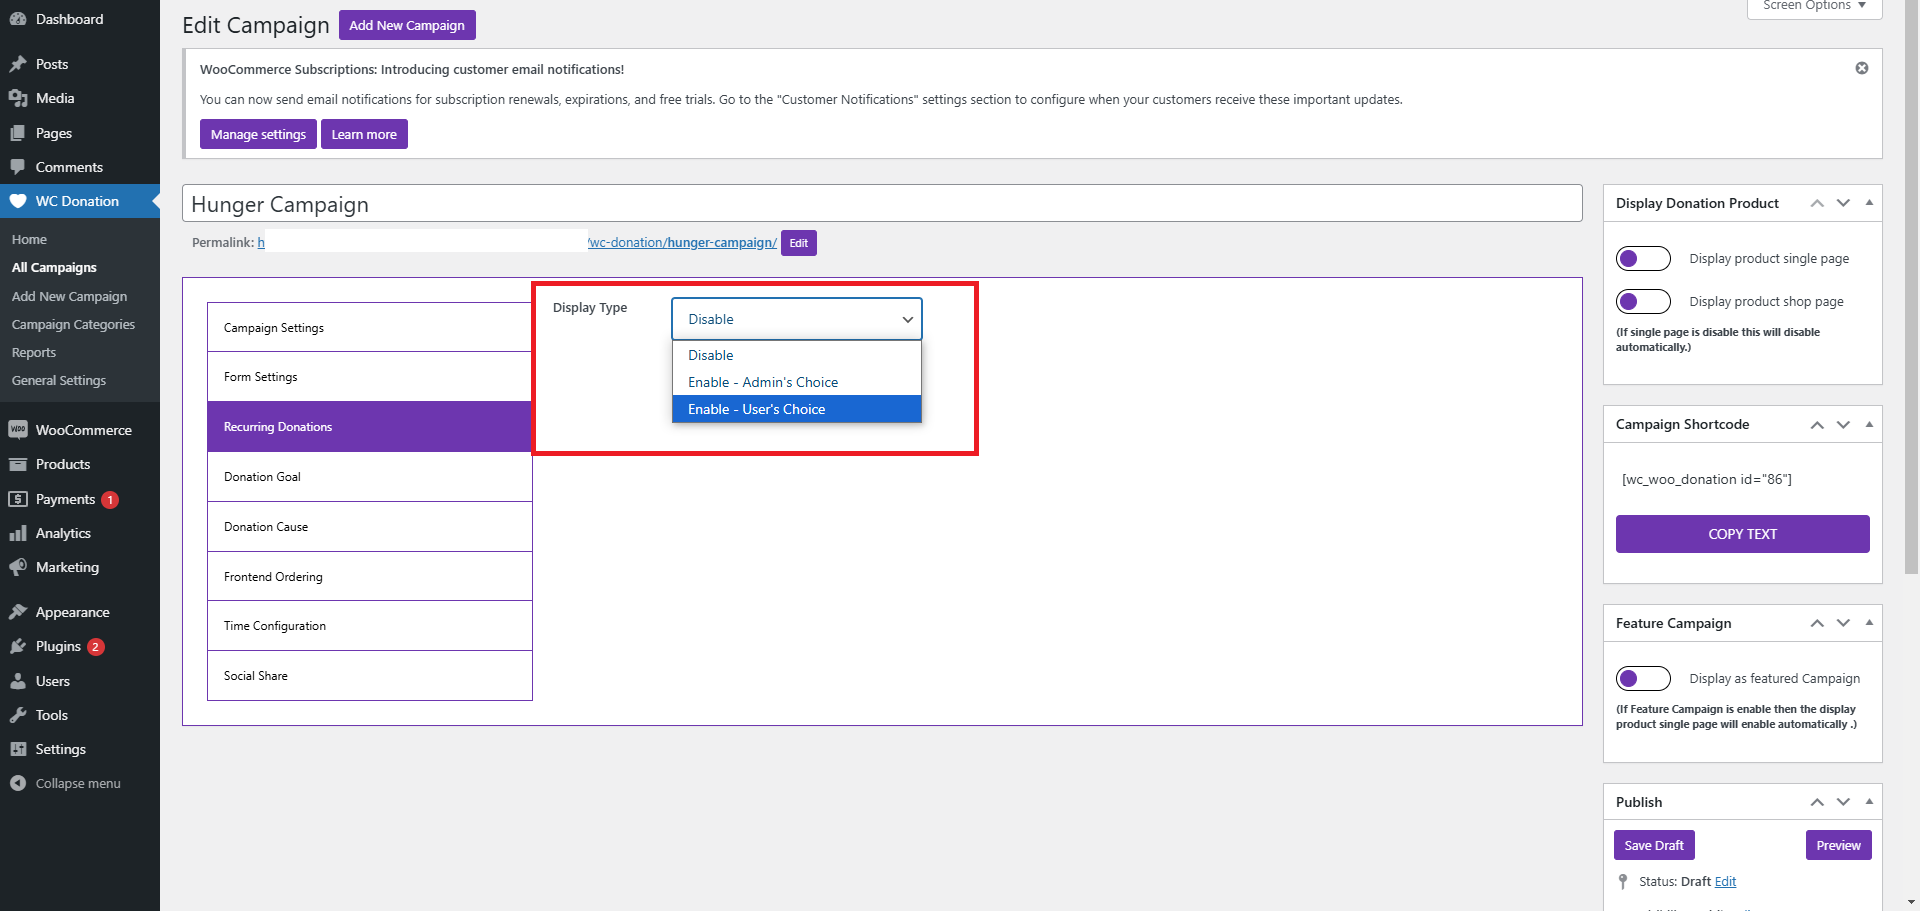
- Select Enable – User’s Choice from the dropdown menu.
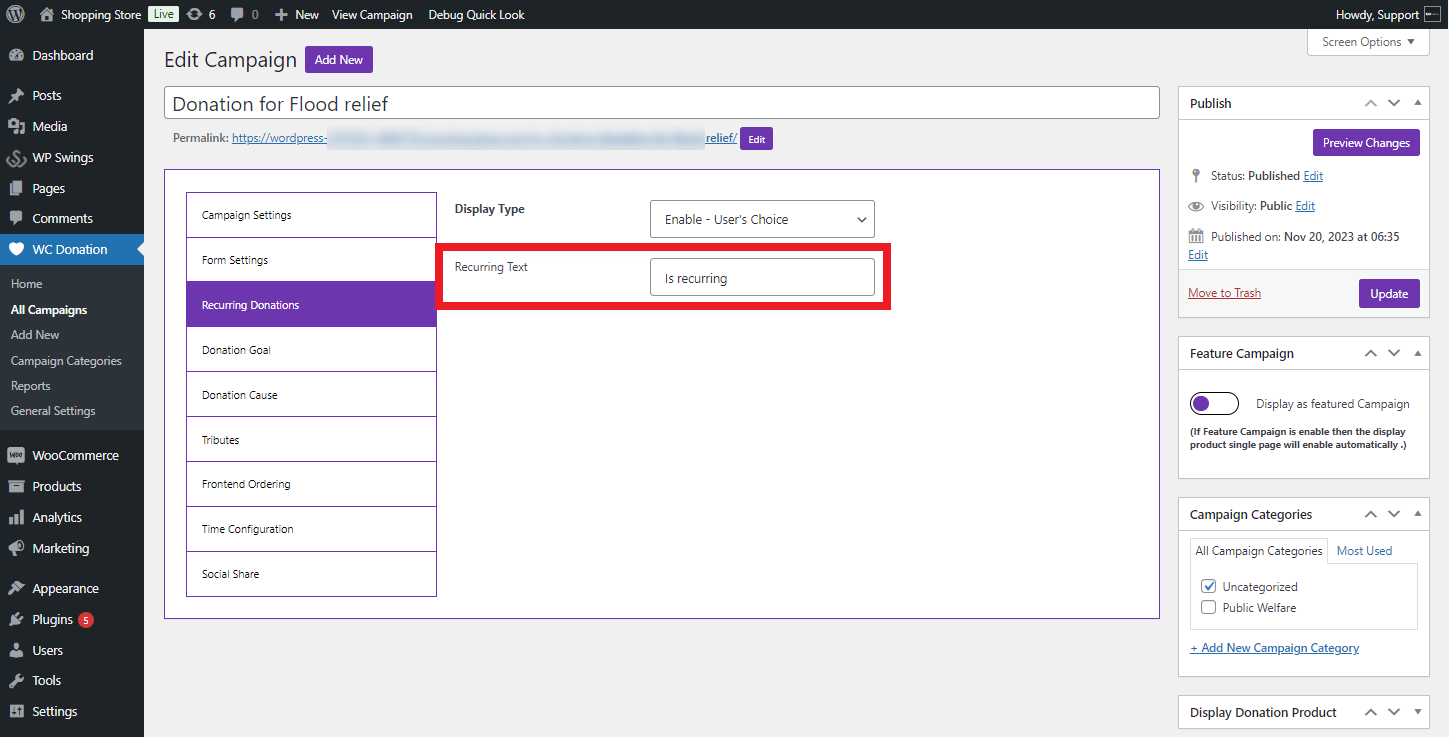
- You can set custom text for recurring donations in the Recurring Text option, too. If you don’t want to put any text, then the Enter Donation Recurring option will show up.
- Press the Update button to enable changes.
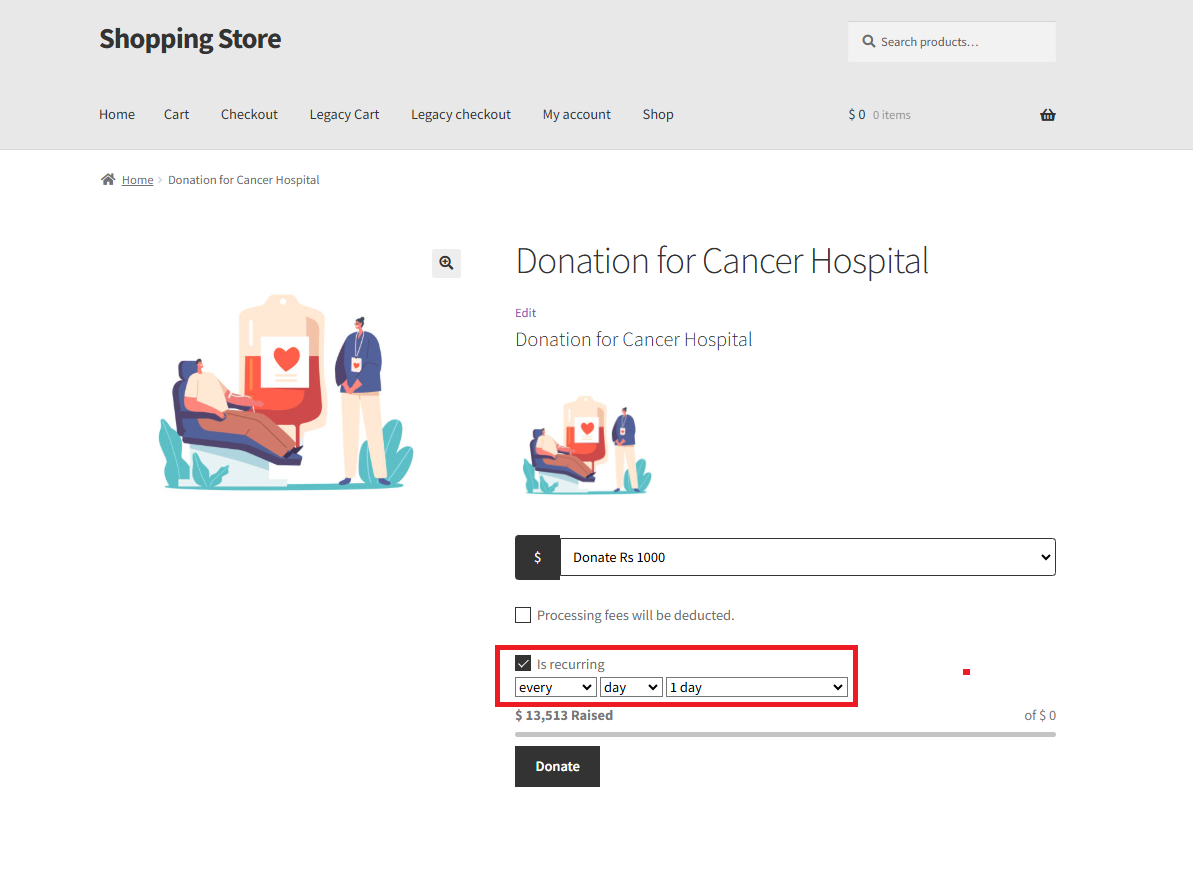
Front-End Impact
- The user will visit the website and choose the donation.
- The user will then choose the Donation level.
- To make it a recurring payment, check the checkbox.
- Determine the Intervals for the recurring payment cycles.
NOTE:
- Every (1 to 6 interval)
- Day/Week/Month/Year (to choose any frequency)
- Till (length) for days, it is going to be 90 days, for a week, it is going to be 52 weeks, for a month, it is going to be 24 months, and for a year, it is going to be 5 years after the first purchase. If the user sets the frequency to ‘Every’ and selects ‘Month,’ the number of months will be shown. If a user chooses 5 months, the donation will be deducted monthly for 5 months. After this period, the donation deduction will automatically stop.
- Once your customer has purchased a product via recurring donation, the donation will be automatically deducted based on the specified frequency.
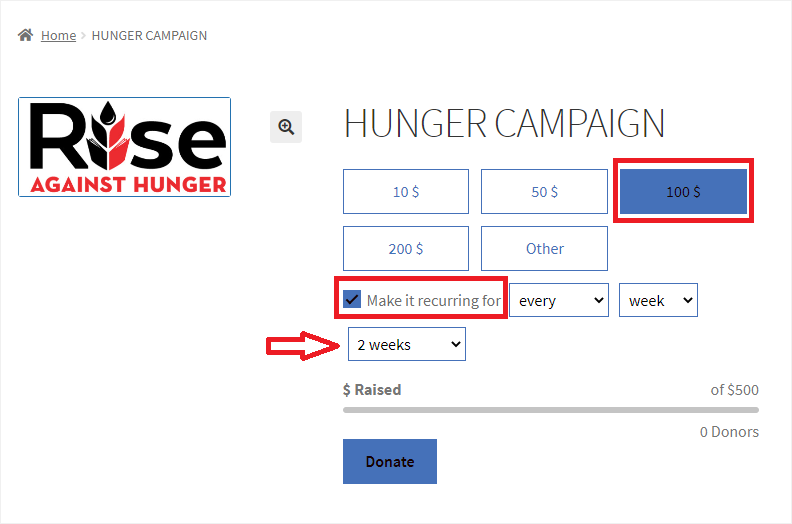
- When you are done, hit the Donate button.
NOTE: Please ensure that you have activated payment gateways, such as PayPal, when making recurring payments.
- The user will be sent to the checkout page.
- The user will provide the required credentials.
- The user can see the recurring payment cycles in the recurring totals section.
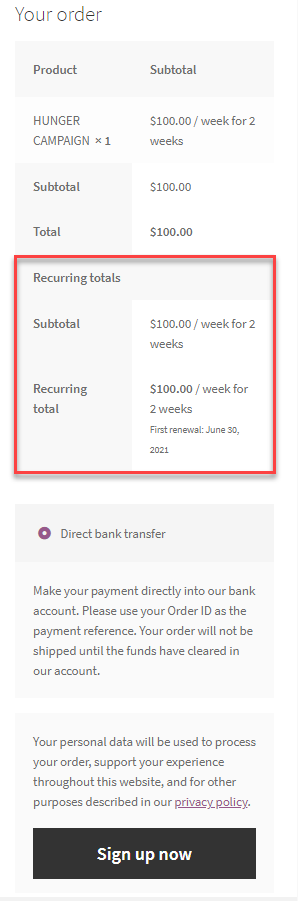
- The user will click the “Sign up now” button.
Subscription Tab
- Navigate to Admin Dashboard > WooCommerce > Subscriptions.
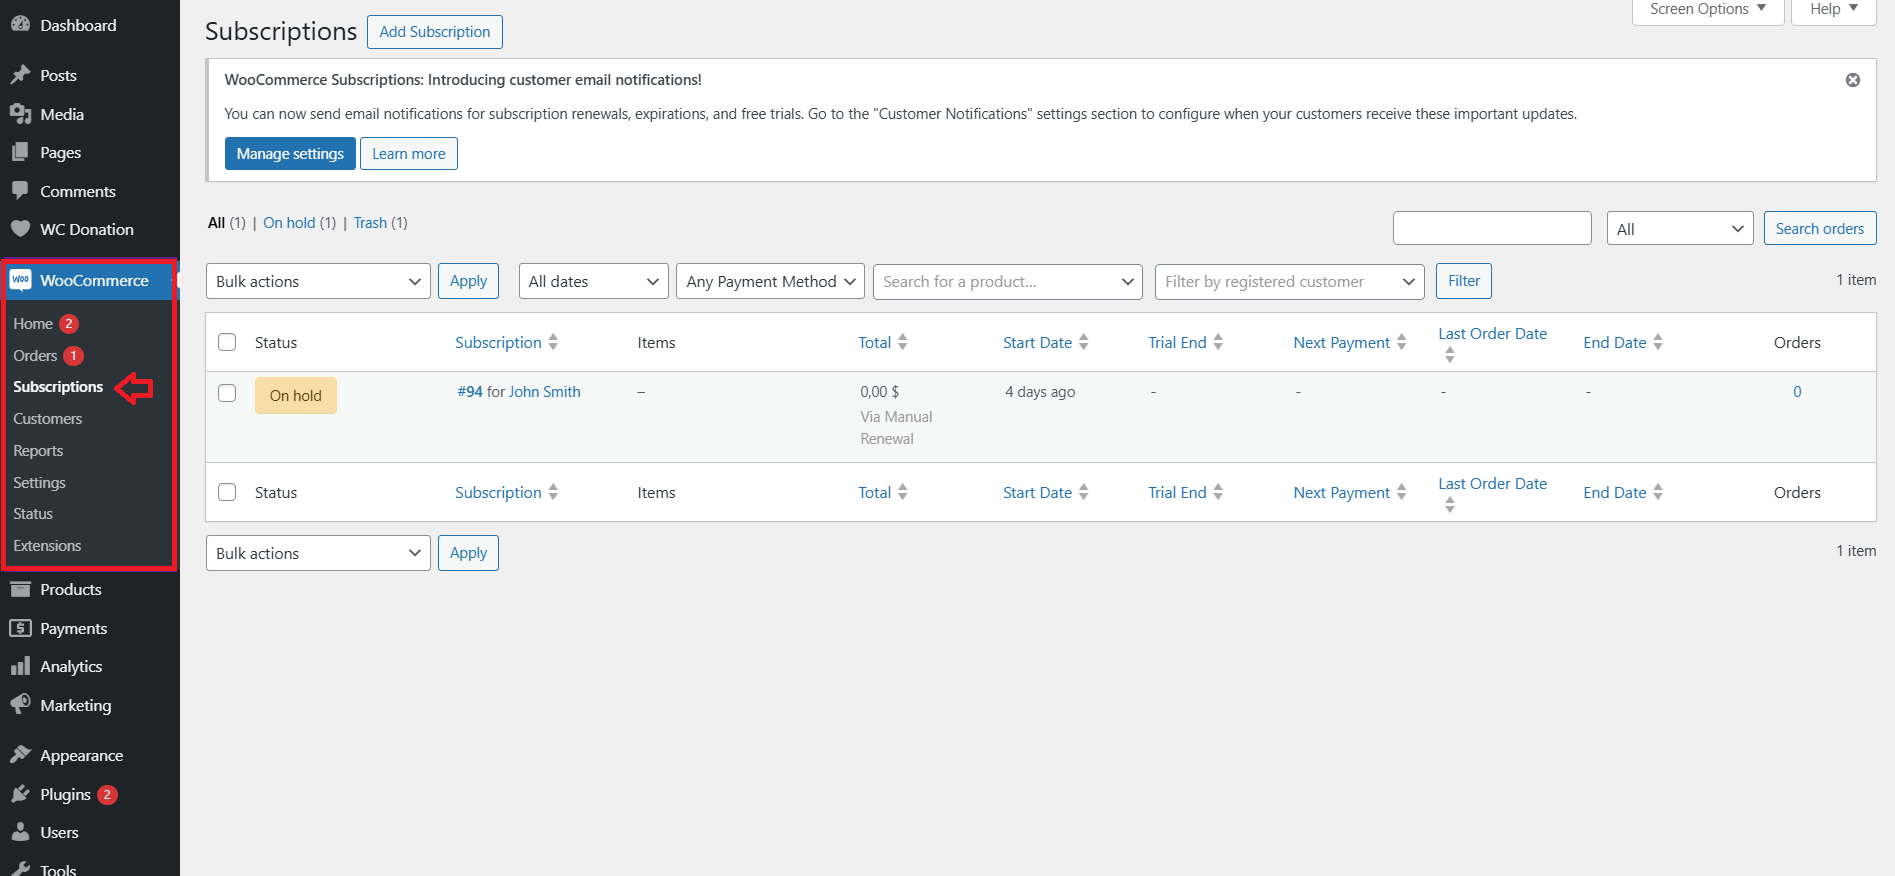
- Press the subscription number in the Subscription column. #94 is the subscription number.
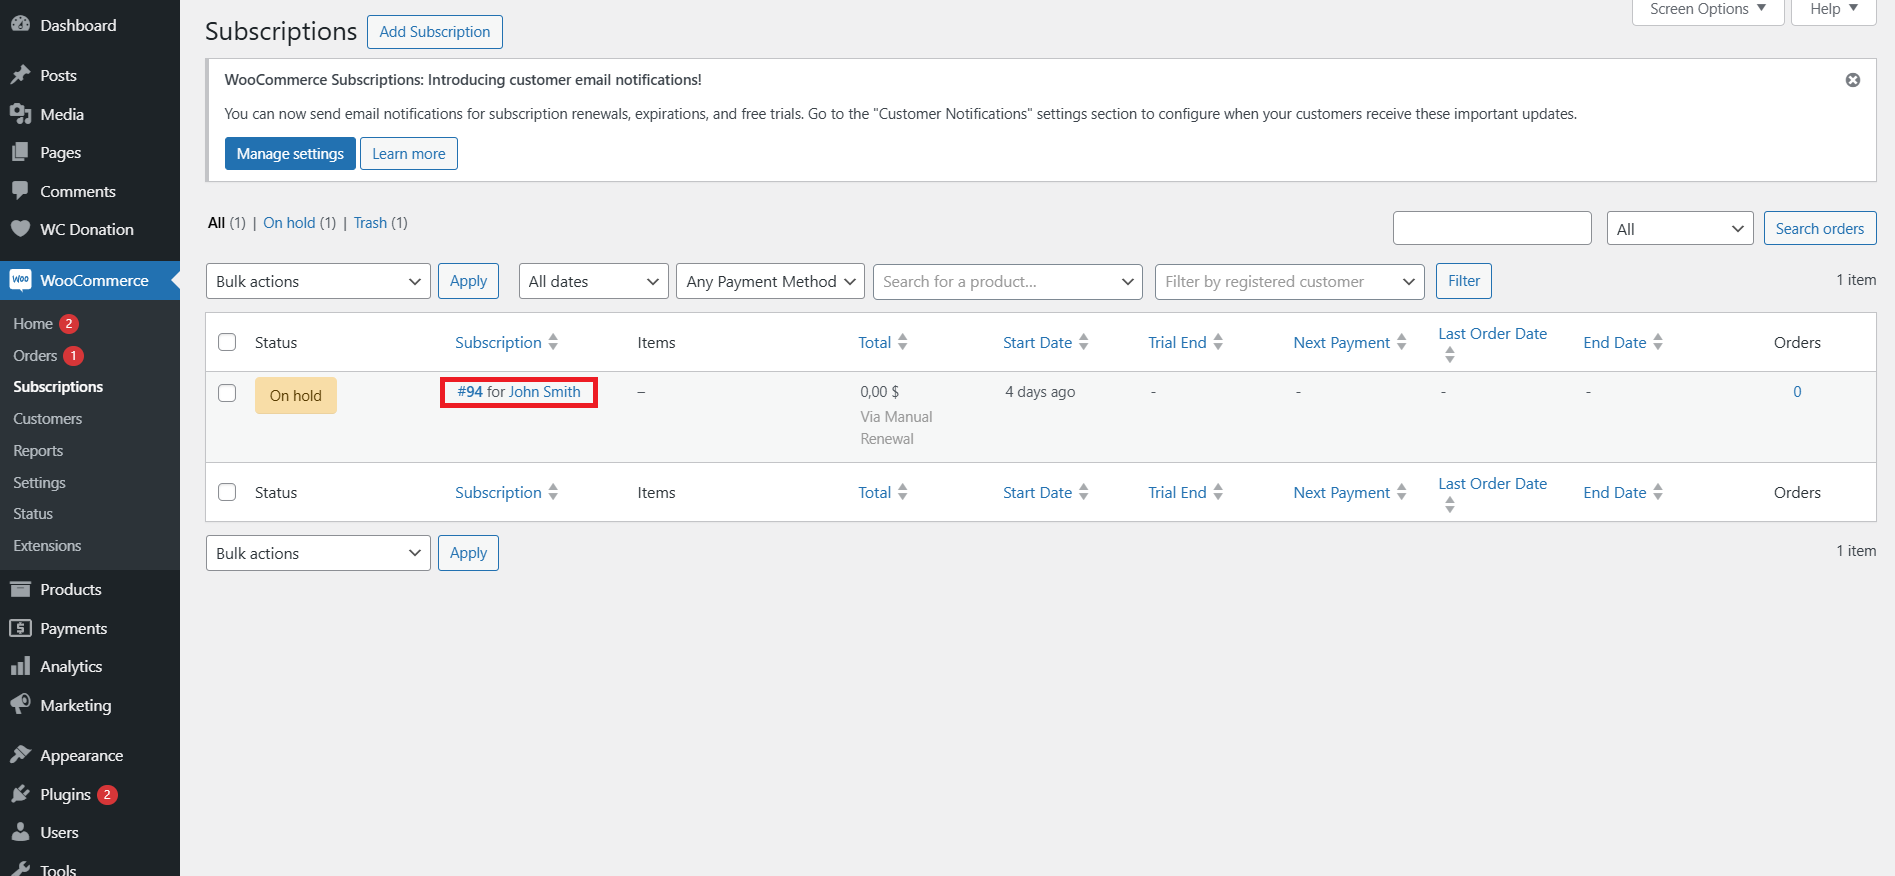
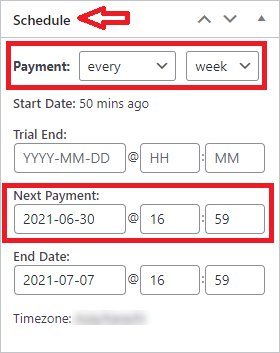
- When editing the Subscription page, there is a Schedule section on the right side of the page, which showcases the details of the Next Payment, End Date, and the Time zone.
Order Tab
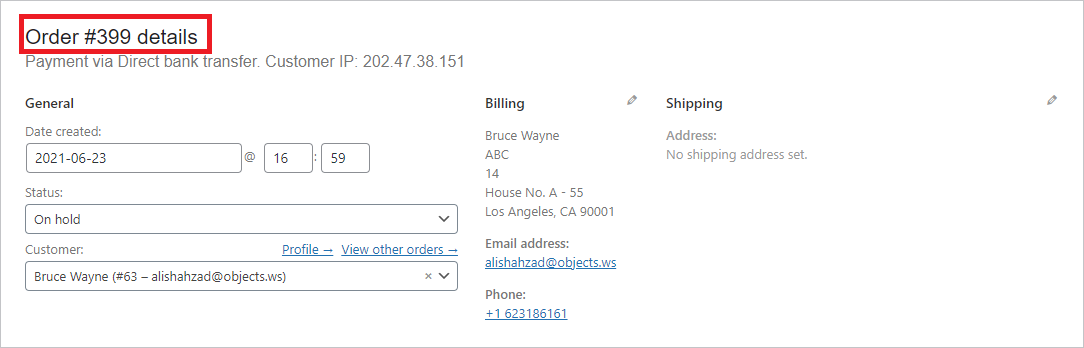
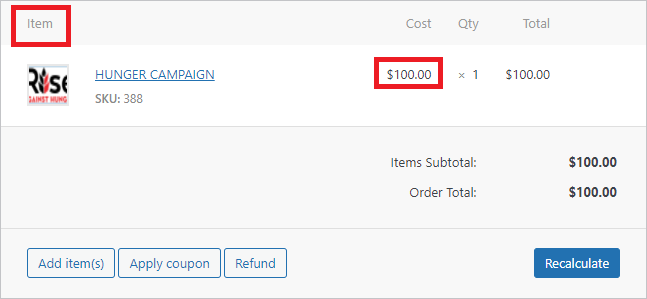
- Go to the Admin Dashboard > WooCommerce > Orders. Then press Order.

- When editing the Order page, we can see all the details.
Count of Donation
- Only orders having status (Processing and completed) will be reckoned as a total donation if there is any donation product in them. The total donation, Total Amount, and Total Donor are subtracted from on-hold and canceled orders.
- In the campaign list, the admin can view the total no. of donations against each campaign along with its total amount.
[product_banner index=’1′]
On Complete
- Navigate to the Admin Dashboard > WooCommerce > Orders.
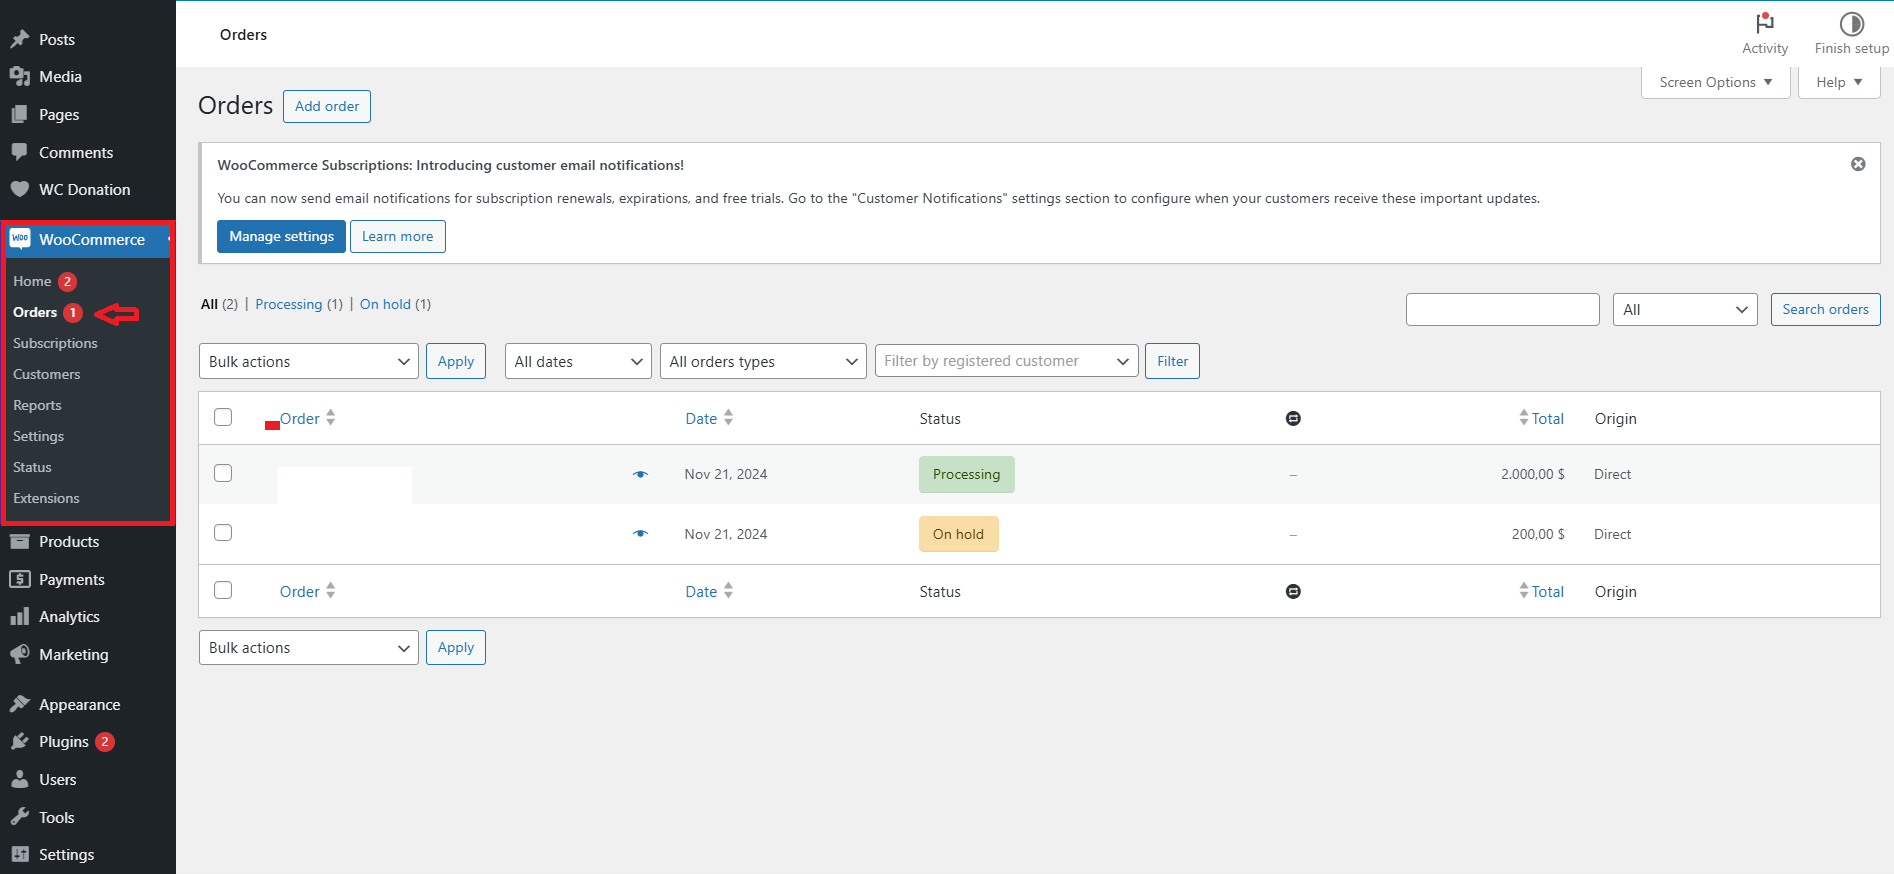
- Orders with the status ‘Completed ‘ will be considered a total donation if they contain any donation products.
On Processing
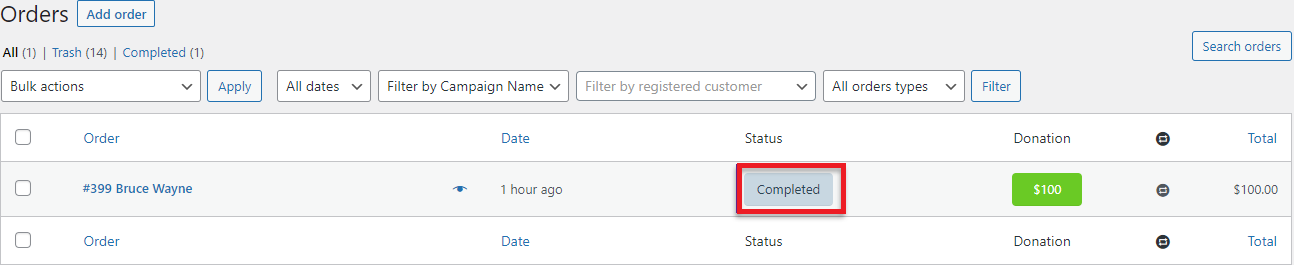
- Go to the Admin Dashboard > WooCommerce > Orders.
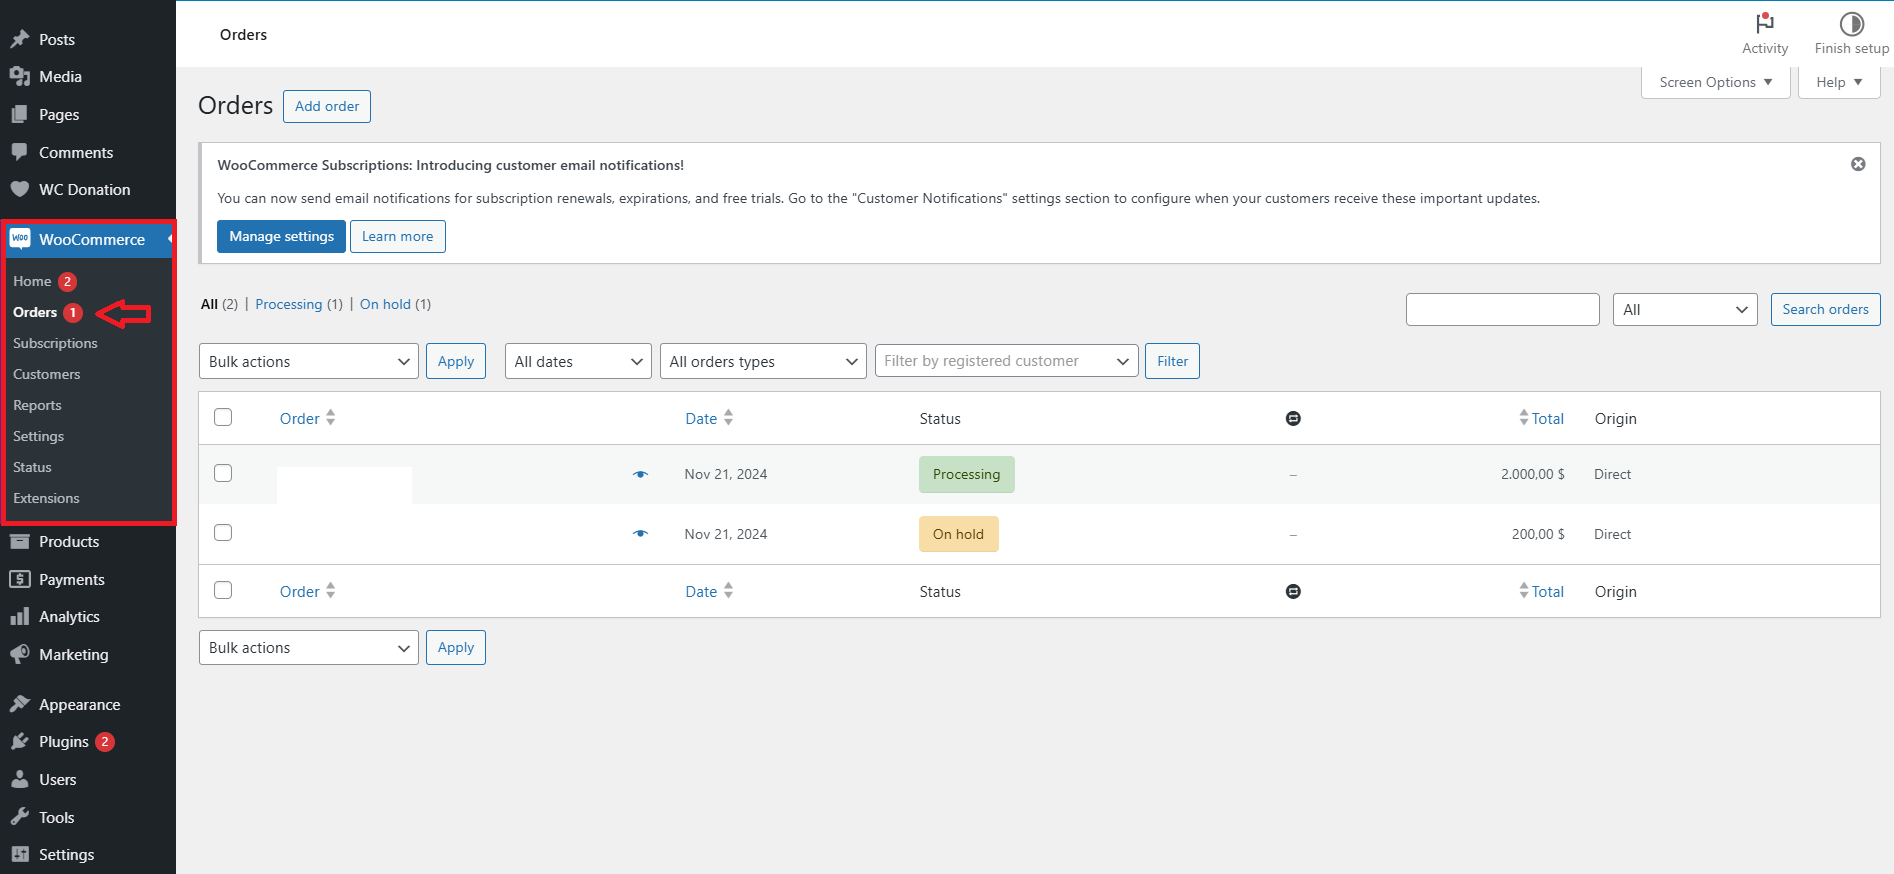
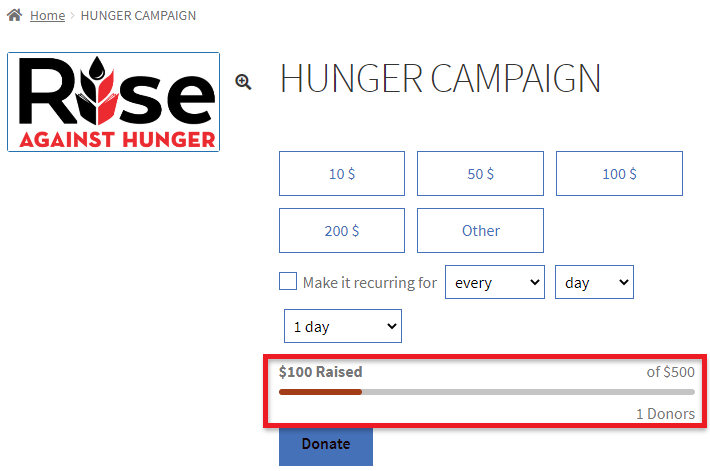
- Orders with the status ‘Processing ‘ will be considered a total donation if they contain any donation products.
Product Page on Complete and on Processing
The impact on the front-end will look like this:
On Hold
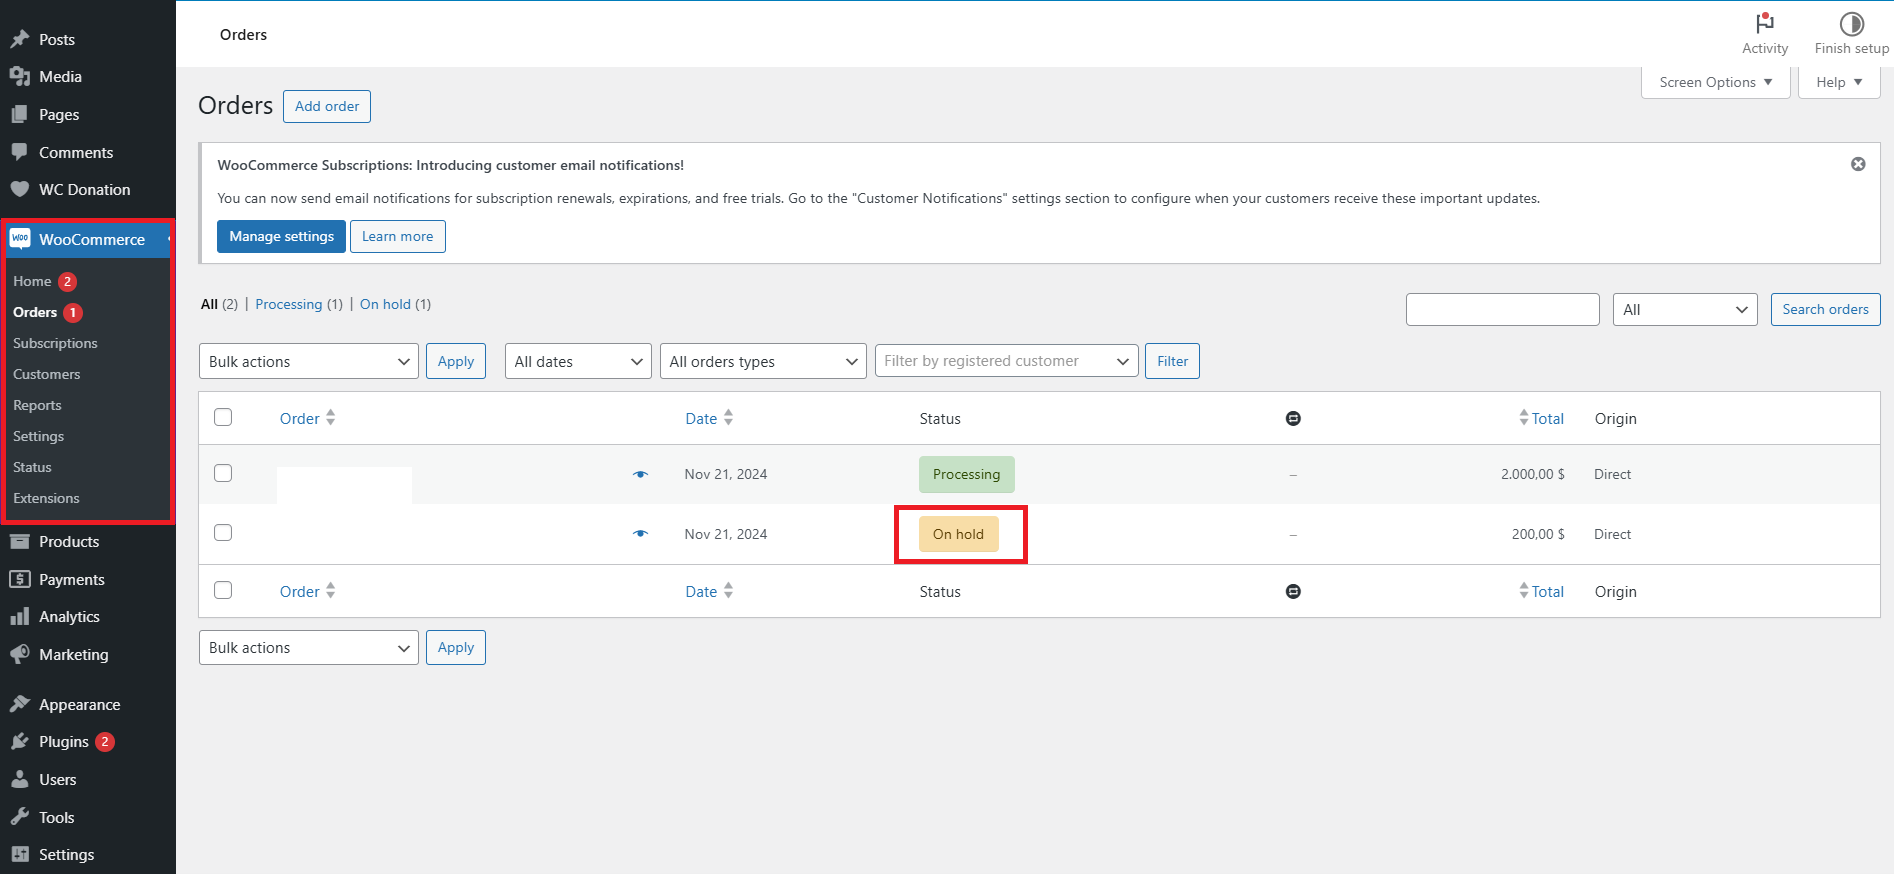
- Go to the Admin Dashboard > WooCommerce > Orders.
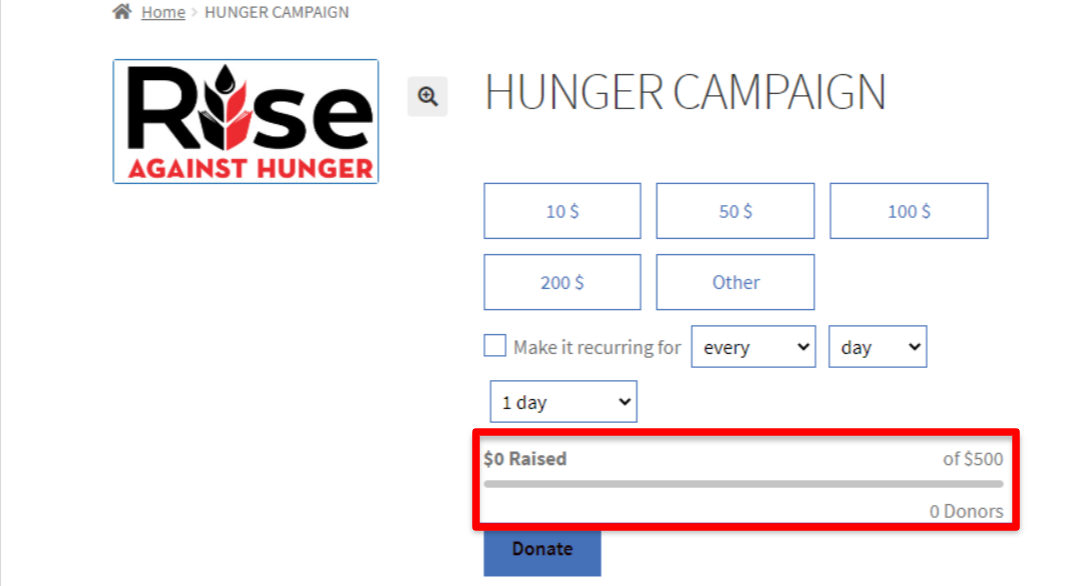
- Orders with the status ‘On Hold ‘ will decrease the donation goal.
On Canceled
- Navigate to Admin Dashboard > WooCommerce > Orders.
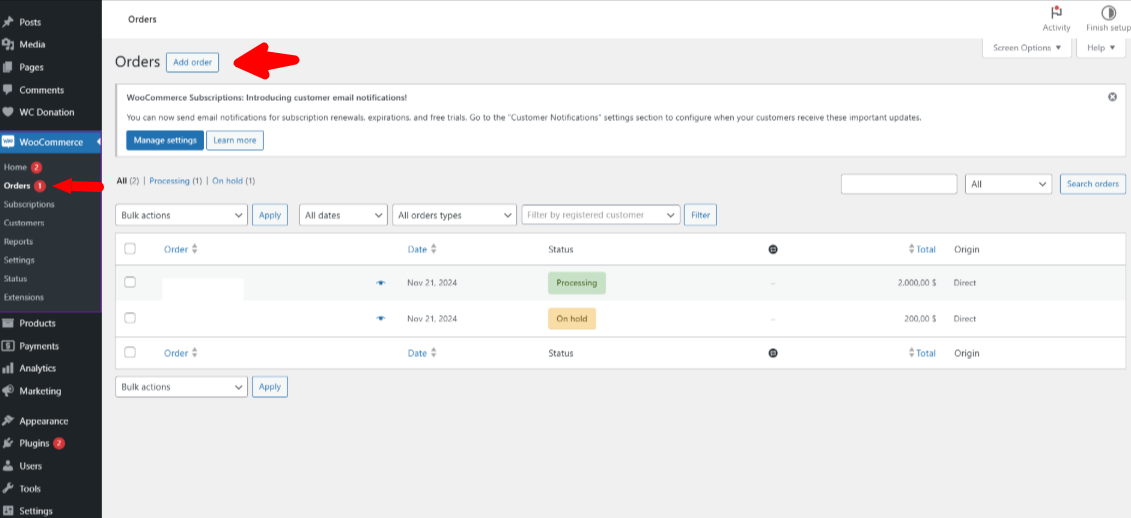
- The donation goal will be reduced if orders have the status of Canceled.

Product Page – On Hold and On Canceled
Second Method (Using Subscriptions for WooCommerce)
In this method, we will use the plugin, Subscriptions for WooCommerce, a brainchild of WP Swings. Follow the steps below to add WooCommerce recurring donation campaigns to your store:
- Download and install the Subscriptions for WooCommerce.
- Use the Subscriptions for WooCommerce documentation to activate the plugin.
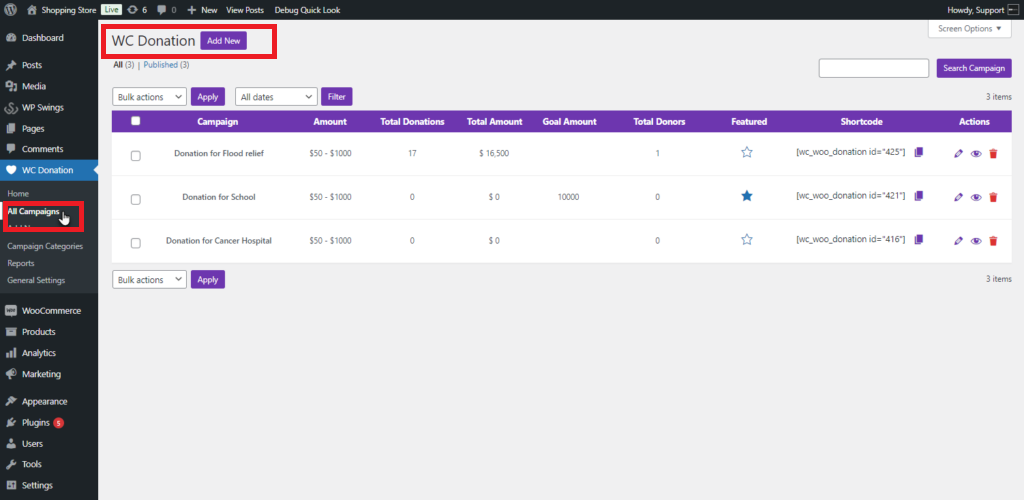
- Navigate to Admin Dashboard > WC Donation > All Campaigns.
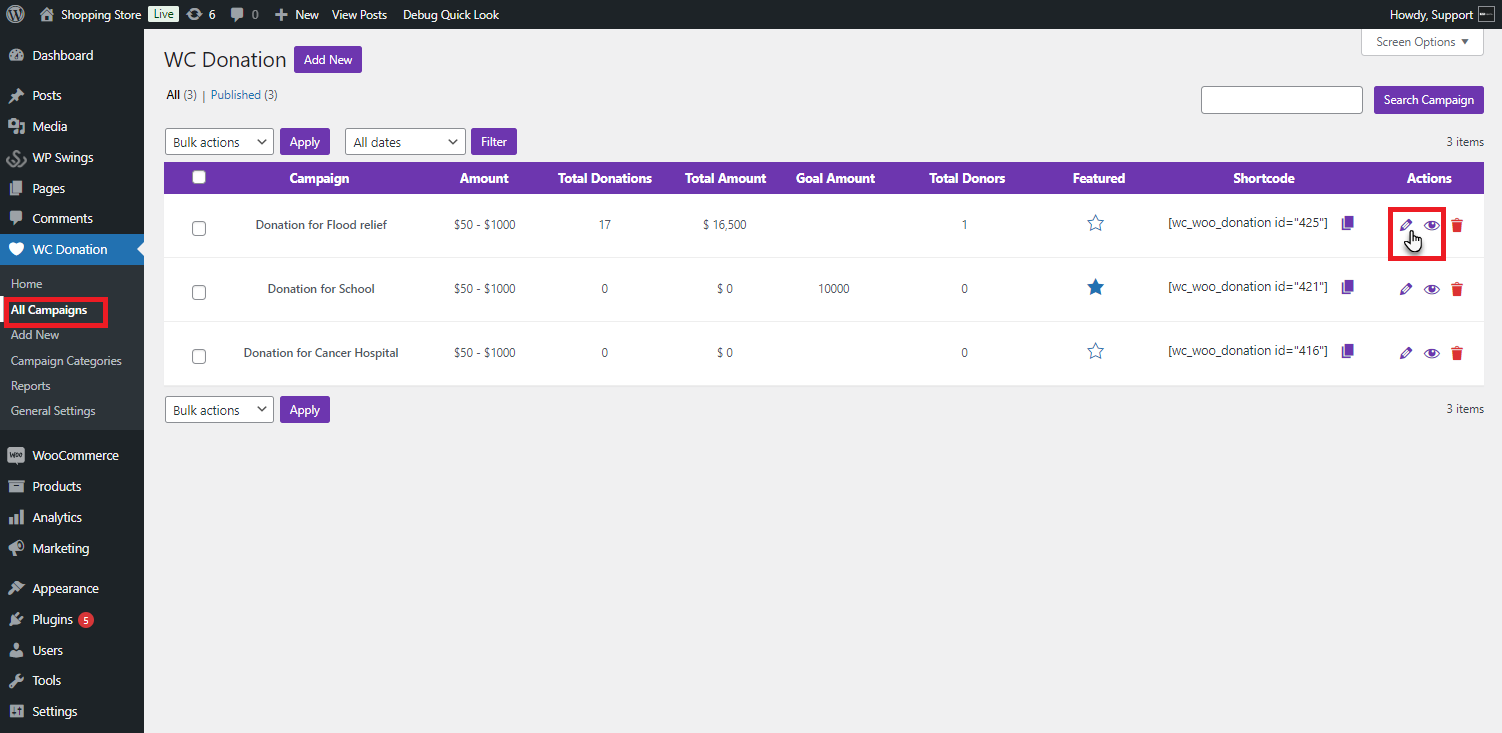
- Click the Edit button to edit the campaign.
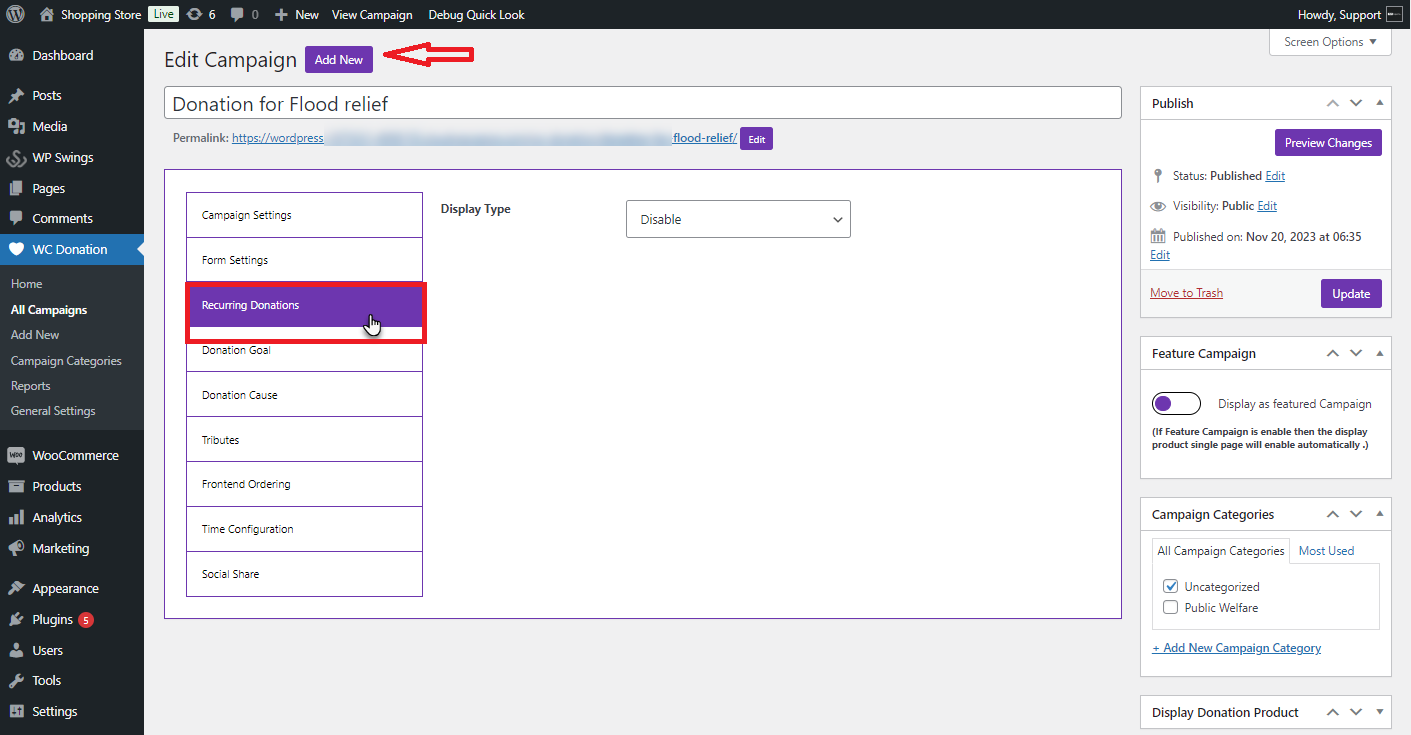
- You will see an Edit Campaign screen. Go to the Recurring Donations tab.
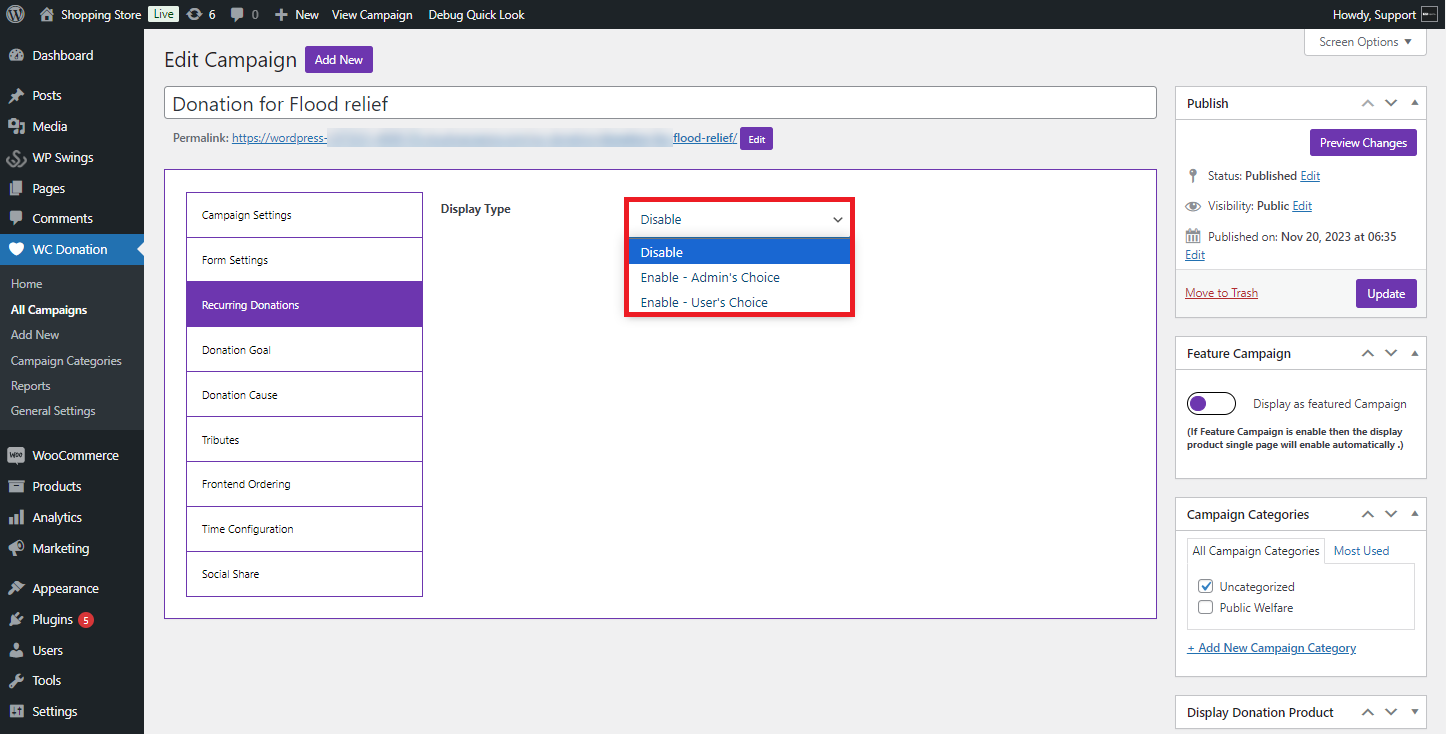
Display Type
- In the Display type, there are three options: Disable, Enable – Admin’s Choice, and Enable User’s Choice.
Enable – Admin’s Choice
- Choose the Enable – Admin’s Choice option using the Display Type. This will let the admin configure recurring Donation settings.
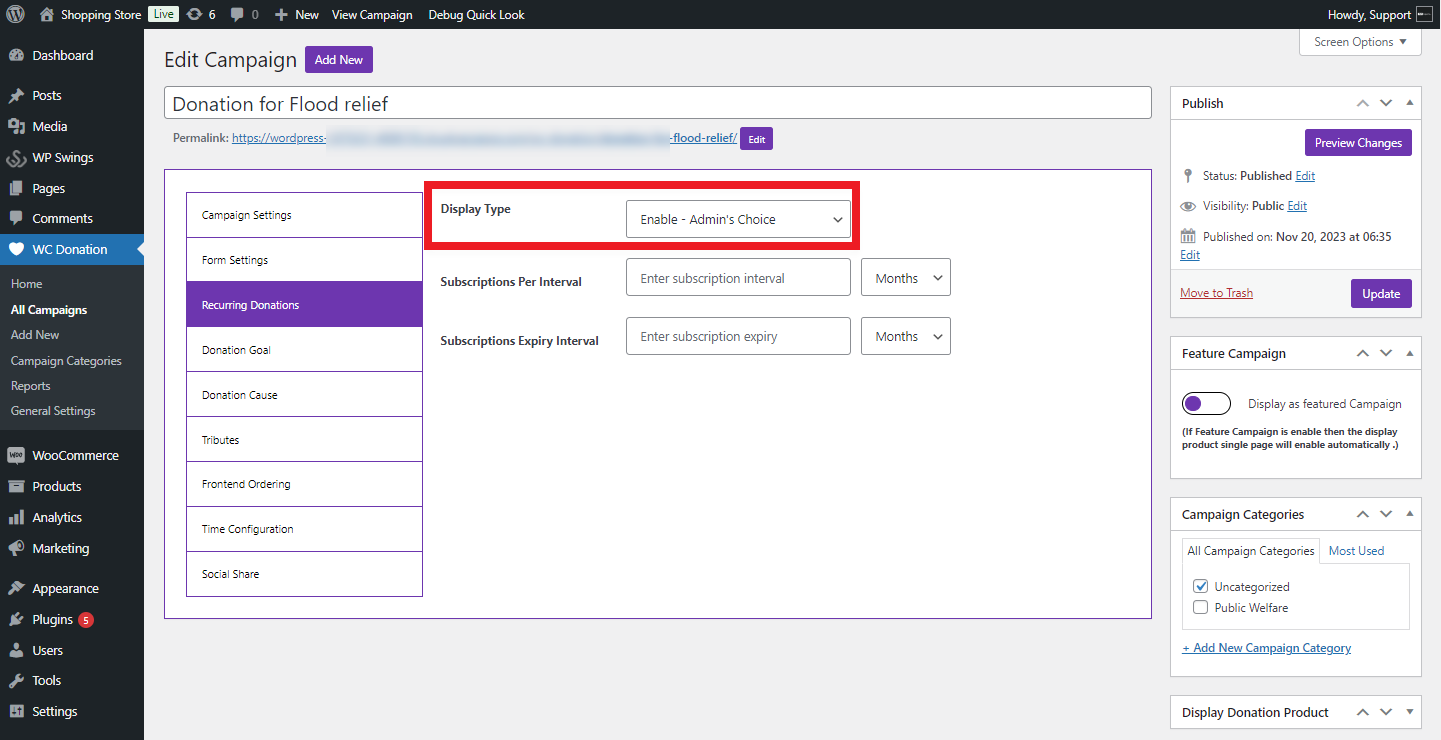
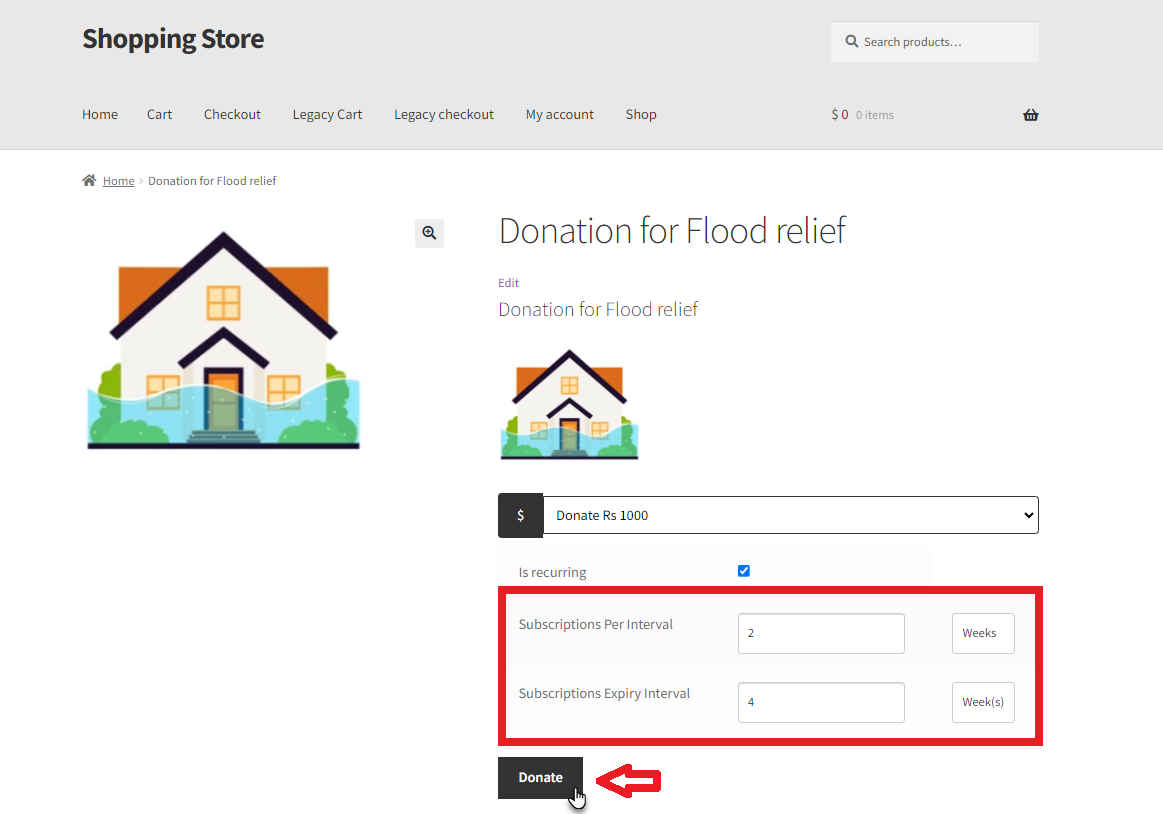
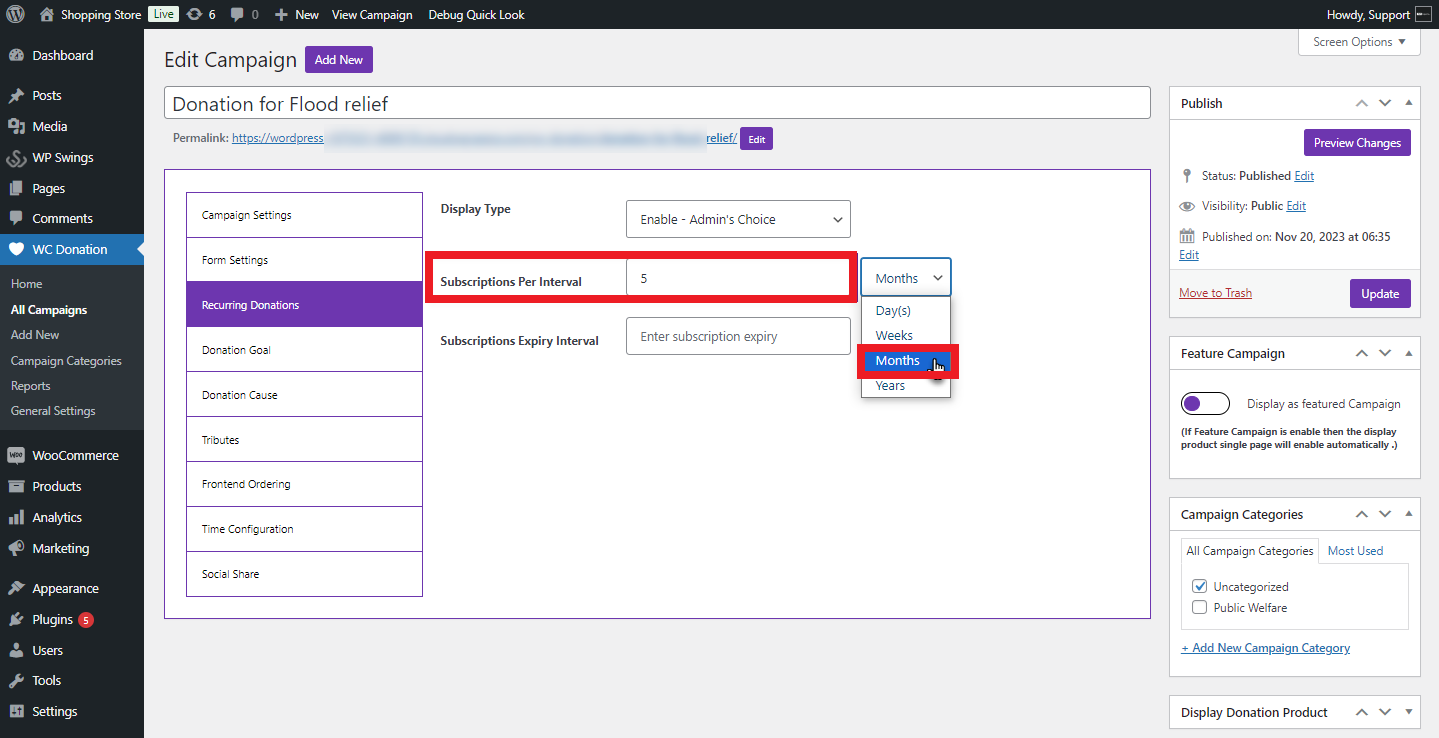
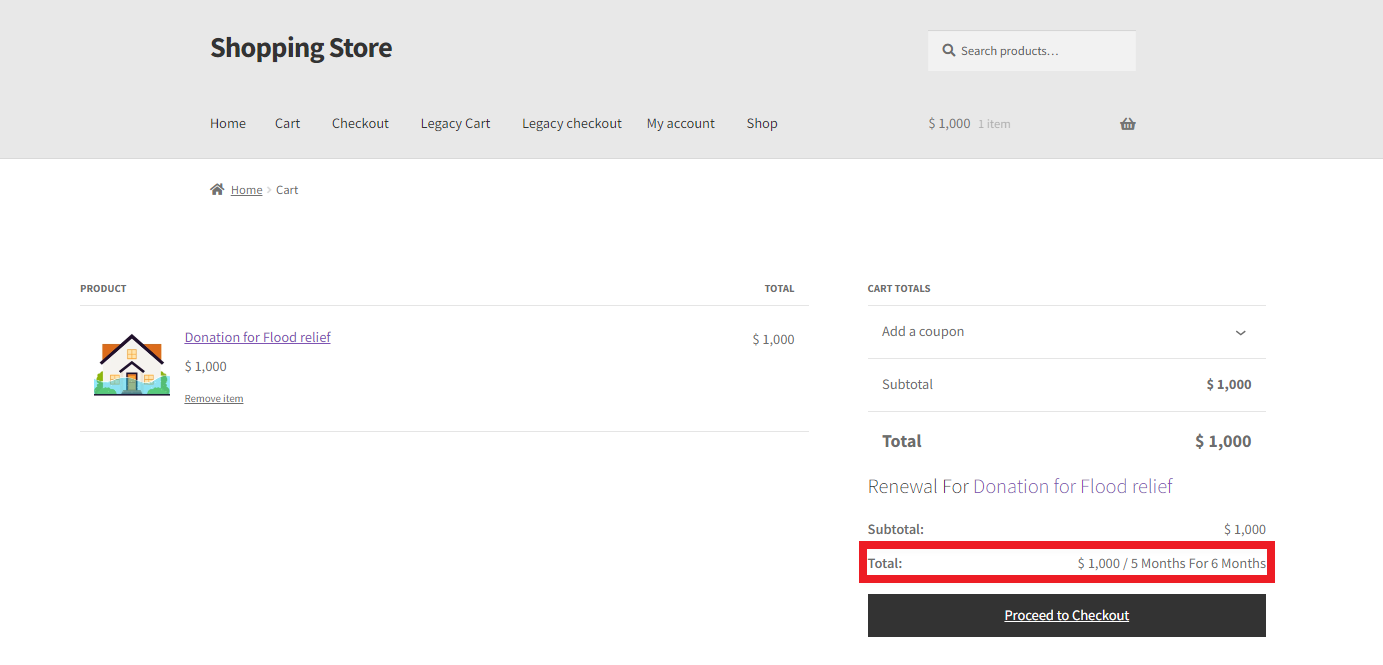
- As an admin, you can determine the subscription interval in the Subscriptions Per Interval field. You can set the interval in Days, Weeks, Months, or Years. Regardless of the interval value you enter, the subscription will run according to that cycle. For example, if 5 months is chosen, the subscription will be charged every 5 months.
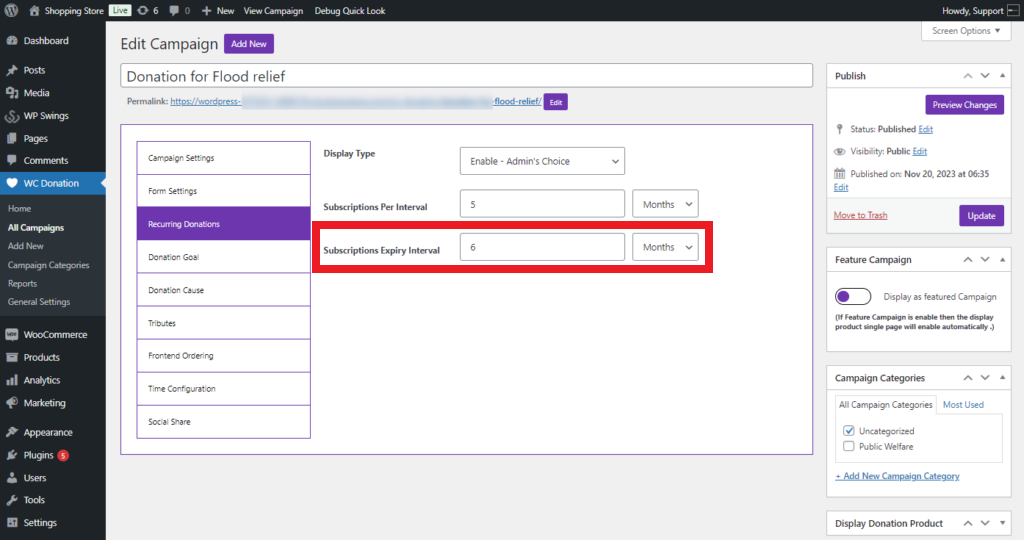
- As an admin, you can set the subscription expiry interval in the Subscriptions Expiry Interval field. If it is left empty or not updated, the subscription will not expire. Whatever the value you put, the subscription cycle will not remain effective after that time. For example, if the expiry is set to 6 months, the subscription will expire after 6 months.
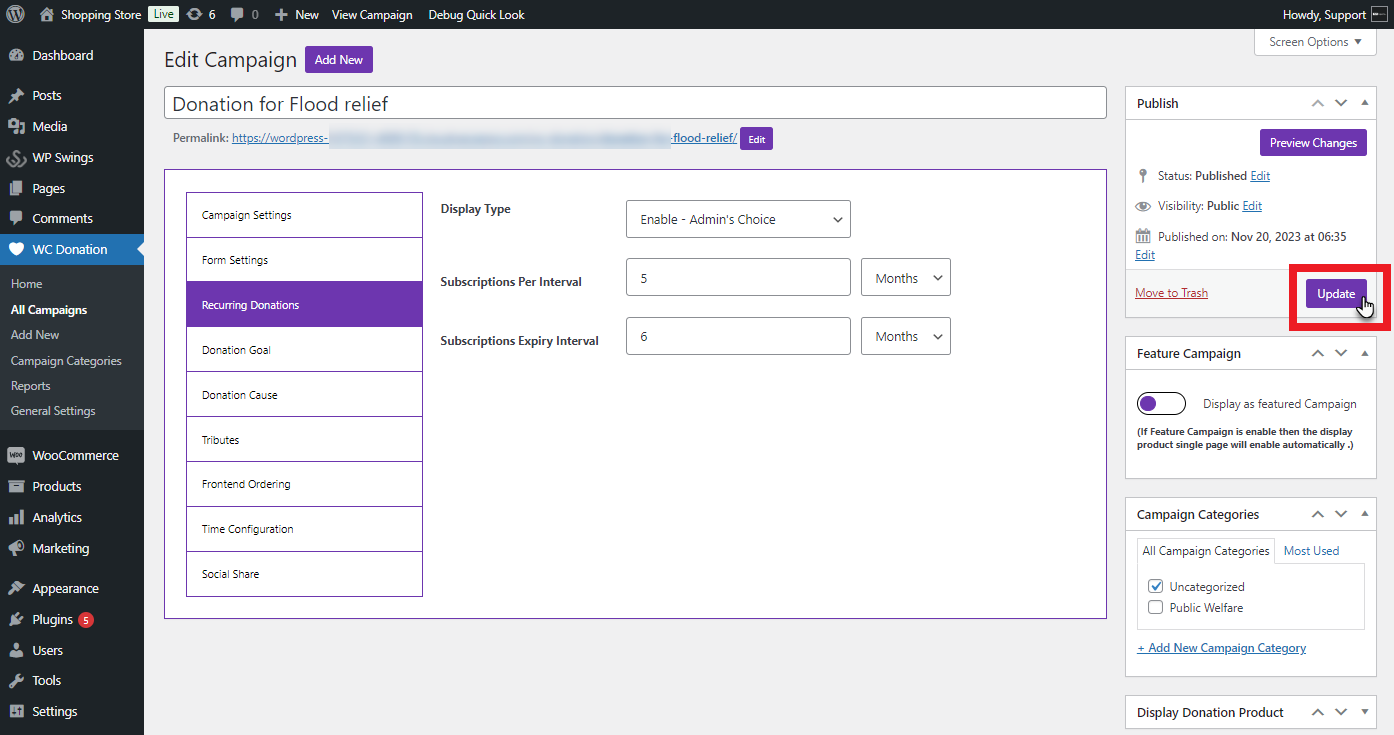
- Press the Update button to enable the changes.
- Log in to your account.
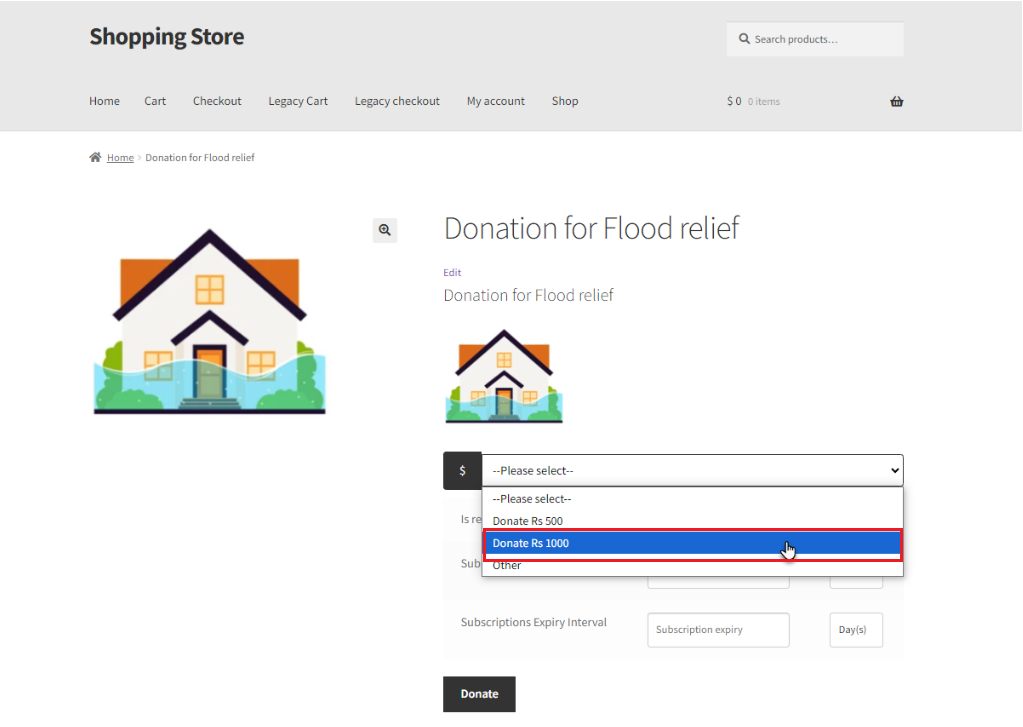
- Go to the Single Donation Page and choose the Donation amount.
- The impact on the front-end will look like this:
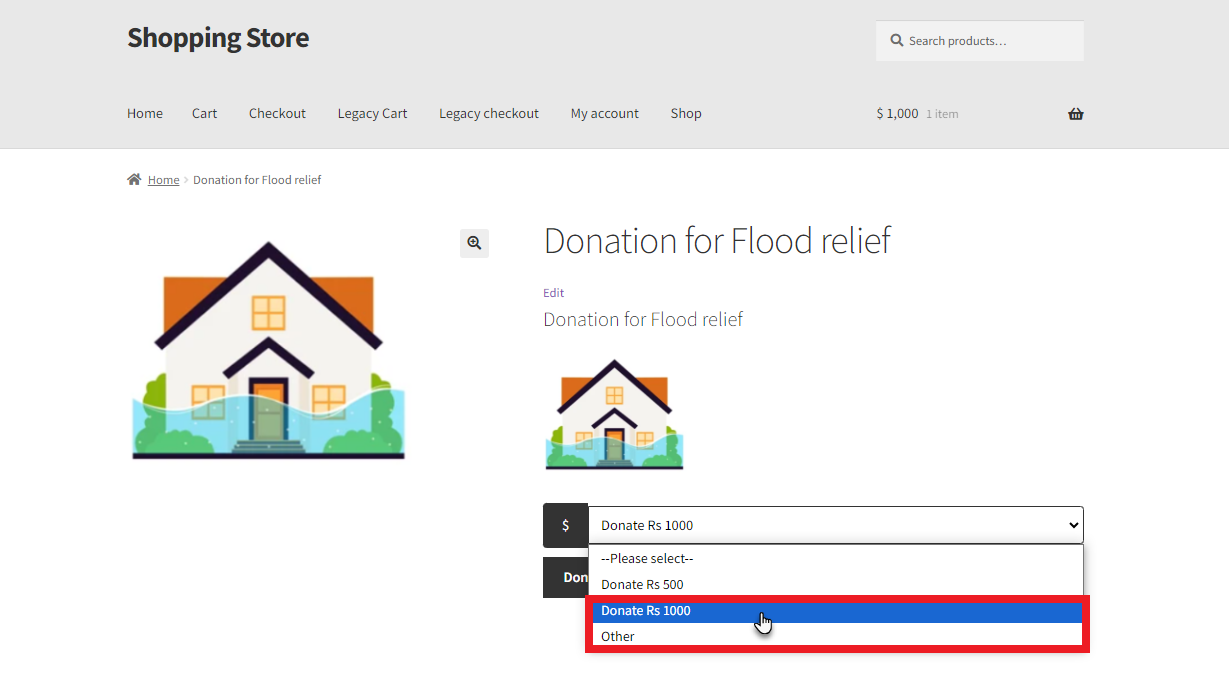
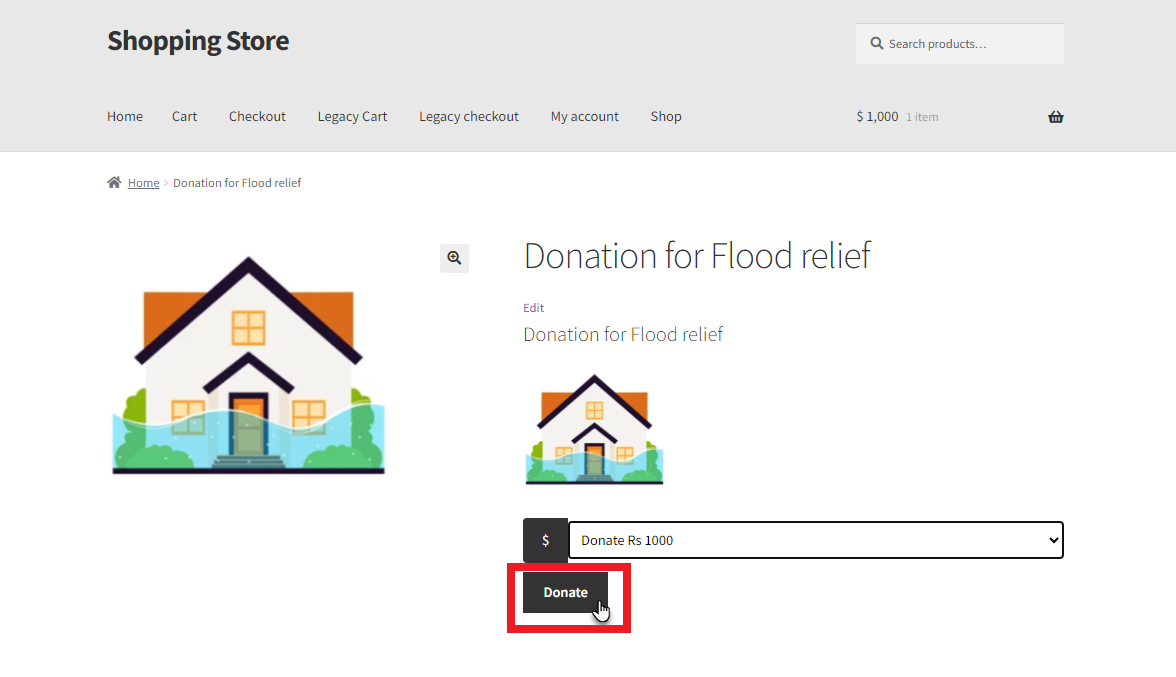
- Press the Donate button.
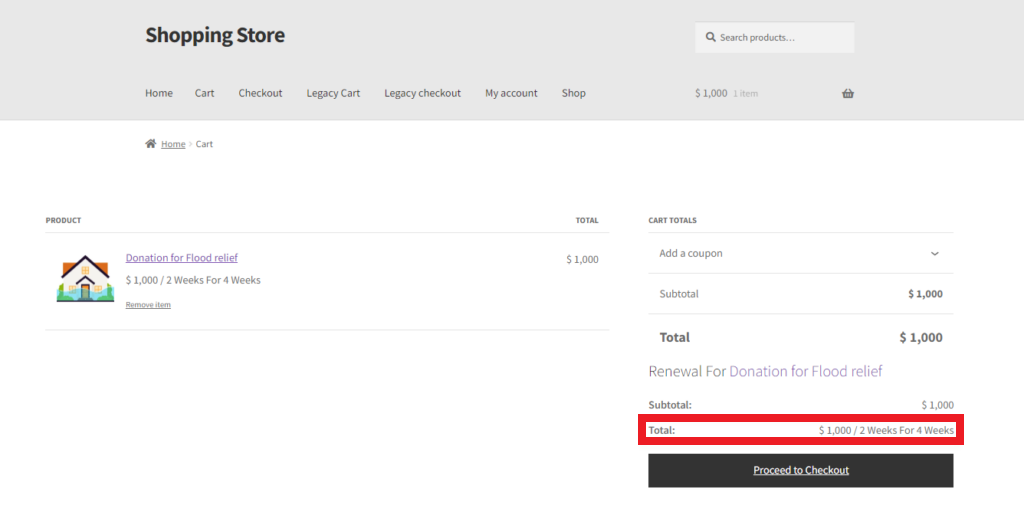
- Navigate to the cart page to see the details of the Donation subscription.
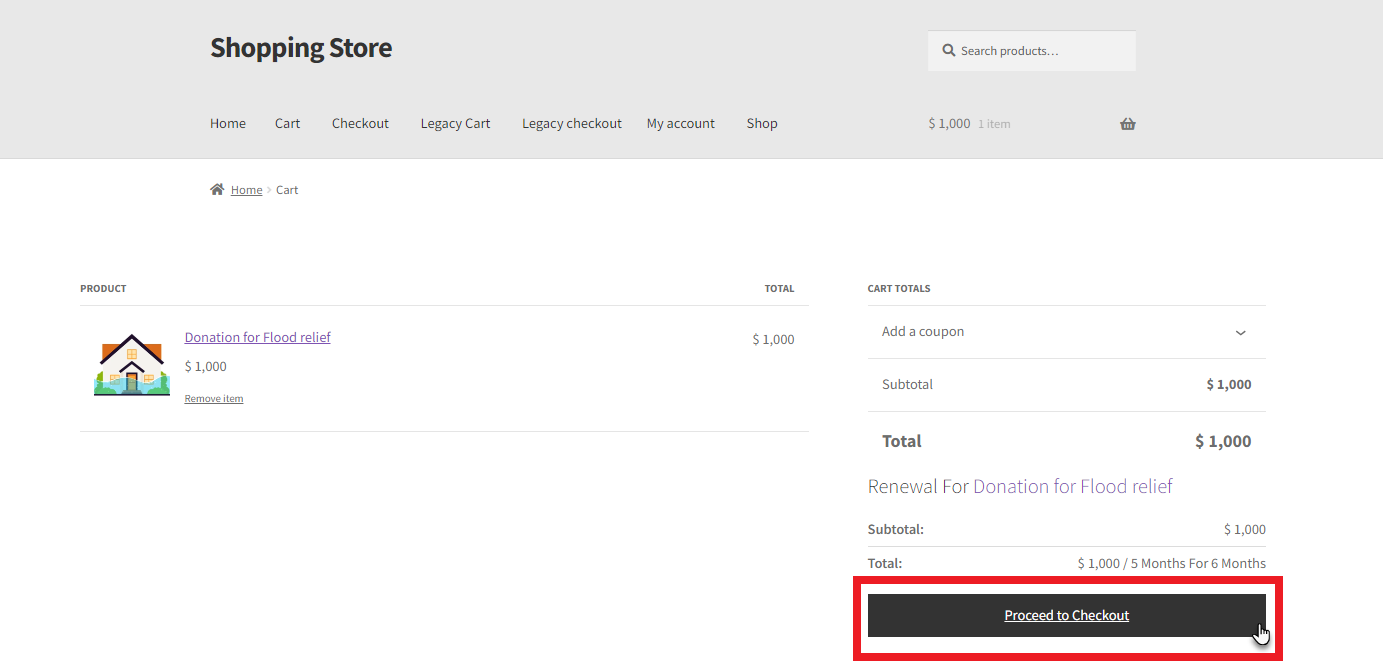
- Press the Proceed to checkout button.
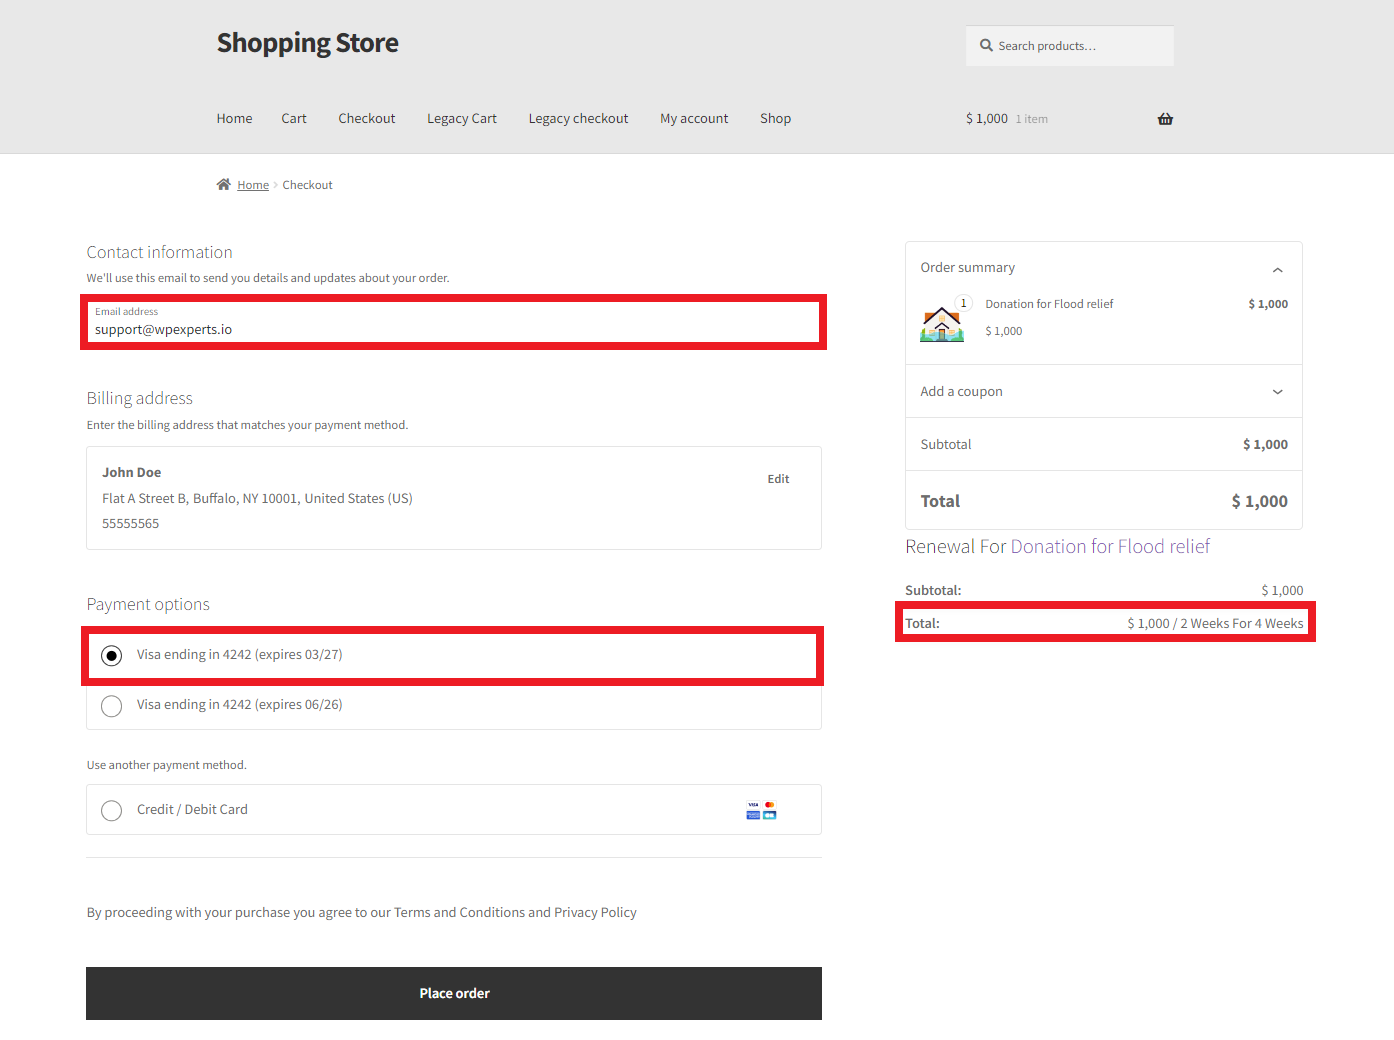
- You can also see the subscription details on the Checkout page.
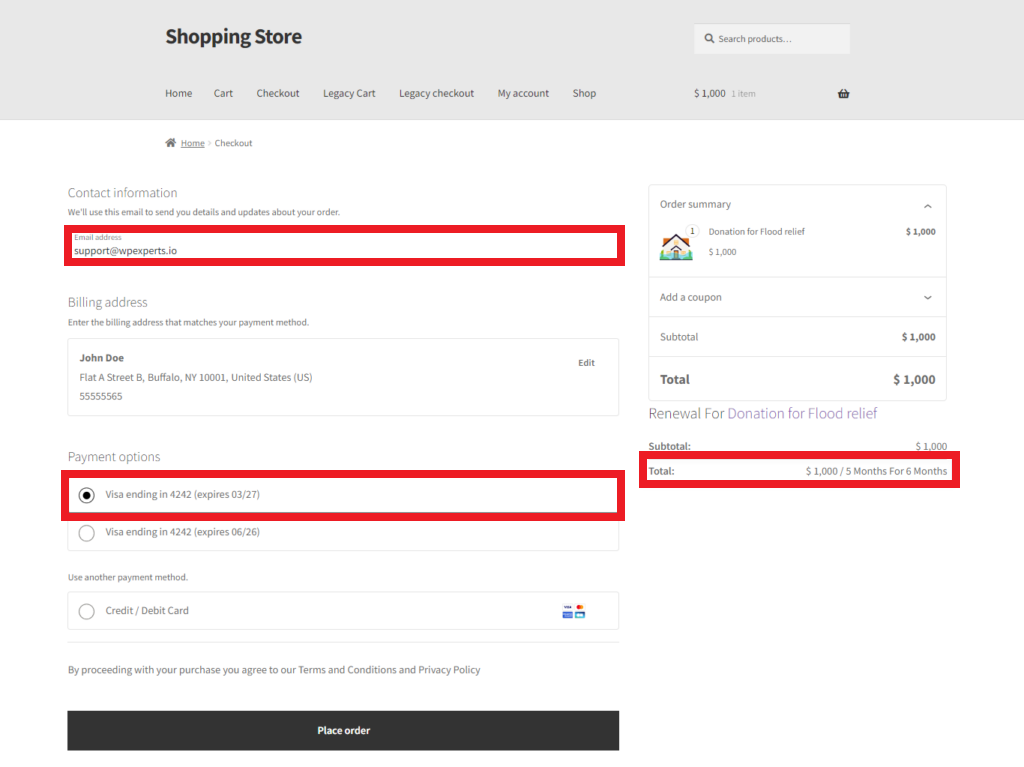
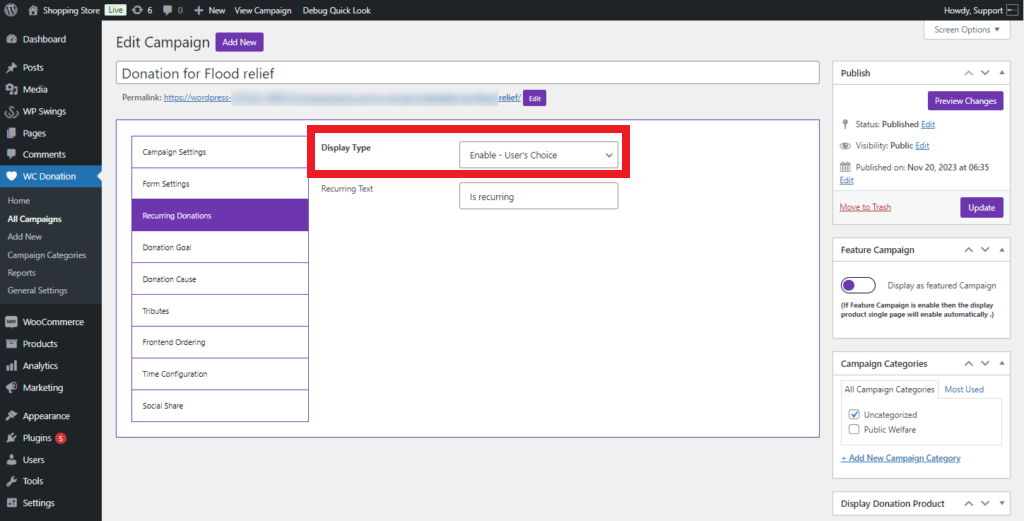
Enable – User’s Choice
- Choose the Enable – User’s Choice option using the Display Type. Users can easily enable recurring Donation settings on the Single Donation Page on the front-end.
- You can change the Recurring Text tab’s option if needed.
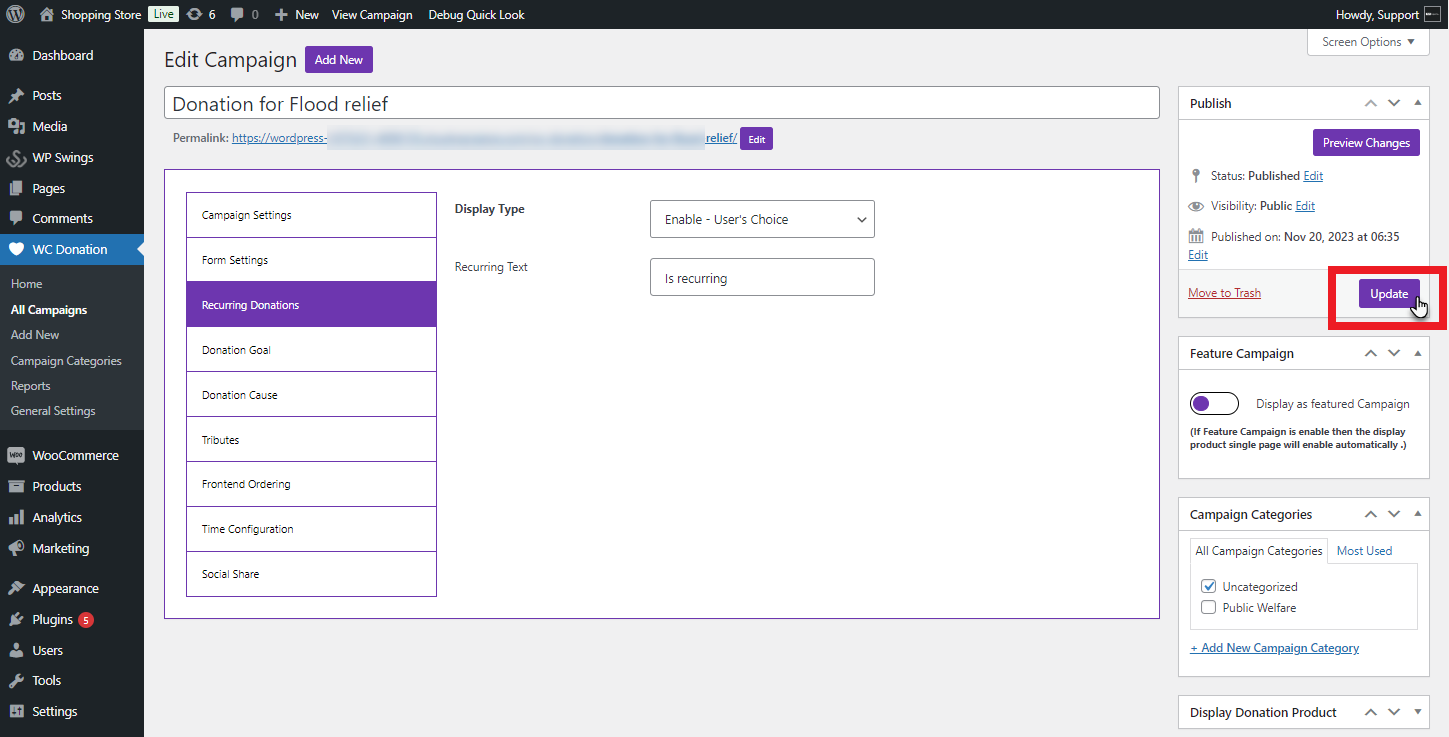
- Press the Update button to enable changes.
- Log in to the account and navigate to the Single Donation page, and choose the Donation amount to see the impact on the front-end.
- Choose the Is Recurring checkbox to activate the settings.
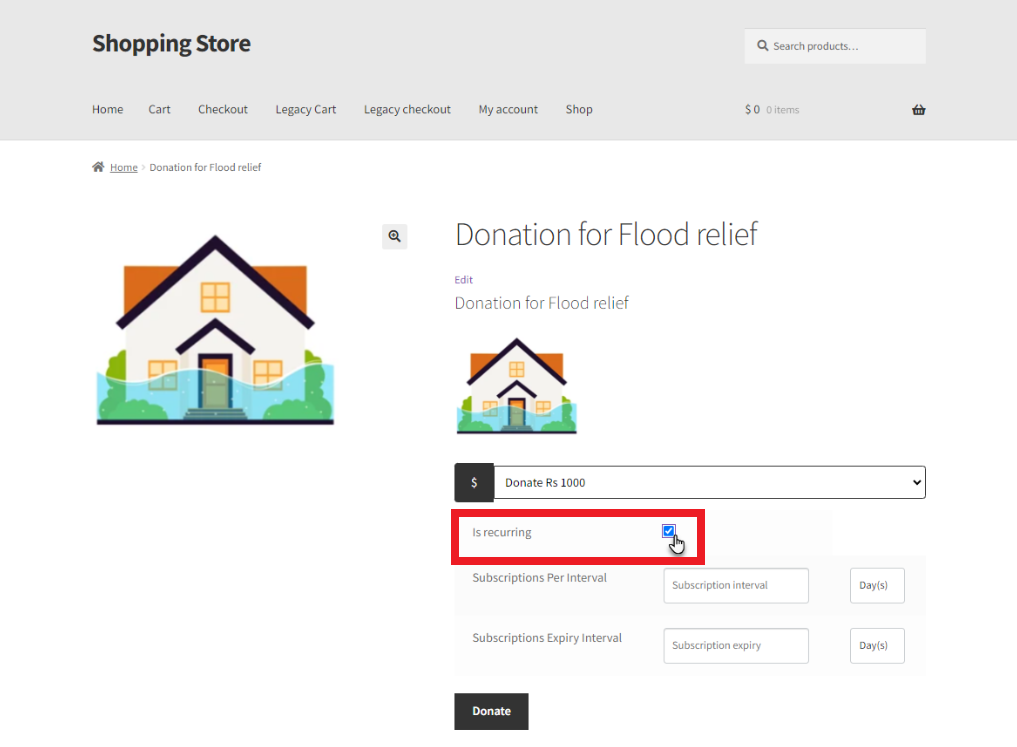
- Set the Subscriptions per Interval and Subscriptions Expiry Interval, and then press the Donate button.
- You can see the Donation Subscription details on the Cart page.
- You can also see the Donation subscription details on the Checkout page.
Subscription Table
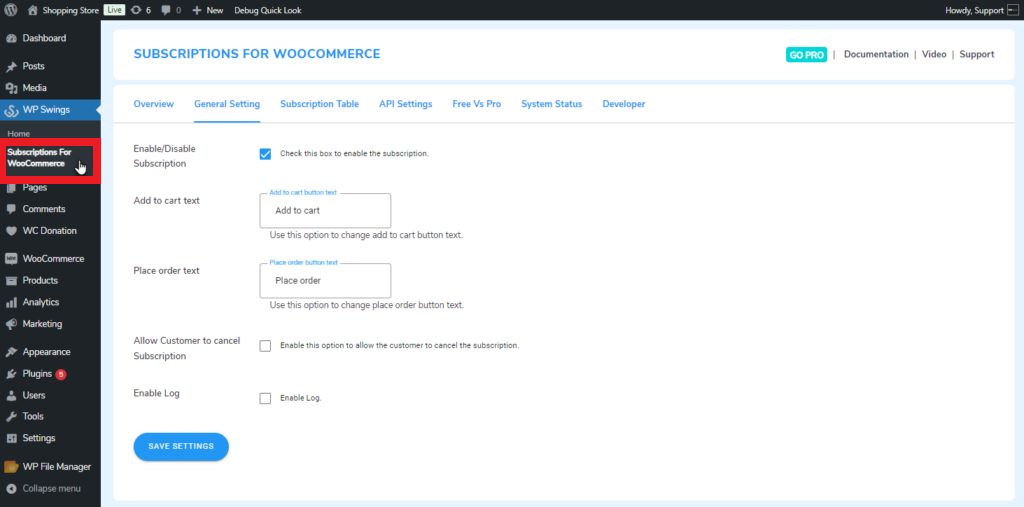
- Once you make a donation subscription, the donation will be mentioned in the WP Swings subscription table. Go to WordPress Admin Dashboard > WP Swings > Subscription For WooCommerce.
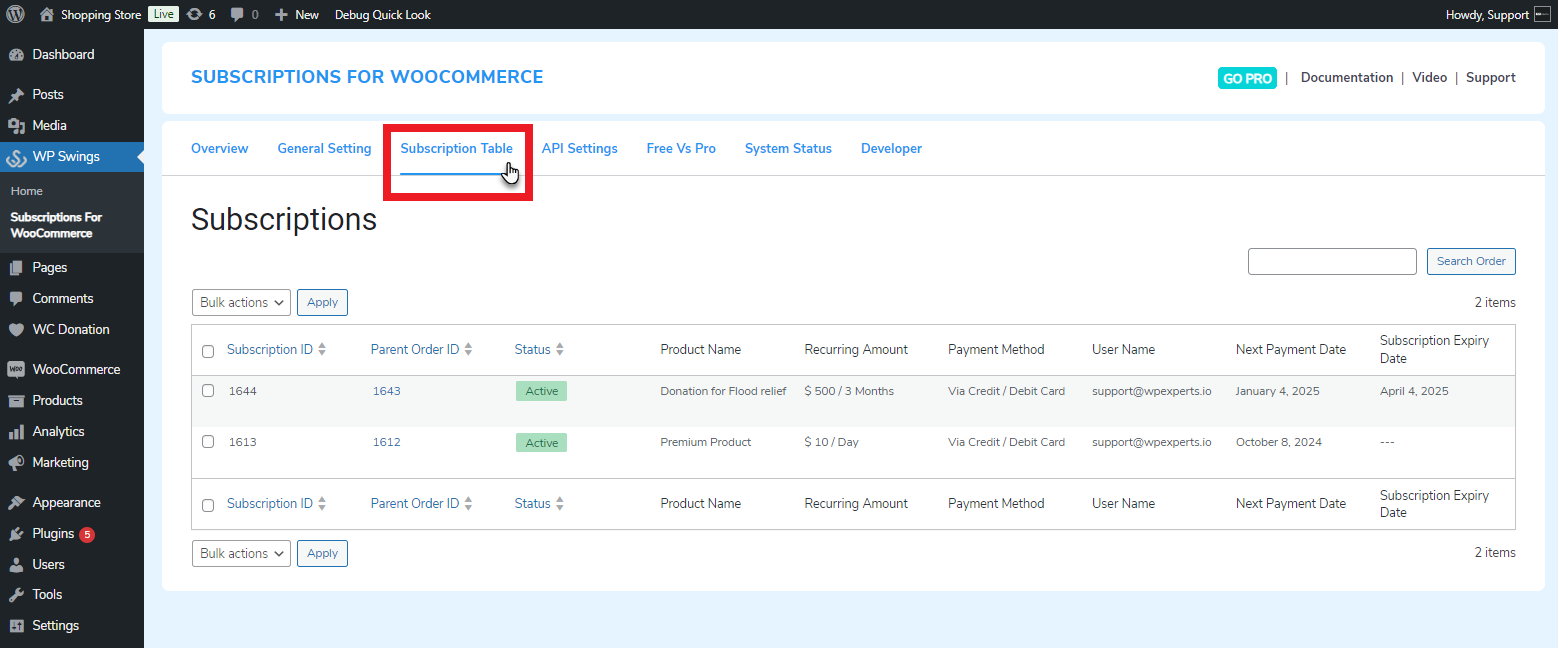
- Go to the Subscription Table to see the Subscription-based donations in it.
This way, you can add recurring donation campaigns to your WooCommerce store using the WooCommerce Subscriptions plugin.
Wrapping Up
Adding WooCommerce recurring donation campaigns to your WooCommerce store is easier than you might think. For this purpose, you can rely on Donation for WooCommerce, a reliable plugin that helps online store owners smartly add recurring donation campaigns according to target audiences’ preferences. Regardless of whether you manage a business that endorses a specific cause, use Donation for WooCommerce to streamline the donation collection processes.
[product_banner index=’1′]