






































 Muhammad Jaffer
Do you think installing WordPress on Ubuntu is daunting? In reality, it’s not. We’ve assisted thousands of people with the query on how to install WordPress on Ubuntu, which becomes muscle memory once you get used to it. We’ll take you through every step of the process—we won’t use any obscure terminology and skip through the “obvious” parts that aren’t so obvious to a beginner.
Why We Recommend Having Ubuntu for WordPress
Look, we have tried every type of hosting. We’ve tried the Windows server, all the Linux distros, and managed hosting—you name it. However, the reason we use Ubuntu for WordPress is that it works better.
Ubuntu is stable, secure, and doesn’t throw random problems out of nowhere. We have seen too many websites go down due to server issues that could’ve been avoided with a sound Ubuntu installation. It is even better when you run it on top of Apache, MySQL, and PHP—the holy WordPress hosting trinity.
The community is outstanding, too. Whenever we have issues (and we do a lot), someone else suffers the same problem and posts the solution online.
What You’ll Need Before We Begin to Learn How to Install WordPress on Ubuntu
We learned this lesson the hard way with our first installations. But you should be prepared before installing WordPress on Ubuntu. It will save you hours. Before we start, ensure you have three necessities:
- Ubuntu Server: Ubuntu 22.04 LTS is our suggestion for WordPress. We use it for most of our projects because of its stability and the years of support it provides.
- Admin Access: You need an account member of the sudo group. We never recommend running as root—it almost always ends in disaster.
- Network Setup: A static IP address and proper firewall configuration that allows HTTP and SSH traffic.
Most server providers can help you get this first setup right if you are worried about this.
11 Simple Steps to Install WordPress on Ubuntu
Quick Summary of Each Step in Installing WordPress on Ubuntu:
|
Step |
Action |
| 1st Step | Update Ubuntu system (sudo apt update && sudo apt upgrade -y) |
| 2nd Step | Install Apache Web Server (sudo apt install apache2) |
| 3rd Step | Install and secure MySQL (sudo apt install mysql-server) |
| 4th Step | Install PHP and required extensions (sudo apt install php…) |
| 5th Step | Download WordPress (wget https://wordpress.org/latest.tar.gz) |
| 6th Step | Move WordPress to the web server directory (sudo mv /tmp/wordpress…) |
| 7th Step | Configure Apache for WordPress (nano /etc/apache2/sites-available/wordpress.conf) |
| 8th Step | Create WordPress database and user (CREATE DATABASE wordpress;) |
| 9th Step | Configure WordPress to connect to the database (wp-config.php) |
| 10th Step | Complete WordPress installation via web browser (http://your-server-ip/wordpress) |
| 11th Step | Log in to WordPress admin and start customizing your site |
Step 1: Getting Your System Ready
First things first, we need to update your Ubuntu system. Consider doing this like preparing your workspace before starting a new project. We always start here because potential bugs from old packages can lead to problems later.
bash

sudo apt update

sudo apt upgrade -y
This might take some time, depending on the updates. Grab a coffee – there is still a long way to go.
Step 2: Installing Apache Web Server
We selected Apache as the foundation of your WordPress site. Thinking why Apache over other web servers? Apache is reliable, well-documented, and works flawlessly with the WordPress echo system.
bash

sudo apt install apache2
Now that Apache is completely installed, we can check it right away. Launch your web browser and type in your server’s IP address. You should visit the Apache2 Ubuntu Default Page. While this may not be exciting, its existence means we are installing WordPress on Ubuntu correctly.
Step 3: Setting Up MySQL Database
Setting up MySQL is the next step in WordPress installation on Ubuntu. WordPress needs somewhere to store your content, user information, settings, and everything else WordPress manages. We depend on MySQL database because it’s fast and reliable, and WordPress also plays well with it.
bash

sudo apt install mysql-server
Once the installation is complete, we need to secure our MySQL installation. We must complete this step for the safety of our website:
bash

sudo mysql_secure_installation
Once the script starts, it will ask you a series of questions about security settings. We recommend answering “yes” to most of them. You will also set a root password; make it strong and write it down somewhere secure.
Step 4: Installation of PHP and required extensions
PHP is what makes WordPress dynamic. When PHP is not running, your site will be static HTML pages. We need PHP, and also several extensions that WordPress uses to support various features:
Put this code to install PHP.
bash

sudo apt install php libapache2-mod-php php-mysql php-curl php-xml php-mbstring php-zip
Let’s check if PHP is working:
bash

php -v
You should get the version number of PHP. If you do, we are ready to move on.
Step 5: Download WordPress
Now the fun part: downloading WordPress. We always download the latest version of WordPress. Utilize WordPress.org to make sure we are always getting clean, unmodified files:
bash

cd /tmp

wget https://wordpress.org/latest.tar.gz

tar -xvzf latest.tar.gz
This code will help download and extract WordPress to a temporary location. We also prefer this method as it provides us with additional organization.
Step 6: Move WordPress to where we want to serve it from
Now we move WordPress to where Apache can serve it to your visitors:
bash

sudo mv /tmp/wordpress /var/www/html/wordpress
Now your files are in the correct location.
Step 7: Apache for WordPress Configuration
Now let’s tell Apache how to handle your WordPress site. For this, the first thing we are going to do is create a configuration file:
bash

sudo nano /etc/apache2/sites-available/wordpress.conf
Then add the below code to the configuration file:
apacheDocumentRoot /var/www/html/wordpress AllowOverride All Require all granted
Now we enable the new site and disable the default site:
bash

sudo a2ensite wordpress.conf

sudo a2dissite 000-default.conf

sudo systemctl reload apache2
Now Apache will serve your WordPress site instead of the page by default.
Step 8: WordPress Database Creation
Next, we need to create a dedicated database for your WordPress site. We will do that and also create a user specifically for WordPress to enhance security:
bash

sudo mysql -u root -p
Enter your MySQL root password and give the following commands:
sql

CREATE DATABASE wordpress;

CREATE USER 'wordpress_user'@'localhost' IDENTIFIED BY 'enter_your_secure_password_here';

GRANT ALL PRIVILEGES ON wordpress.* TO 'wordpress_user'@'localhost';

FLUSH PRIVILEGES;

EXIT;
Be sure to use something strong for ‘enter_your_secure_password_here.’ We always create a separate user for database access and don’t use the root account because it is much more secure.
Step 9: WordPress Database Connection Configuration
The next stage in WordPress installation on Ubuntu is to let WordPress know how to connect to the created database. We will do this by modifying the WordPress configuration file:
bash

cd /var/www/html/wordpress

sudo cp wp-config-sample.php wp-config.php

sudo nano wp-config.php
Locate these lines and modify them with the database information.
php

define( 'DB_NAME', 'wordpress' );

define( 'DB_USER', 'wordpress_user' );

define( 'DB_PASSWORD', 'your_secure_password' );

define( 'DB_HOST', 'localhost' );
Ensure that the provided information in the above code matches your MySQL setup.
Step 10: Completing the Installation of WordPress on Ubuntu
This is it! Open up a web browser and go to:
http://your-server-ip/wordpress
You should see the WordPress installation screen.
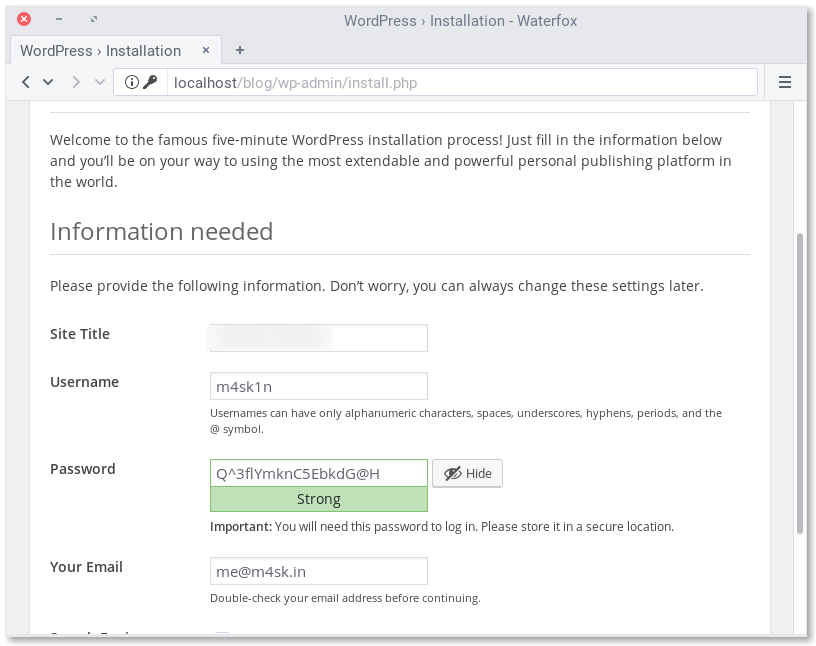
We like this part the best because it means that everything we have done so far is working.
Follow the prompts for:
- Your site title
- Admin username (do not use “admin” – too easy for a hacker to guess)
- A strong password
- Your email address
Hit “Install WordPress” and you are done with the technical portion of the installation!
Step 11: Explore Your Just-Installed WordPress Site
Once the installation is complete, you will see the login screen. Enter your admin user to access the WordPress dashboard.
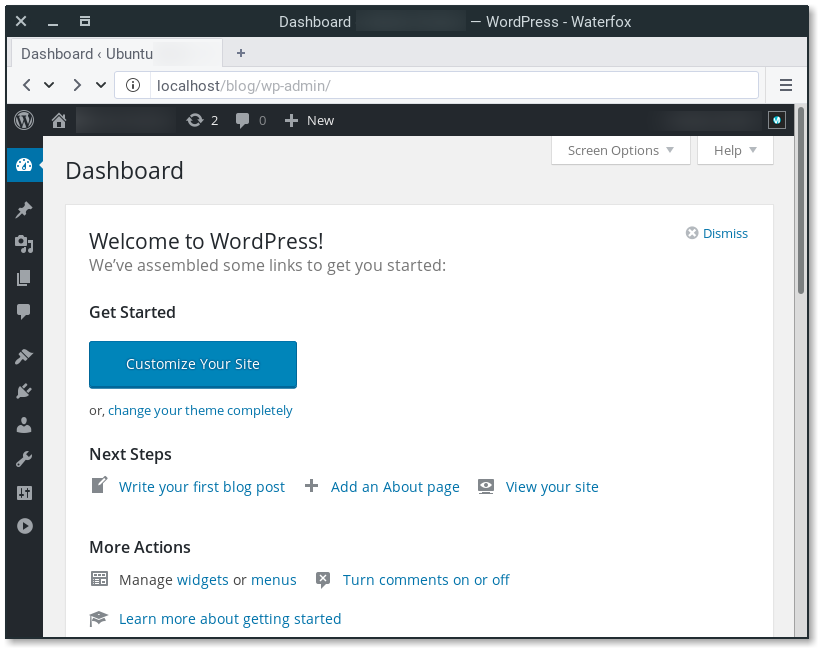
Now that you have logged in to the WordPress dashboard, install themes, add plugins, and start adding content.
Security Best Practices After Installing WordPress on Ubuntu: We Live By
Now that your site is open for business, we recommend following some security best practices:
- Keep WordPress, the themes, and plugins current
- Use strong passwords on all accounts
- Install a security plugin such as Wordfence
- Backup your site and database regularly
- Consider adding SSL certificates for HTTPS
What’s Next After WordPress Installation on Ubuntu?
Congratulations! With Ubuntu backing WordPress, you now have another layer of control over your hosting environment. All you need to do now is configure things to your liking and know that the environment is yours.
From here, you can:
- Install and configure your themes
- Install plugins that add functionality
- Publish your content
- Optimize performance as your website evolves
How to Install WordPress on Ubuntu: Final Thoughts
Although this can seem overwhelming at first, remember that every expert was once a beginner. We have guided hundreds of people in installing WordPress on Ubuntu. And it is certainly possible—just be patient!
The beauty of this situation is that you now have a rock-solid base from which to run WordPress. As an OS, Ubuntu provides the stability you need to run a successful site. Apache will handle the web serving, MySQL stores your data securely, and PHP powers the dynamic functionality of the site.
This combo is proven and can scale from a personal blog to a high-traffic business-level site.
We will also continue to find new optimizations and improvements along the way. That is the beauty of working with WordPress on Ubuntu: you will learn as you go! The power is now in your hands to produce something from nothing, so get going!
As WordPress experts, we have developers who can solve any problem you face during WordPress installation on Ubuntu. Contact WPExperts for any query or issue, and easily install WordPress on Ubuntu.