








































 Muhammad Jaffer
Do you own an online B2C store? So, you must be worried about why not all of your visitors make a purchase. They may want to request a quote, ask for custom pricing, or make a bulk purchase. That’s why you must convert your regular store and have a “Request a Quote” feature.
The Request a Quote system makes it very easy. It allows your visitors to request a custom quote on things they are interested in buying. Hence, it increases your sales. So, here’s the article you need on how to create a “Request a Quote” system in WooCommerce.
[product_banner index=’1′]
Why Should I Add or What are the Benefits of Adding a Request a Quote System in my WooCommerce Store?
Converting your WooCommerce store to a quote-getting destination for your visitors offers numerous advantages:
Gives You Pricing Flexibility
A quotation system enables you to price depending on the customer and the amount ordered. You can offer a discount depending on the amount, a customer’s loyalty level, or the urgency of the order. This will give you the freedom to offer a rate that is not too expensive for some customers. And maybe too little for some, and you get the maximum profit.
Increases Better Customer Relationships
When customers request a quote, you start a conversation and do not rush to process the transaction. Such back-and-forth helps you get to what they actually need, address their concerns, and make yourself seem helpful rather than just another online store. Businesses that take the time to work personally with the customer are remembered.
Works Perfectly for B2B and Wholesale
Business buyers infrequently buy in the same manner as regular consumers. They require purchase orders, net payment terms, and approval from different departments before spending the company’s money. A quote system naturally accommodates all of these things: you can discuss terms, adjust quantities, and formalize everything before making an actual order.
Captures Interest Before
Sometimes, some customers land on your site who want to buy but aren’t quite ready yet. Possibly, they are considering options, pausing for budget approval, or asking their spouse. Without a quote function, customers like this will leave your site and hopefully never come back. But with quotes, you can capture their interest and gather their information—a chance to follow up on the sale down the road.
Assists In Market Understanding
Each quote request contains valuable information for you. You get to know your products in terms of interest, where people are showing interest in specific price points, and what more information you need to develop the products for purchase.
Comprehensive Step-by-Step Guidelines on Creating a ‘Request a Quote’ Feature in WooCommerce
Well, let’s move on to the steps on how you can build the Request a Quote functionality on your own. You need WooCommerce with the B2B Request a Quote plugin. It is really very easy to handle and incorporate the requisite components.
[product_banner index=’1′]
Step 1: Installing the B2B Request a Quote plugin
- Downloading the WooCommerce add-on: Go to WPExperts.io’s store page, find the B2B Request a Quote extension for WooCommerce. Make the purchase and simply download the plugin ZIP file.
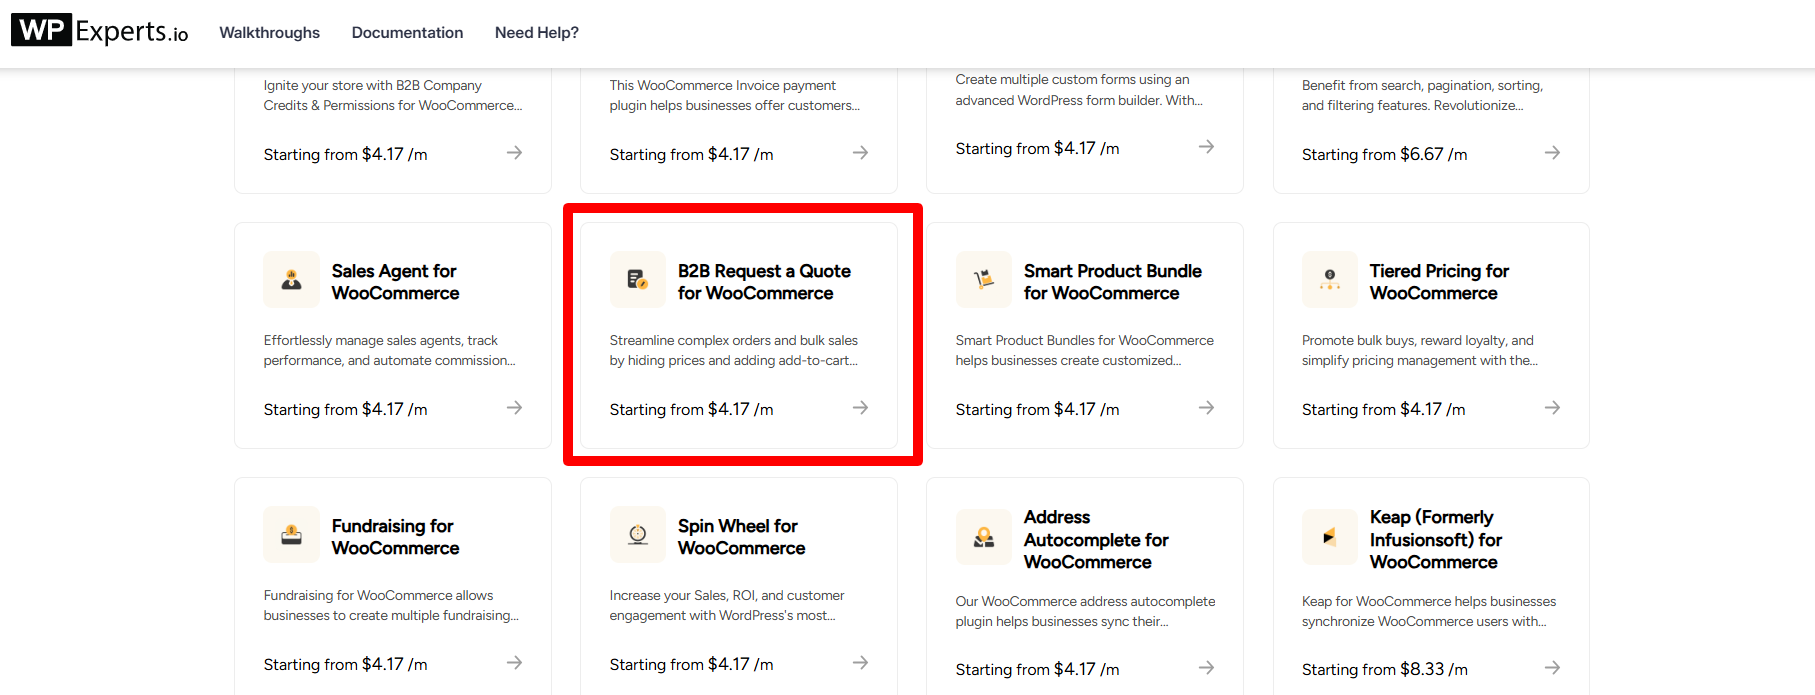
- Now installing: “WordPress dashboard” > “Plugins” > “Add New” to install a new plugin.
- Upload the Plugin: Click the “Upload Plugin” button, select the downloaded ZIP file, then click “Install Now”.
- Activate: Installation done? Activate the extension and get ready to configure.
Step 2: Configuring the Plugin
After installing the plugin, a new menu item named Request a Quote has been added to your WordPress dashboard. Here, you can set up settings for your quote system.
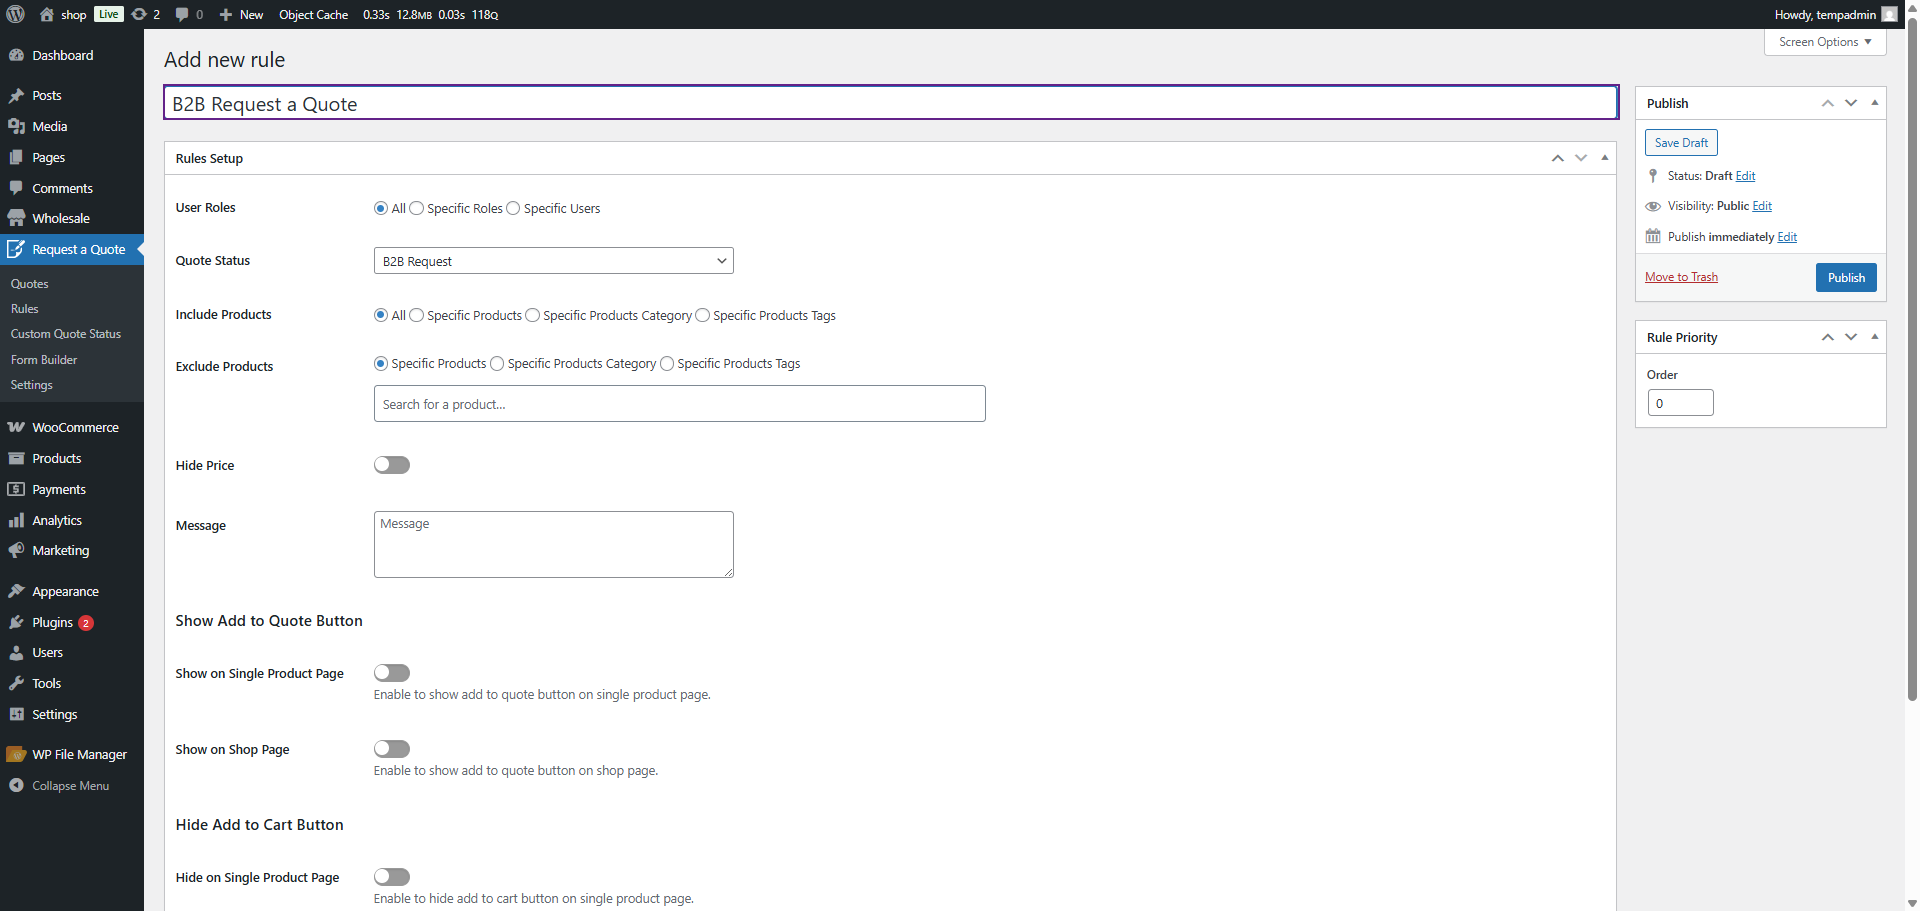
- Set Up Quote Rules: Rules can be created for who is allowed to make quote requests for which products. It decides whether all users can make quote requests or only specific ones.
- Make a Rule: Navigate to Request a Quote > All Rules > and click ‘Add Rule’ to create a new rule based on your needs.
Step 3: Customize the Quote Request Form
Now, we’ll customize the quote request form. The quote request form is the one customers use when they want a quote for a given product.
- Go to Request a Quote → Form Builder.
- On your screen, you will see a ‘drag and drop’ form builder interface. Using that interface, you will be able to add fields such as customer name, email address, product quantity, and any other information you might want.
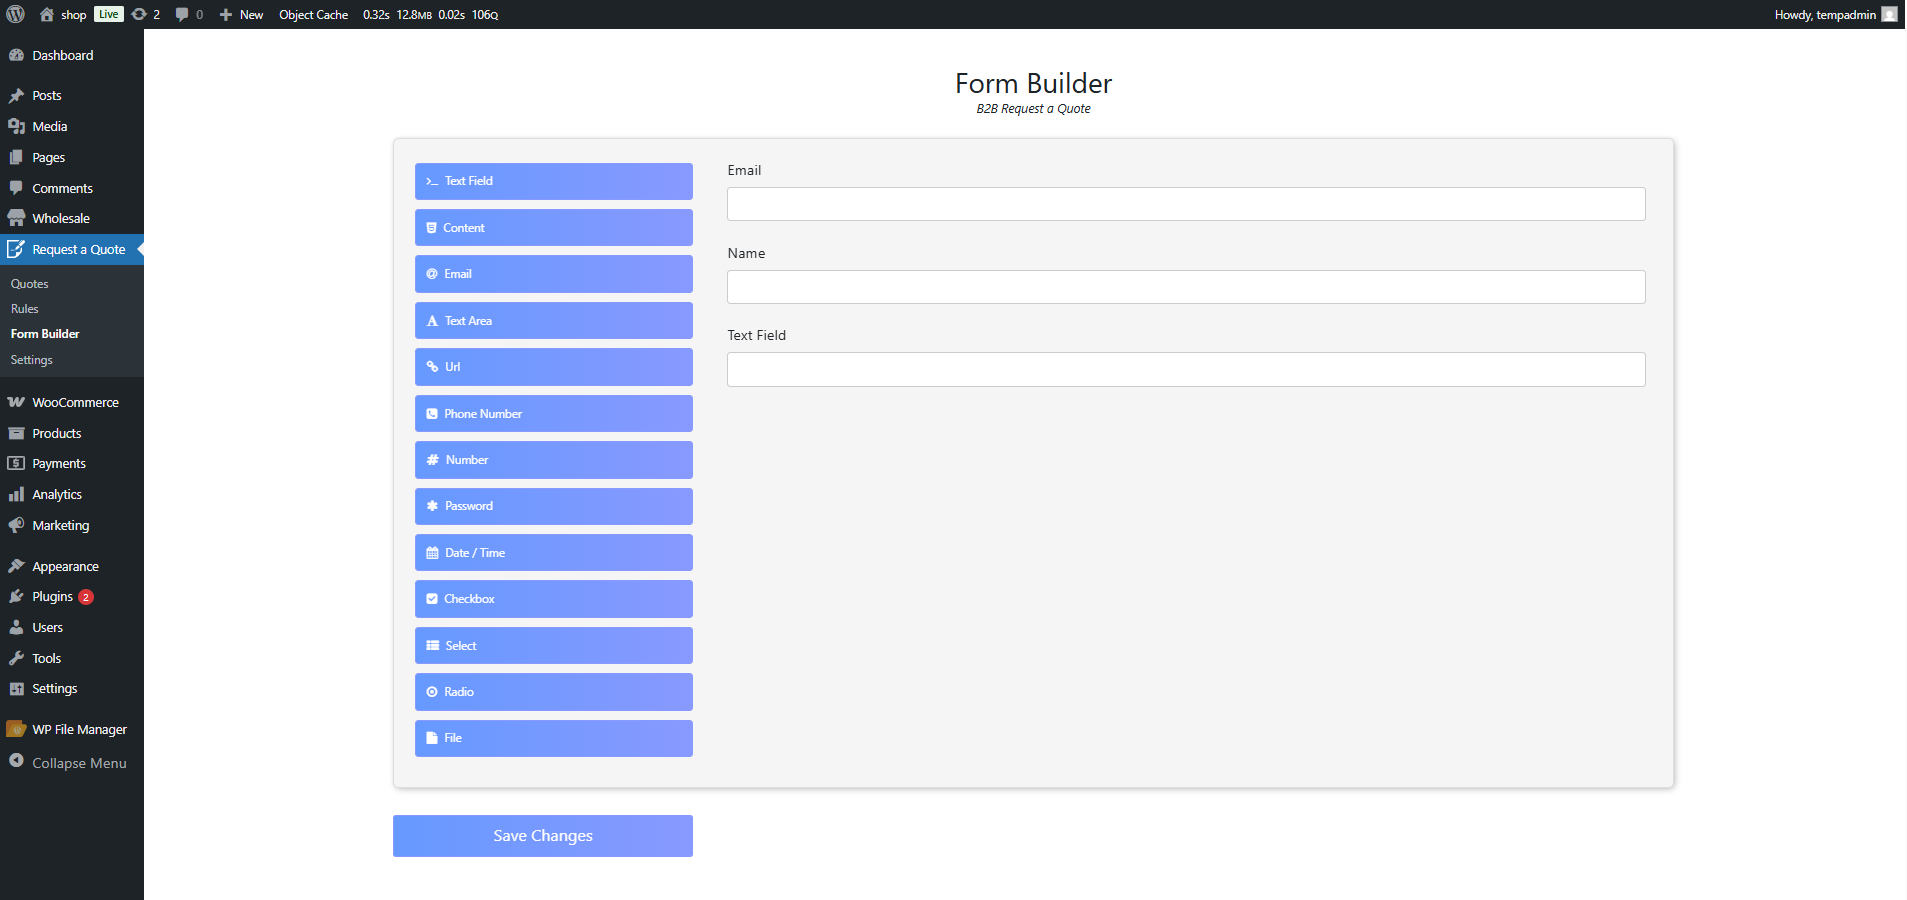
- Once you are satisfied with your form, you can click ‘Save Changes’.
Step 4: Add the “Add to Quote” Button
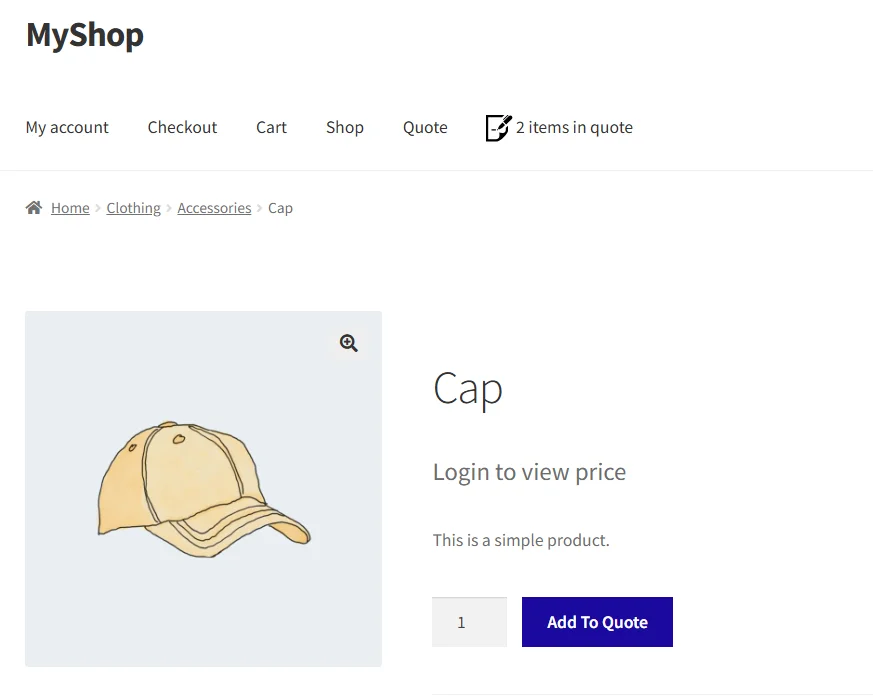
One distinct element of a request-a-quote system is the “Add to Quote” button. Using this get a quote button, customers can add products to their quote cart in much the same way that they can use the ‘Add to Cart’ button for regular purchases.
And they can also:
- Display on Product Pages: The “Add to Quote” button can be made functional on the product page, or even on the shop page.
- Hide the Add to Cart Button: You can select to hide the traditional Add to Cart button in favor of the Add to Quote button, if you wish.
Step 5: Configuring Quote Statuses & Notifications
Handling quote requests can become simpler when you can monitor them by status. You can also configure alerts to notify you about new quote requests.
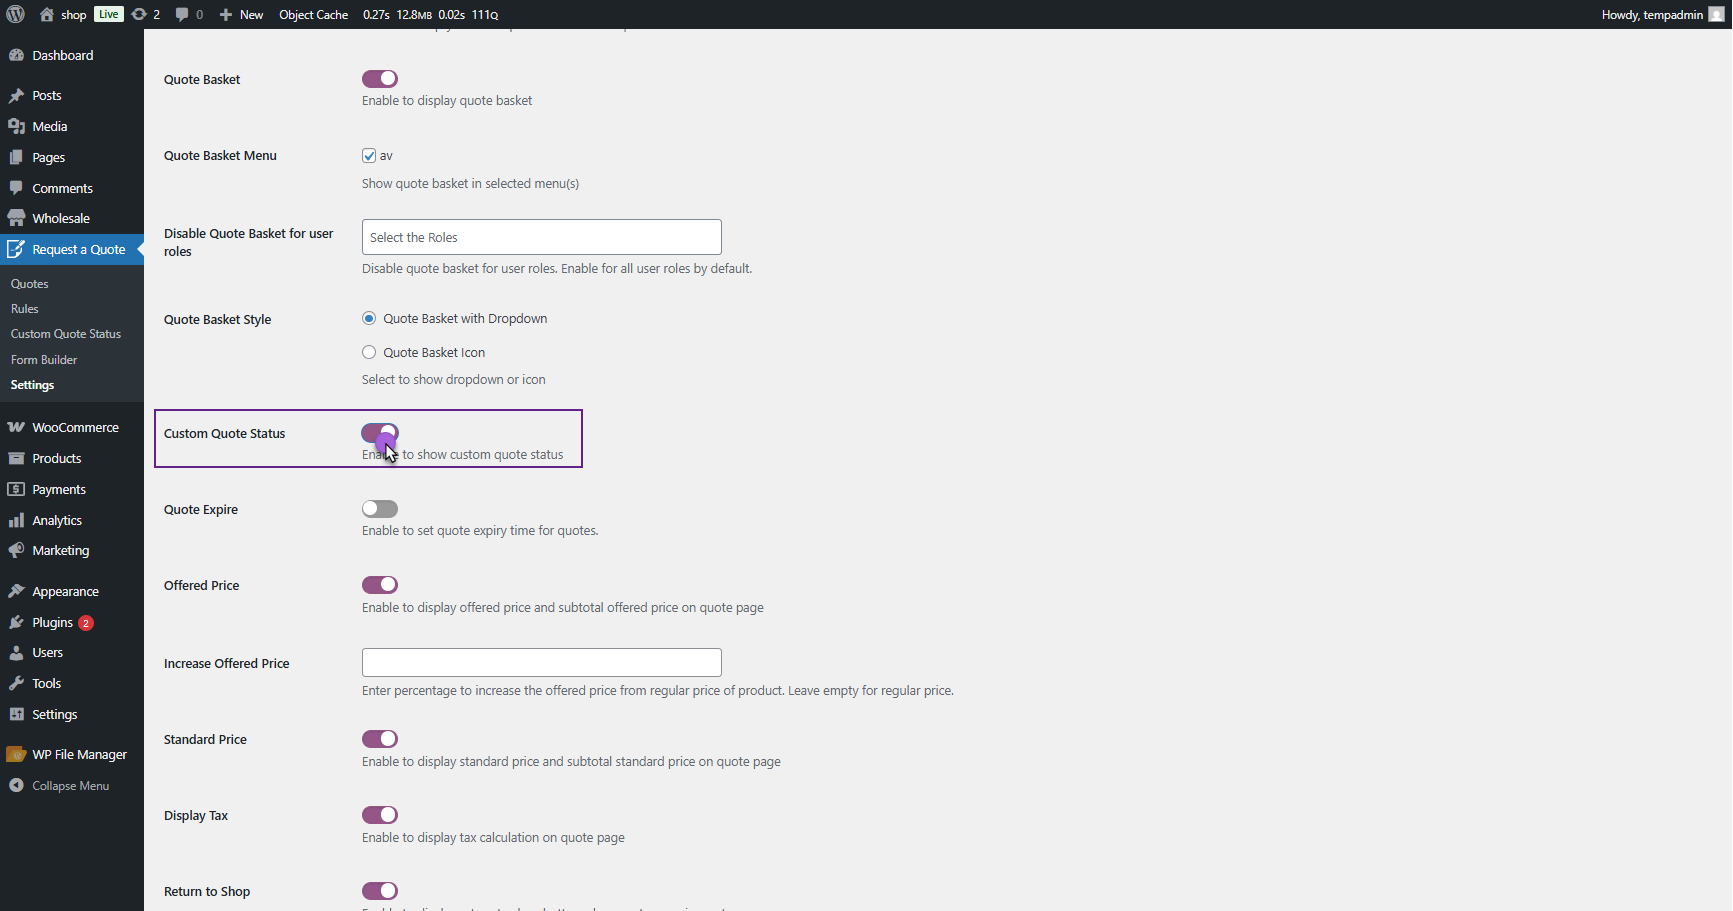
- Quote Statuses: Create statuses for quotes that would be “Pending,” “Accepted,” or “Rejected.”
- Email Notifications: Use email notifications to notify yourself and the client whenever a quote request is placed or a quote status changes.
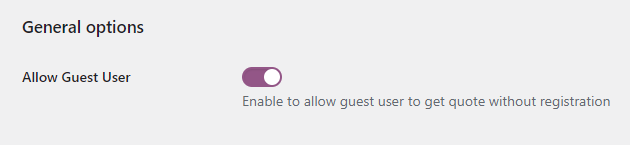
Step 6: Provide the Guest Users with the Capability of Requesting Quotations
You can activate this feature so that customers who don’t have an account yet on your site can request quotes. Such features make it easier for potential customers to contact you, even without an account yet.
Step 7: Build a Quotes List Page
Now you’ll need a page for customers to view all the quotes they requested. Here’s how you set it up:
- Create a New Page: In WordPress, go to Pages and create a new page titled “My Quotes.”
- Add the Shortcode: Add the [wc-quote-request-page] shortcode to show all quotes from the page.
- Customize the Page: You can personalize the page to your liking, matching your store’s theme.
Step 8: Expiry Dates for Quotes
Expiration dates can be set to ensure quotes do not last forever. A date of expiration creates a deadline and, hence, some urgency for customers to act.
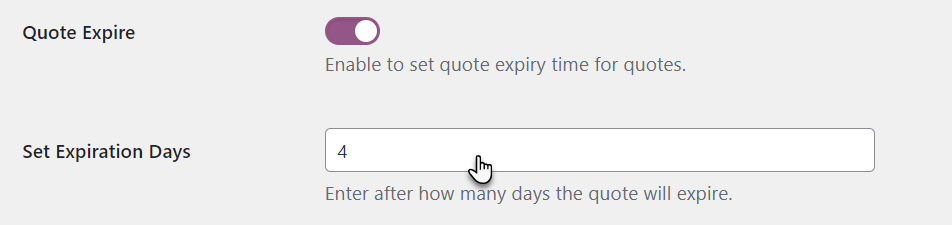
After the quote expires, its status will automatically change to “Expired,” so customers know it has no further value.
Step 9: Export and Manage Quotes
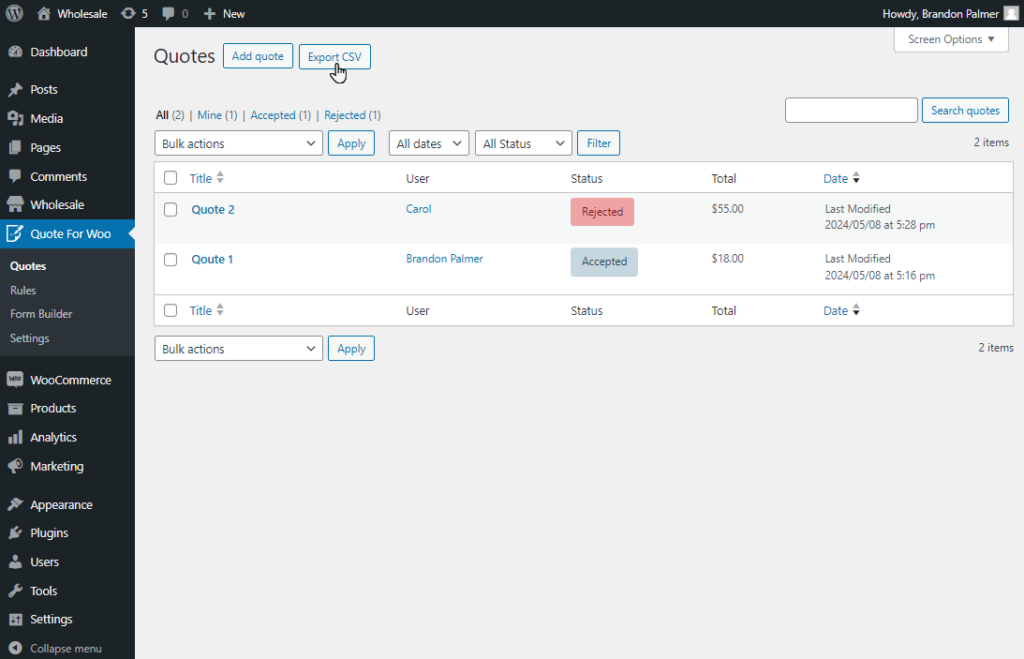
Finally, to organize all your quotes, you can also export them into a CSV format.
- In your dashboard, go to “Request a Quote” > “Quotes.”
- Use the Export CSV button to download all the quote details and keep them organized.
Step 10: You can Contact Us Anytime for Support
If you need any help or have questions, do not hesitate to contact us about our custom WooCommerce development services. Alternatively, you can refer to the B2B Request a Quote documentation that we provide.
Final Words
Including a ‘Request a Quote’ option on your WooCommerce website can be an excellent way to give customers more flexibility. When you get quotes for bulk purchases or want to offer customized quotes to your customers, this quotation system will make you perform these operations efficiently.
By following these steps, you can quickly set up your quotation facility, enabling you to provide customized services to your customers. They’ll surely come back to your website again and again.
So, what do you have to wait for now? Install the B2B Request a Quote system today and convert more leads to sales.
[product_banner index=’1′]