


































 Muhammad Jaffer
Do you wish to start an online business with minimal costs? Or do you plan to convert your WordPress blog into an amazing ecommerce store? Installing WooCommerce on WordPress is the best thing you can ever do for your ecommerce venture.
If you are a complete newbie or a seasoned WordPress developer, today we will walk you through every step it takes to install WooCommerce on WordPress. Let us begin this WooCommerce tutorial and watch how you can build your online store from scratch.
What is WooCommerce and Why Use It
Launched in late 2011, WooCommerce has now become the world’s most popular WordPress ecommerce plugin. It literally powers more than 28% of all online stores. And the best part, installing WooCommerce is free, and it is fully customizable.
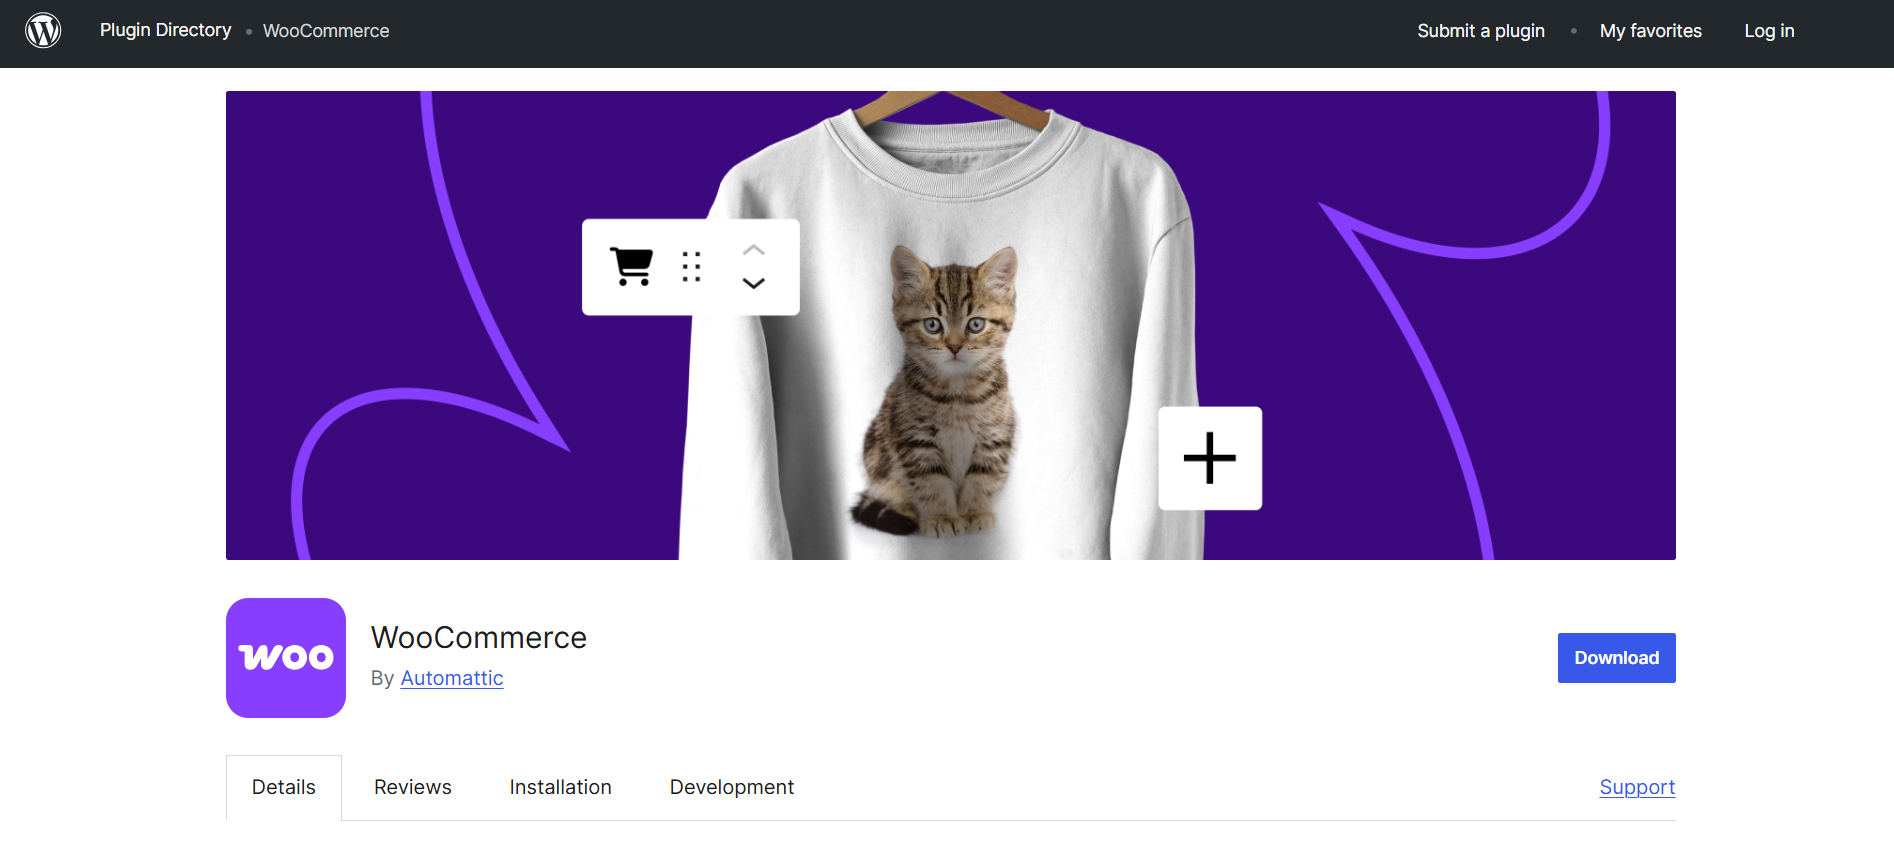
On top of that, with thousands of WooCommerce extensions available, managing an e-commerce site is as easy as can be. With no further ado, let’s dive right into this WooCommerce tutorial.
Here are the reasons why you may love WooCommerce:
- Affordable: The base plugin is absolutely free.
- Totally customizable: Thousands of themes and add-ons to choose from.
- SEO friendly: Being WordPress-based, it excels in SEO features.
- Scalable: Adapts to your business from small shops to big business operations.
- User-friendly: Simple-to-use interface that is simple to manage.
Requirements Before Setting Up WooCommerce: What You Need Before You Begin
Prior to beginning this WooCommerce tutorial, ensure that you have:
- A WordPress website: Your website needs to be on WordPress 6.0 or the latest WordPress version.
- Web hosting: A Good web hosting company that supports WordPress.
- Domain name: Your own web address.
- SSL certificate: Required for secure transactions (most hosts include it free of charge).
- Admin access: Full admin access to your WordPress site.
Ensure you have all these basics.
11 Easy Steps to Set Up a WooCommerce Store on WordPress
Step 1: Begin by Installing the WooCommerce Plugin
The initial step to having WooCommerce set up on WordPress is plugin installation. This is a simple step and will only take a few minutes.
Installing WooCommerce:
- Log in to your WordPress dashboard with your admin login.
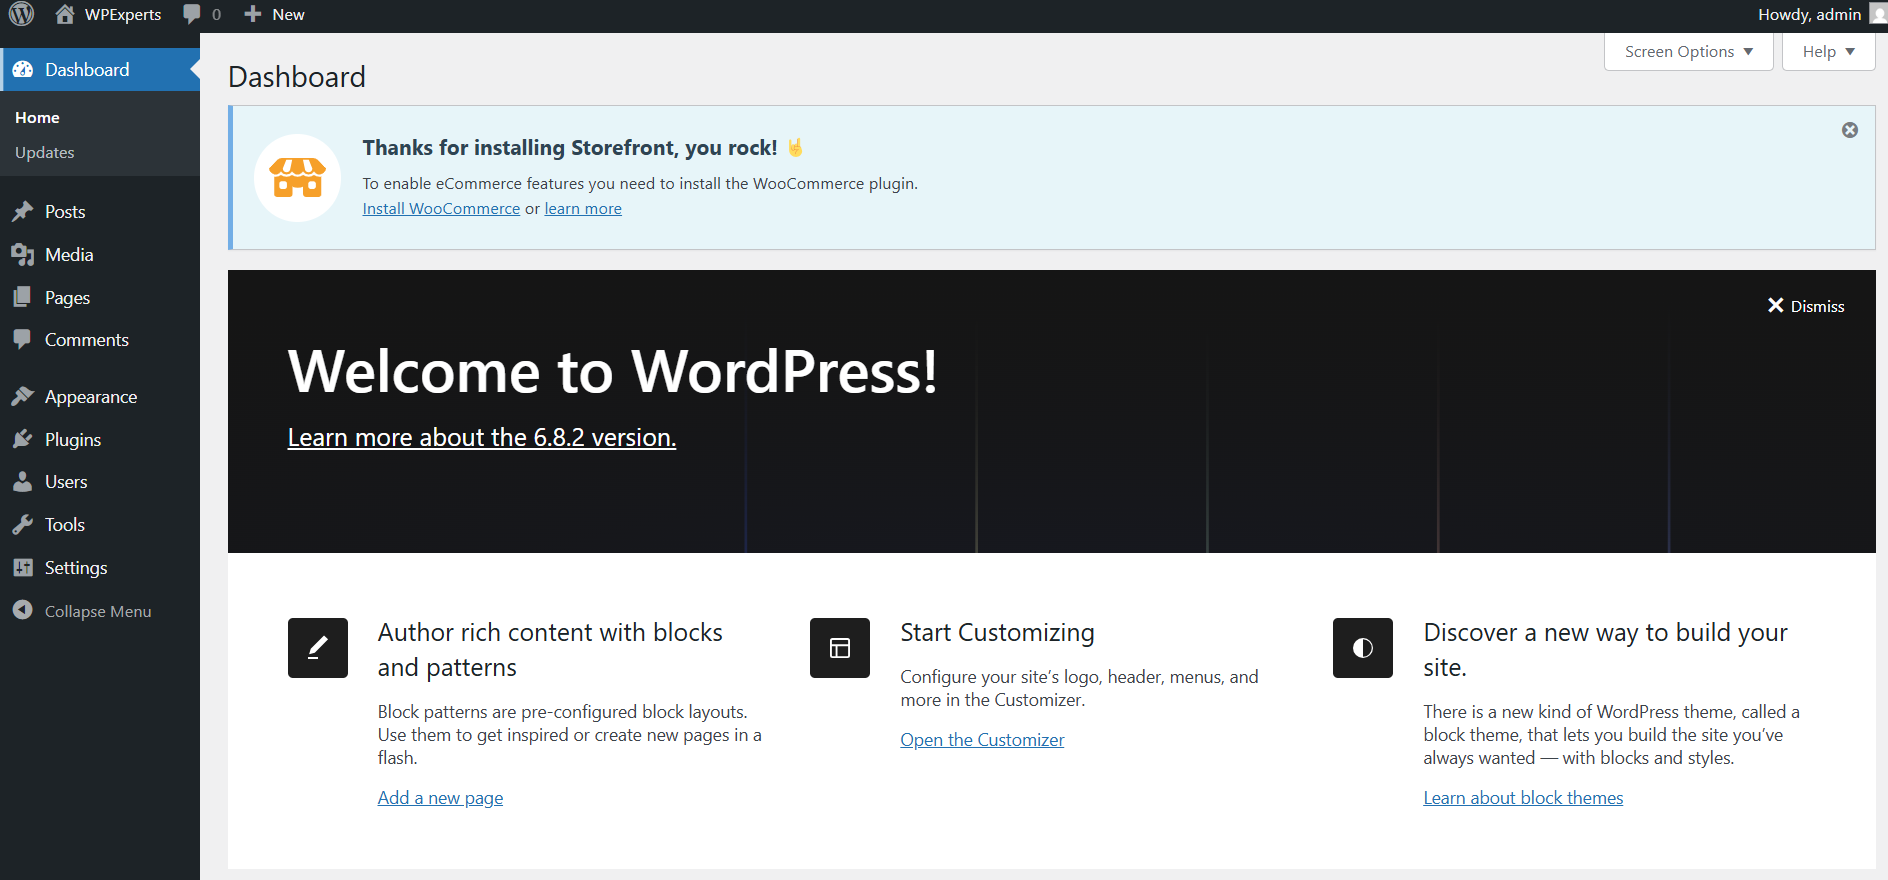
- Go to Plugins > Add New in the left-hand menu.
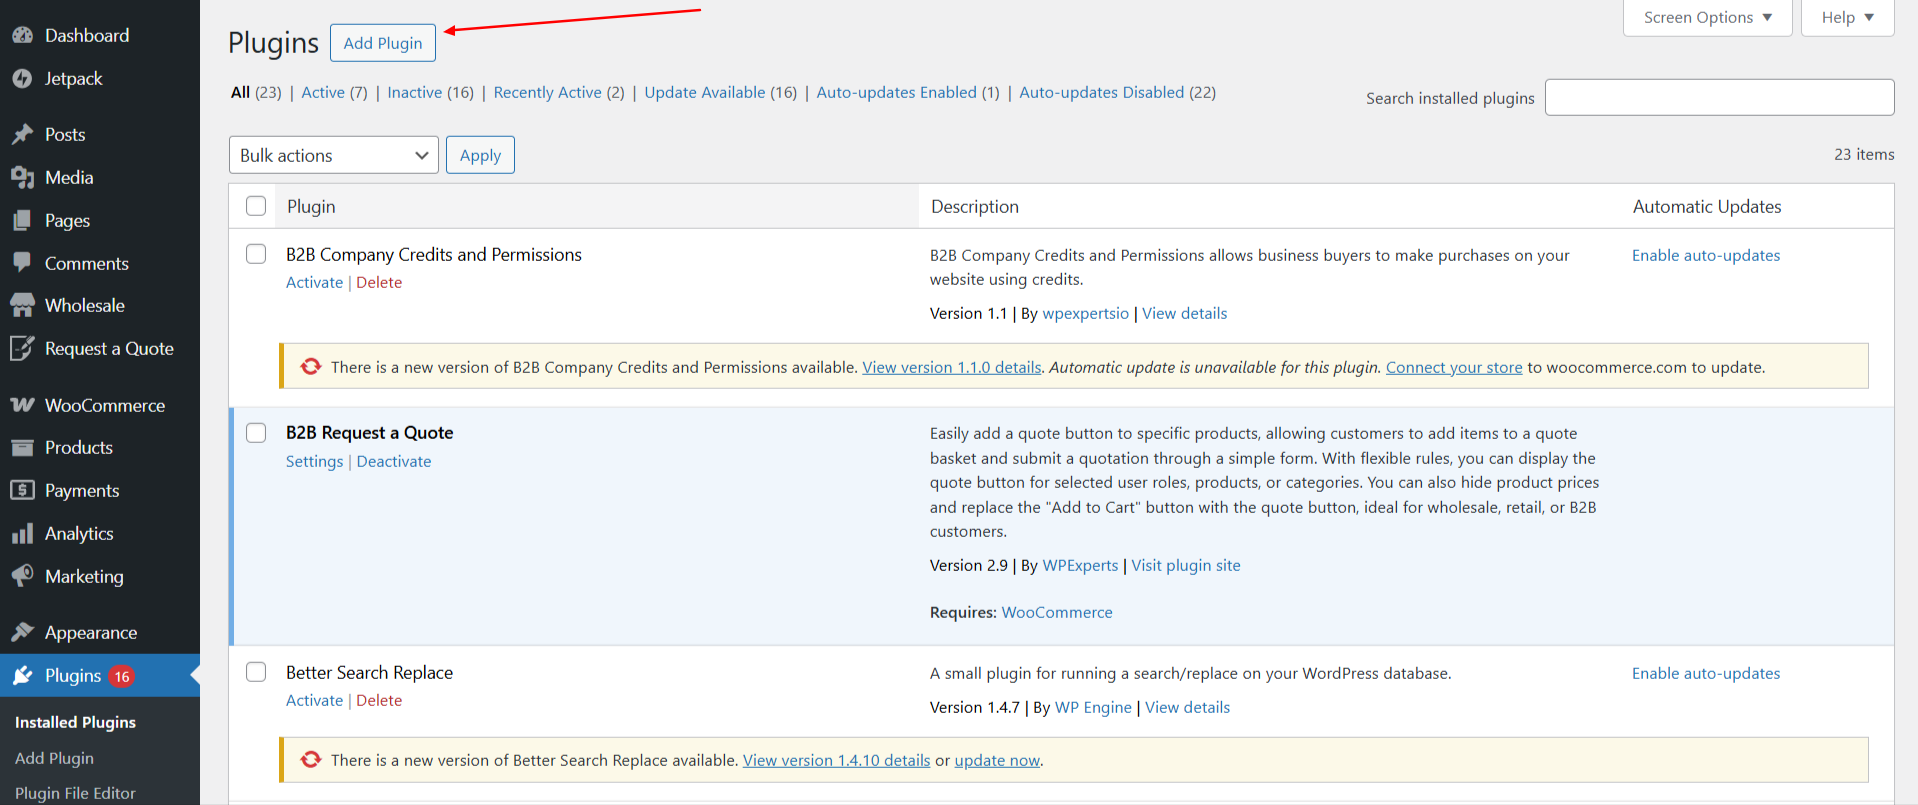
- Enter “WooCommerce” in the search box in the top right.
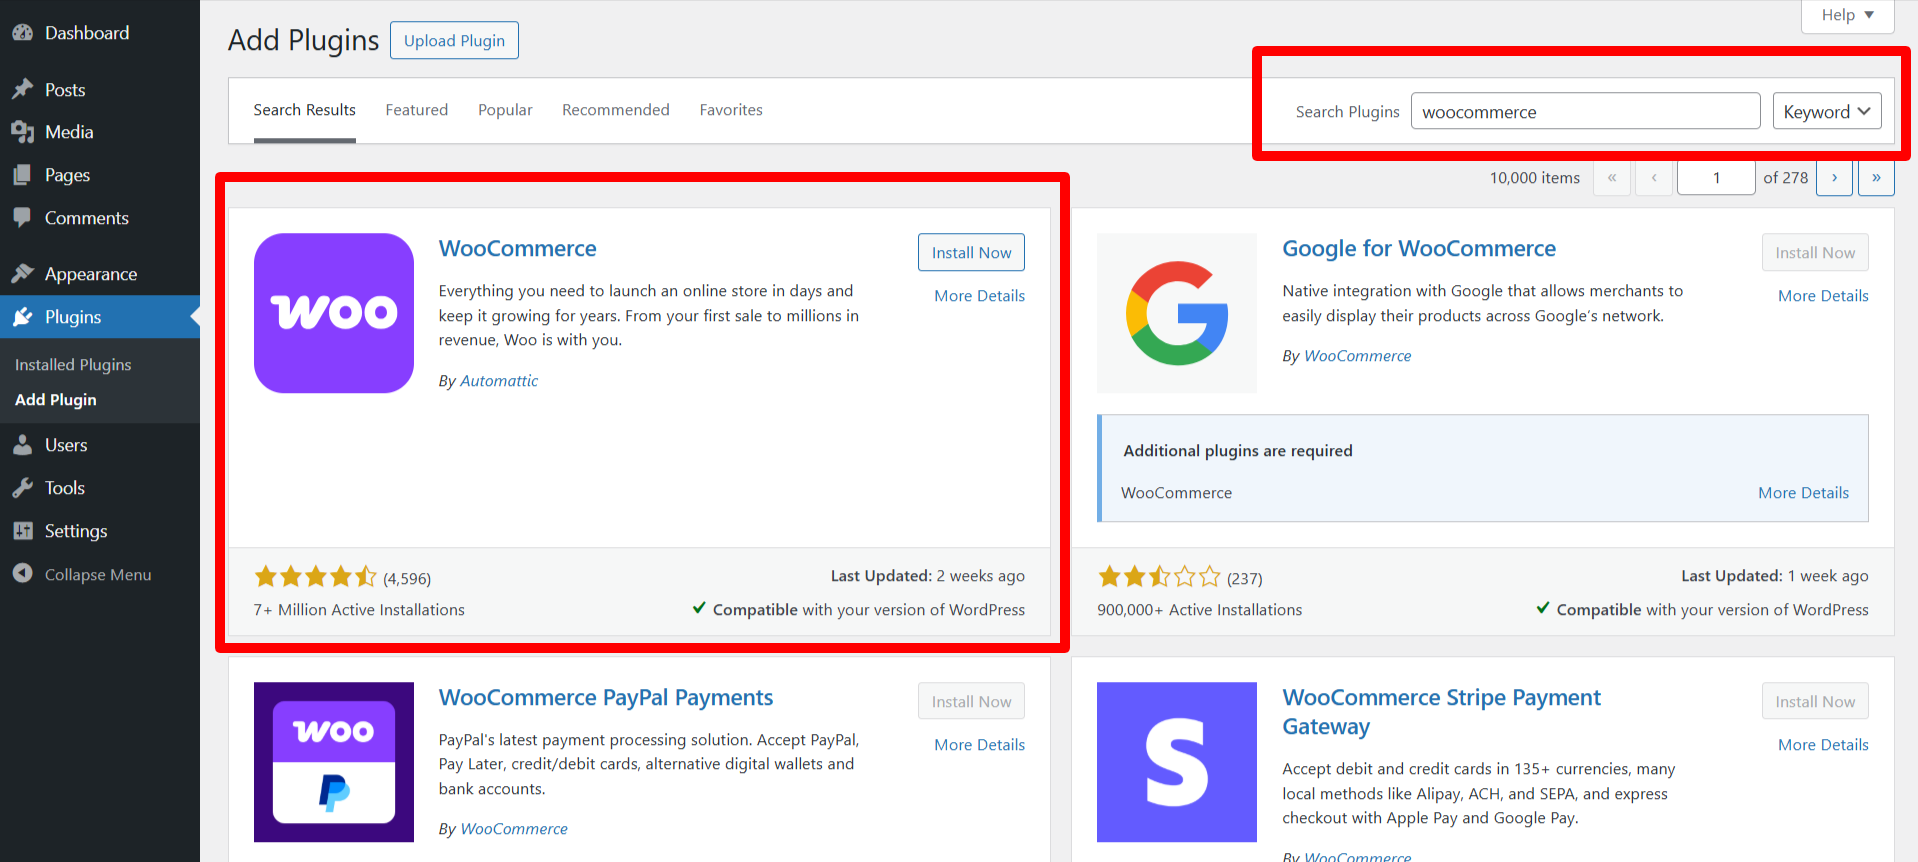
- Click “Install Now” to the right of the WooCommerce plugin by Automattic.
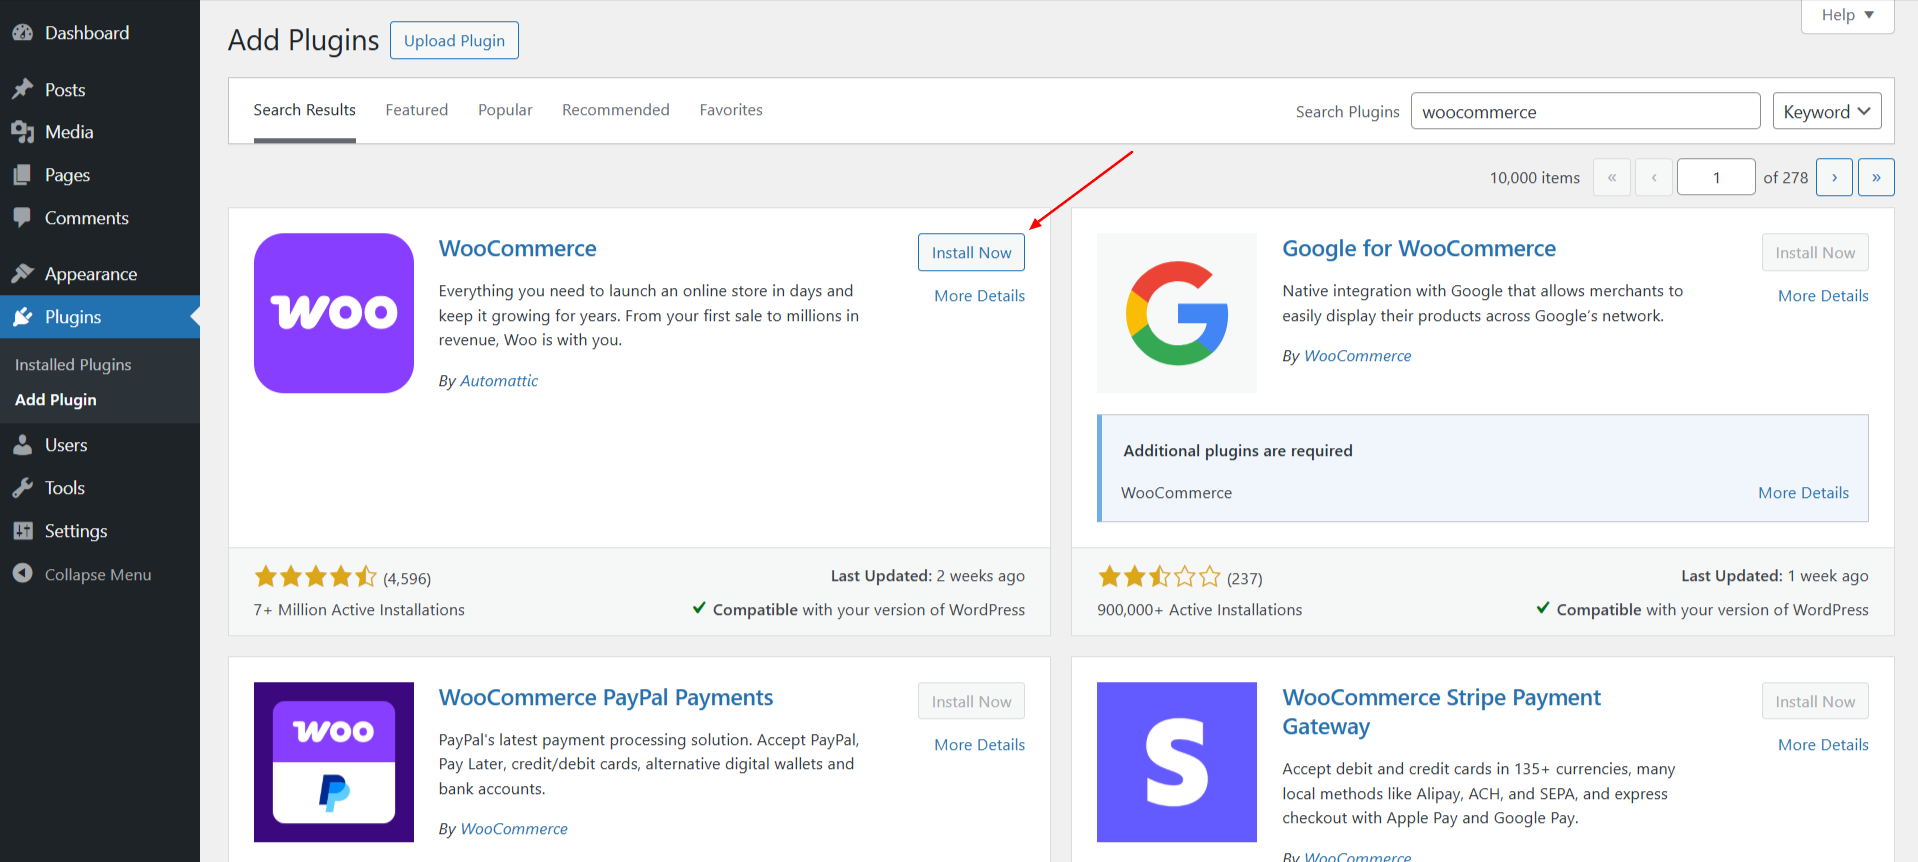
- Activate the plugin when installed.
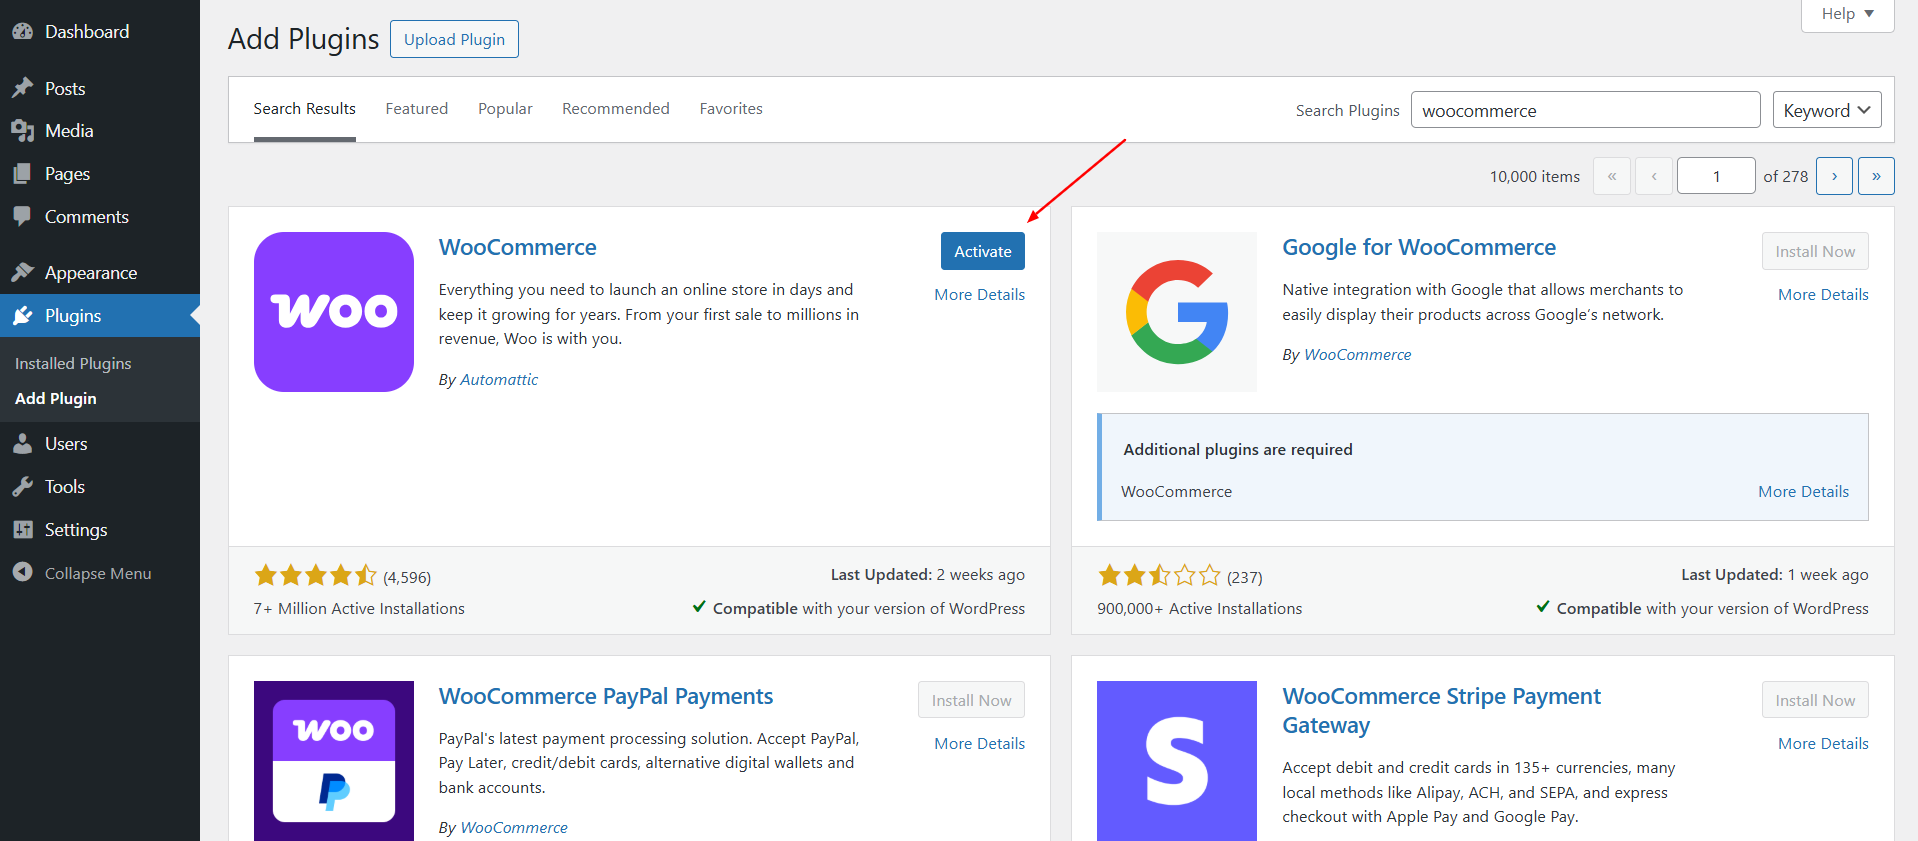
The moment you install it, go to the WooCommerce tab and start working through the series of setups. You’ll notice there is a new “WooCommerce” menu item that now shows on your WordPress dashboard – that’s your gateway to operating your web store.
Step 2: WooCommerce Setup Wizard Completion
When you activate WooCommerce, its setup wizard will be launched.
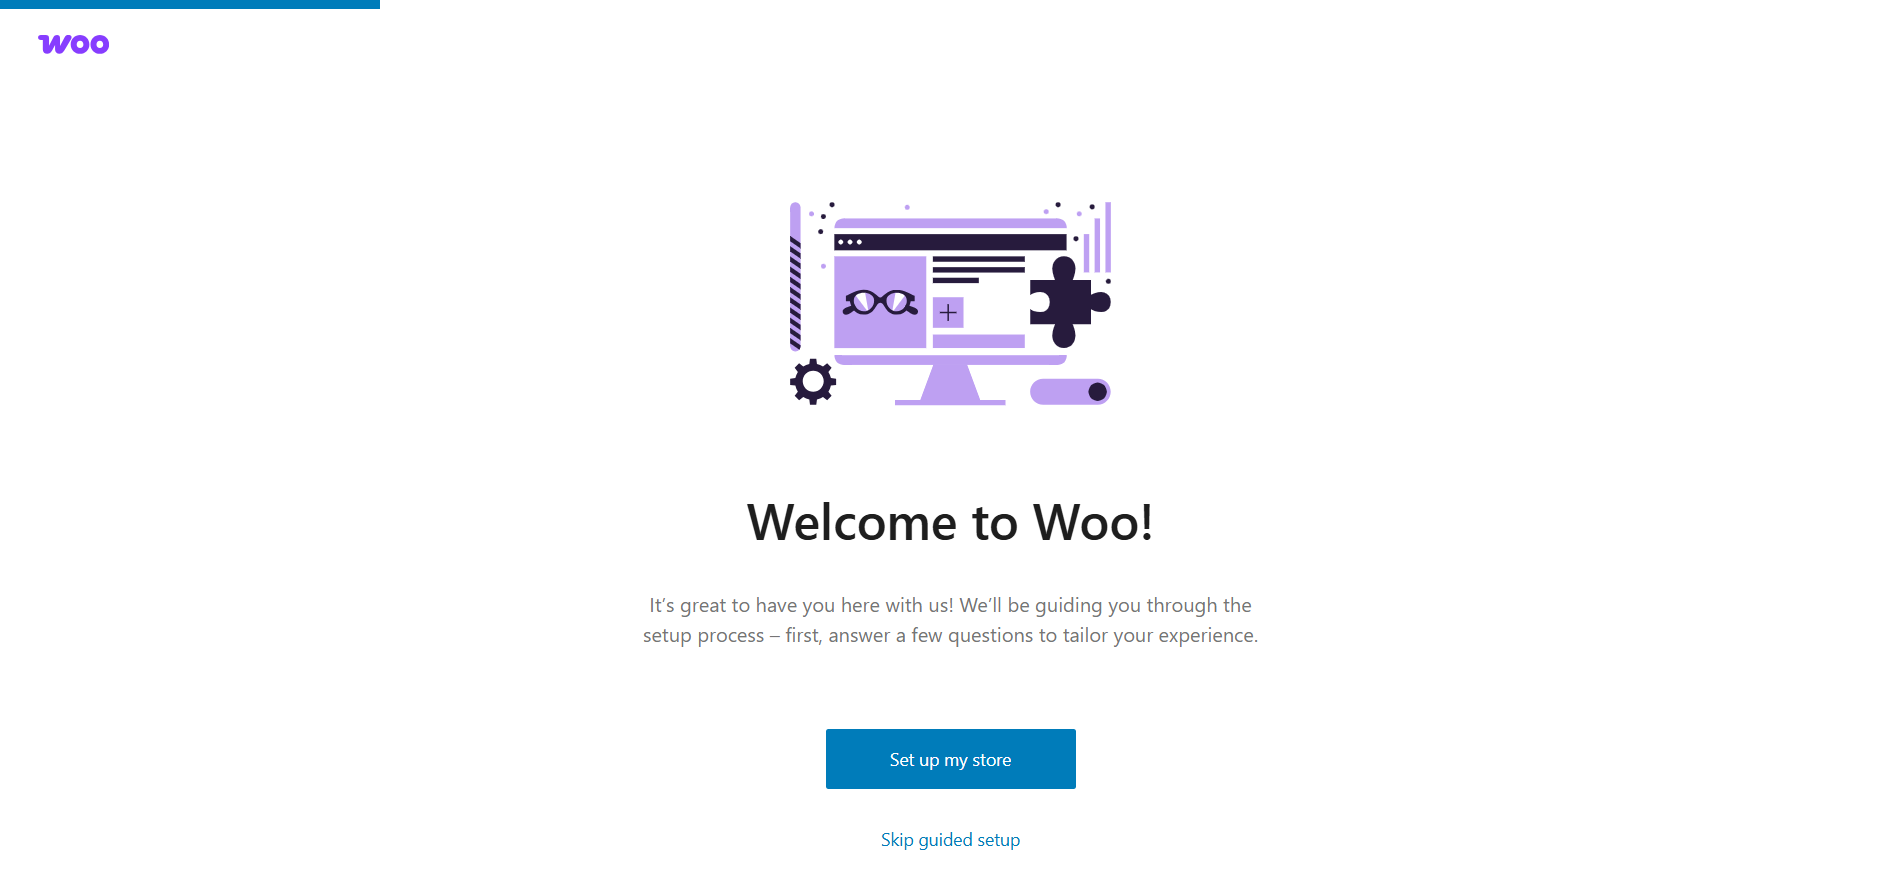
The wizard guides you through a step-by-step process for setting up your store’s initial settings easily and effectively.
— Setup Wizard Steps
Store Details:
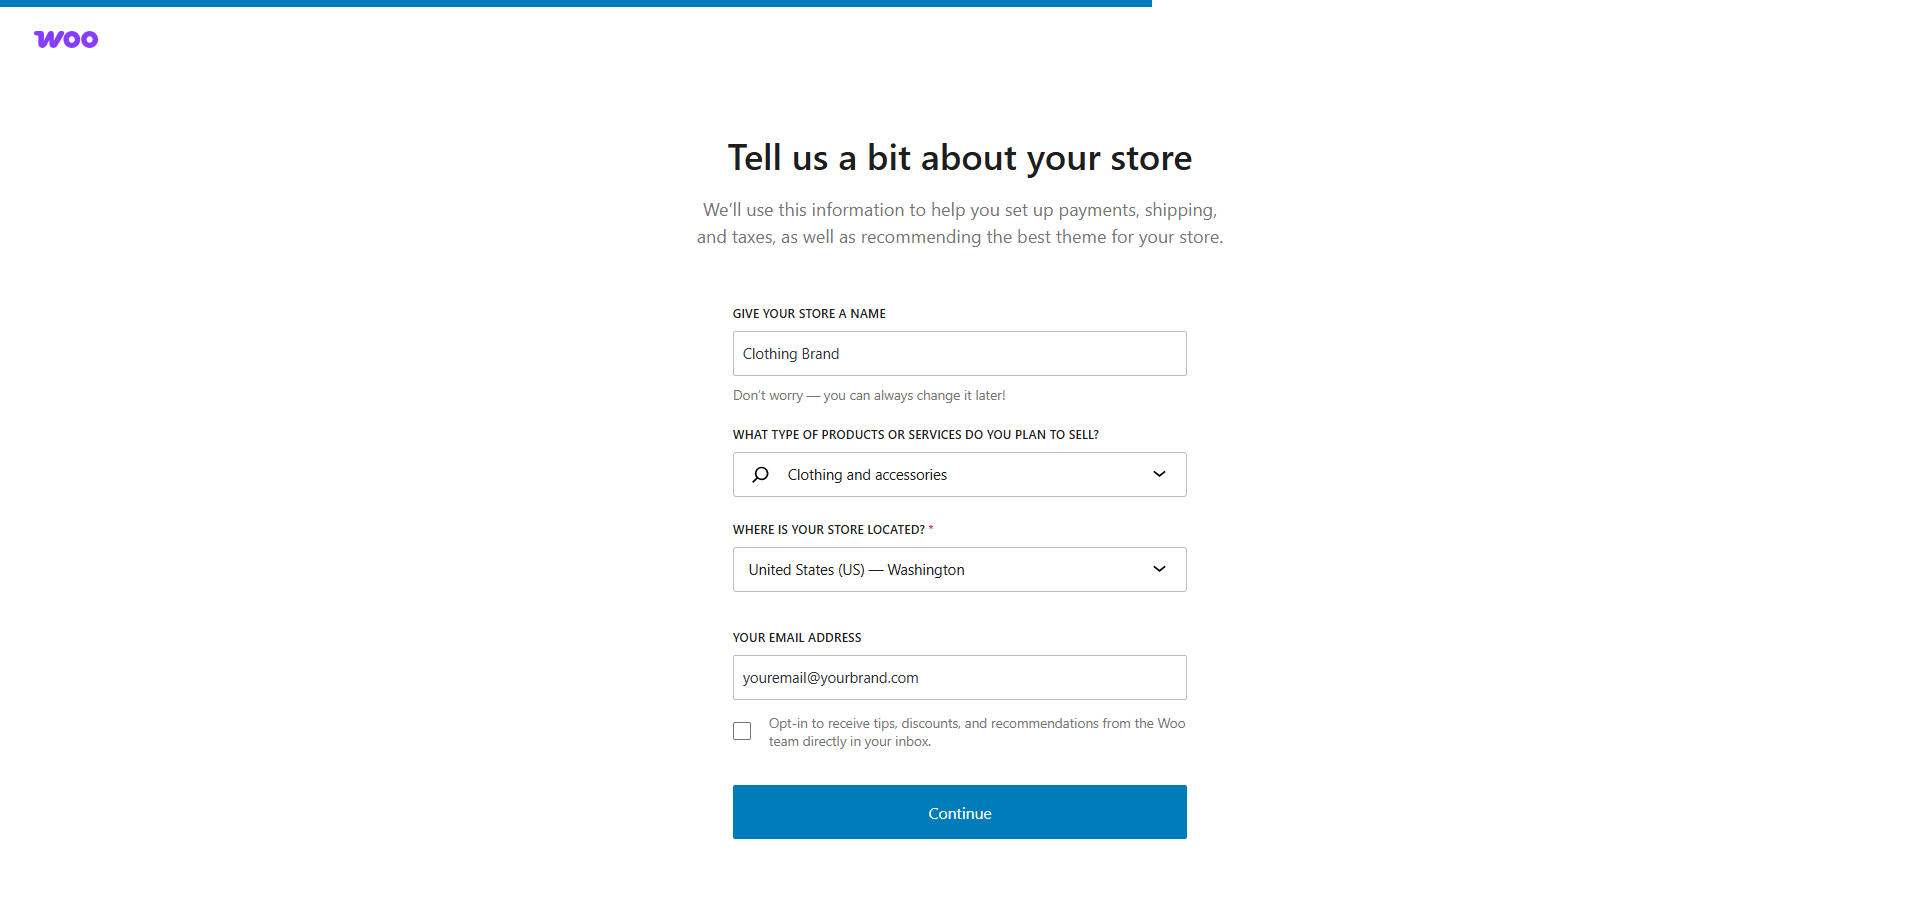
- Give your store a name.
- Tell what type of products you will sell.
- What is your store location.
- Your email address.
Get a Boost with Some Premade WooCommerce Features:
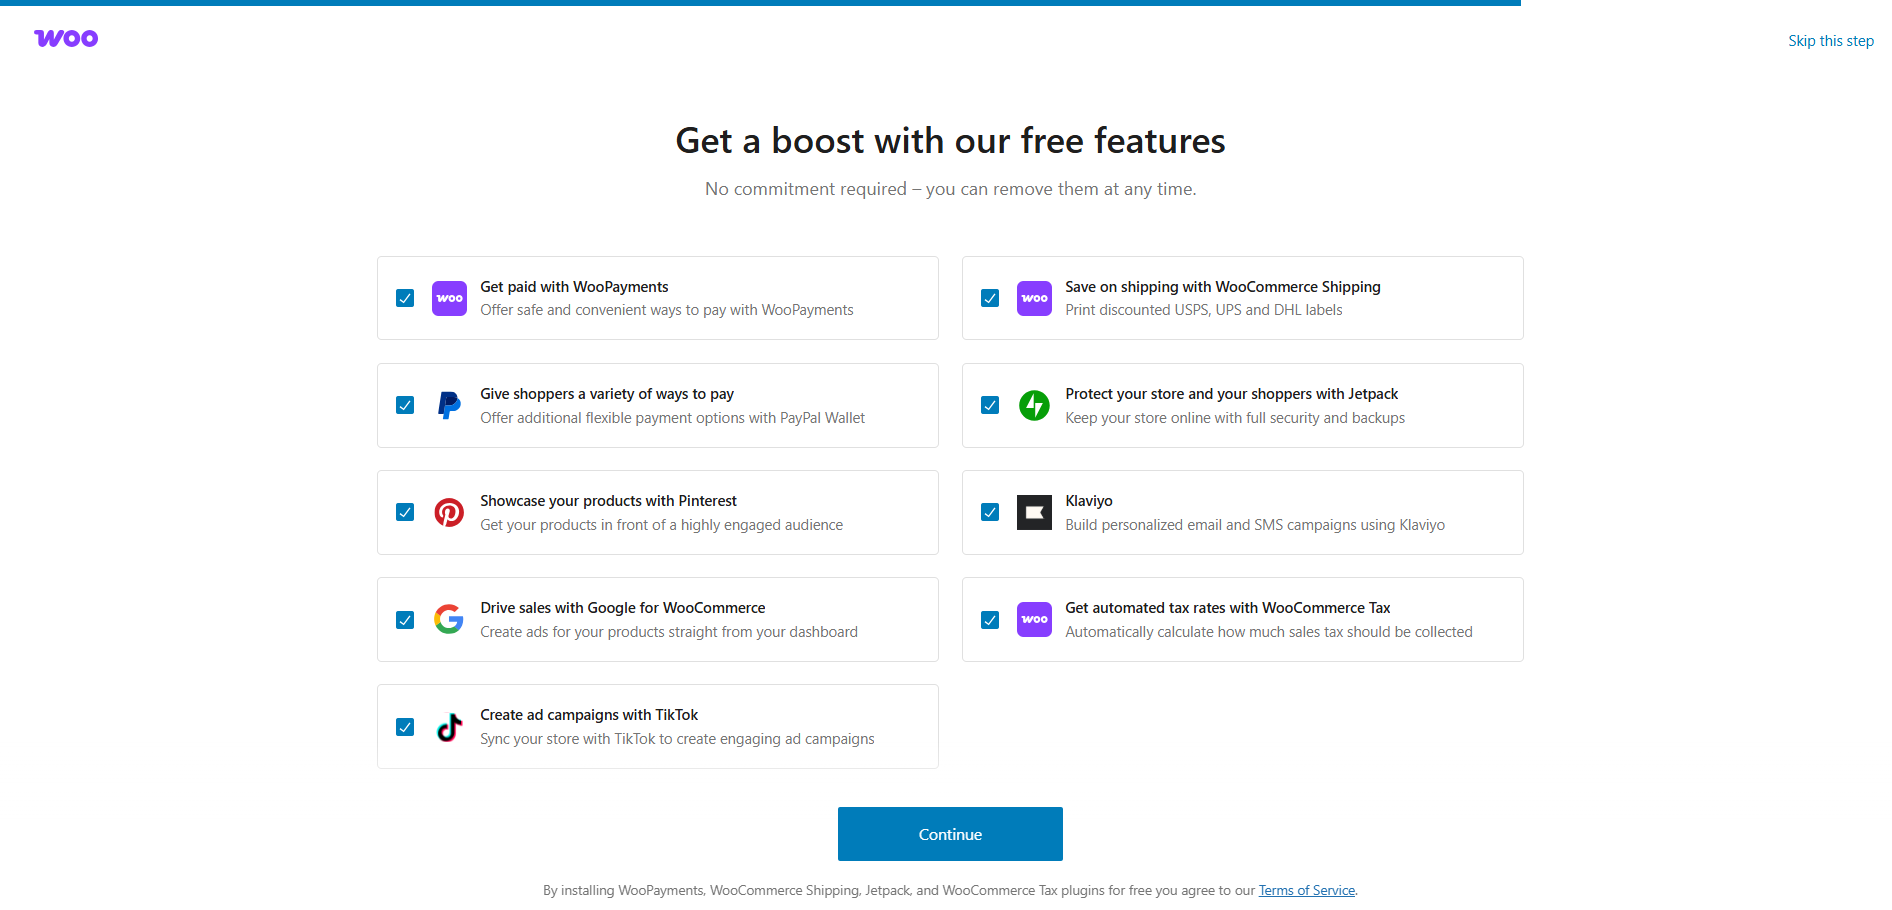
- Select WooPayments.
- WooCommerce Shipping Methods.
- Paypal wallet.
- Opt for or ignore the Jetpack security solution.
- Showcase your products on Pinterest.
- Klaviyo.
- And some other features mentioned in the screenshot.
— Complete these 5 More Steps to Start Selling
After completing the wizard, you’ll be redirected to the WooCommerce home page on the WordPress dashboard. Now, complete these five steps to start selling with WooCommerce and perfectly set up a WooCommerce store on your WordPress.
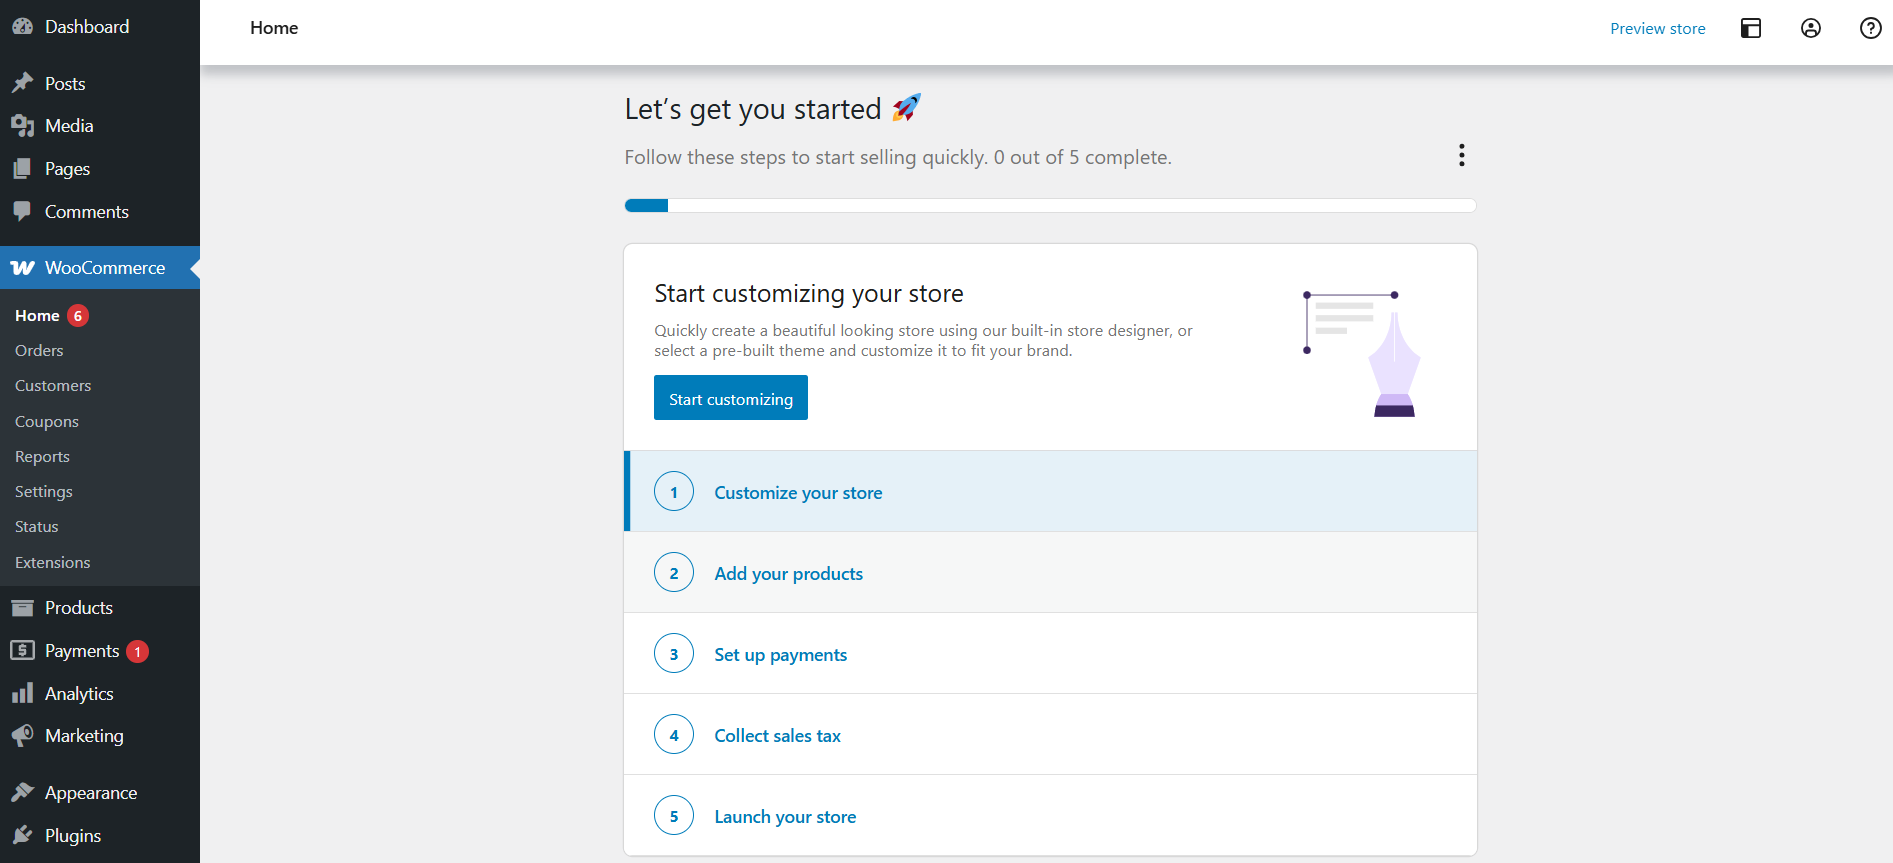
- Customize your store.
- Add your products.
- Set up payments.
- Collect sales tax.
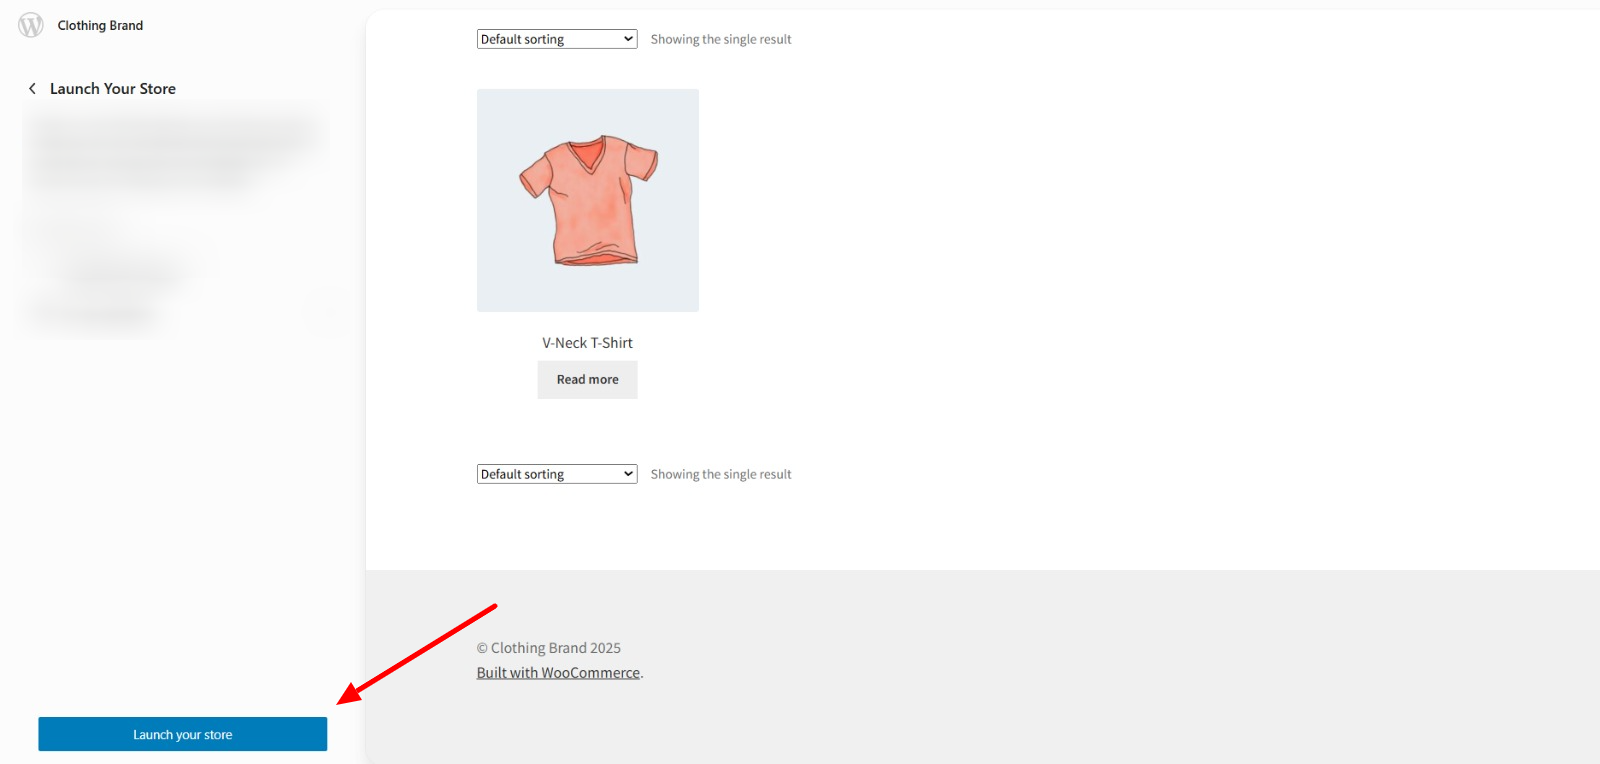
- Launch your store.
Step 3: Tailor Your Store
Okay, now it’s time to get your store looking great. How your store appears can actually make a big difference in whether folks trust you and, more significantly, whether they buy from you. Let’s get started and ensure your store setup is solid.
1. Choose the Right Theme
First things first—pick a theme that suits your brand. You can opt for the free theme or a premium theme, depending on what you require.
Follow these steps to upload your preferred theme:
- Go to Appearance > Themes > Add Theme.
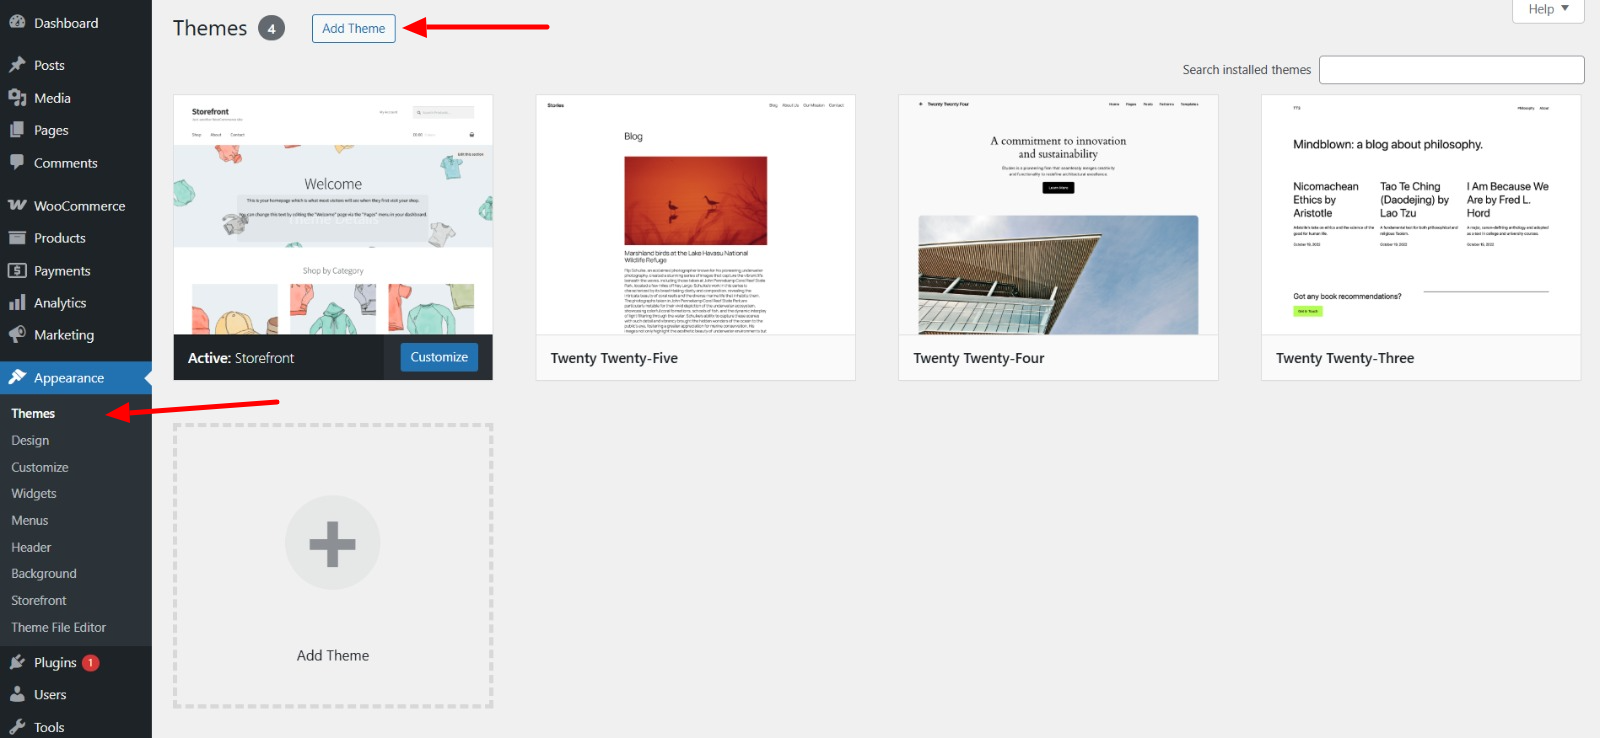
- Search for your theme or upload your chosen, already downloaded theme zip file.
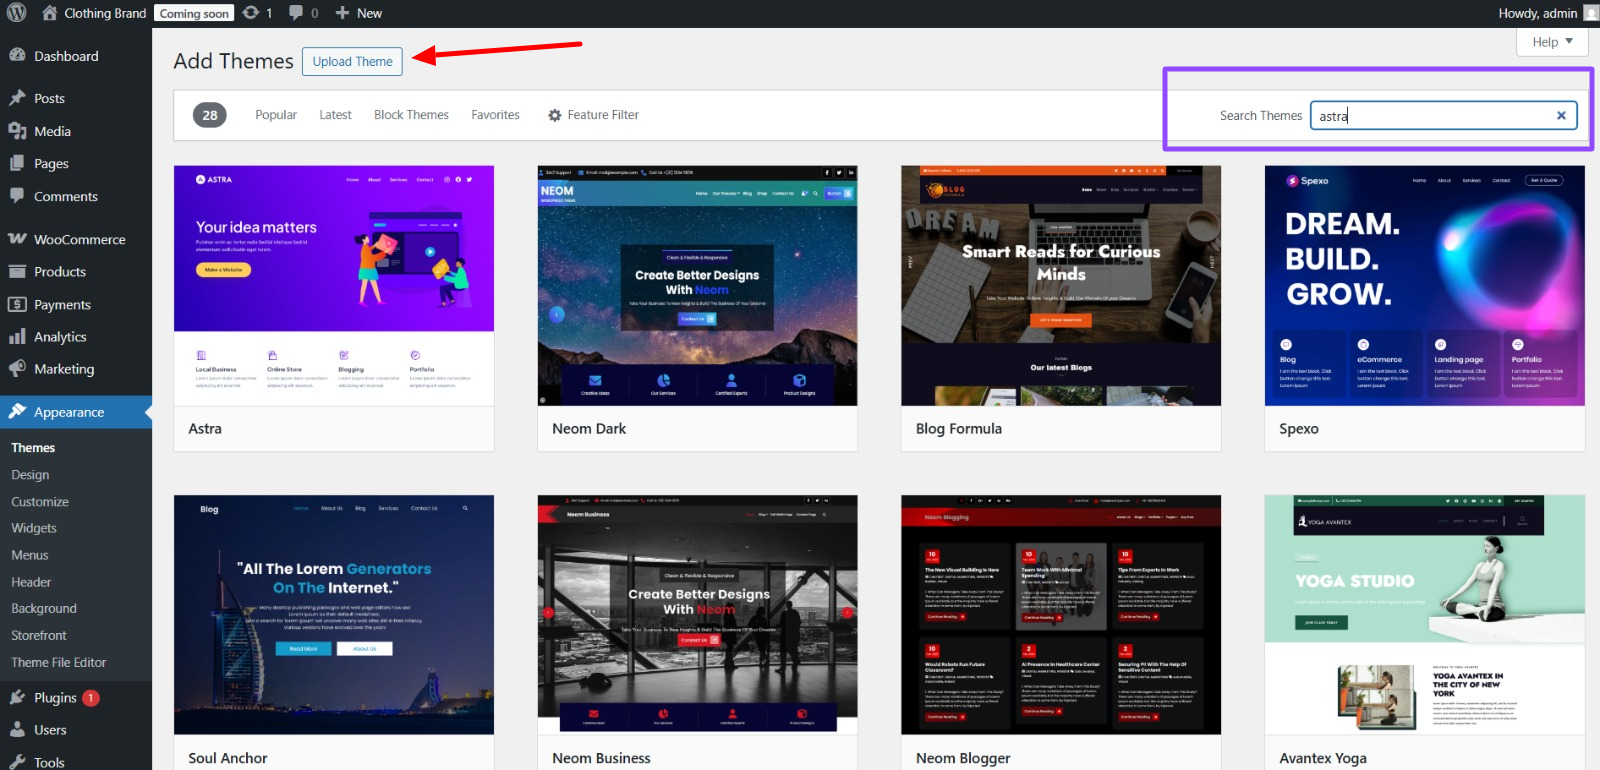
- Click Install.
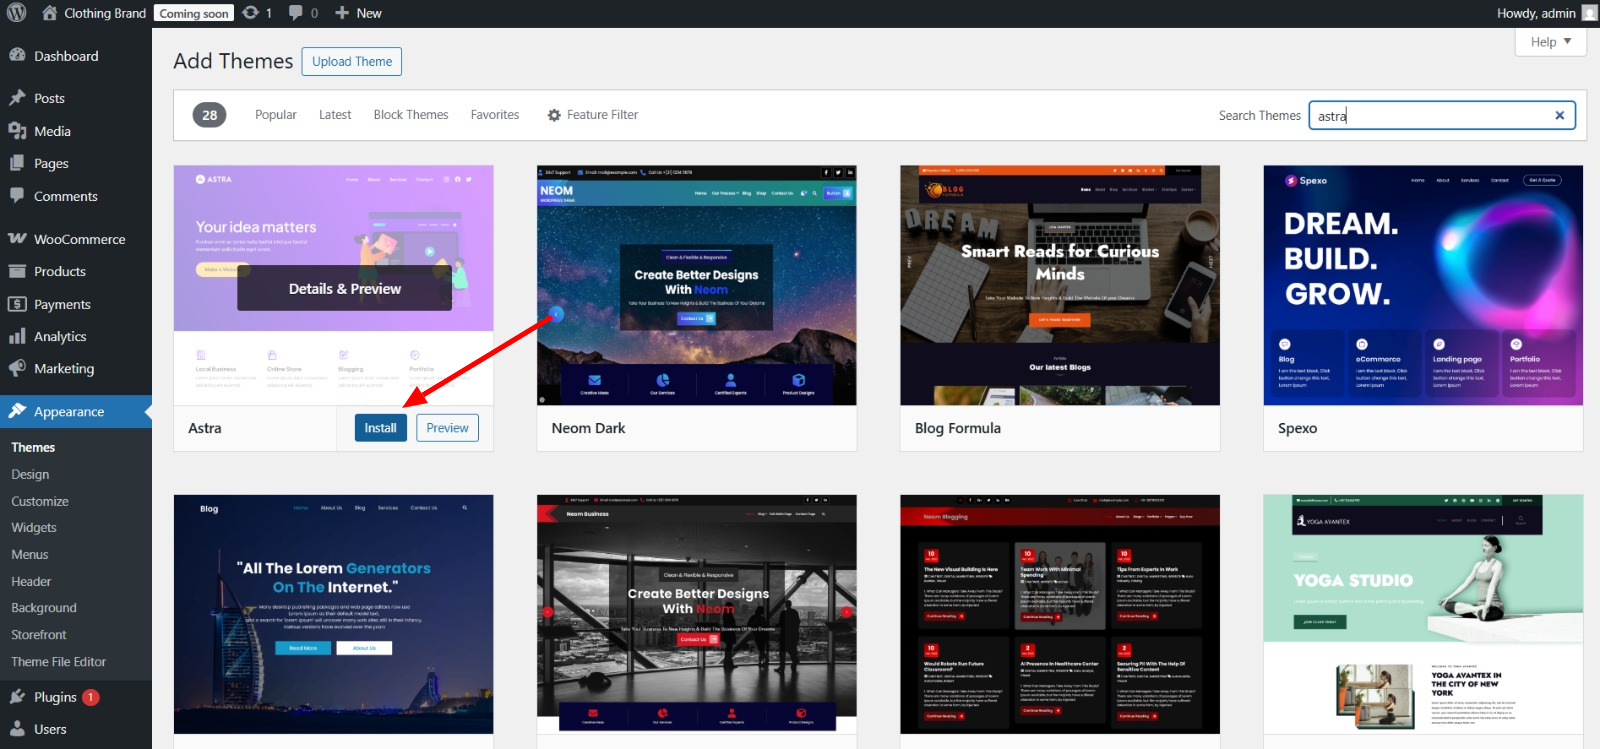
- Now, click activate.
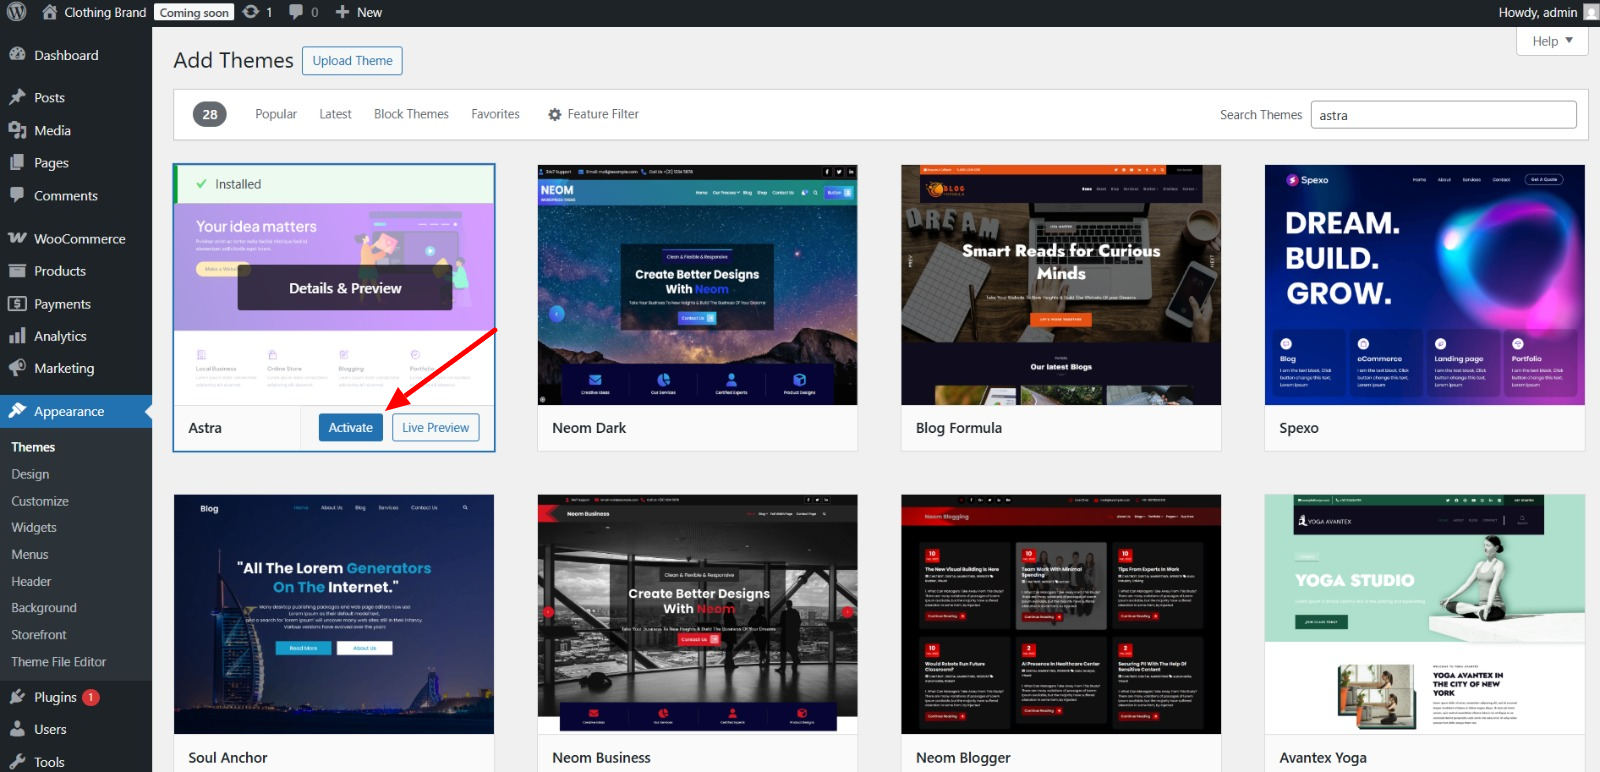
Your theme is now live, and you can begin customizing it to suit your needs.
Free Themes:
- Storefront (official WooCommerce theme)
- Astra
- OceanWP
- GeneratePress
Premium Themes:
- Flatsome
- Avada
- Divi
- Shopkeeper
What to Look For in a Theme:
- Mobile-friendly (it’s 2025, it has to be this way)
- Fast loading speeds (nobody wants to wait)
- WooCommerce compatibility (has to play nicely with your store)
- Customization options (make it yours)
- Customer support (because you’re likely to need it)
- Regular updates (you want your site to stay fresh)
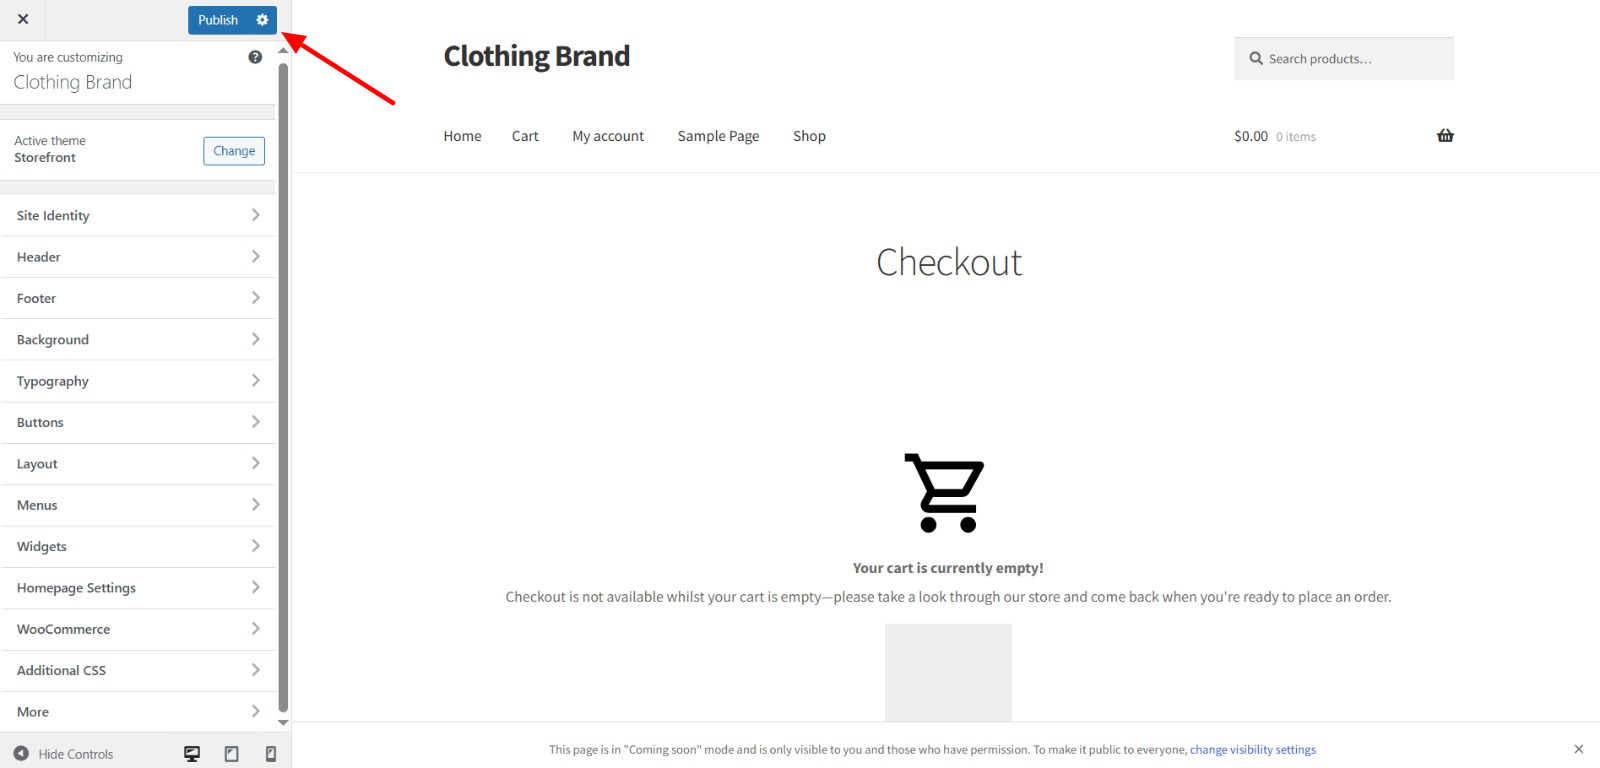
2. Go to the Customizer
Once you’ve picked a theme, head to Appearance > Customize to start tweaking things.
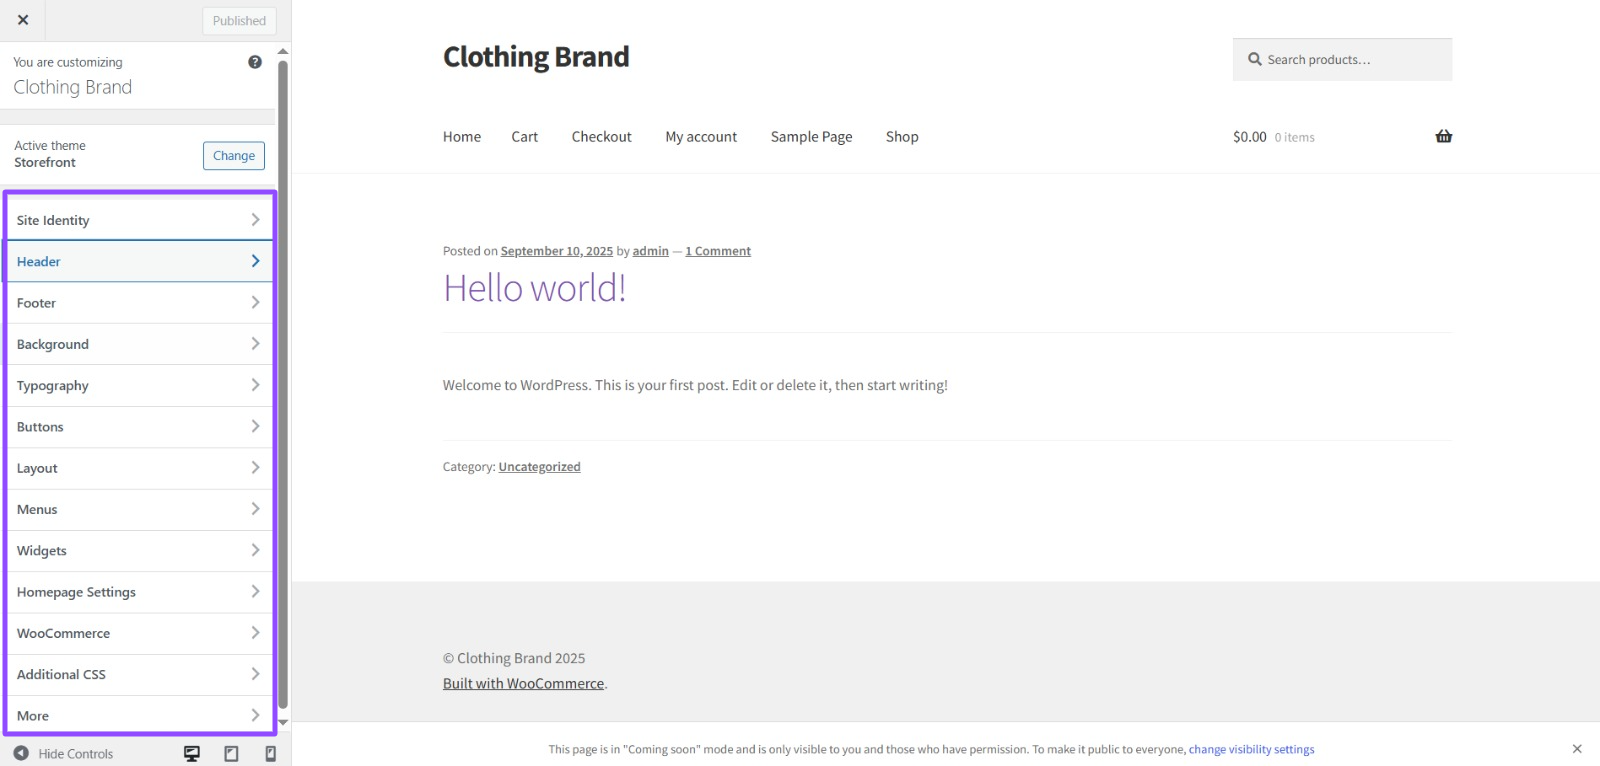
3. Show Off Your Brand
Now it’s time to make your store feel like yours. Here’s how:
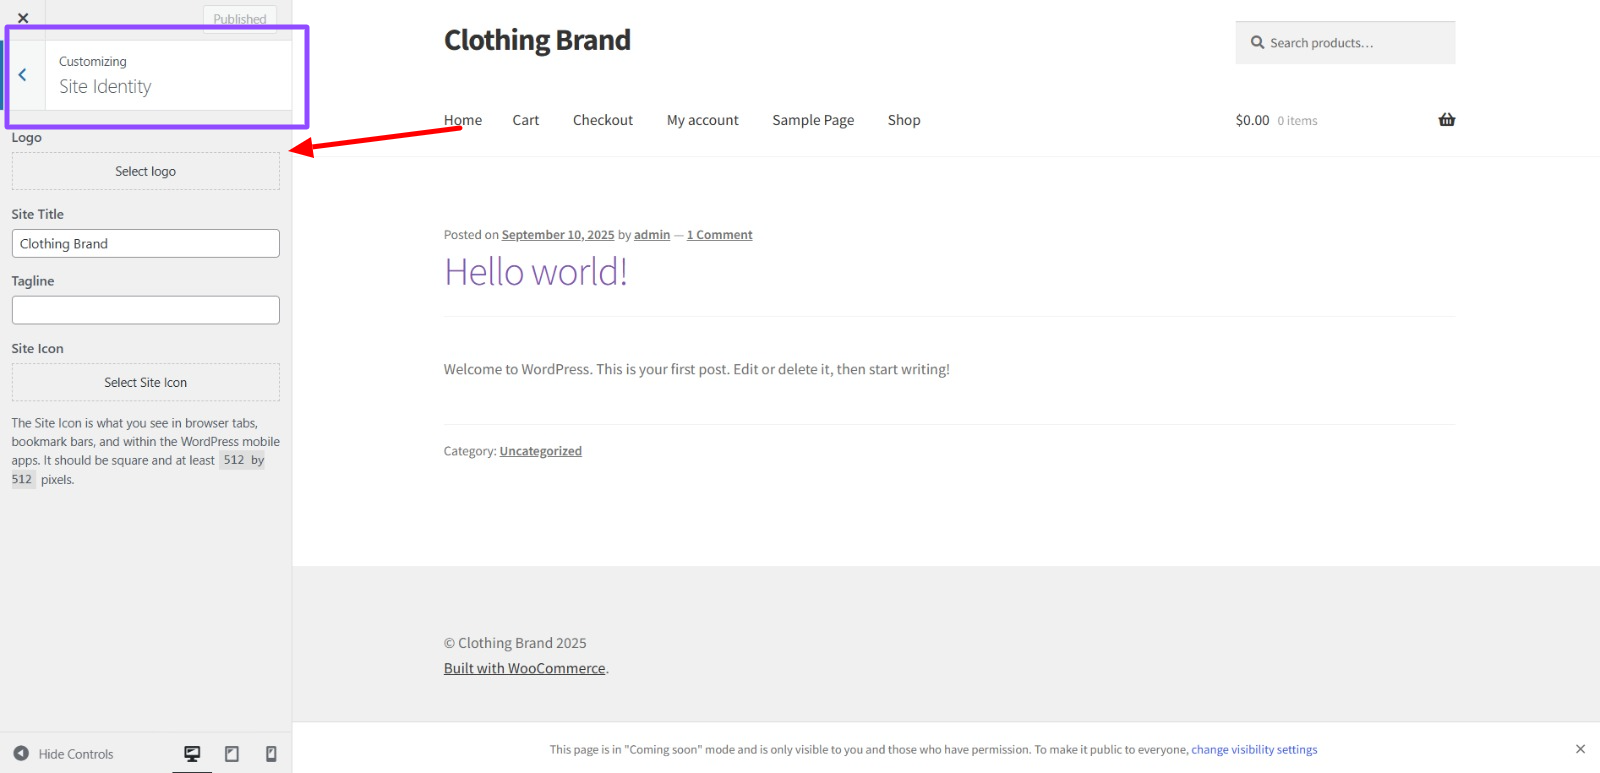
To upload your website logo, click the Site Identity tab, then Select Logo to set your brand icon. This makes sure everything looks consistent and professional.
4. Set Up Your Homepage
Your homepage is like your store’s front door—make it inviting!
Configure the homepage design to highlight your best products.
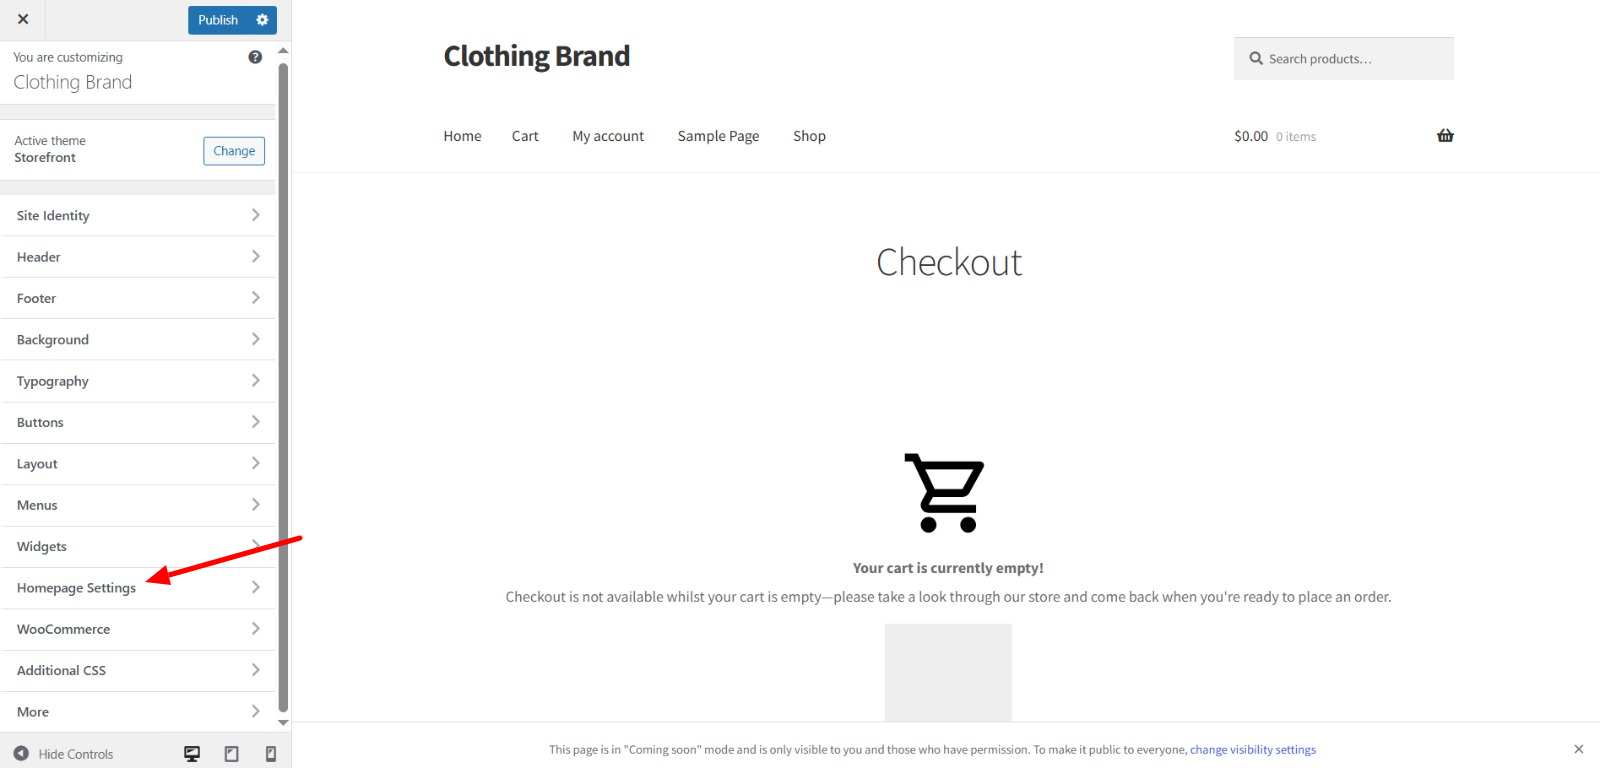
This enables your visitors to view your best offerings immediately.
5. Simplify Navigation
Individuals should be able to locate what they need quickly.
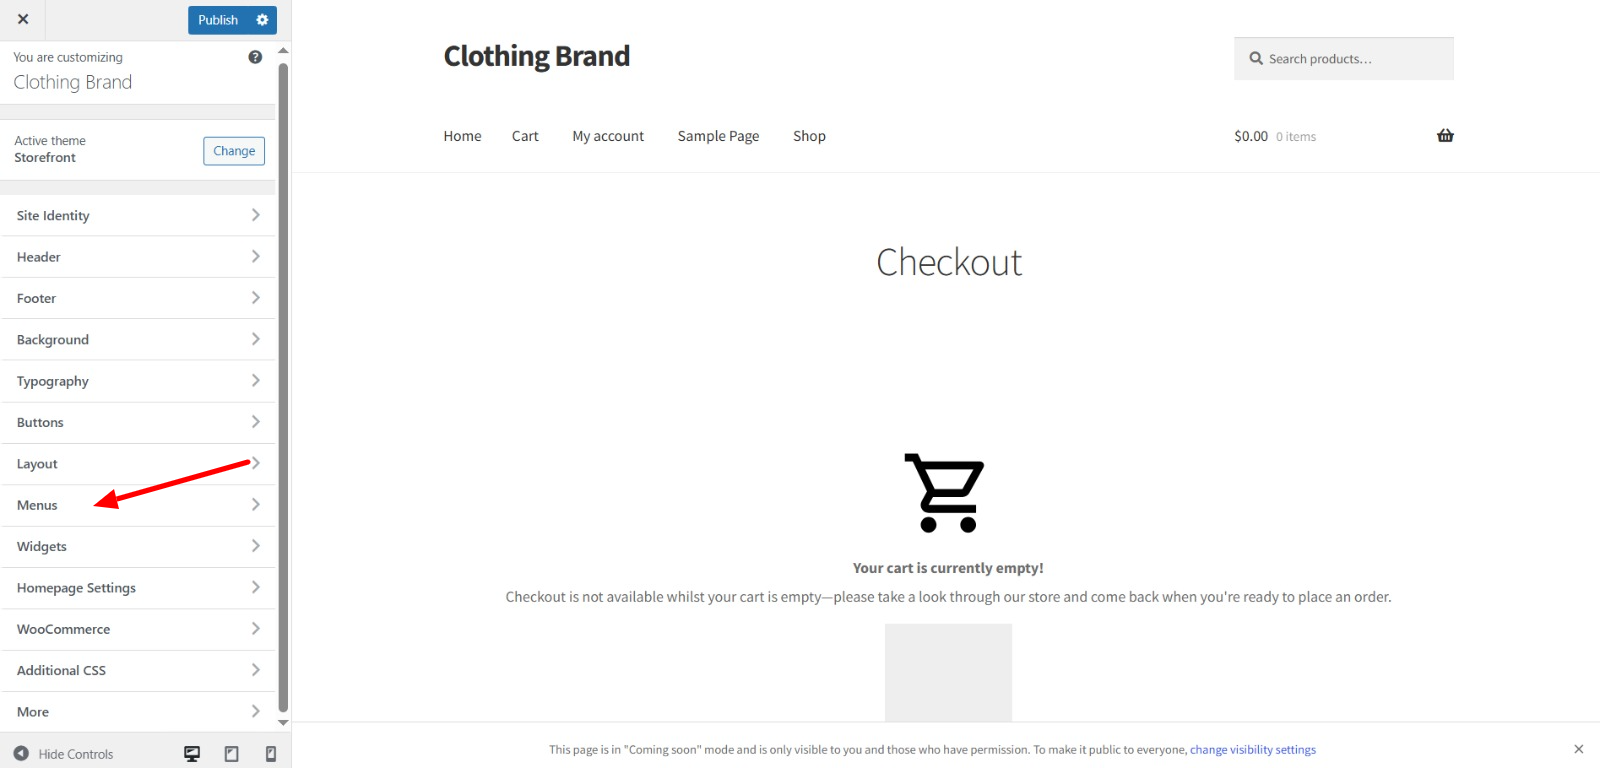
Configure navigation menus that are logical and facilitate users in reaching their destinations without any confusion.
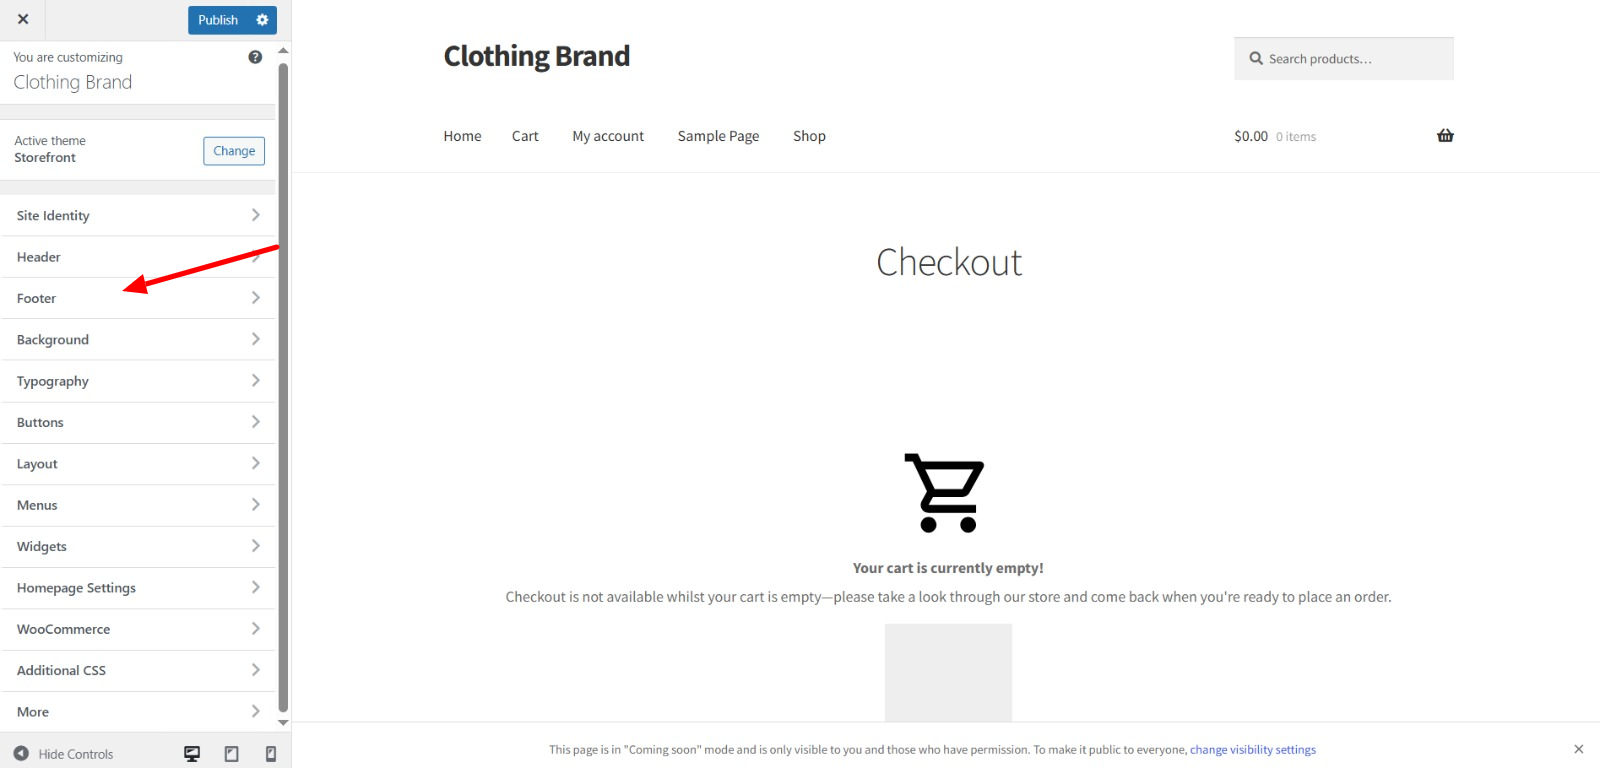
6. Include Footer Information
Don’t overlook the bottom of your page! Include footer information such as your contact number/email so buyers can easily get in touch with you.
7. Preview and Publish
Double-check before you click “publish.” Preview the changes to ensure that they all work together. When it’s all ready, go ahead and publish it live!
Step 4: Add your Products
And the best part comes here– adding products to your web store. WooCommerce supports various types of products to support various business models.
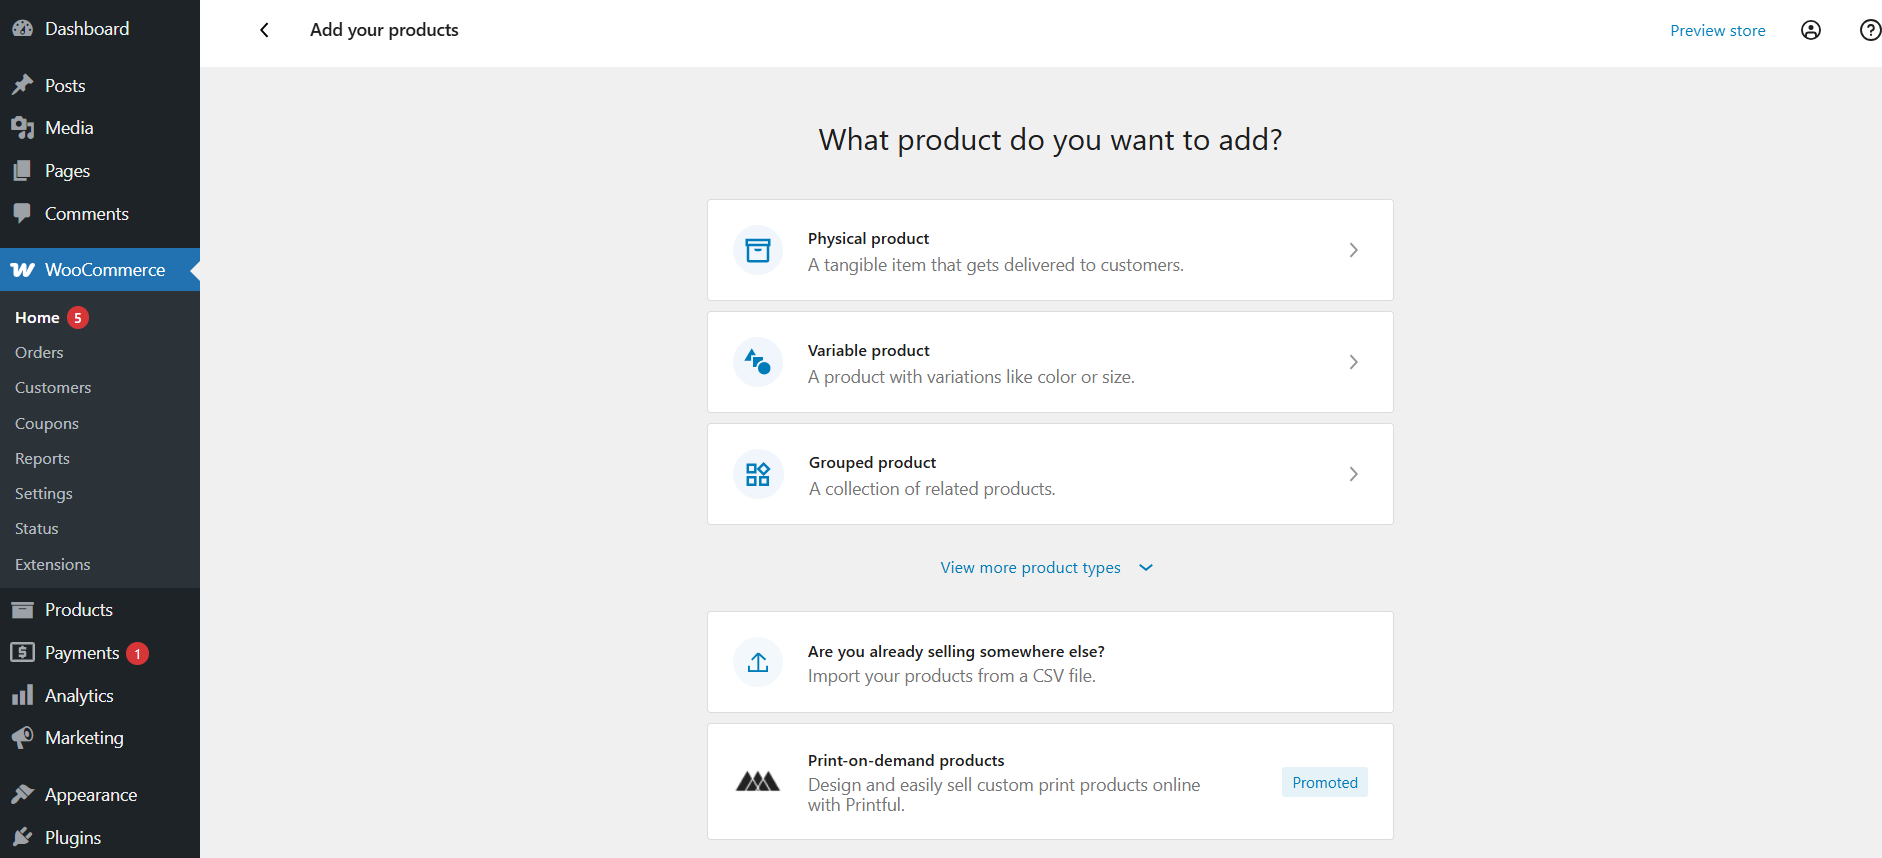
— Product Types in WooCommerce
Simple Products:
- Normal physical or digital products
- One price
- No variations
Variable Products:
- Different variations (size, color, material)
- Different prices for each variation
- Complex inventory management
Grouped Products:
- Related products that are purchased together
- Individual price per product
- Customer chooses quantities
External Products:
- Pointers to other products somewhere on the web
- Affiliate marketing favorite
- Commission-based sales
— How to Add a Product in Your WooCommerce Store
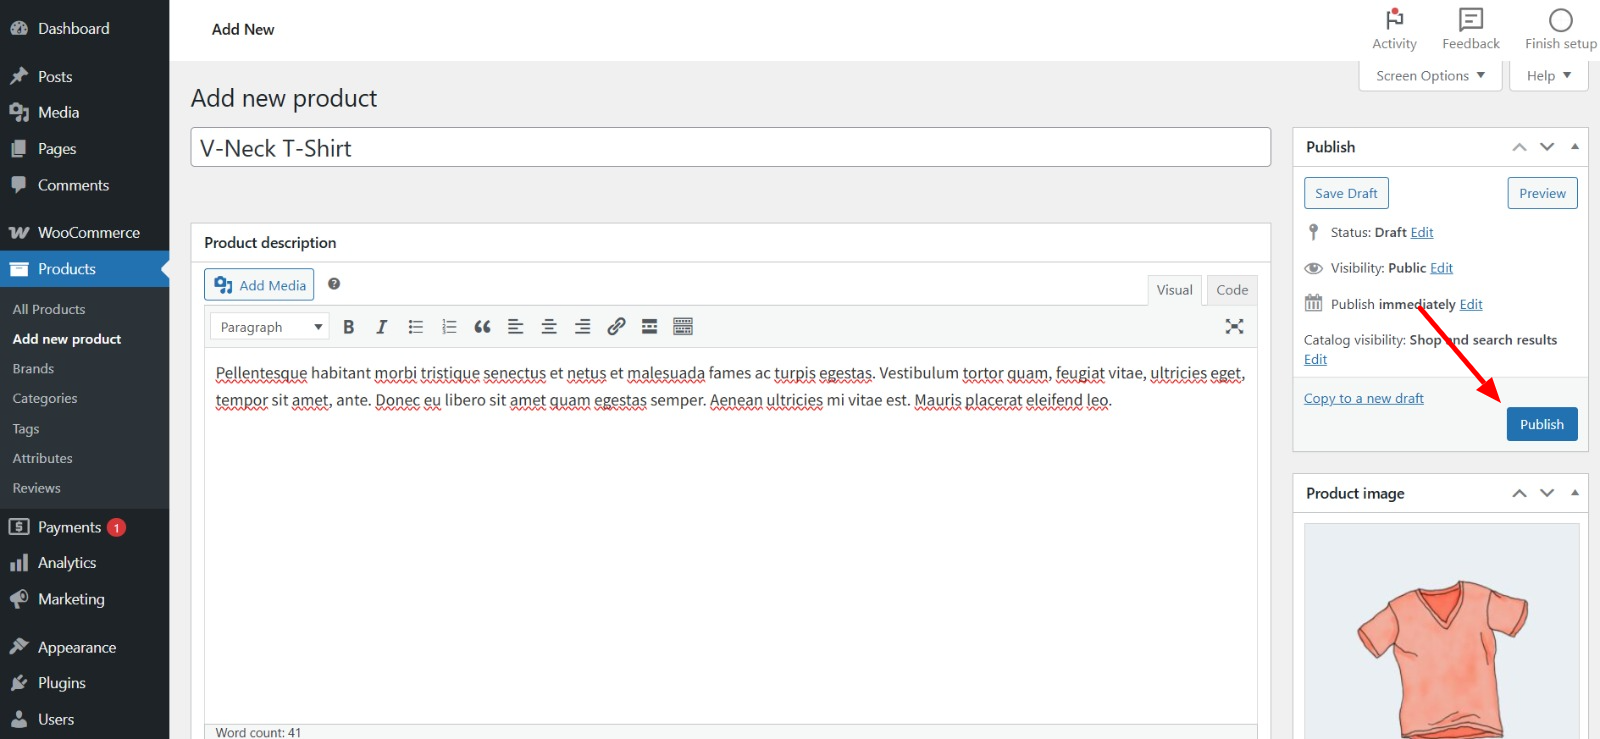
- Go to or hover on Products > Add New.
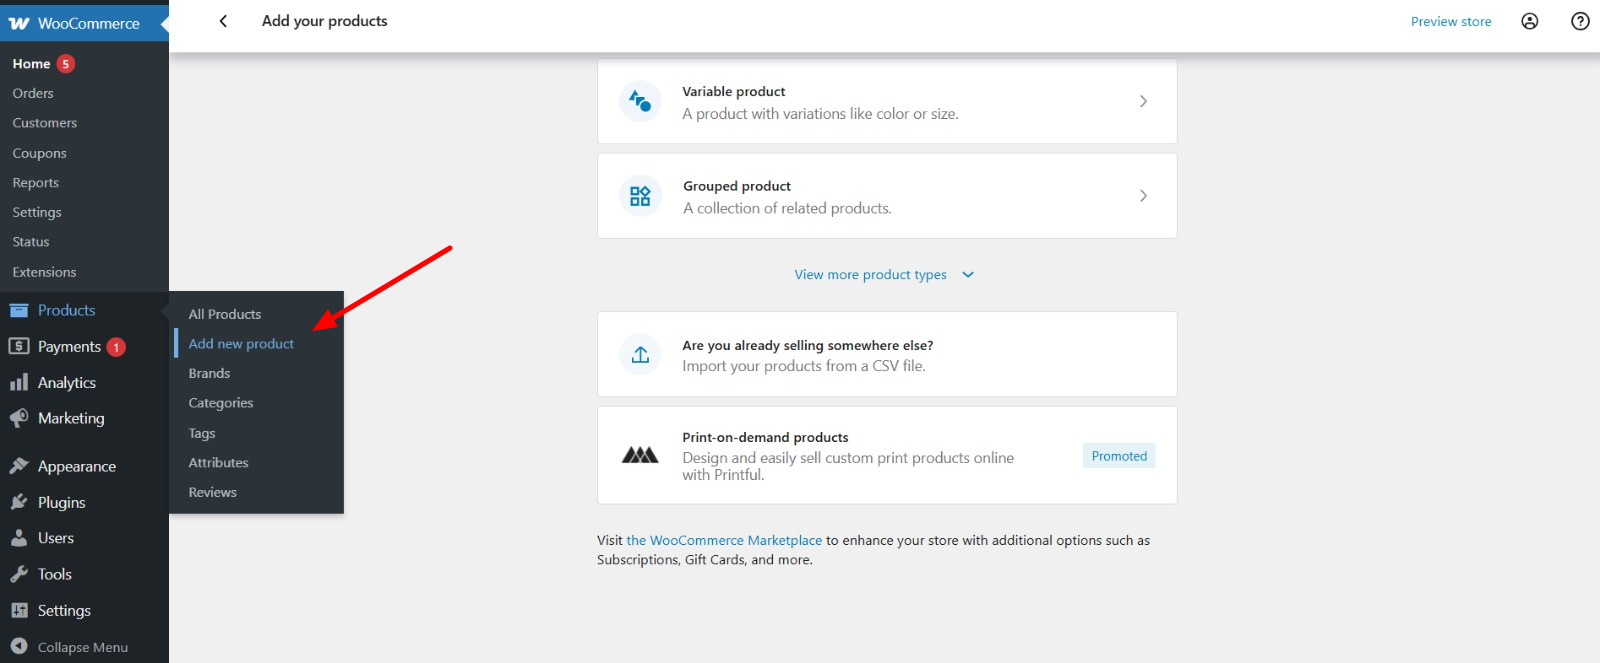
- Add product title (descriptive and SEO-friendly).
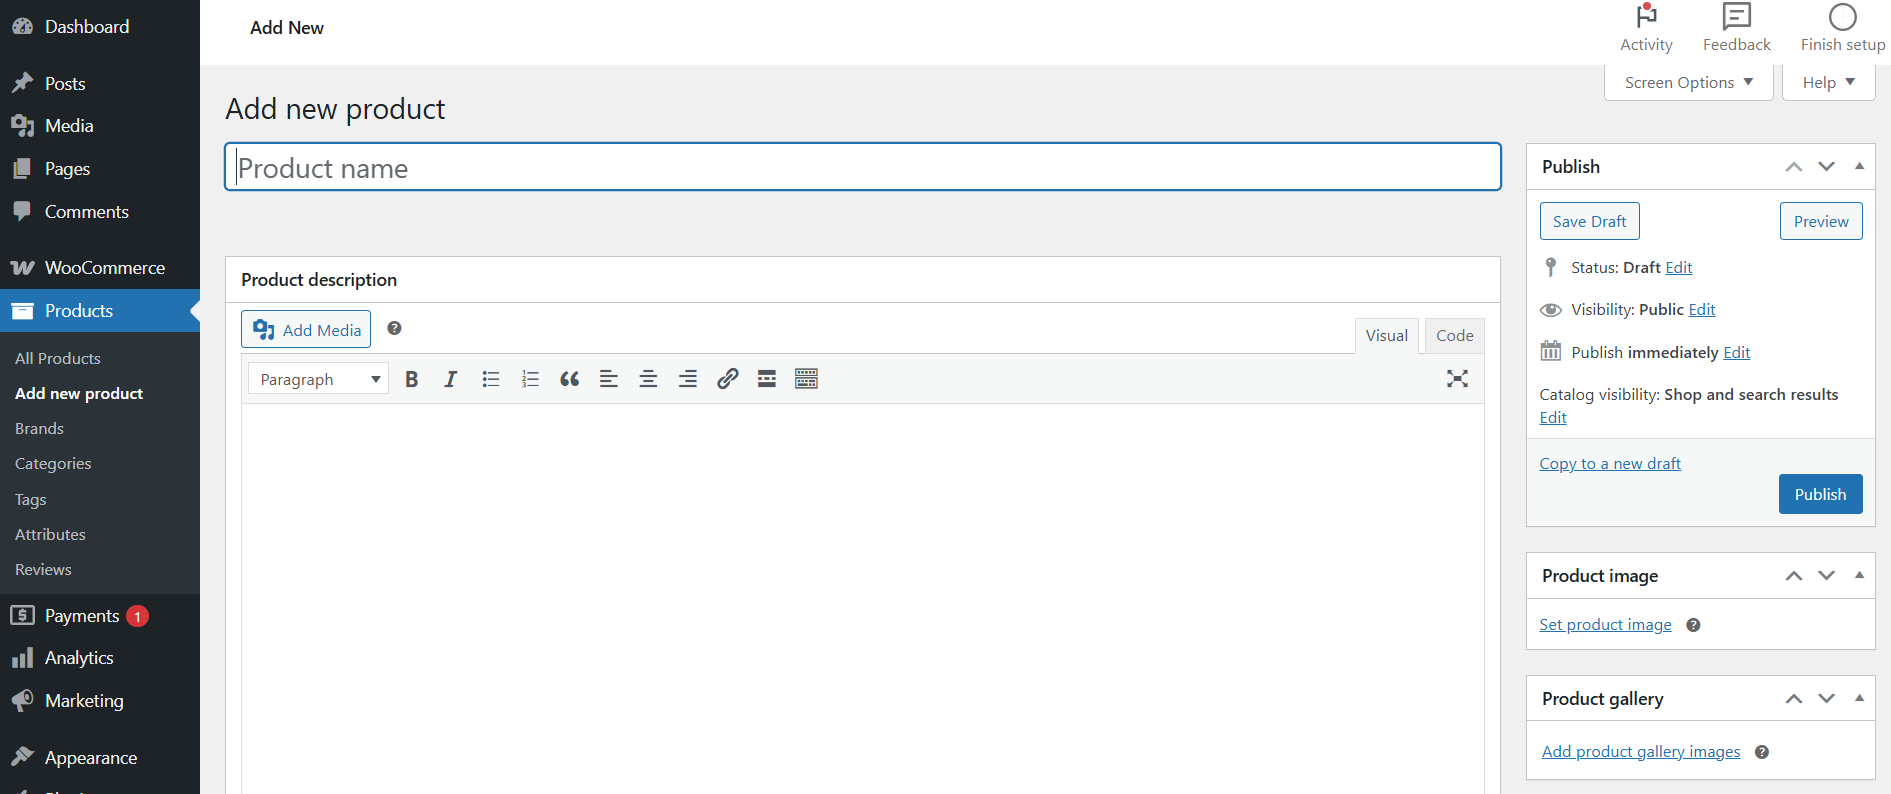
- Describe and SEO-optimize product description, pointing out features and benefits.
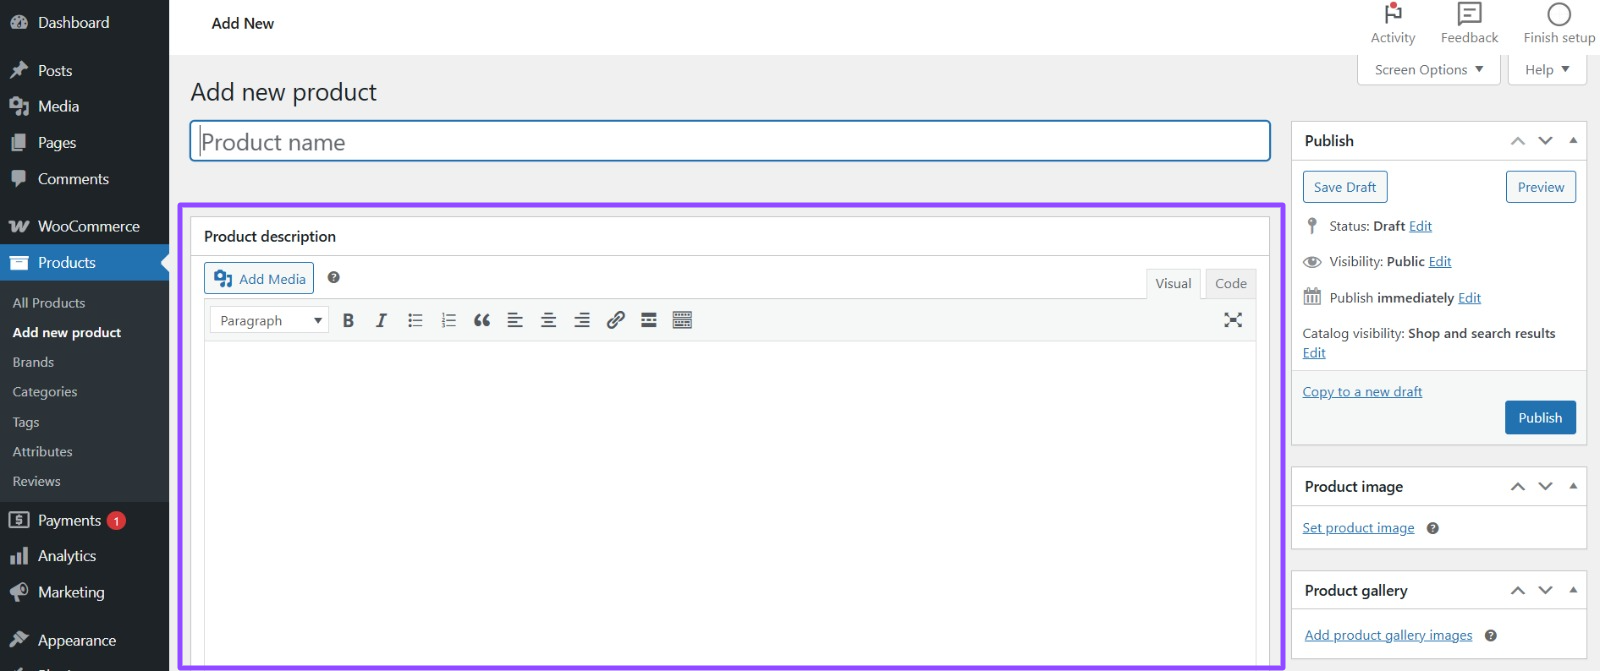
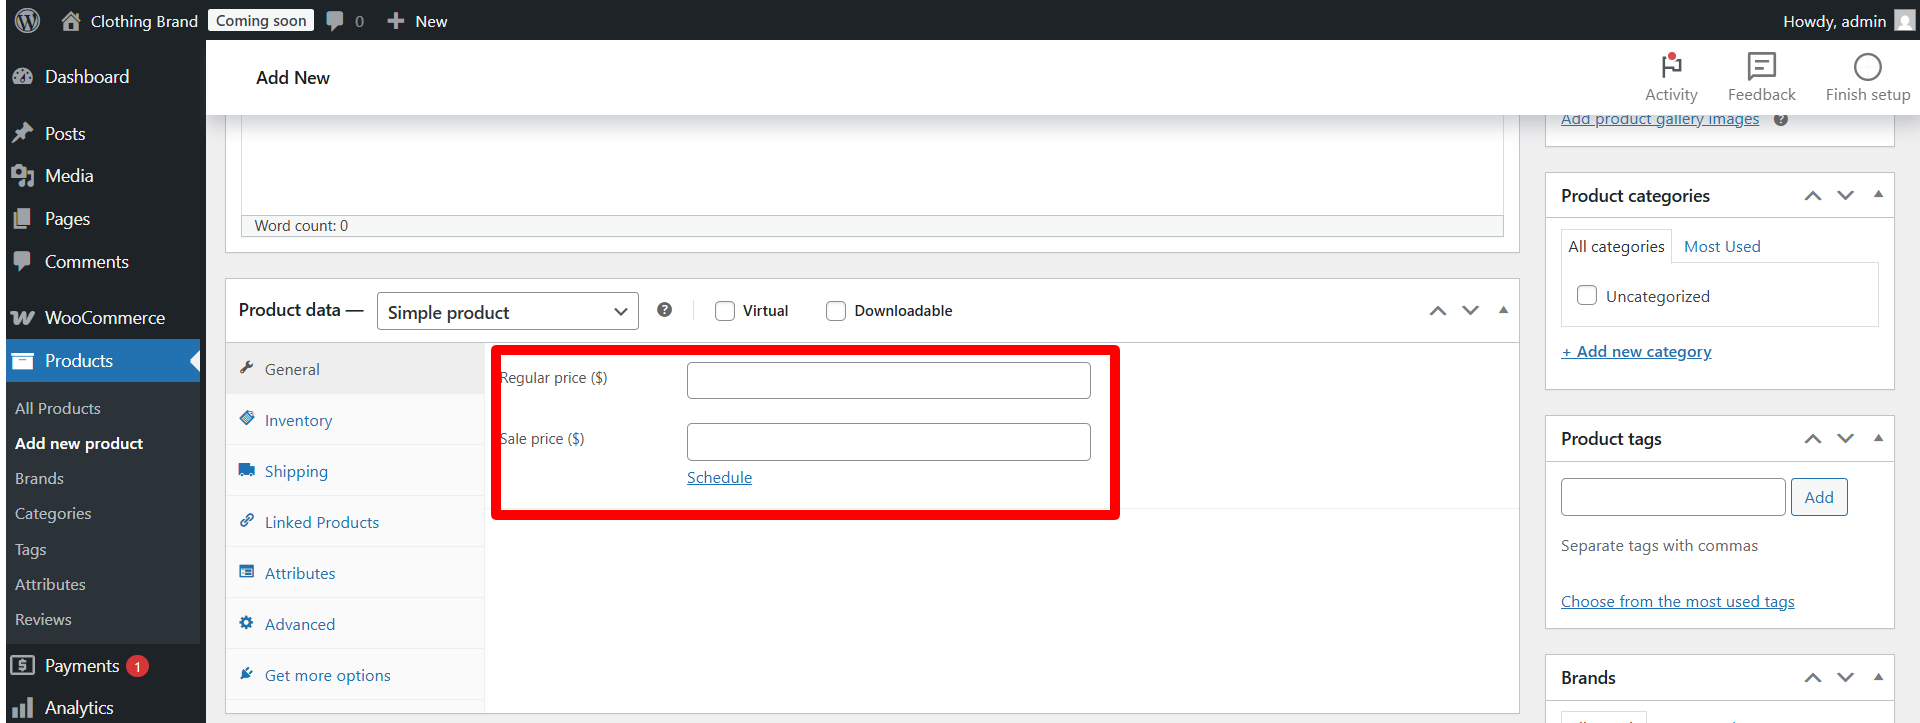
- Insert product price in the Product Data area.
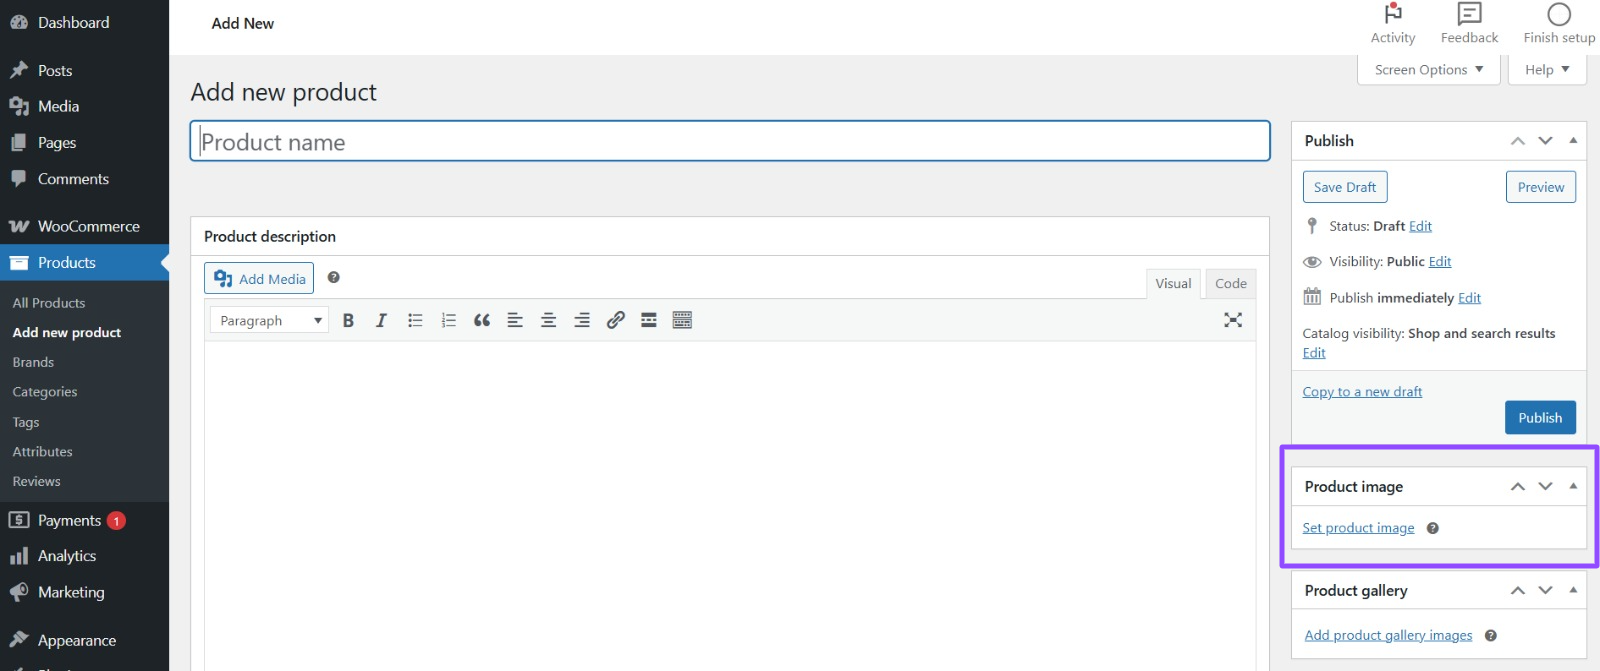
- Insert quality product images (you can insert multiple pictures through the product galleries options in the WooCommerce product page).
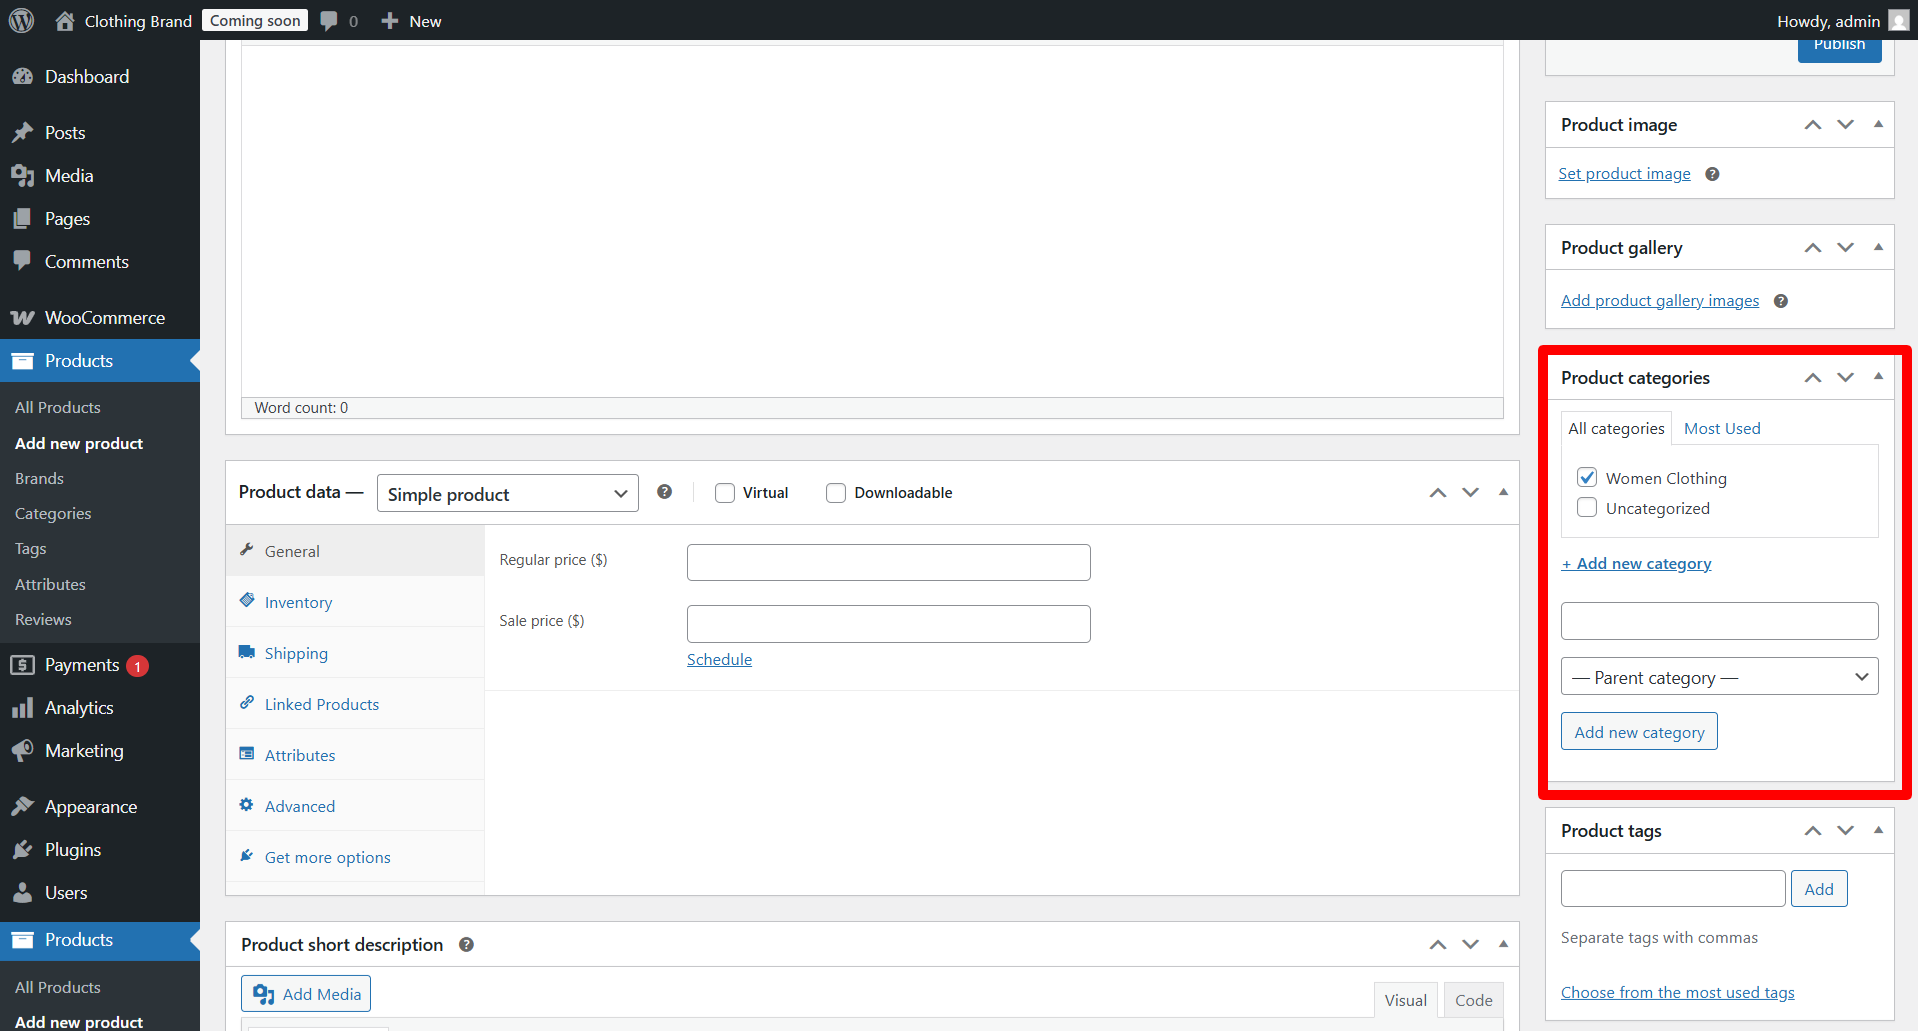
- Select the category of your product or create one if it does not already exist.
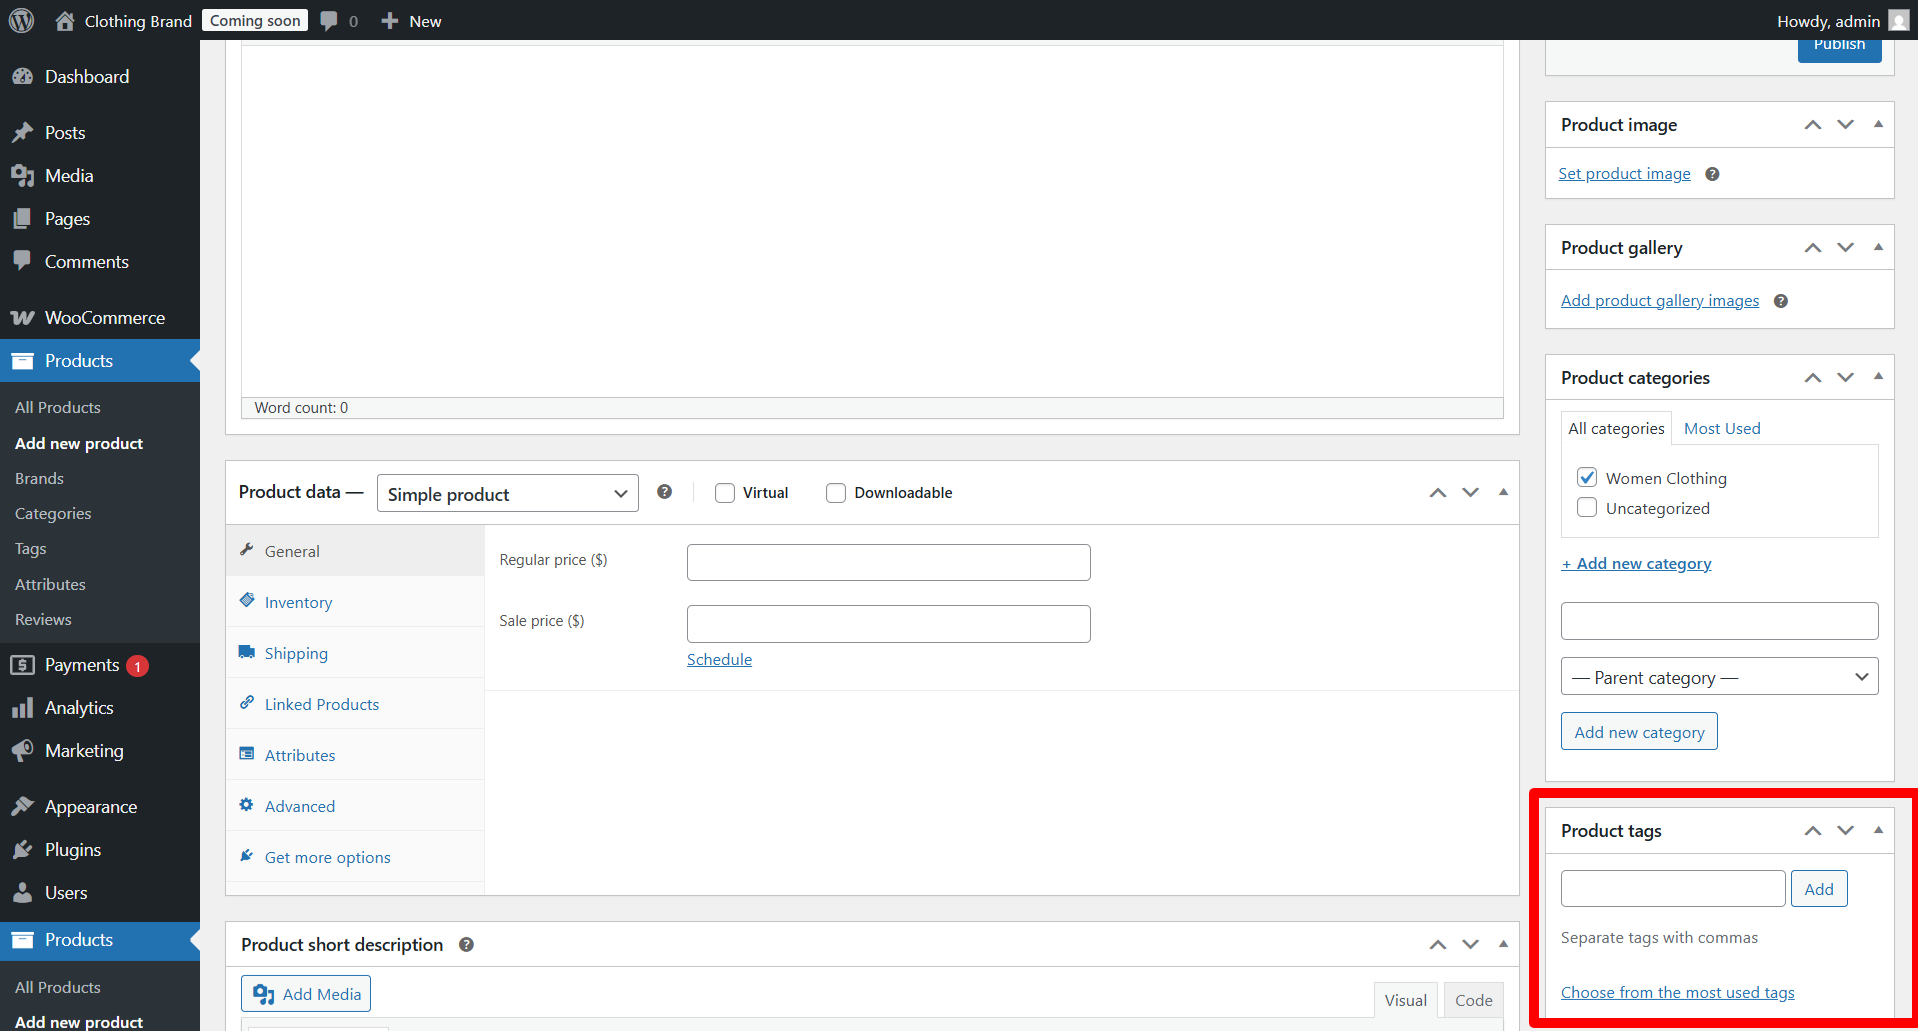
- Add product tags for better search visibility inside your own store.
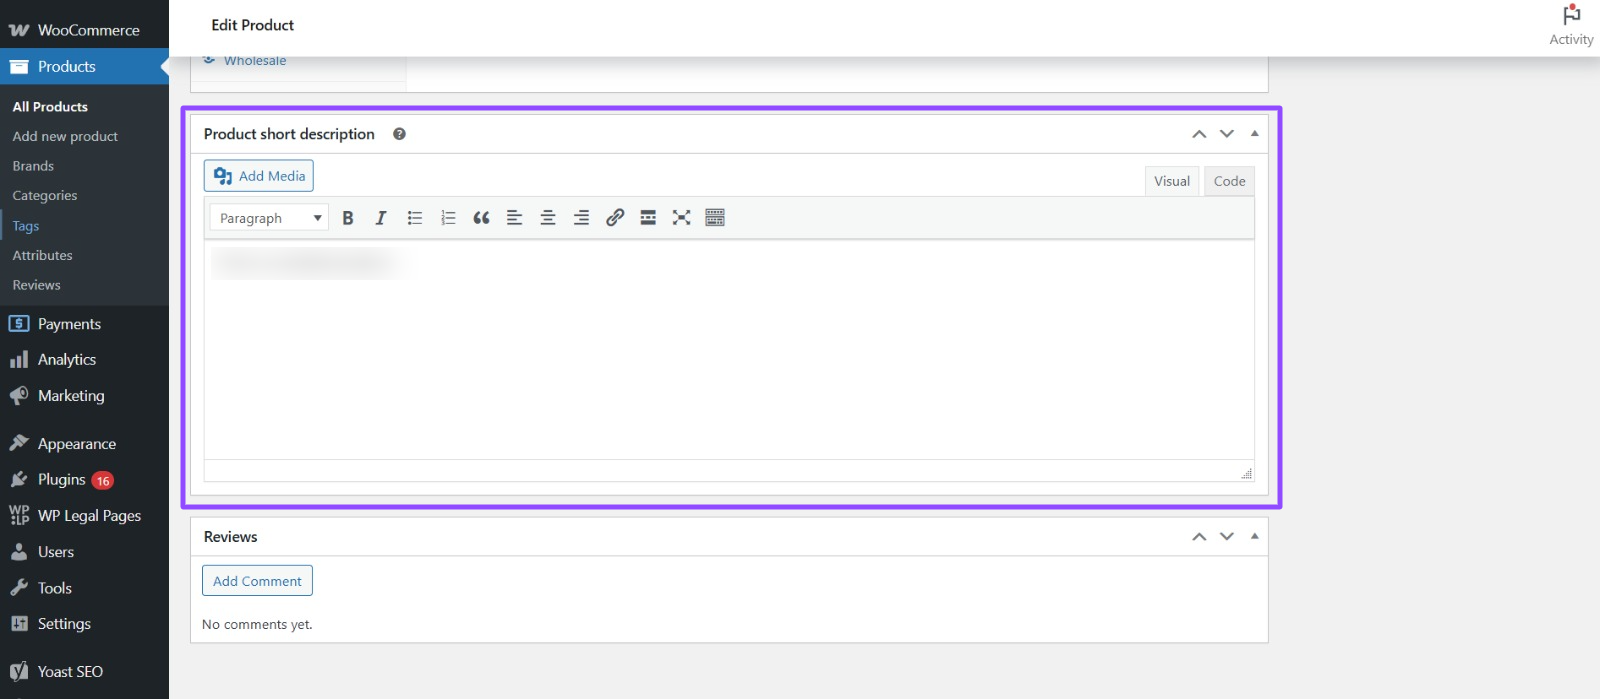
- Add the product’s short description to guide the user in the first place. (Pro tip: Make sure it’s catchy and SEO friendly to catch both search engines and users.)
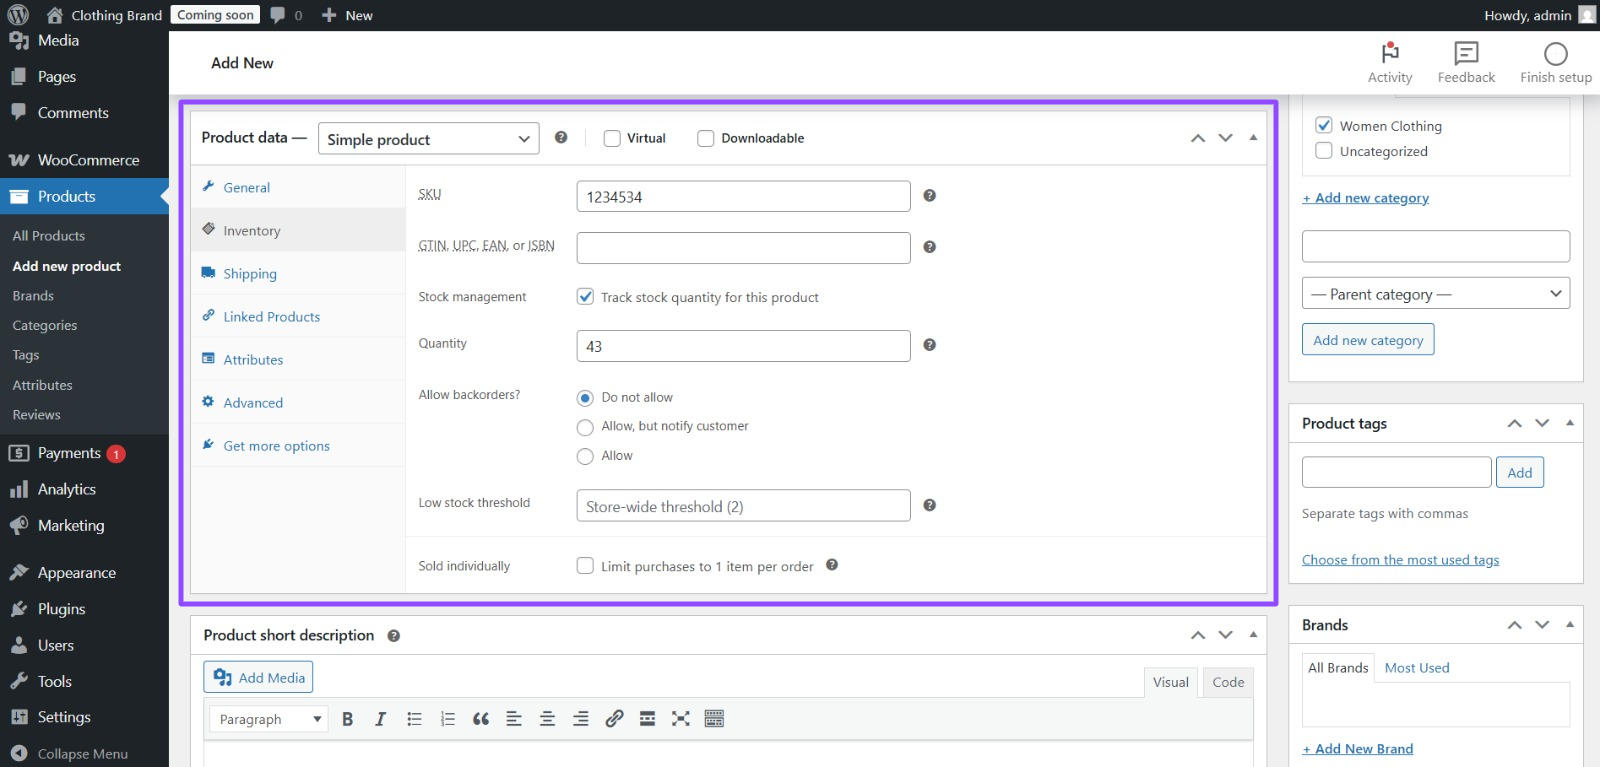
- Set up inventory settings if you are dealing with inventory.
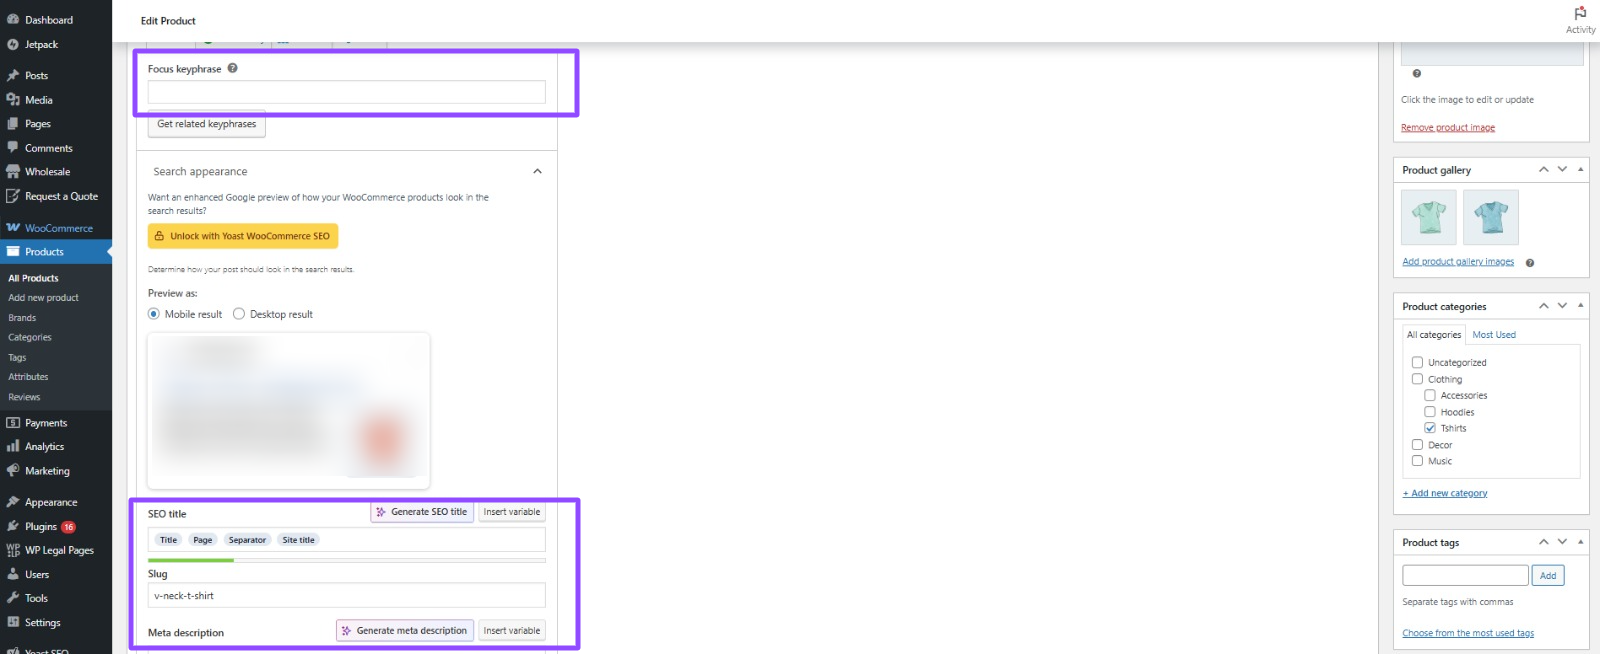
- Set up SEO functionality (meta title, description, focus keyword). To manage this thing easily, we recommend that you have an SEO plugin. I.e, Yoast, Rank Math, and AIO SEO.
- Publish product.
— Product Image Best Practices
- Utilize high-definition images (min. 1000px width)
- Utilize consistent backgrounds and lighting
- Display products from multiple angles
- Use lifestyle photos of the usage of the product
- Optimize file weights for quick loading
Step 5: Configure Payment Gateways
Payment processing is required for any online store. WooCommerce accommodates several built-in payment gateways, and additional payment gateways can be installed as needed.
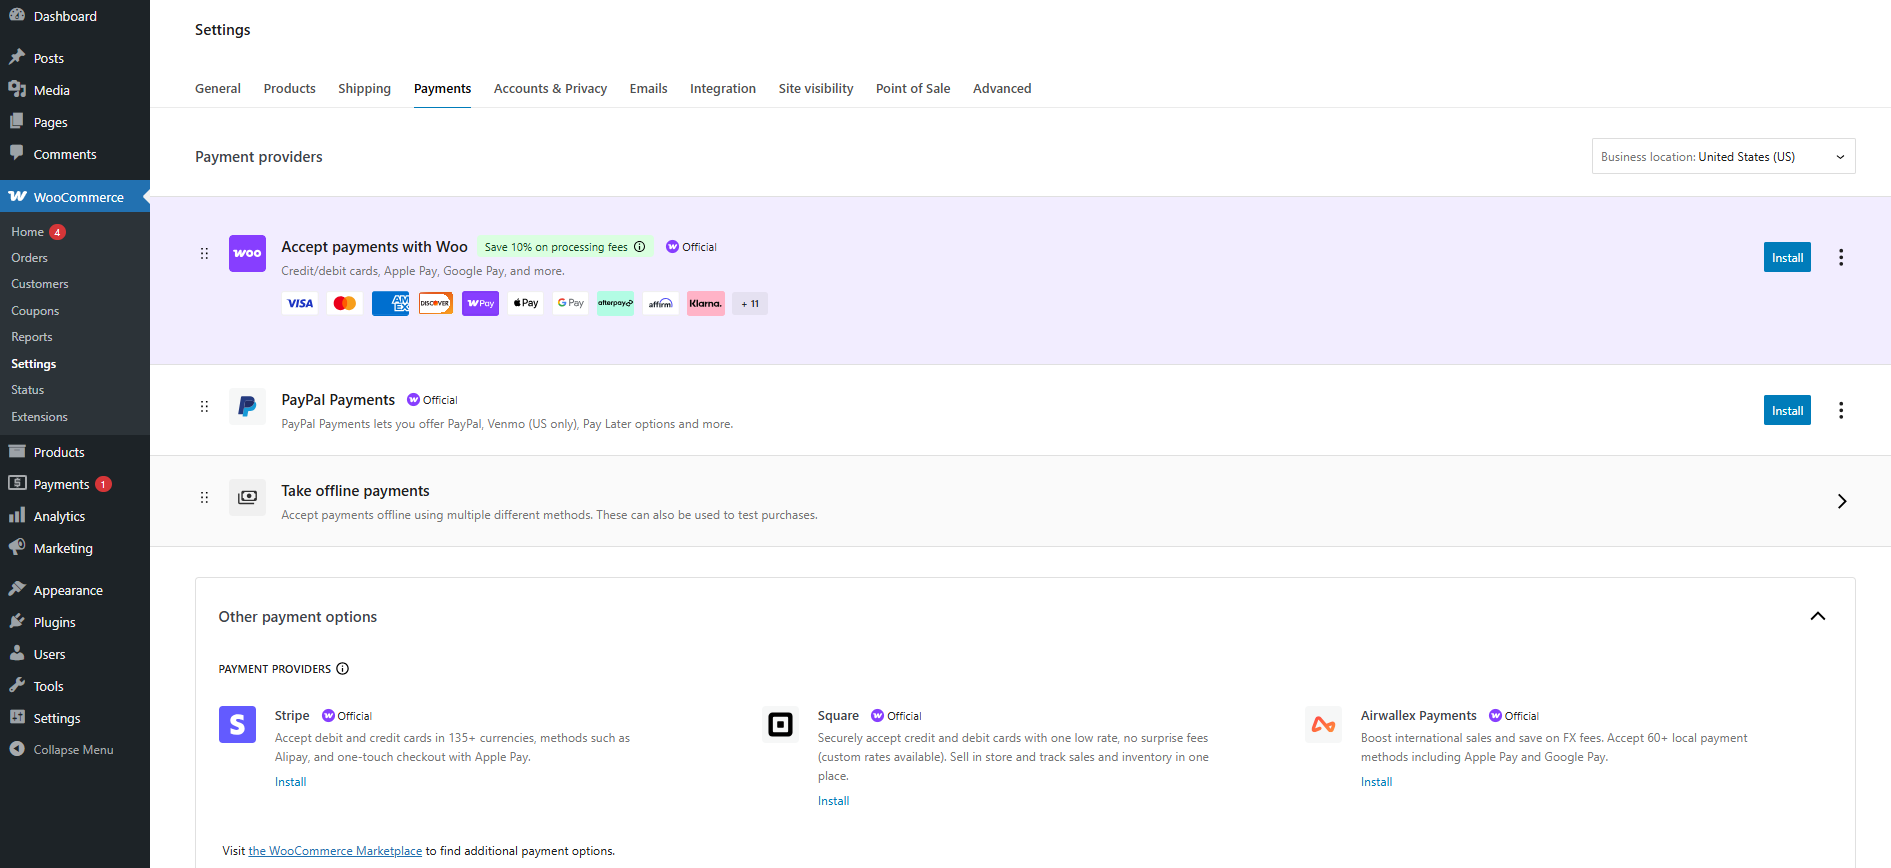
— Online Payment Options
You can now choose which payment gateways you want for your web store. There are so many options to choose from. Some of them are:
- Accept payments with Woo
- PayPal Payments
- Stripe
- Square
- Airwallex Payments
- Payoneer Checkout
- Paymob
— Configuring Payment Gateways
- Go to WooCommerce > Settings > Payments.
- Enable your preferred payment methods by checking them.
- Click “Set up” or “Manage” beside each payment gateway.
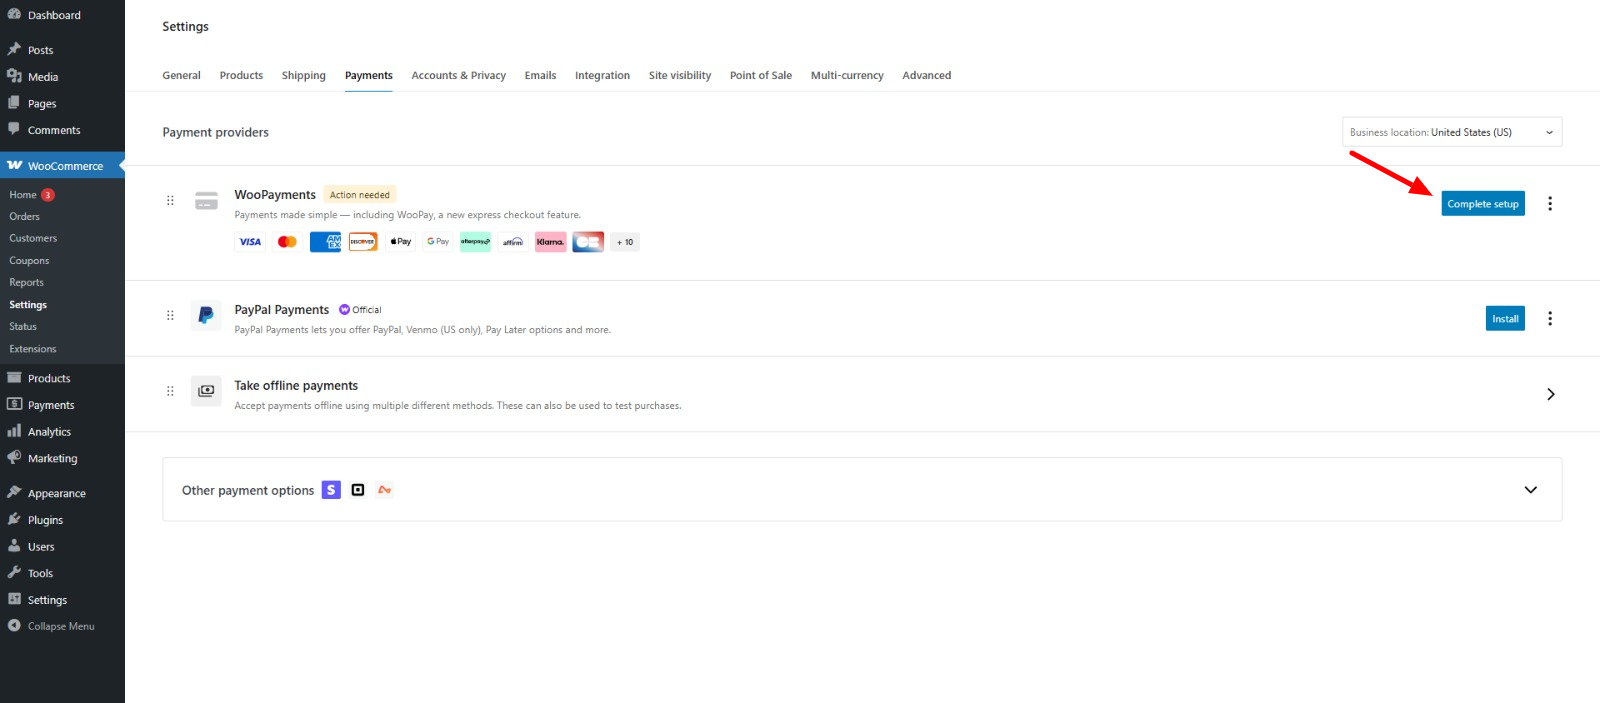
- Enter necessary credentials (API keys, merchant IDs, etc.)
- Set up payment options (test mode, transaction fees, etc.)
- Save settings and test the payment process.
— Most Popular Third-Party Payment Gateways
Stripe:
- Processes credit cards directly on your site
- Strong fraud protection
- Accepts multiple currencies
Square:
- Ideal for business owners with physical presence
- Marries online and offline transactions
- Competitive rate on the transaction
PayPal:
PayPal Payments lets you offer PayPal, Venmo (US only), Buy Now Pay Later (BNPL) options, and more.
— Offline Payment Options
While setting up WooCommerce on WordPress, we all loved it when we saw that there were offline payment options available.
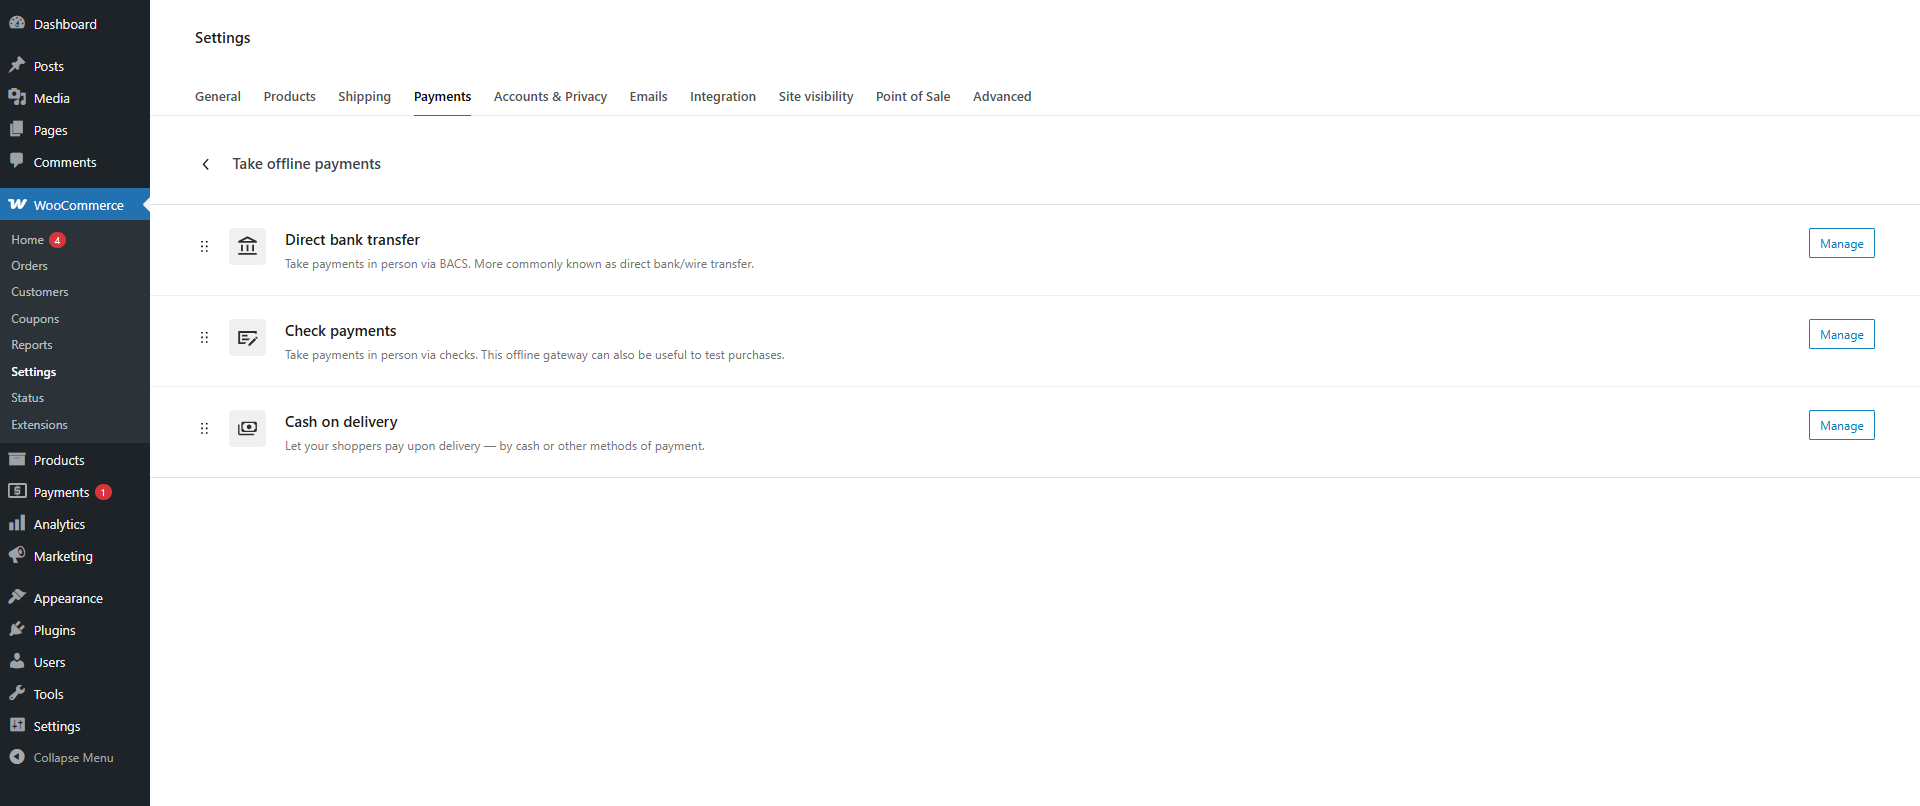
Direct bank transfer:
Take payments in person via BACS. More commonly known as a direct bank/wire transfer.
Check payments:
You can take payments in person via bank checks. This offline payment gateway method is useful for testing purchases.
Cash on delivery:
Let your shoppers pay upon delivery — by cash or other methods of payment.
- Ideally suited for same-city deliveries
- Customers pay upon delivery of the order
- No processing of online payments needed
— Configuring Offline Payment Gateways:
- Go to WooCommerce > Settings > Payments > Take offline payments.
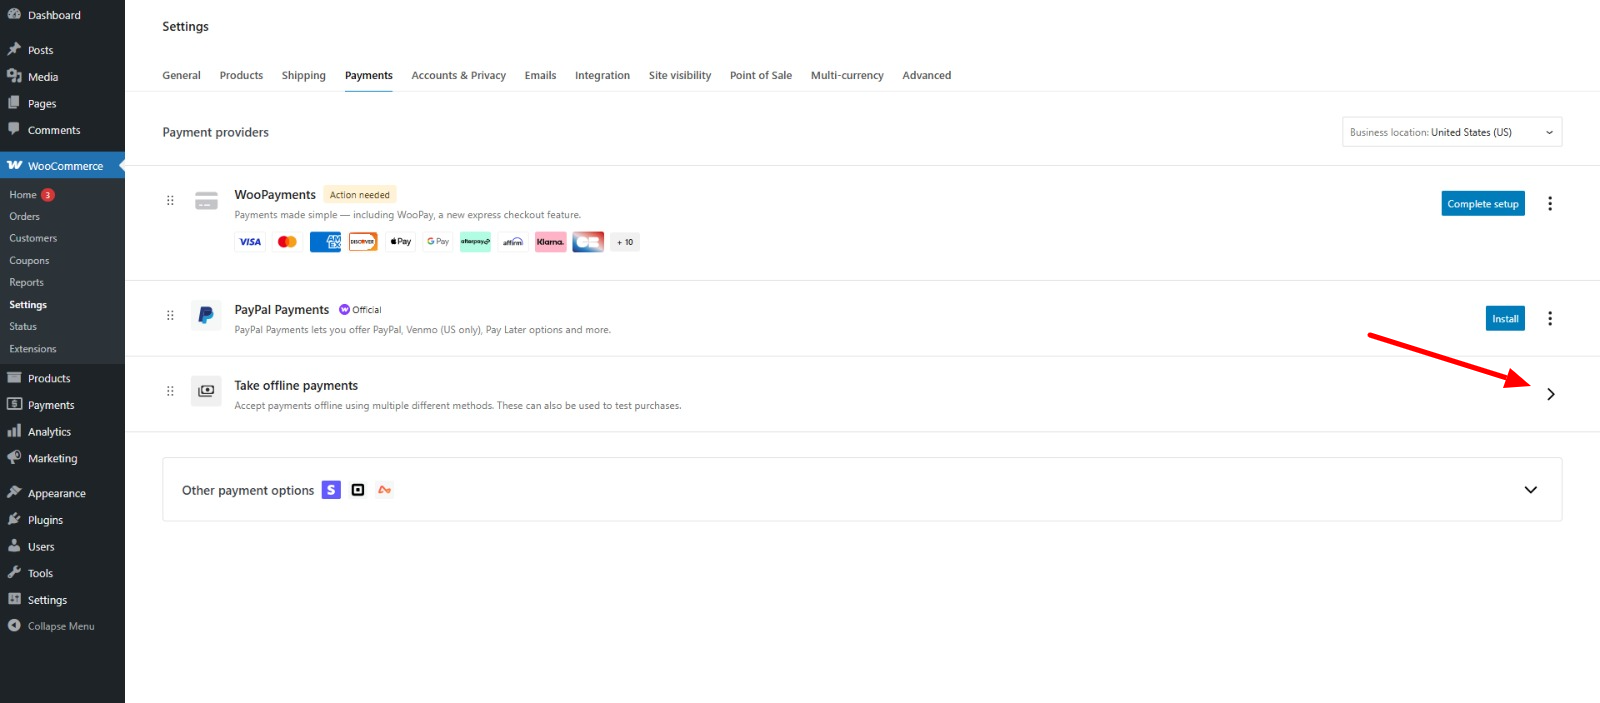
- Enable your preferred payment methods by checking them.
- Click “Manage” beside each payment gateway.
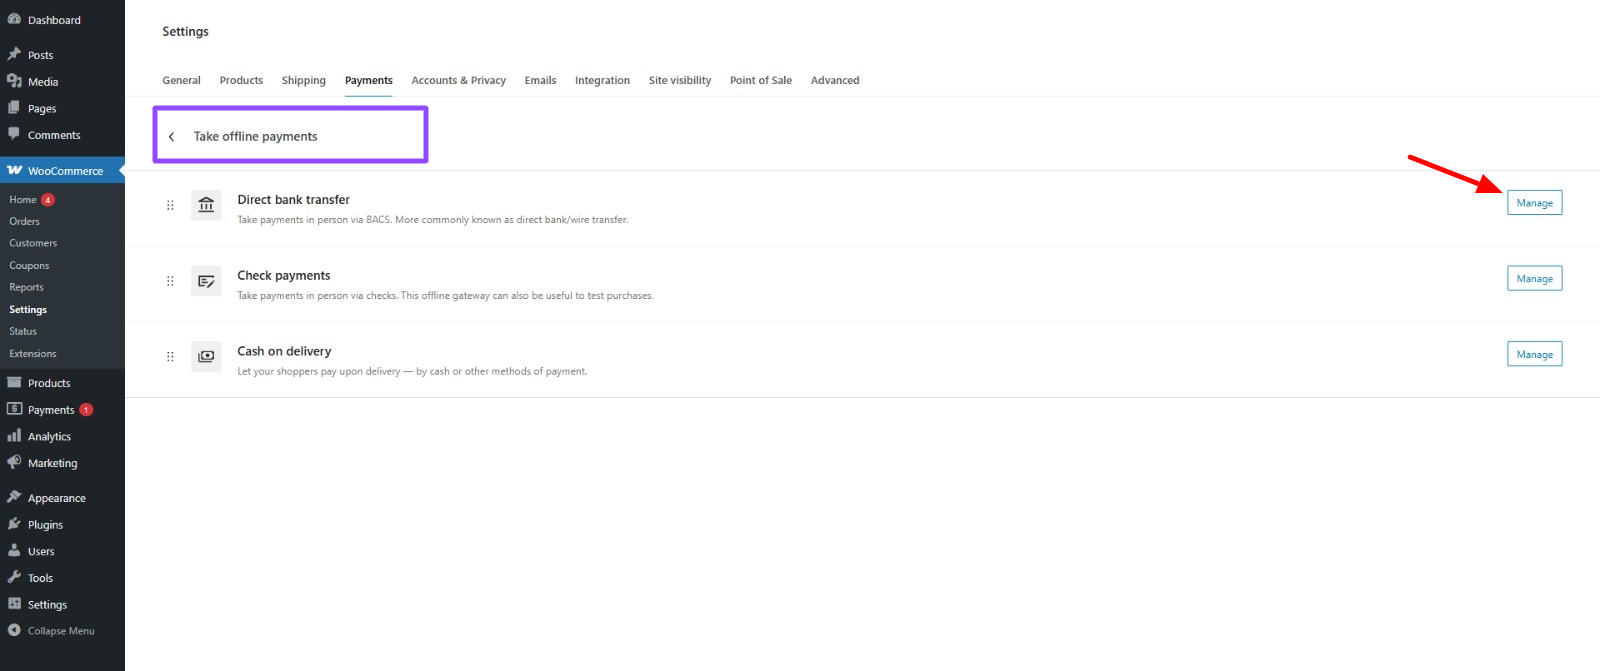
- Enter necessary credentials (Edit title, description, instruction, and account details, etc.)
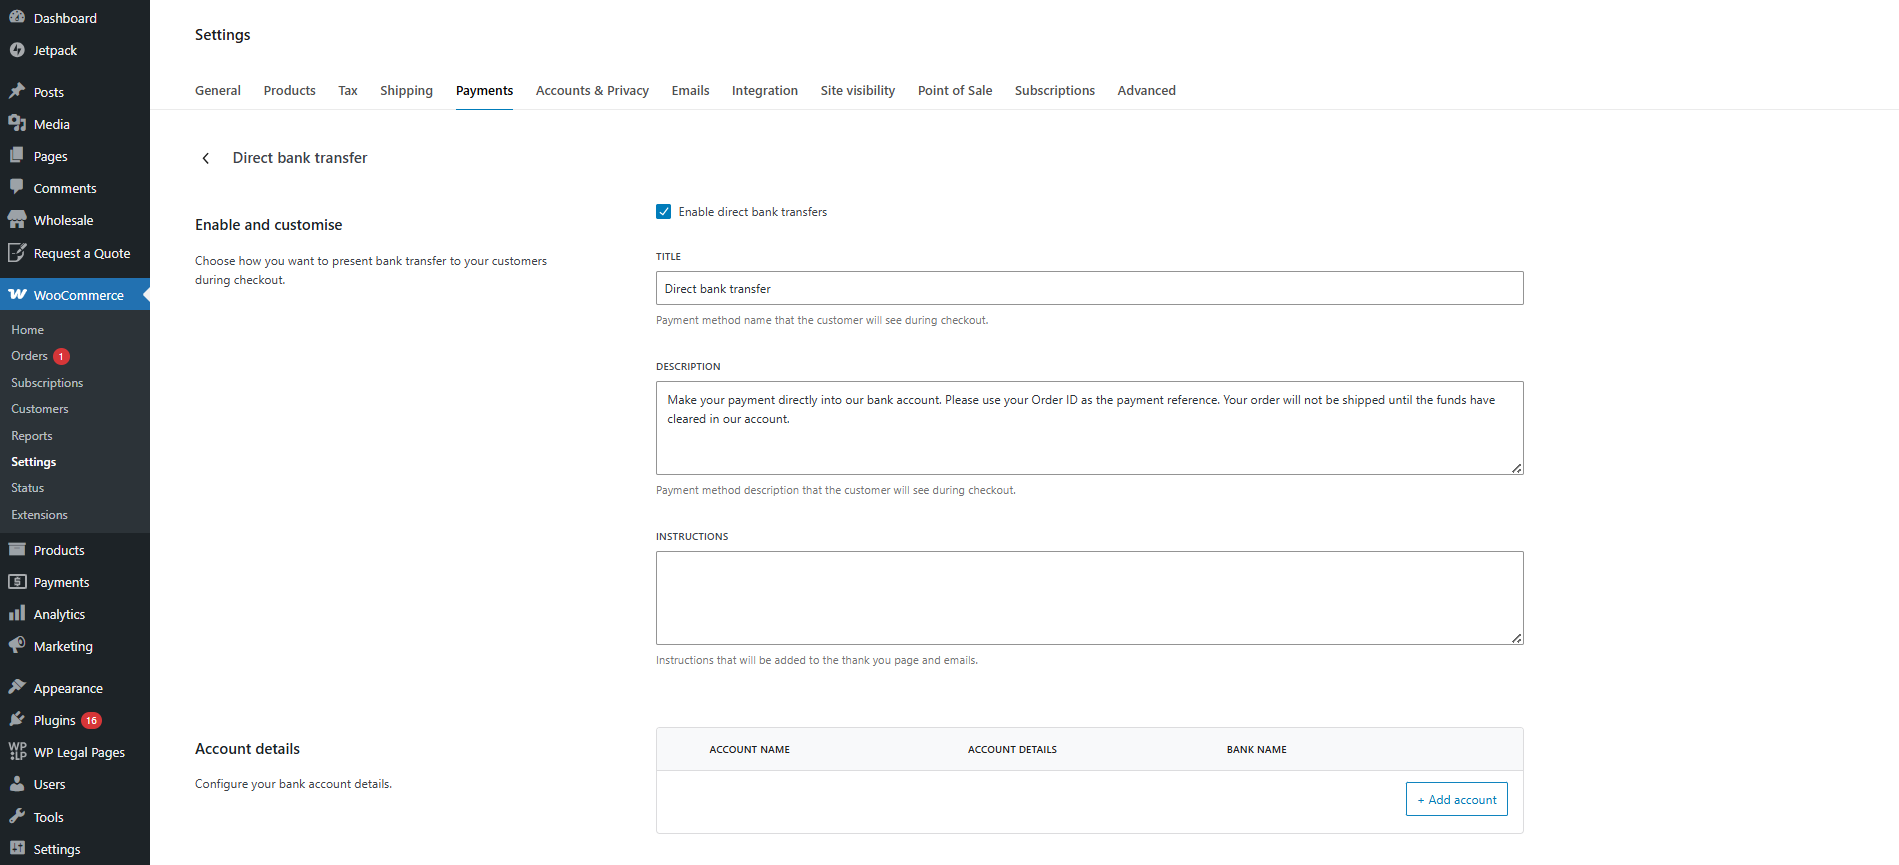
- Save settings and test the payment process.
Step 6: Collect Sales Tax
The next step in this WooCommerce tutorial is setting up how you’ll collect taxes on each transaction. You have two options to collect tax.
1st Option: Choose a Tax Solutions Providing Plugin
For now, let’s choose Woo as a tax partner.
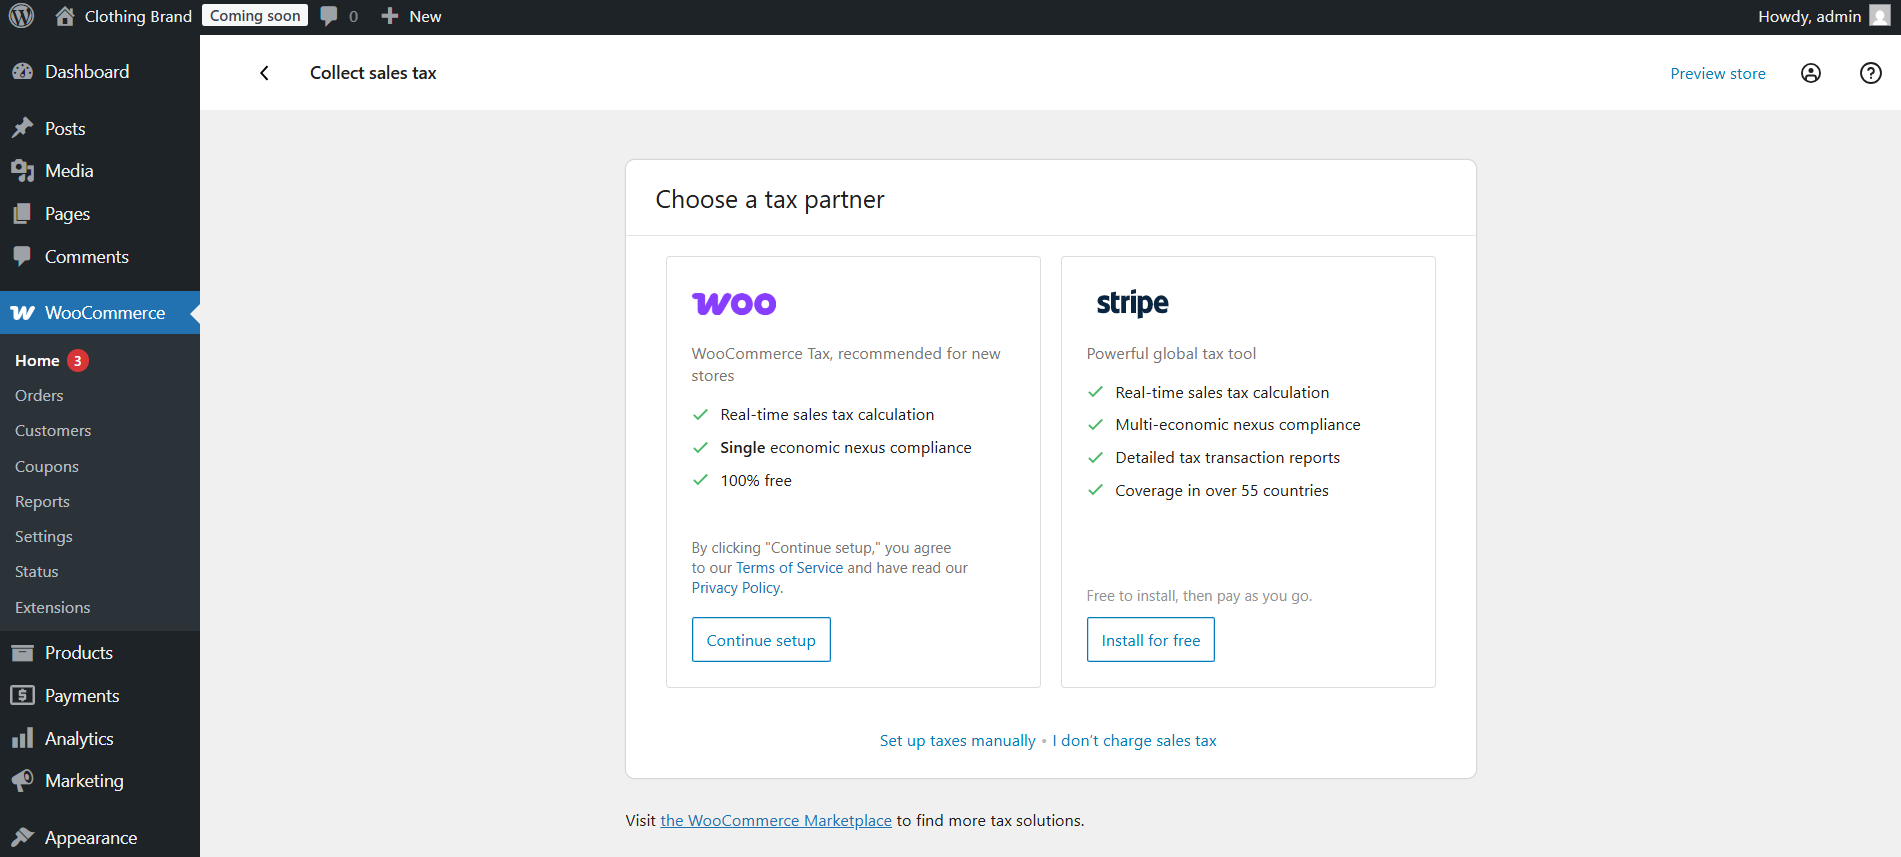
- Enter your store location.
- Install the WooCommerce Tax extension.
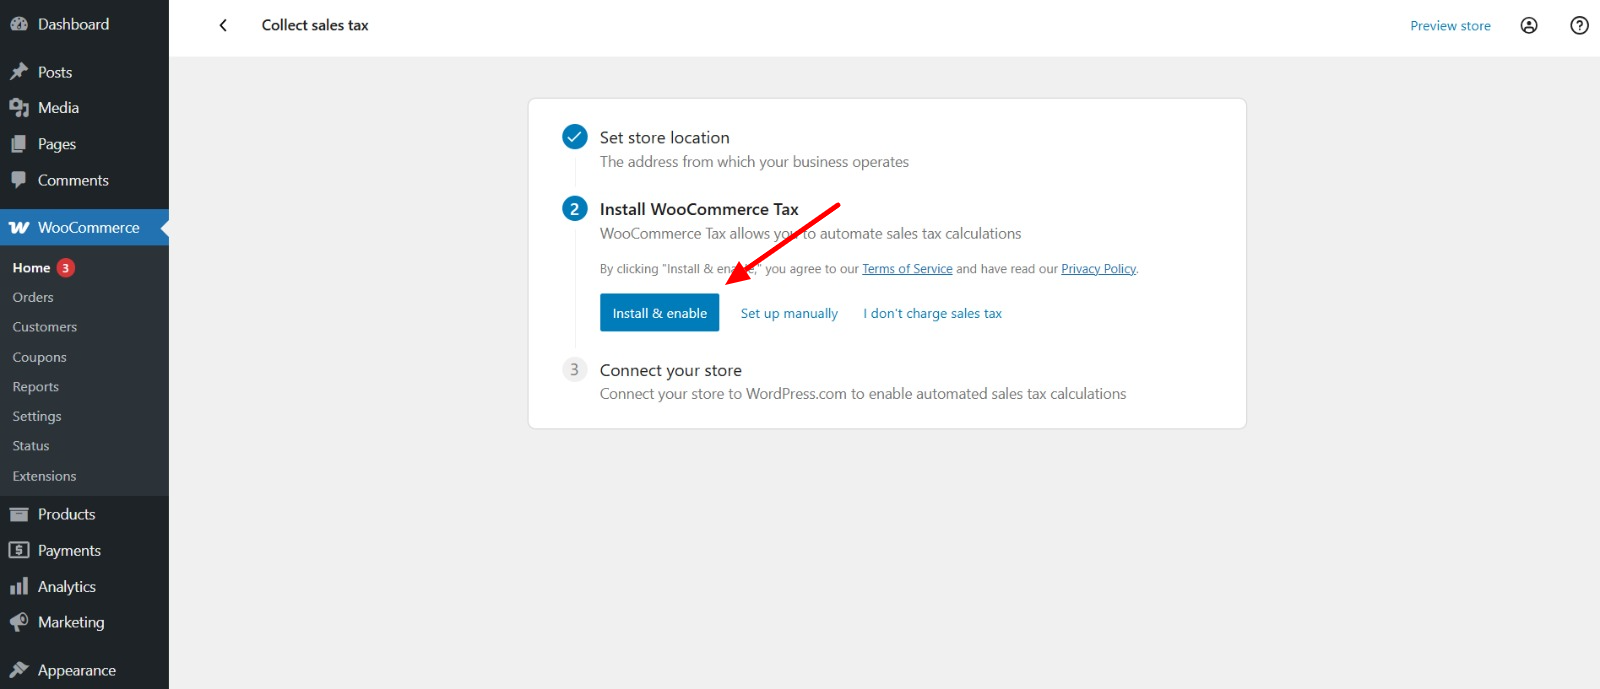
- Connect your store and set up your tax rates.
2nd Option: Manually Set Up Tax Rates
- Go to WooCommerce > Settings > Tax.
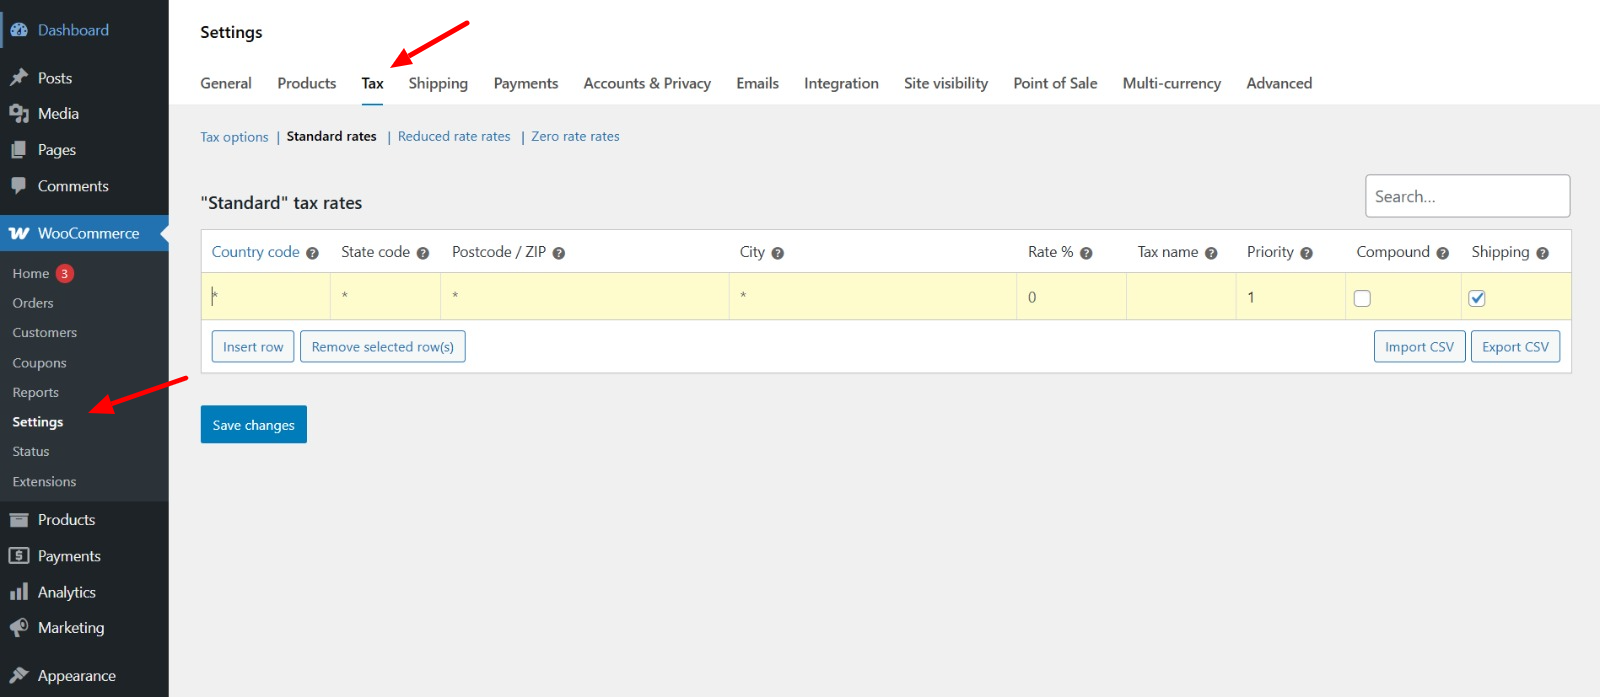
- Insert a row and fill in your information in the following columns.
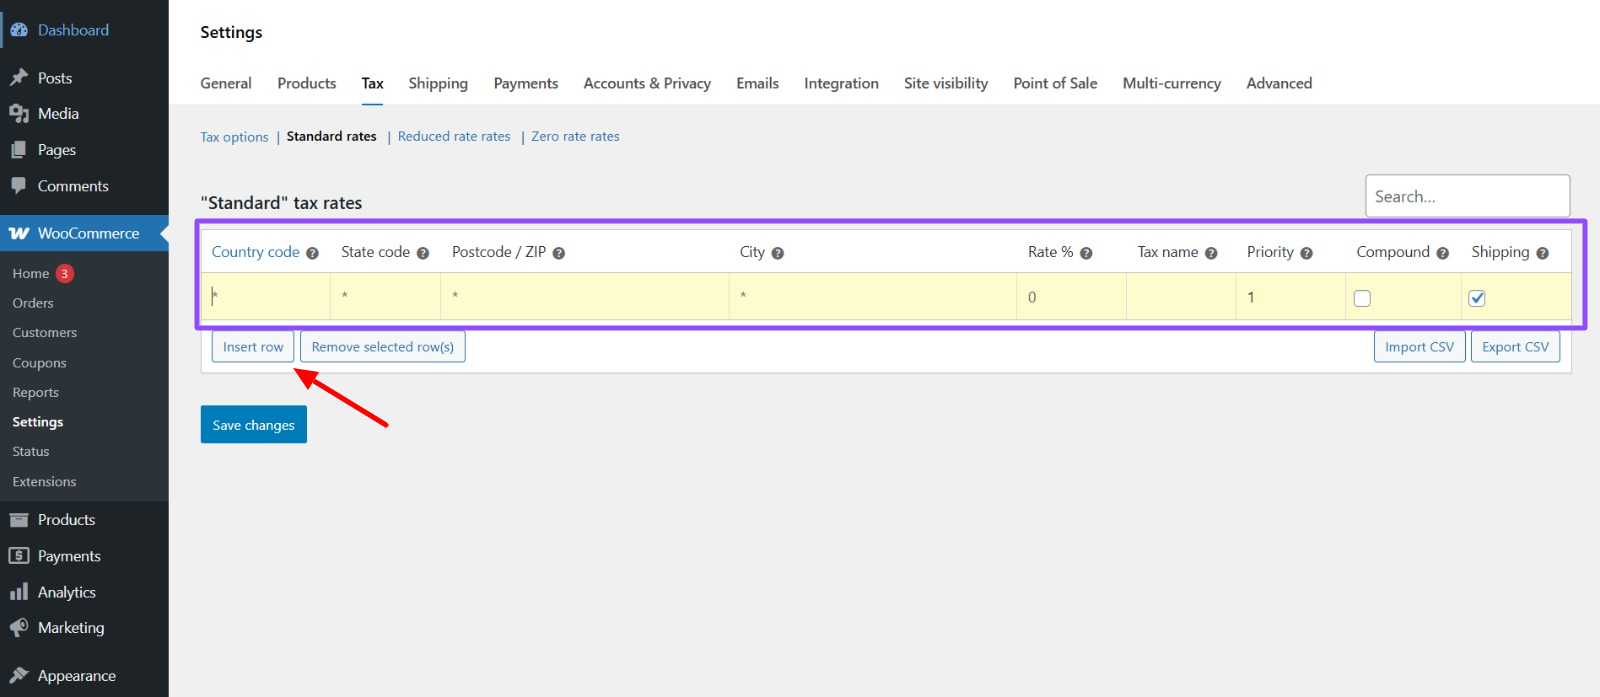
- Save changes.
Disclaimer: If your business does not charge taxes, you can instantly select “My business doesn’t charge sales tax” and skip this step.
Step 7: Shipping Options Configuration
Shipping is of great importance for physically shipped items. WooCommerce has a flexible shipping system for all types of business models.
— Setting Shipping Zones
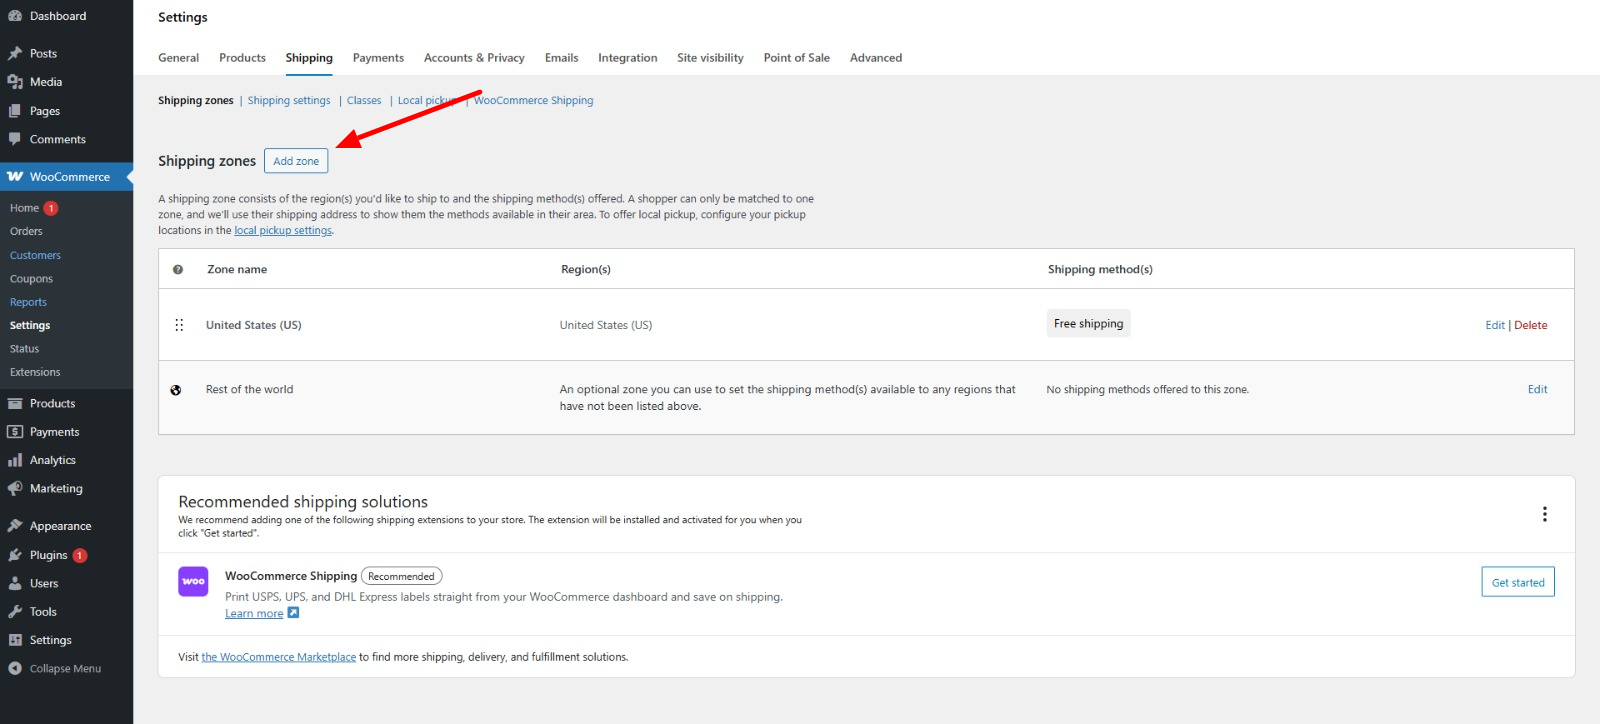
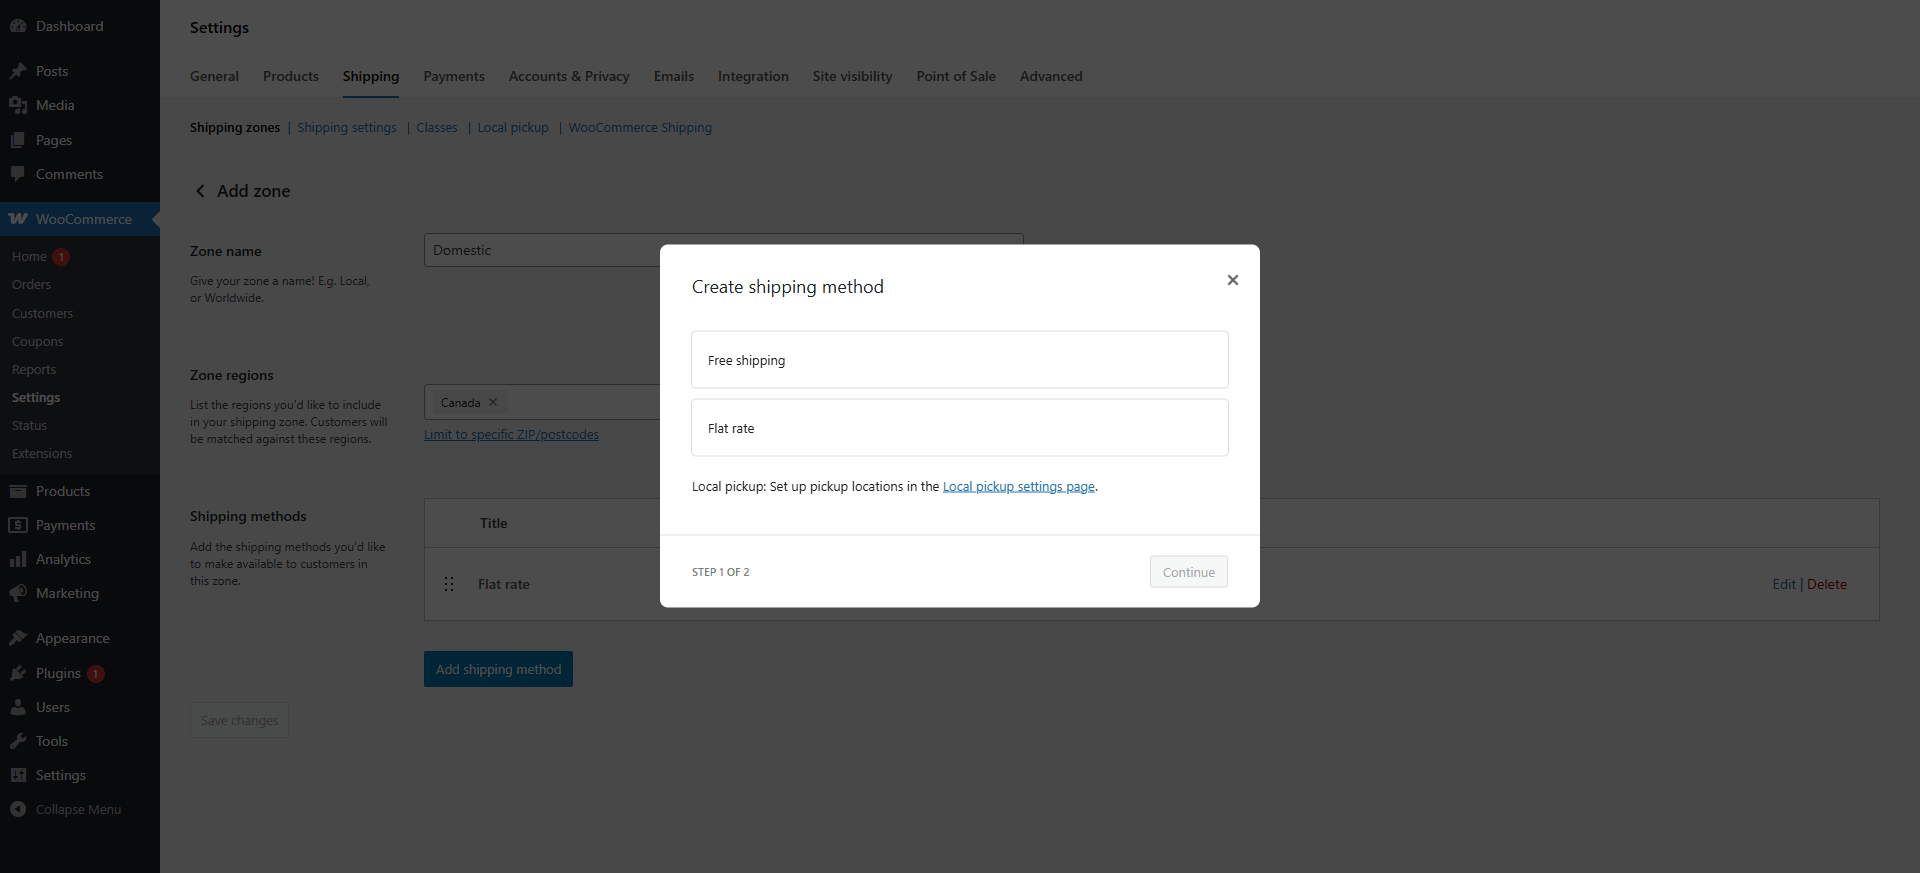
- Go to WooCommerce > Settings > Shipping.
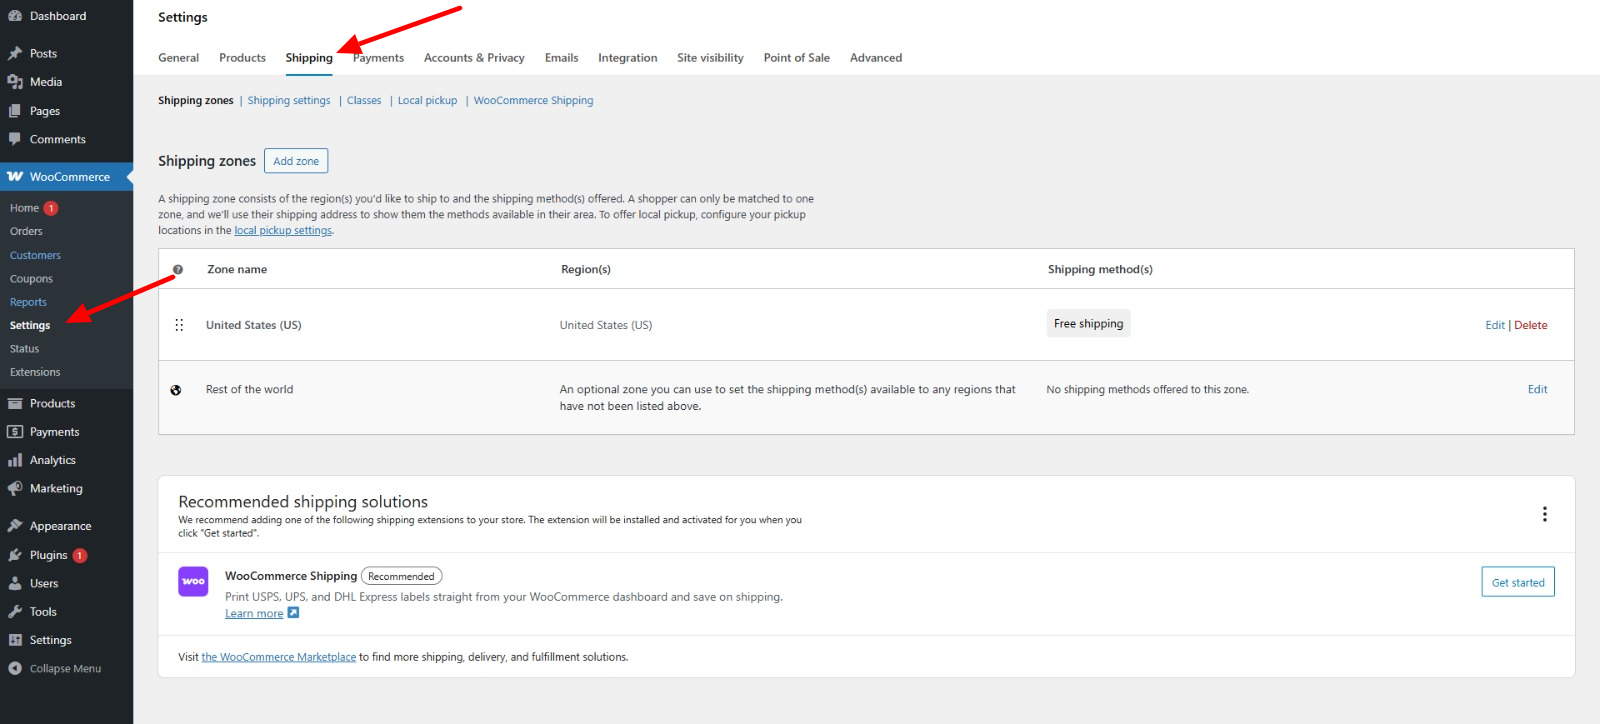
- Click “Add shipping zone”.
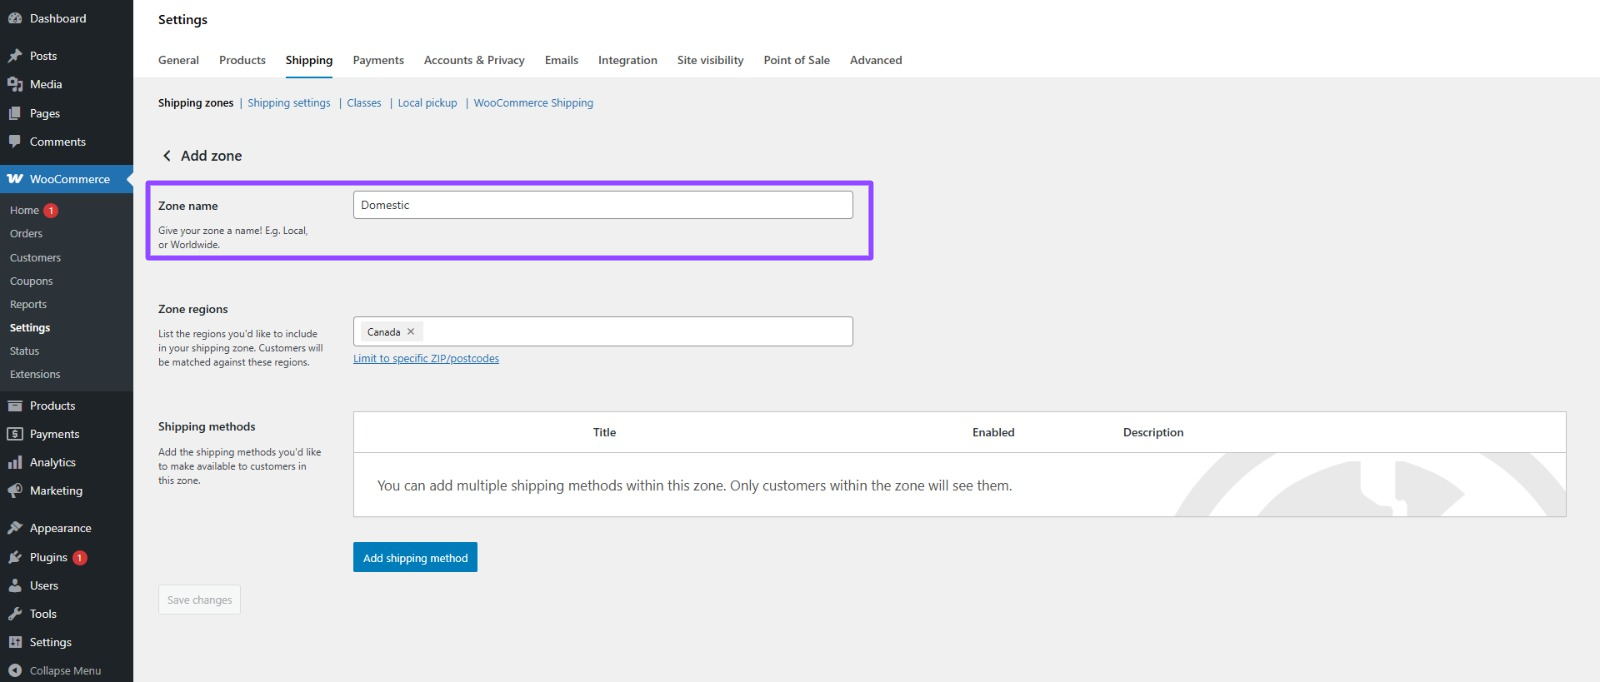
- Give your zone an optional name, e.g., “Domestic, International,” etc.
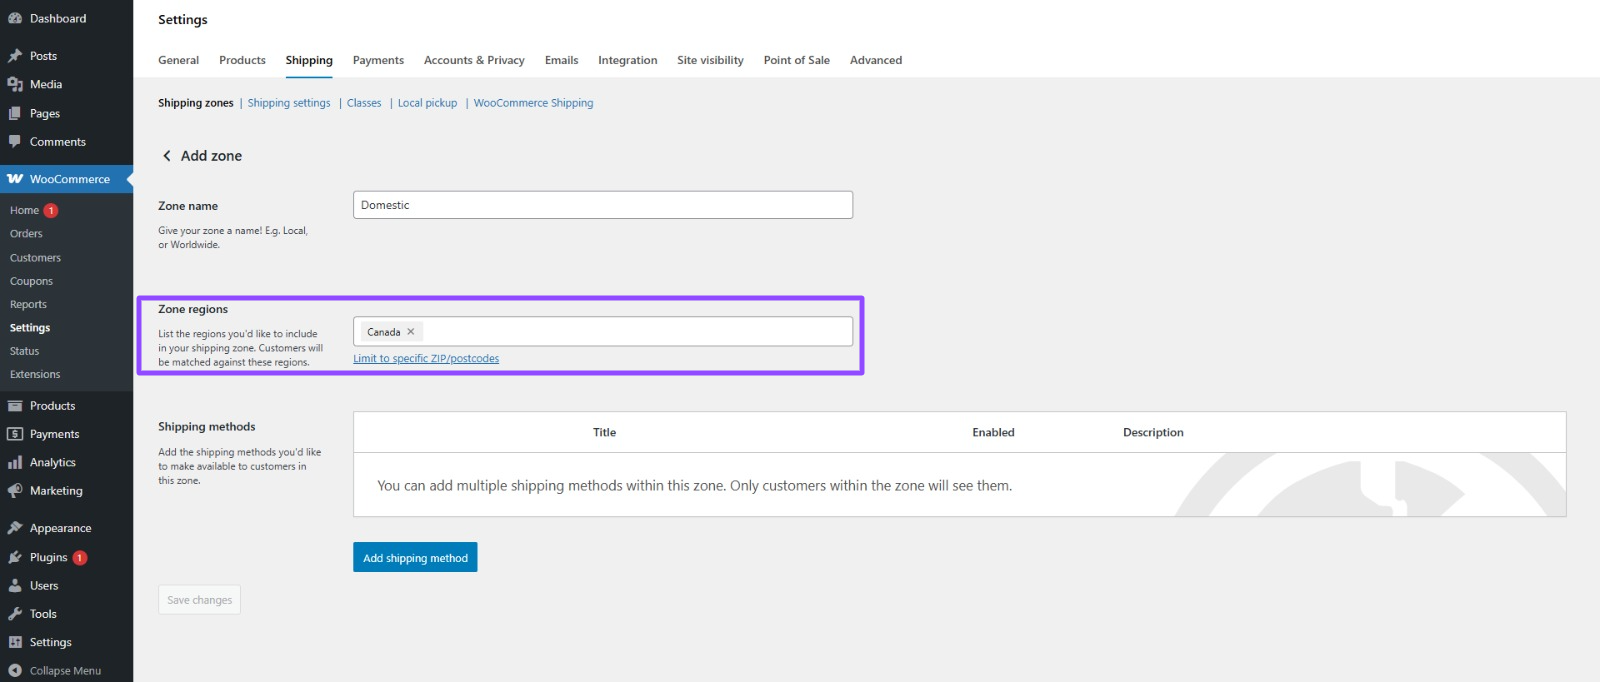
- Zone regions, e.g., countries or states.
- Add shipping methods.
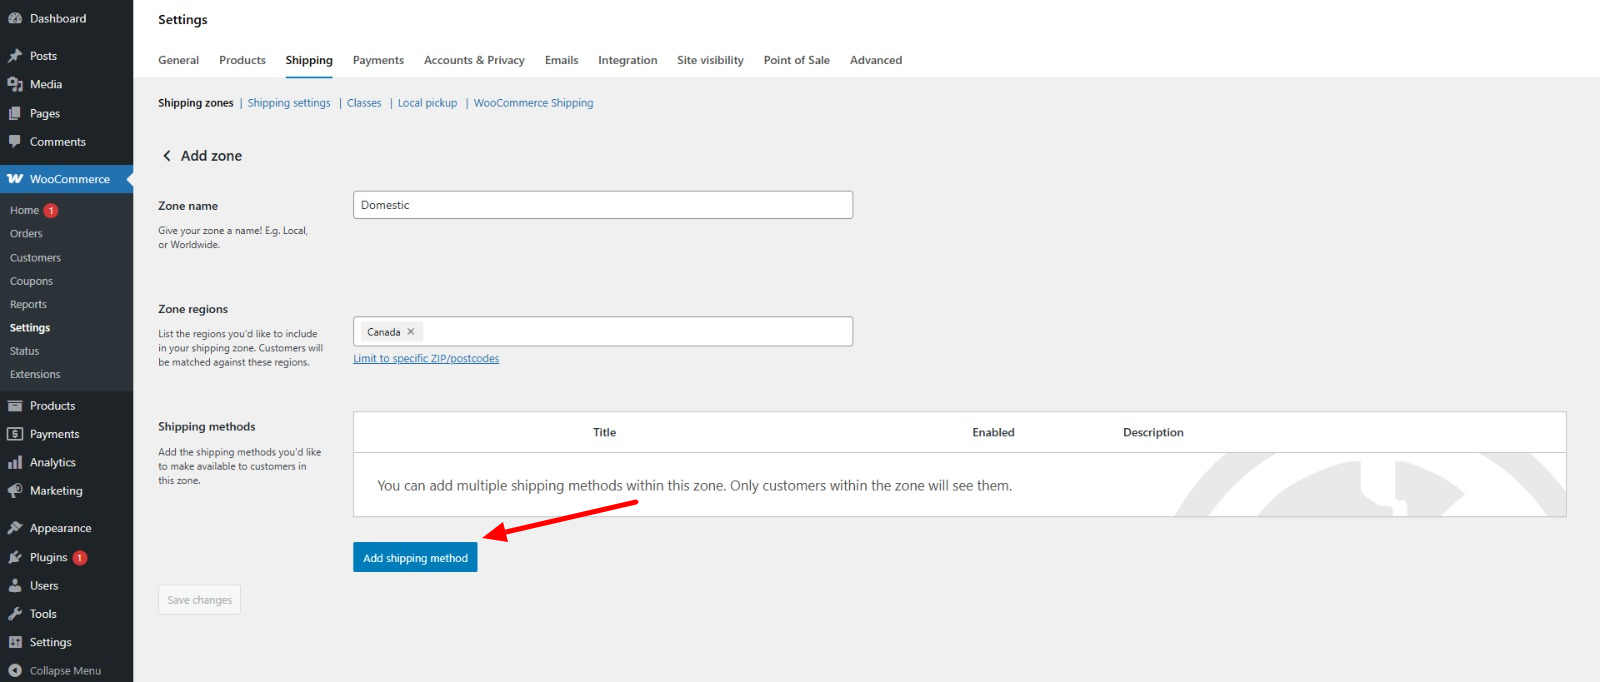
- Select from flat rate or free shipping, then set them up according to your requirements.
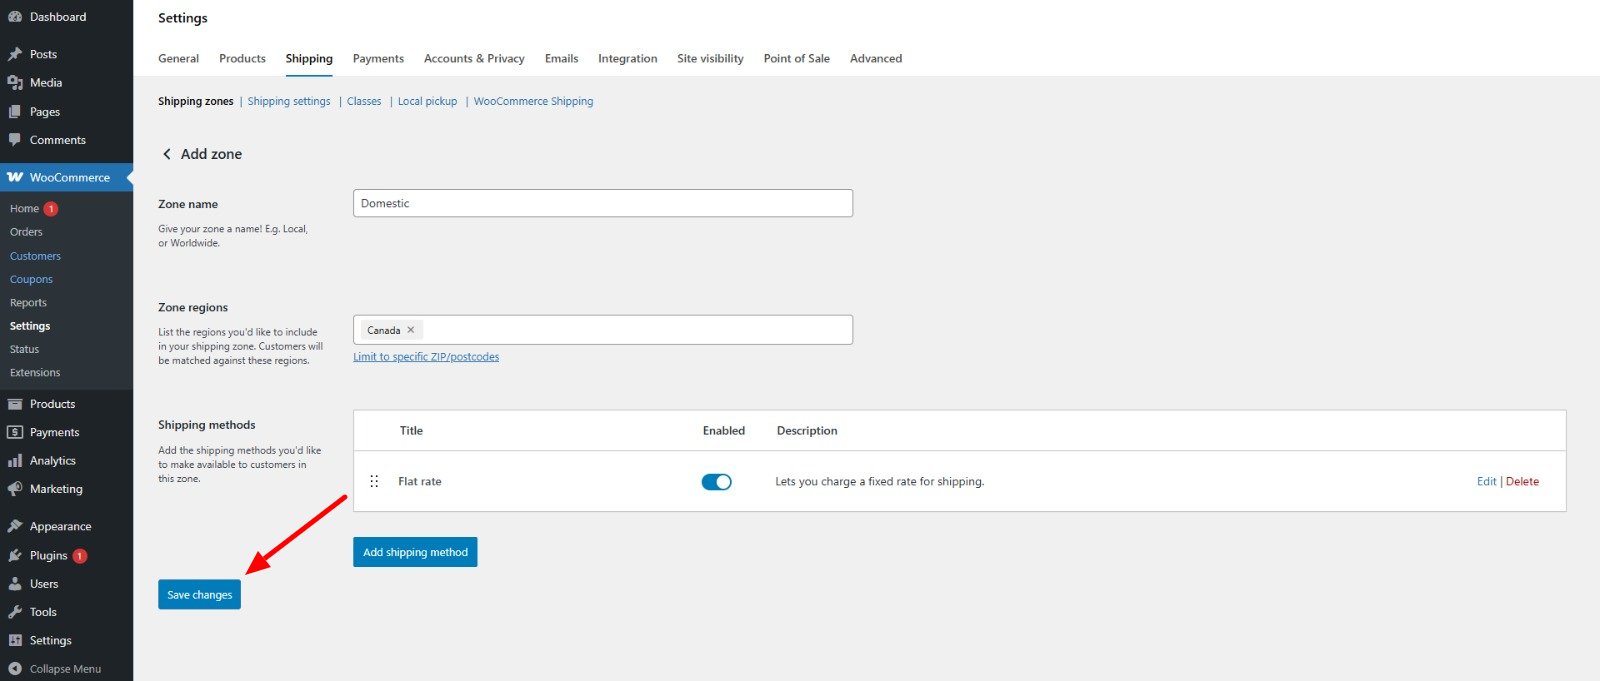
- Now save your settings.
— Common Shipping Methods
Flat Rate Shipping:
- Fixed rate without consideration of order quantity
- Easy for customers to understand
- Easy to calculate profit margins
Free Shipping:
- Powerful marketing tool
- Conditional (min. order quantity) can be
- Generally increases average order value
Local Pickup:
- Customers take orders from your store
- Conserves shipping cost
- Best for local stores
Weight-Based Shipping:
- Based on the weight of the package
- More precise with varying product sizes
- Requires weight data for all products
Step 8: Install Must-Have WooCommerce Extensions
Extensions take the functionality of your store beyond what the standard WooCommerce package has to offer. Begin with these absolute essentials:
— Marketing Extensions
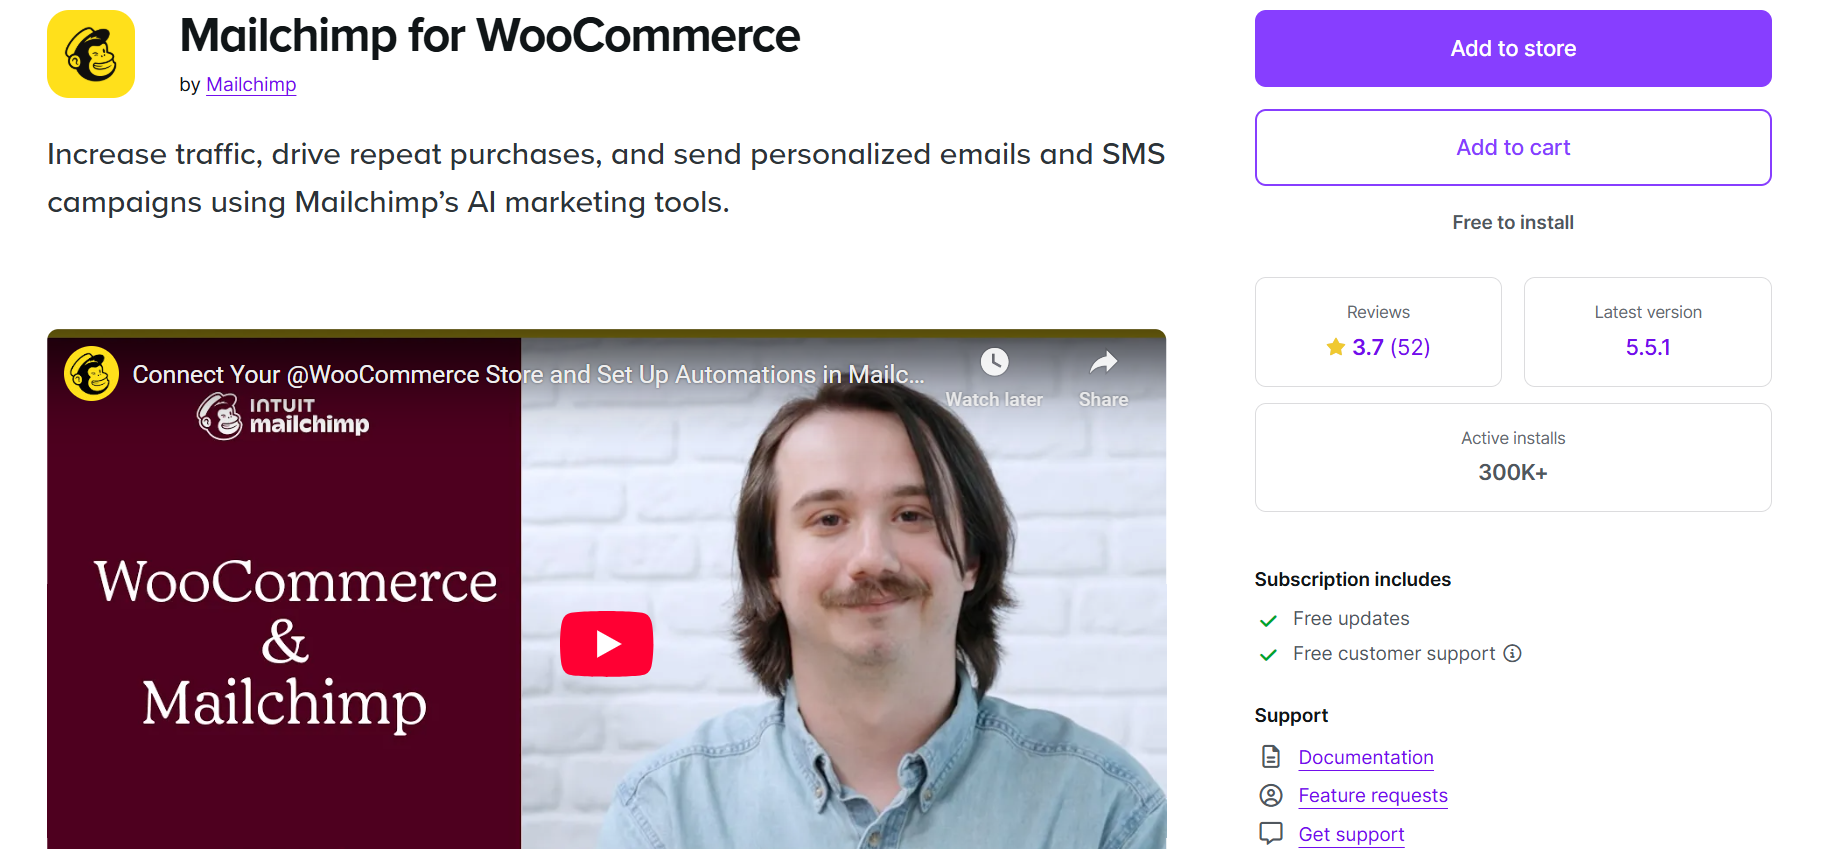
- Mailchimp for WooCommerce: To integrate email marketing in your store.
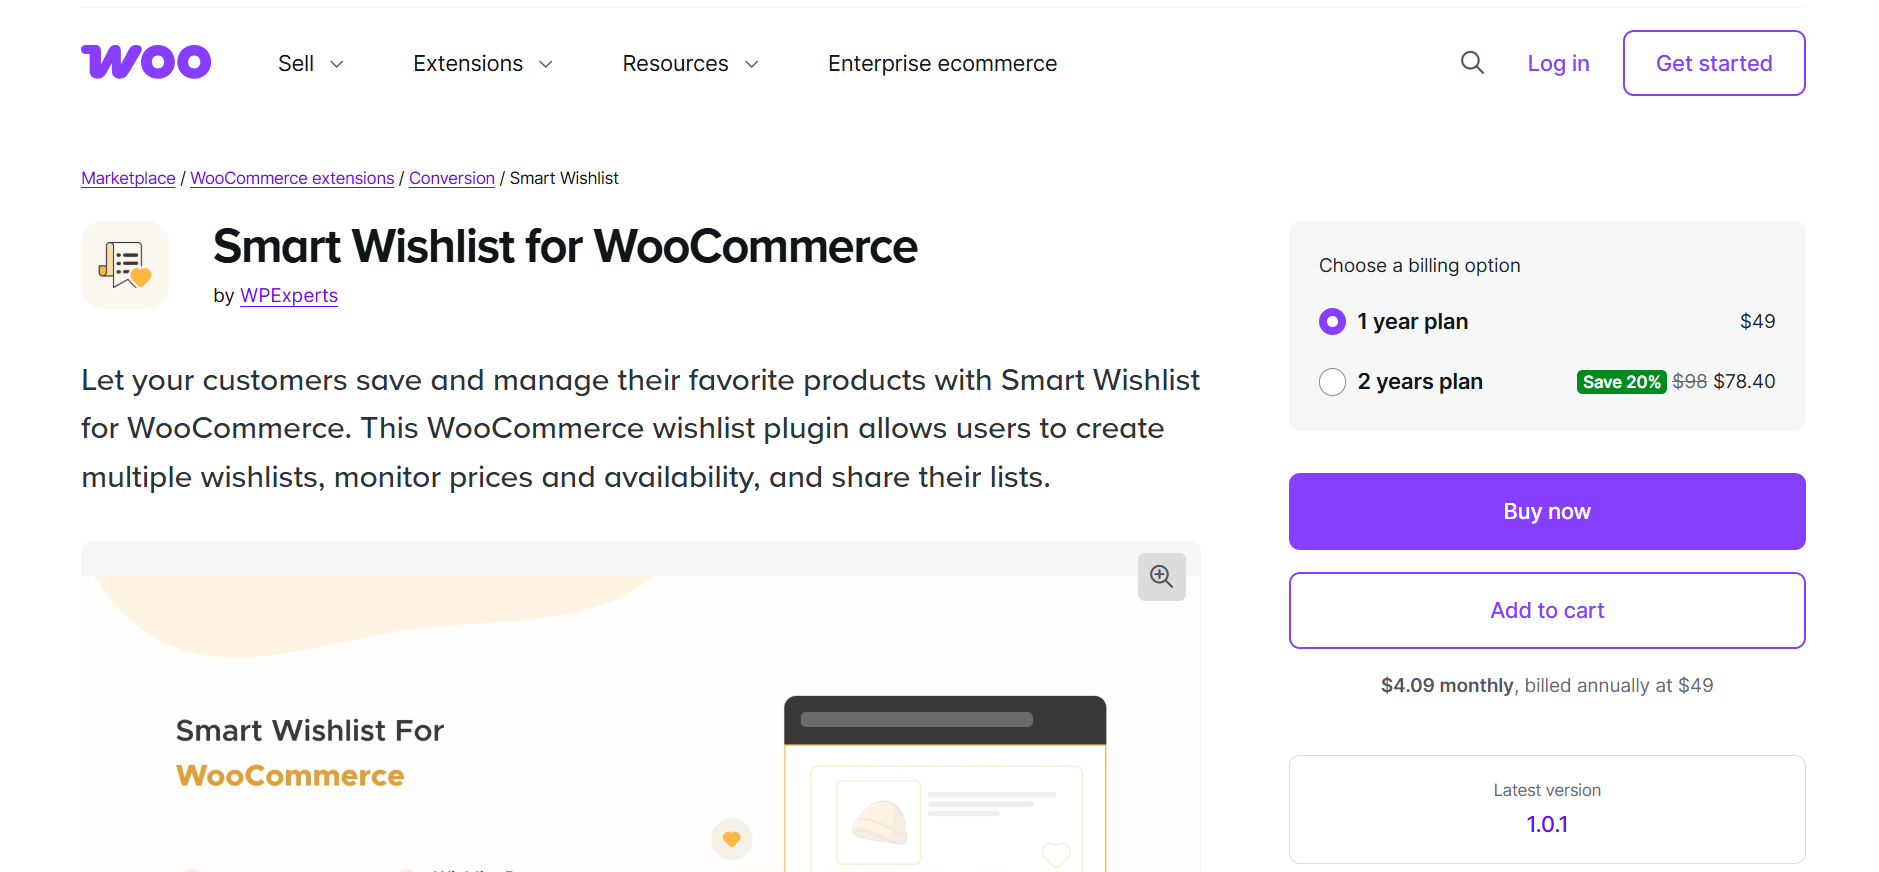
- Smart Wishlist for WooCommerce: Allow visitors to save for later.
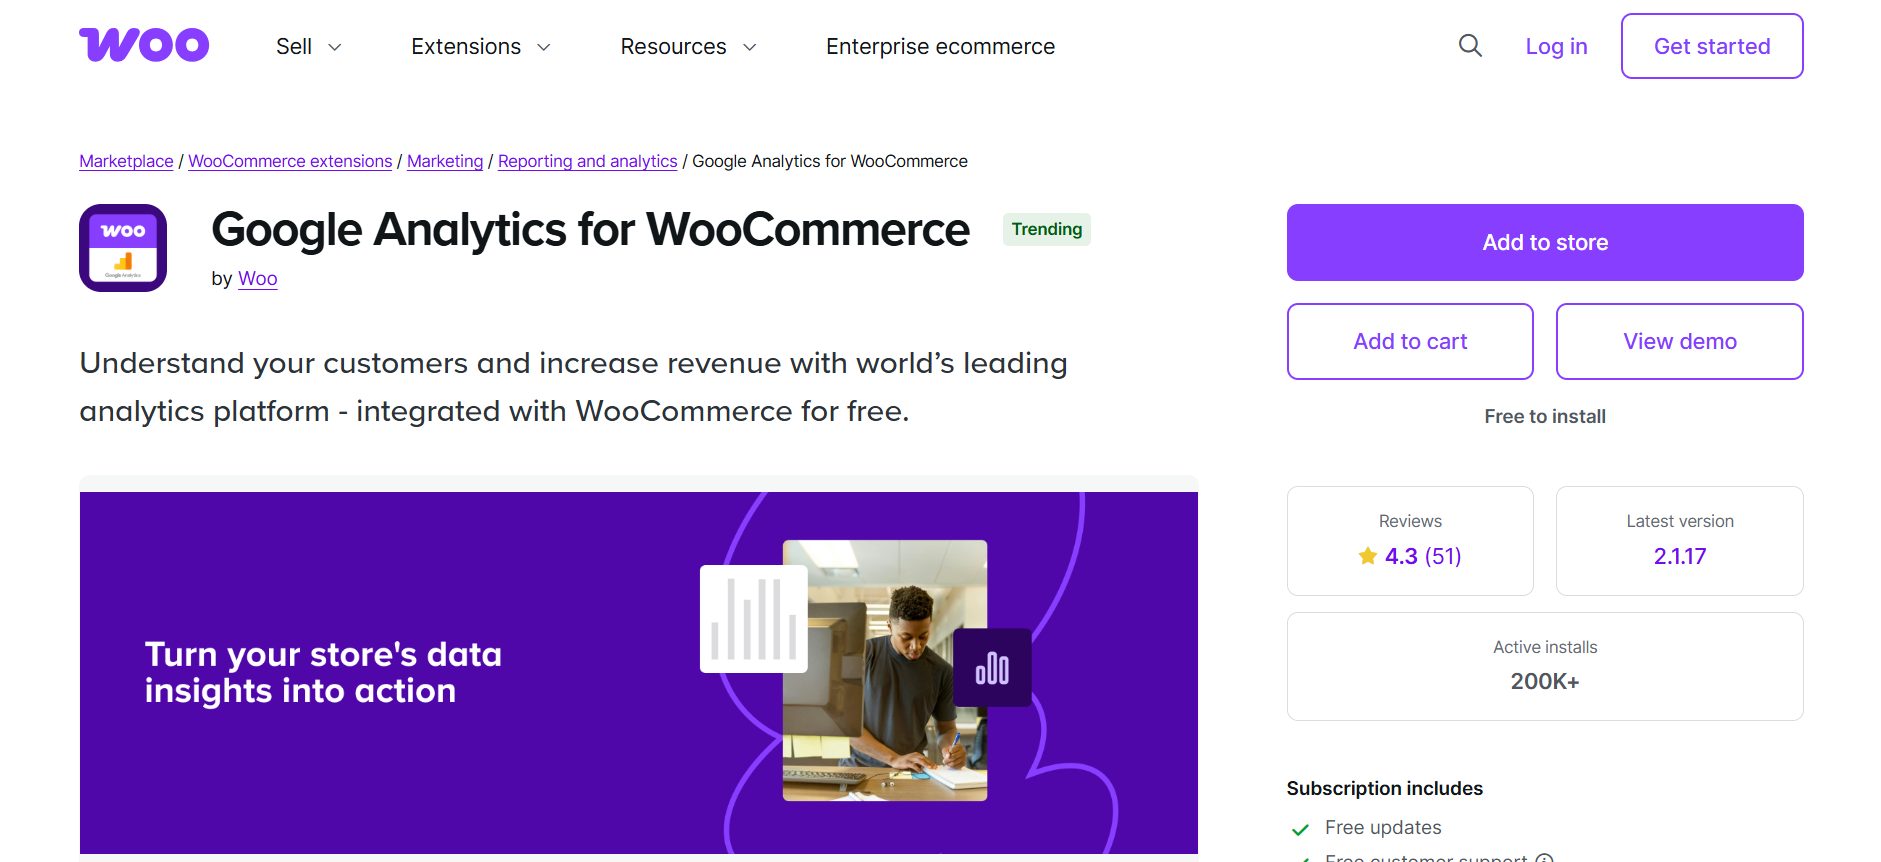
- WooCommerce Google Analytics: Monitor store performance.
— Security Extensions
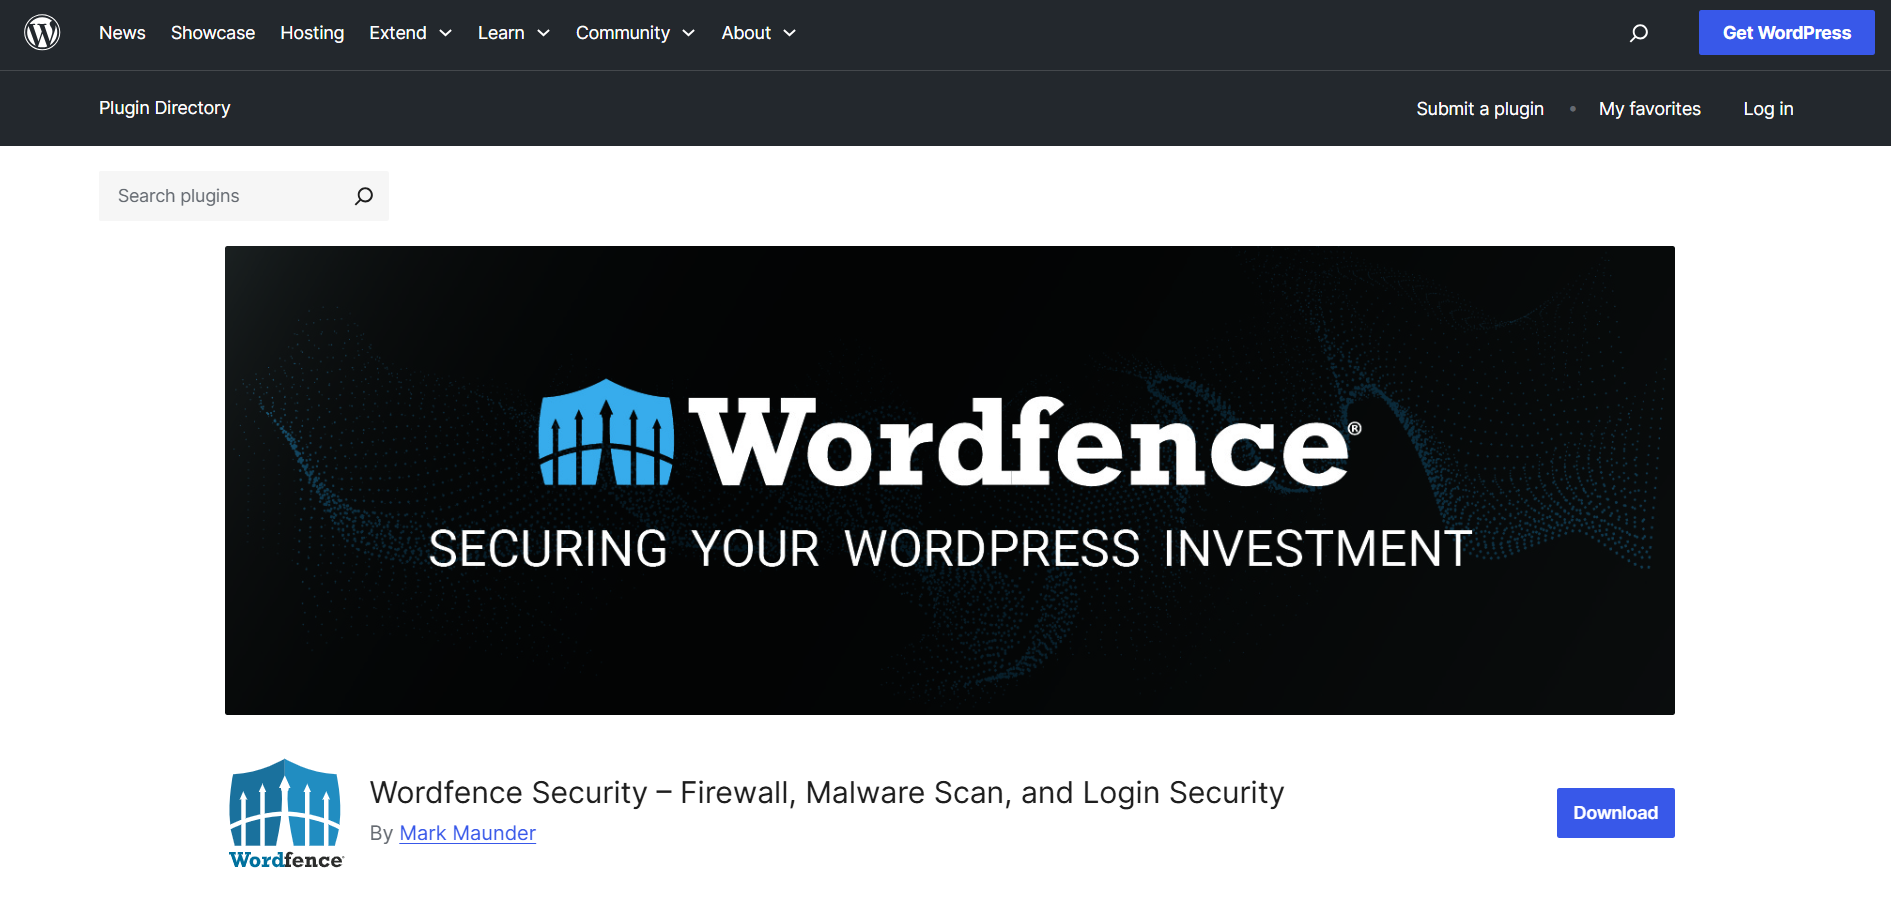
- Wordfence Security: Strong WordPress security.
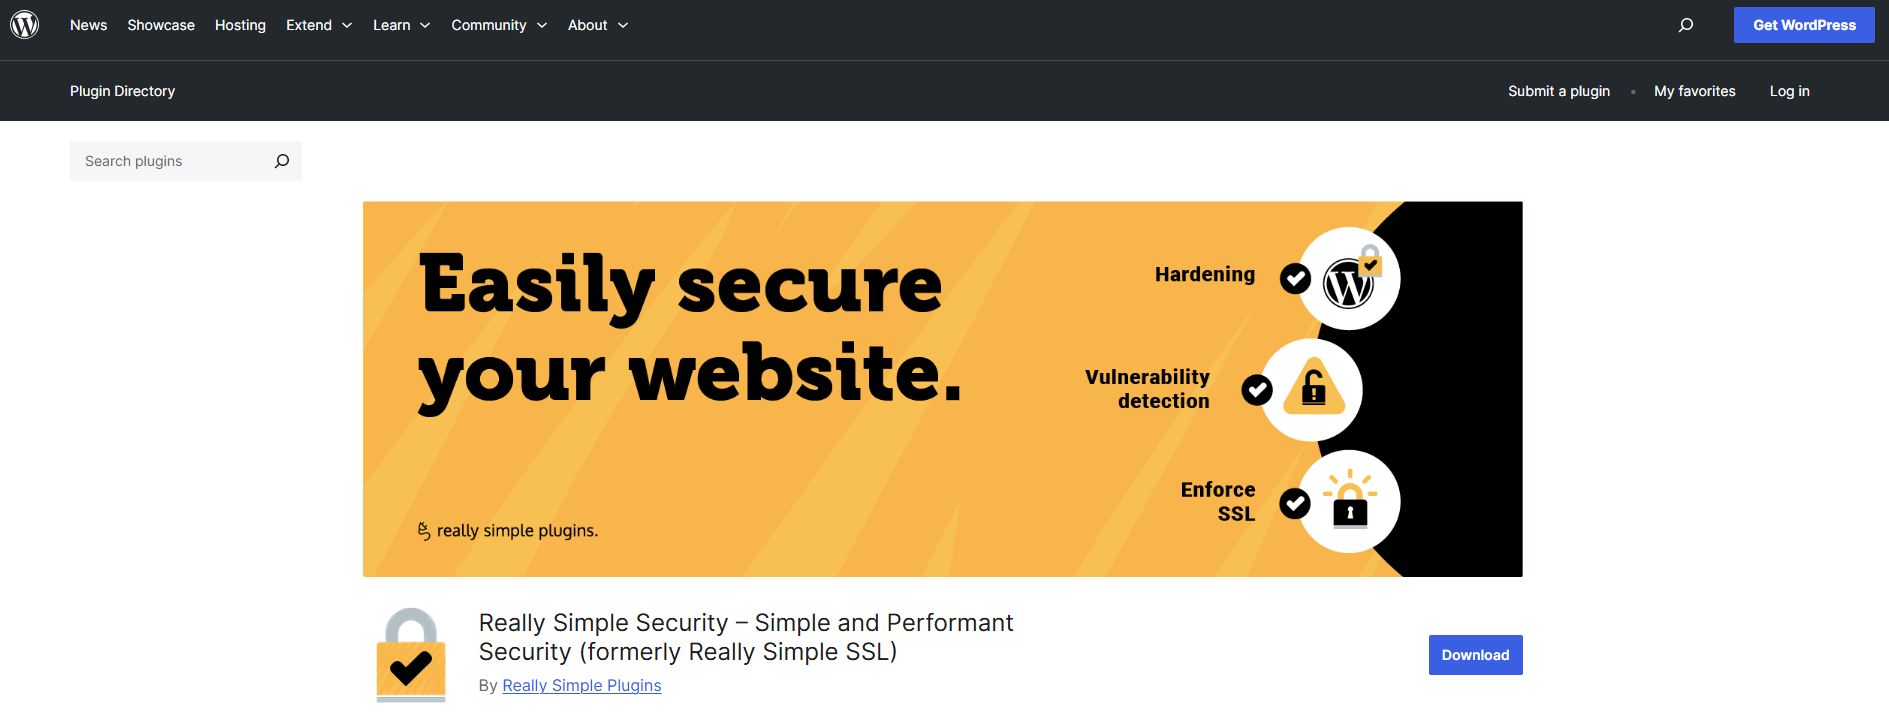
- Simple SSL: Protect customer information (usually bundled with hosting).
— Performance Extensions
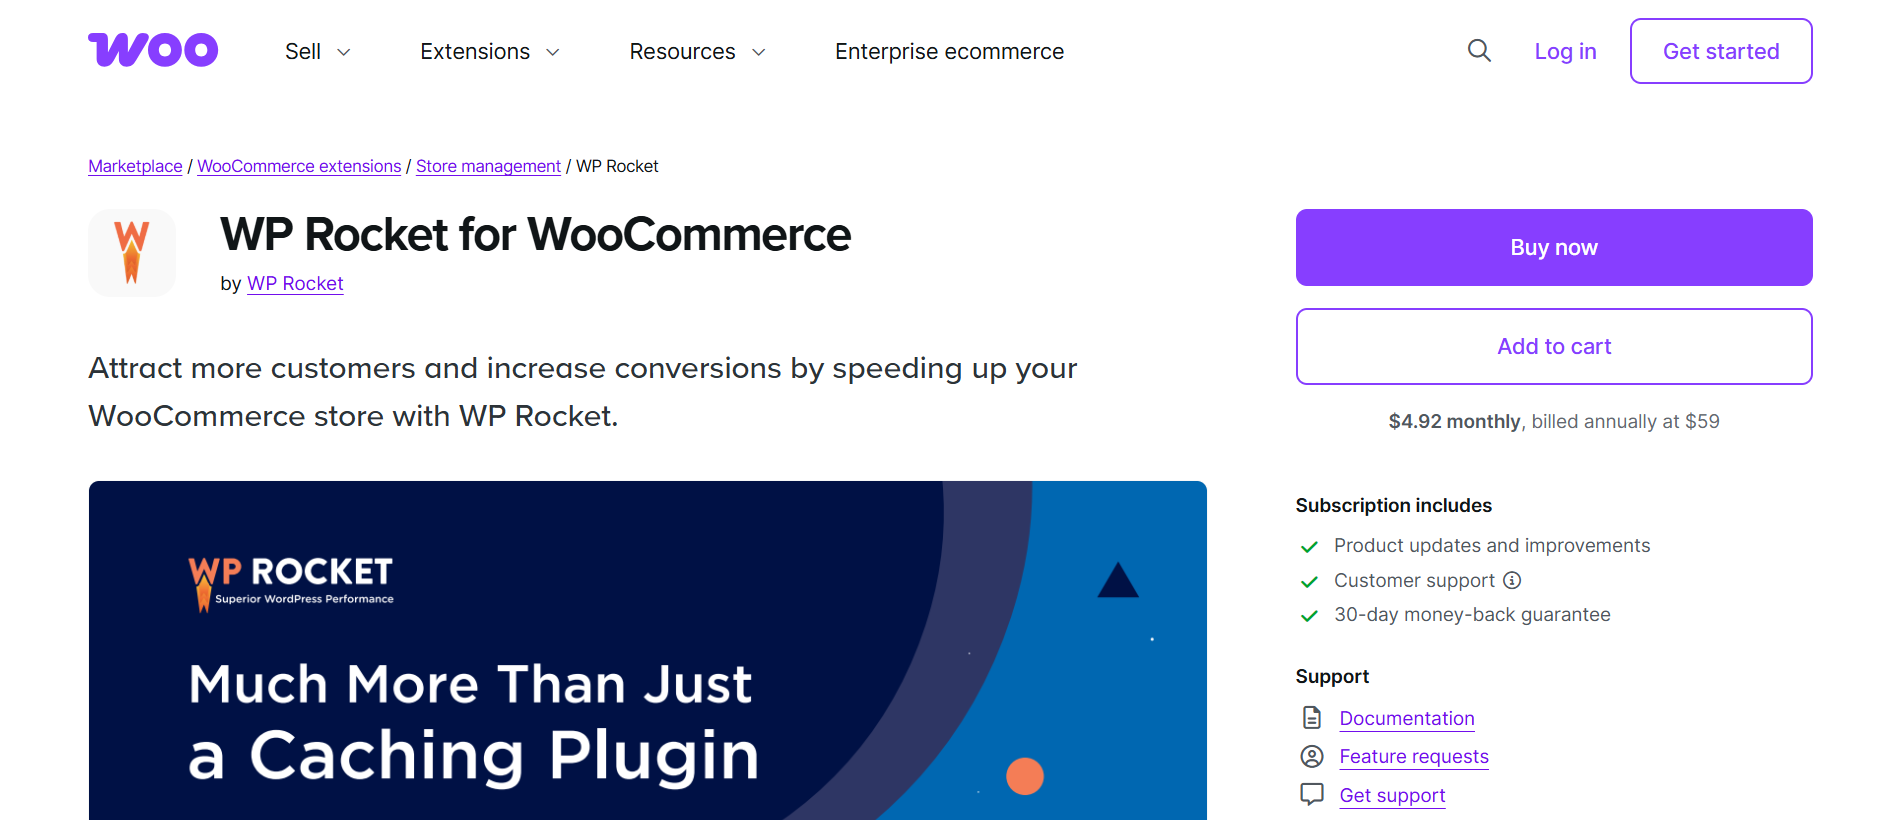
- WP Rocket: Caching to improve page loading.
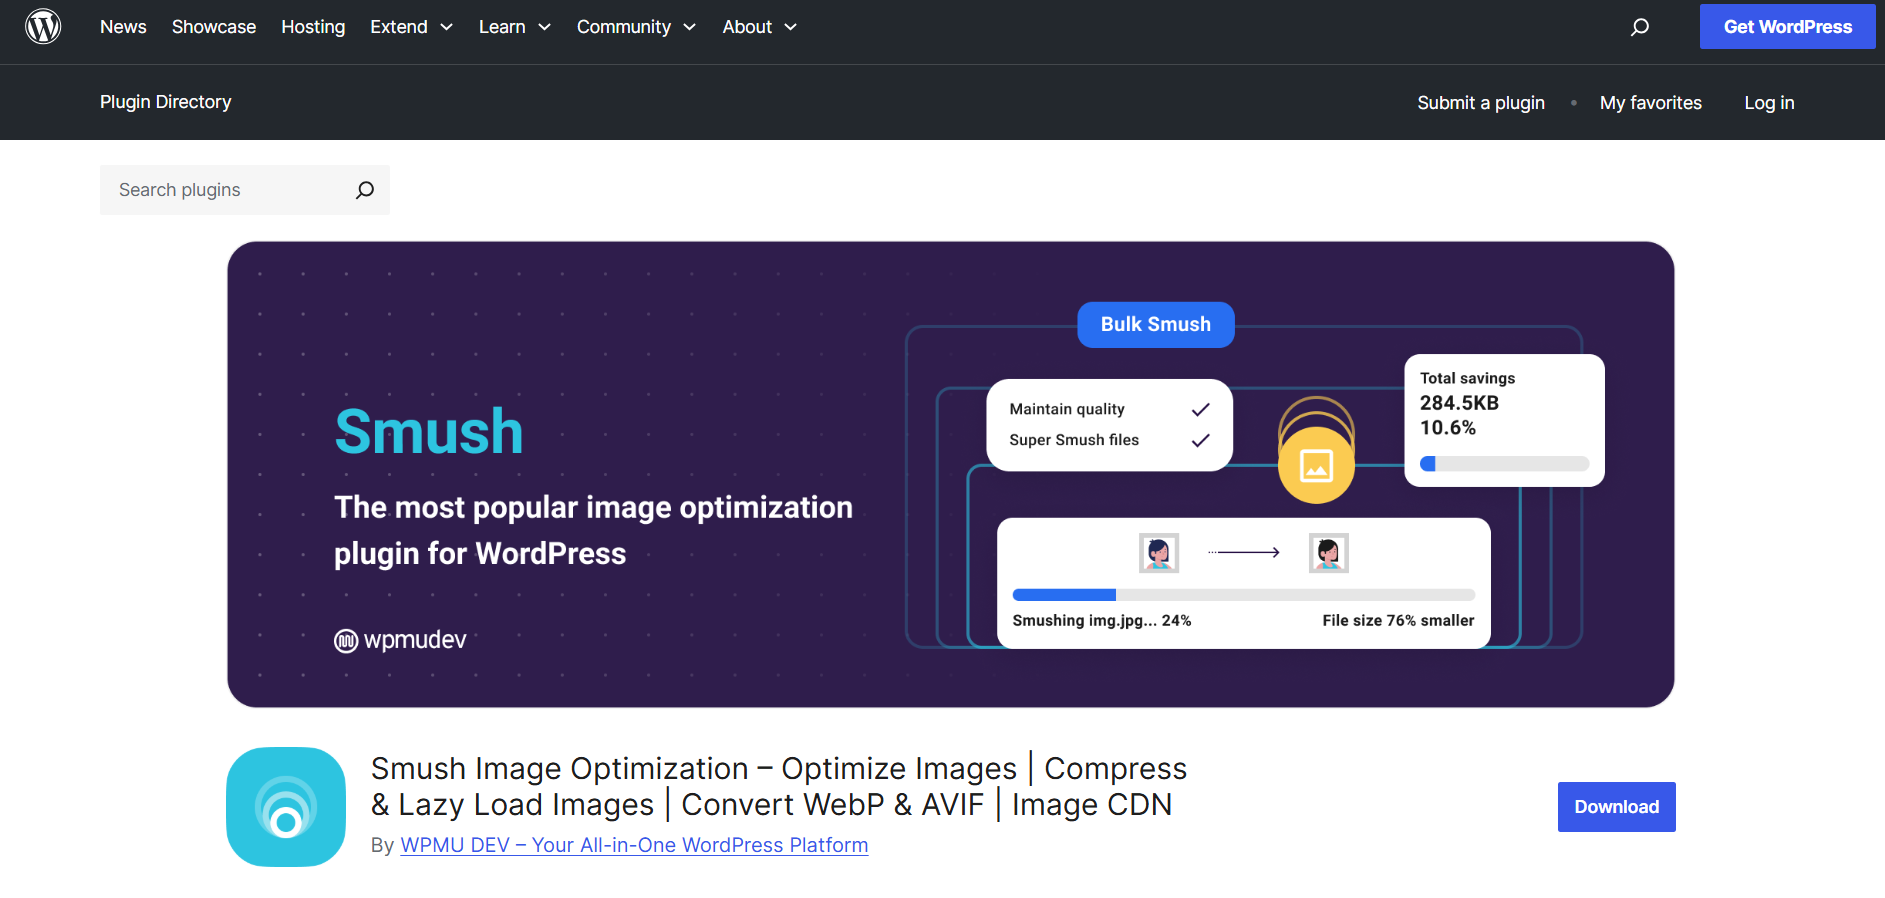
- Smush: For image compression.
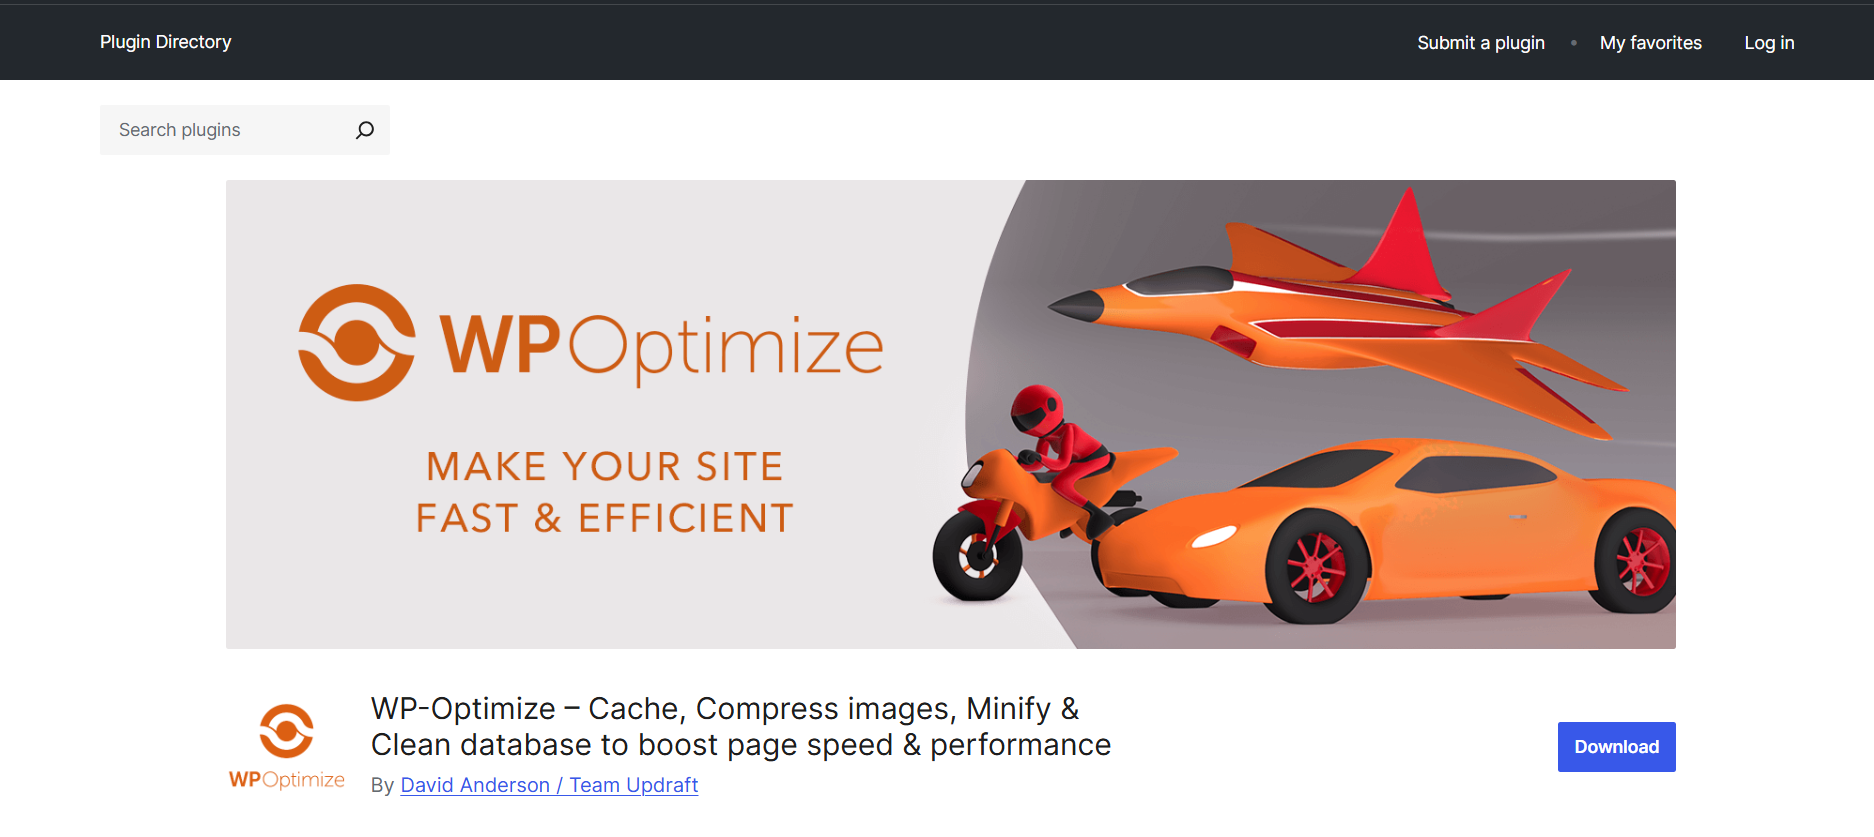
- WP-Optimize: For database cleaning.
— Customer Experience Extensions
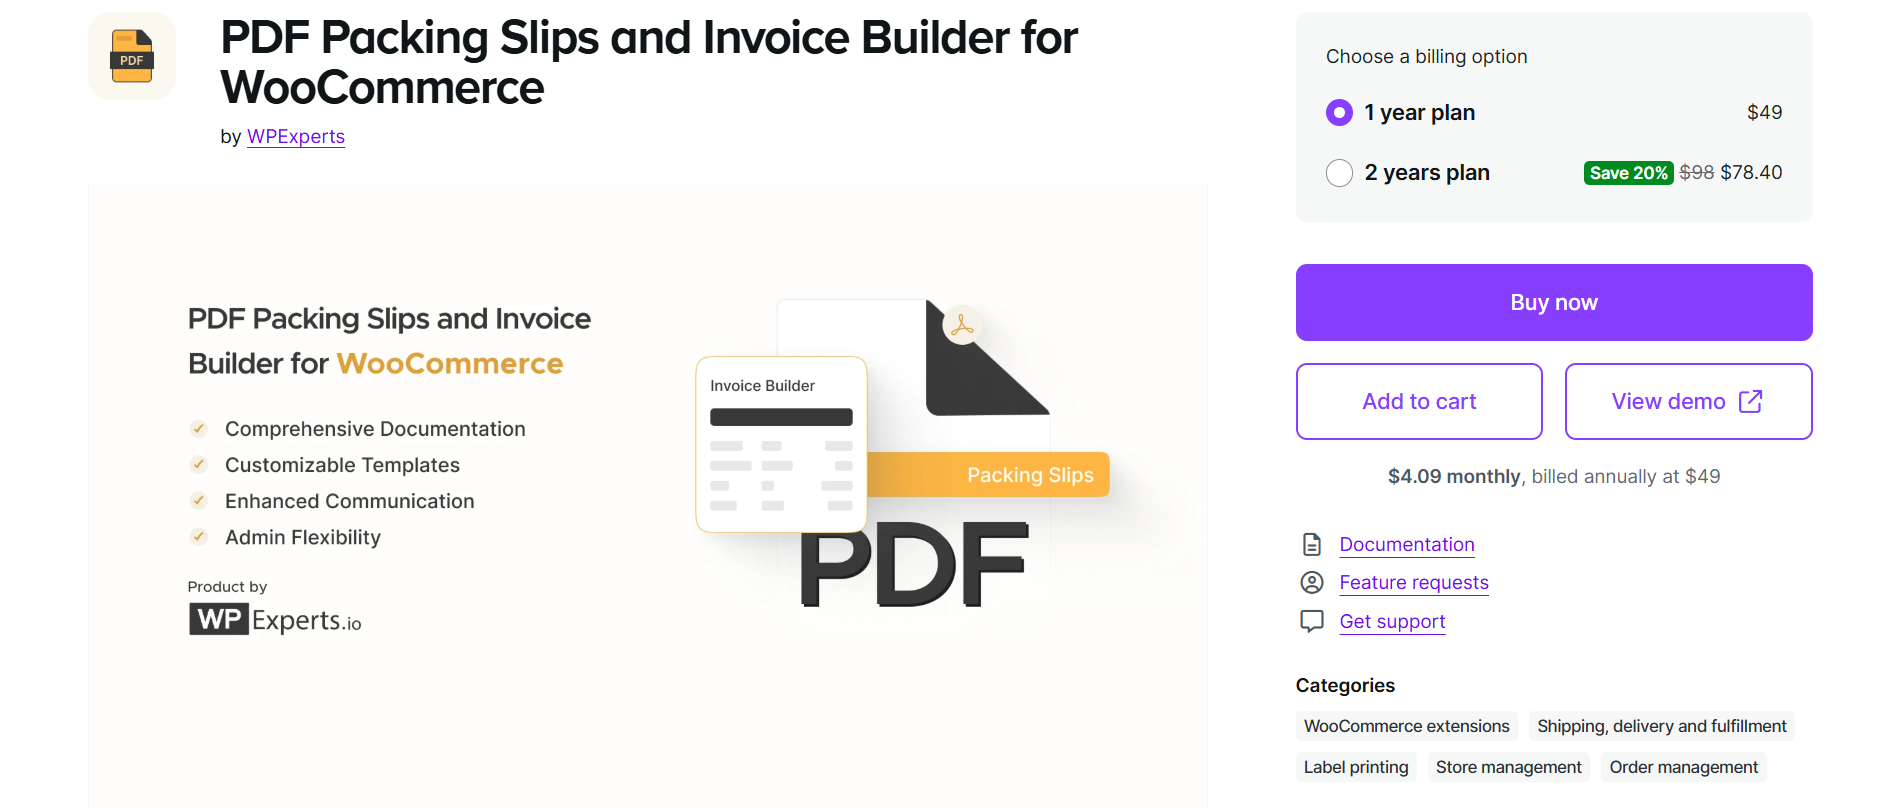
- PDF Packing Slips and Invoice Builder for WooCommerce: Professional-looking invoices.
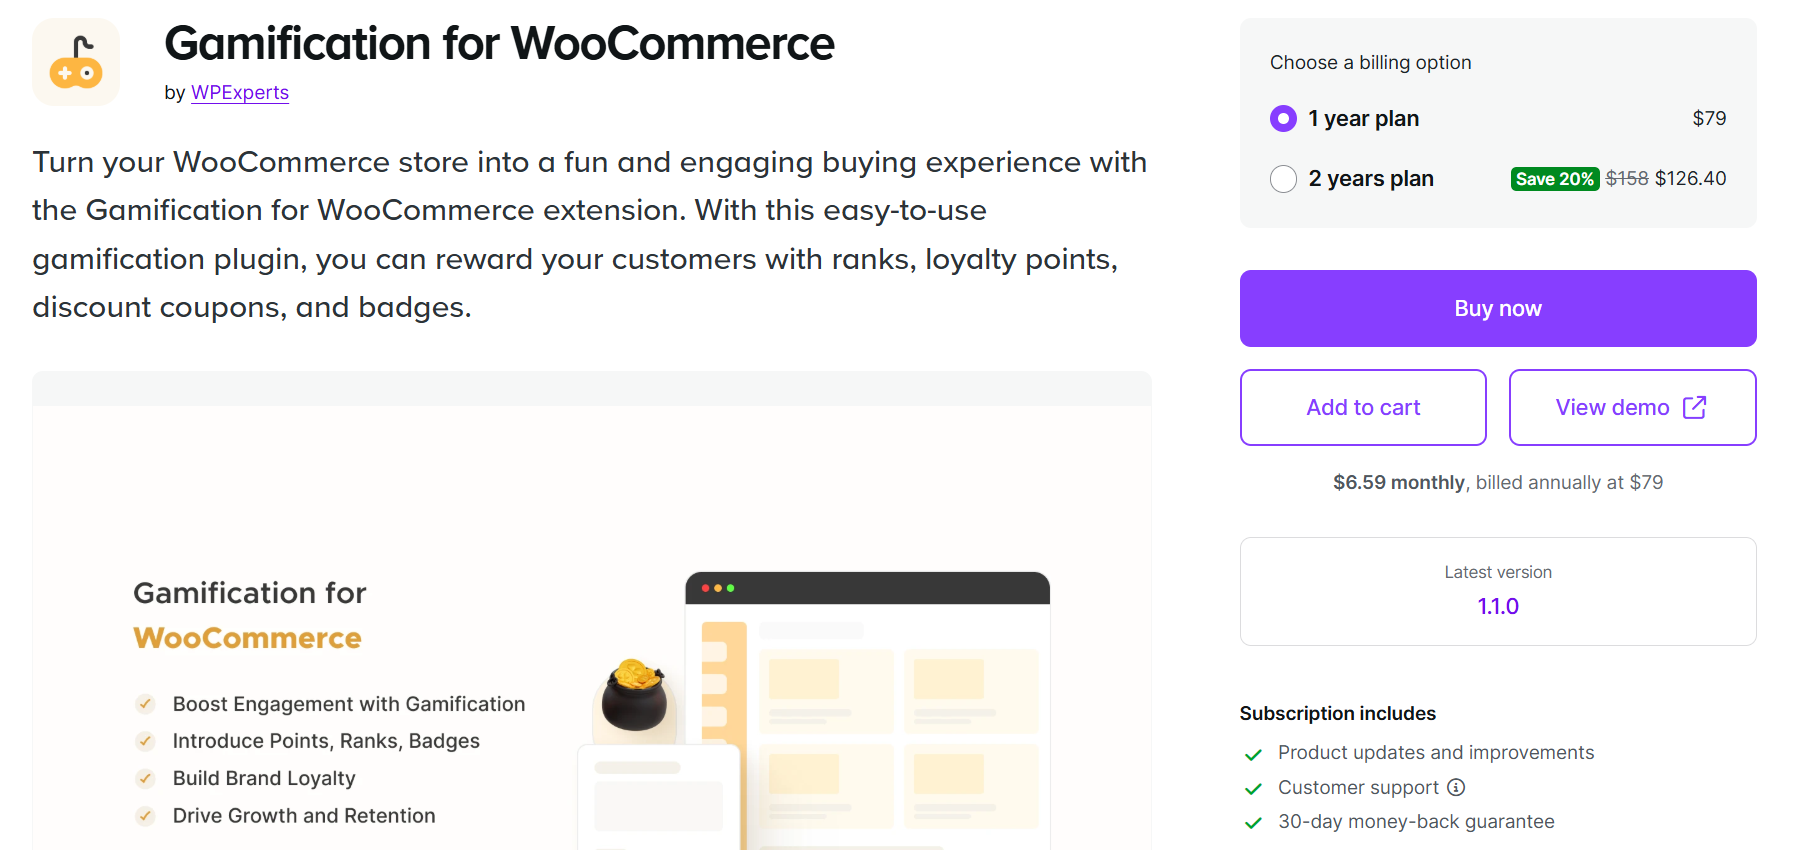
- Gamification for WooCommerce: Gamify your website to increase ROI.
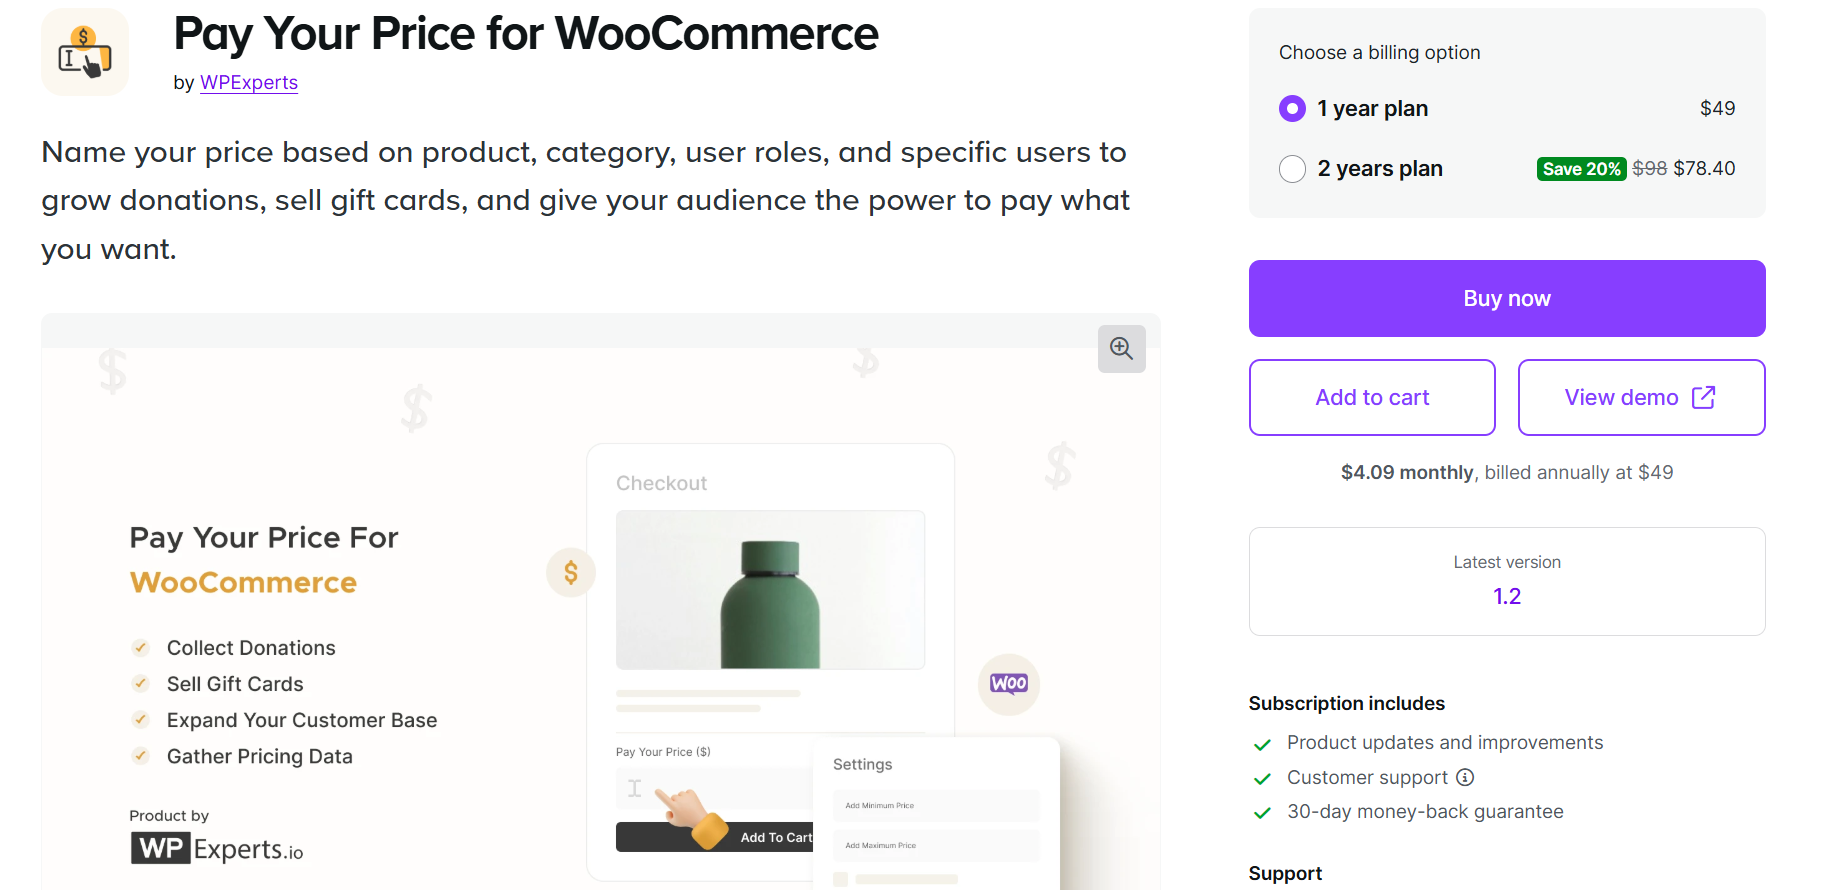
- Pay your Price for WooCommerce: Add a pay-what-you-want feature in your WooCommerce store to stand out from others.
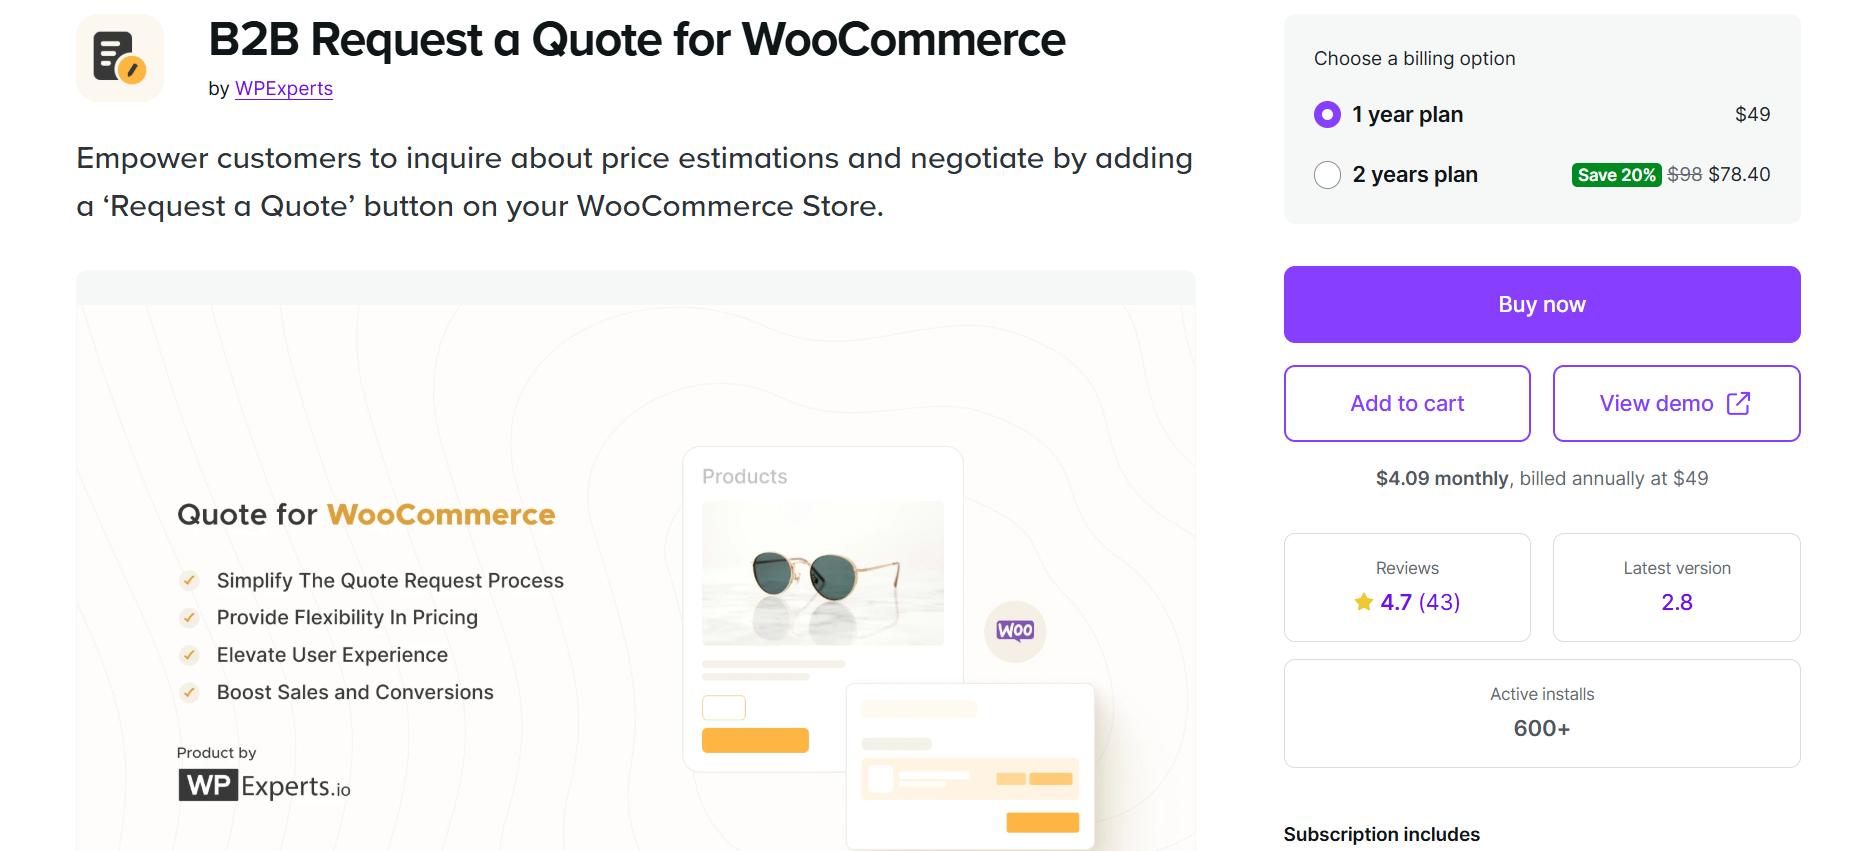
- B2B Request a Quote: Let your customer send a custom price for your products.
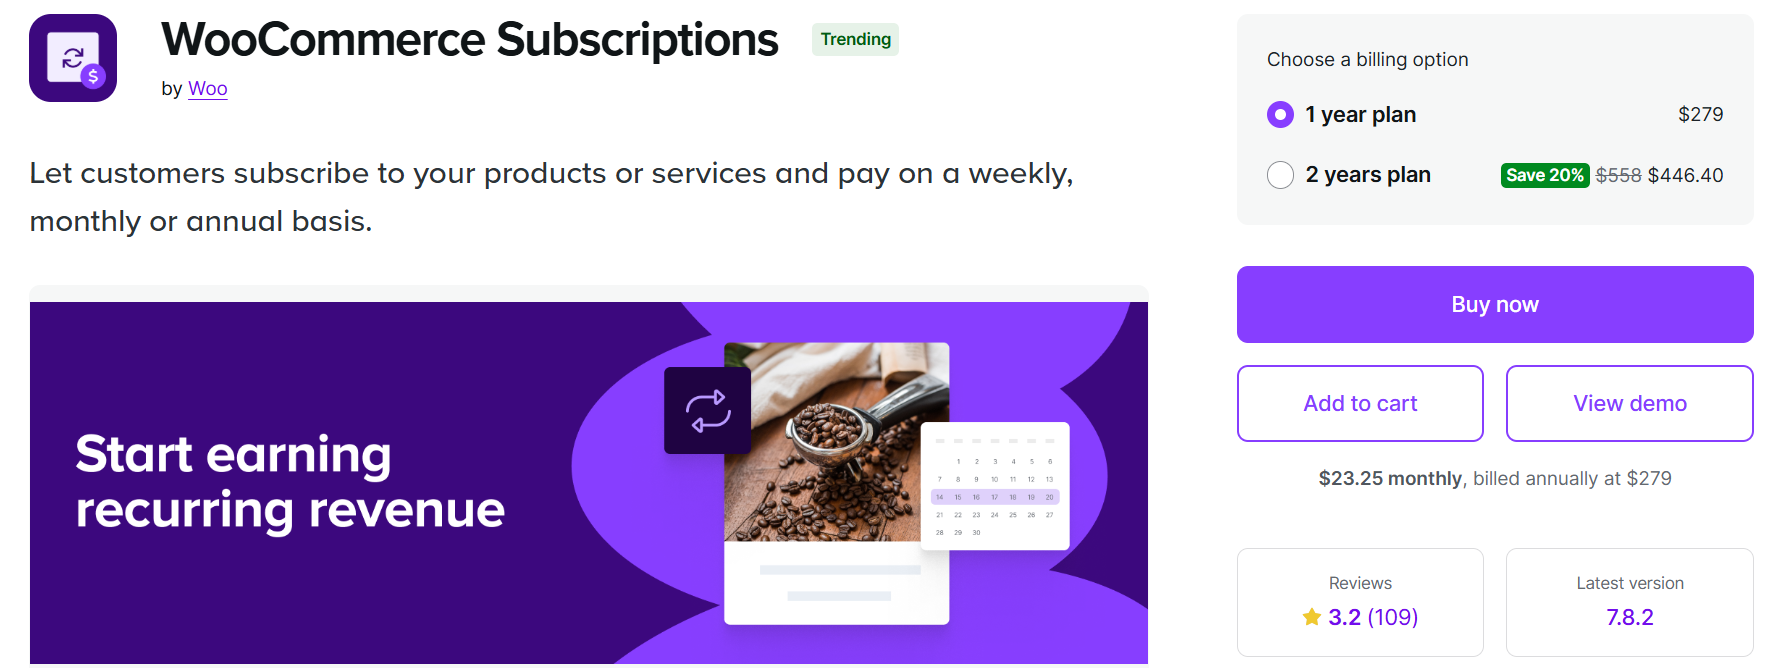
- WooCommerce Subscriptions: Recurring payment products.
Step 9: SEO for Your WooCommerce Store
Search engine optimization (SEO) is the key to organic traffic for your store. Employ these SEO techniques to get your store more prominent.
— Must-have SEO Plugins
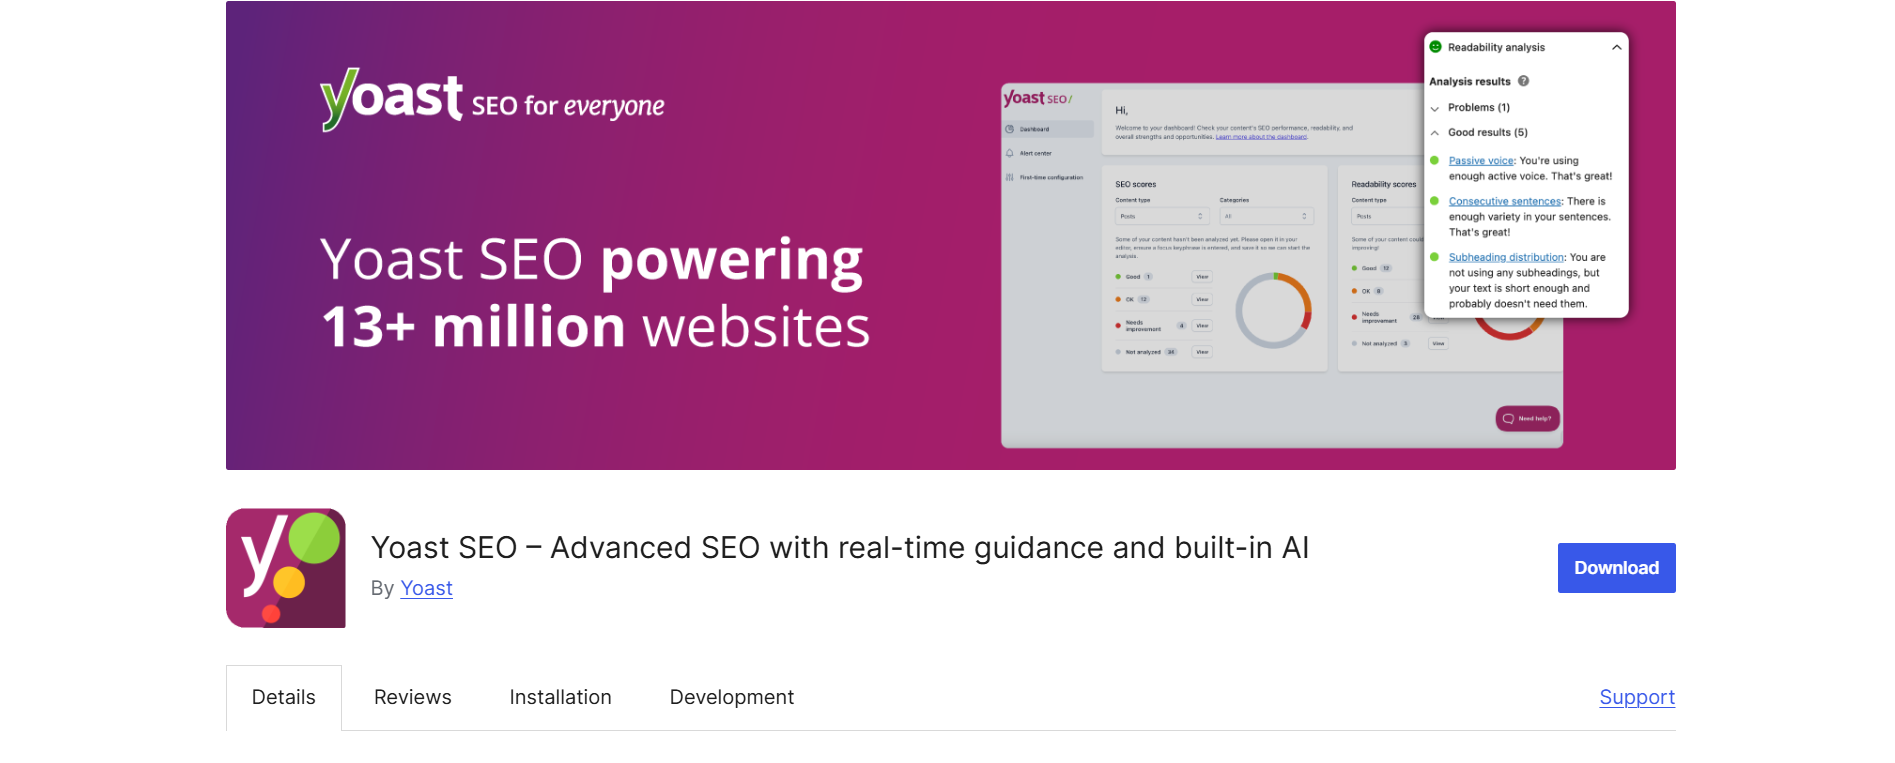
- Yoast SEO: Advanced SEO optimization (Beginner-friendly).
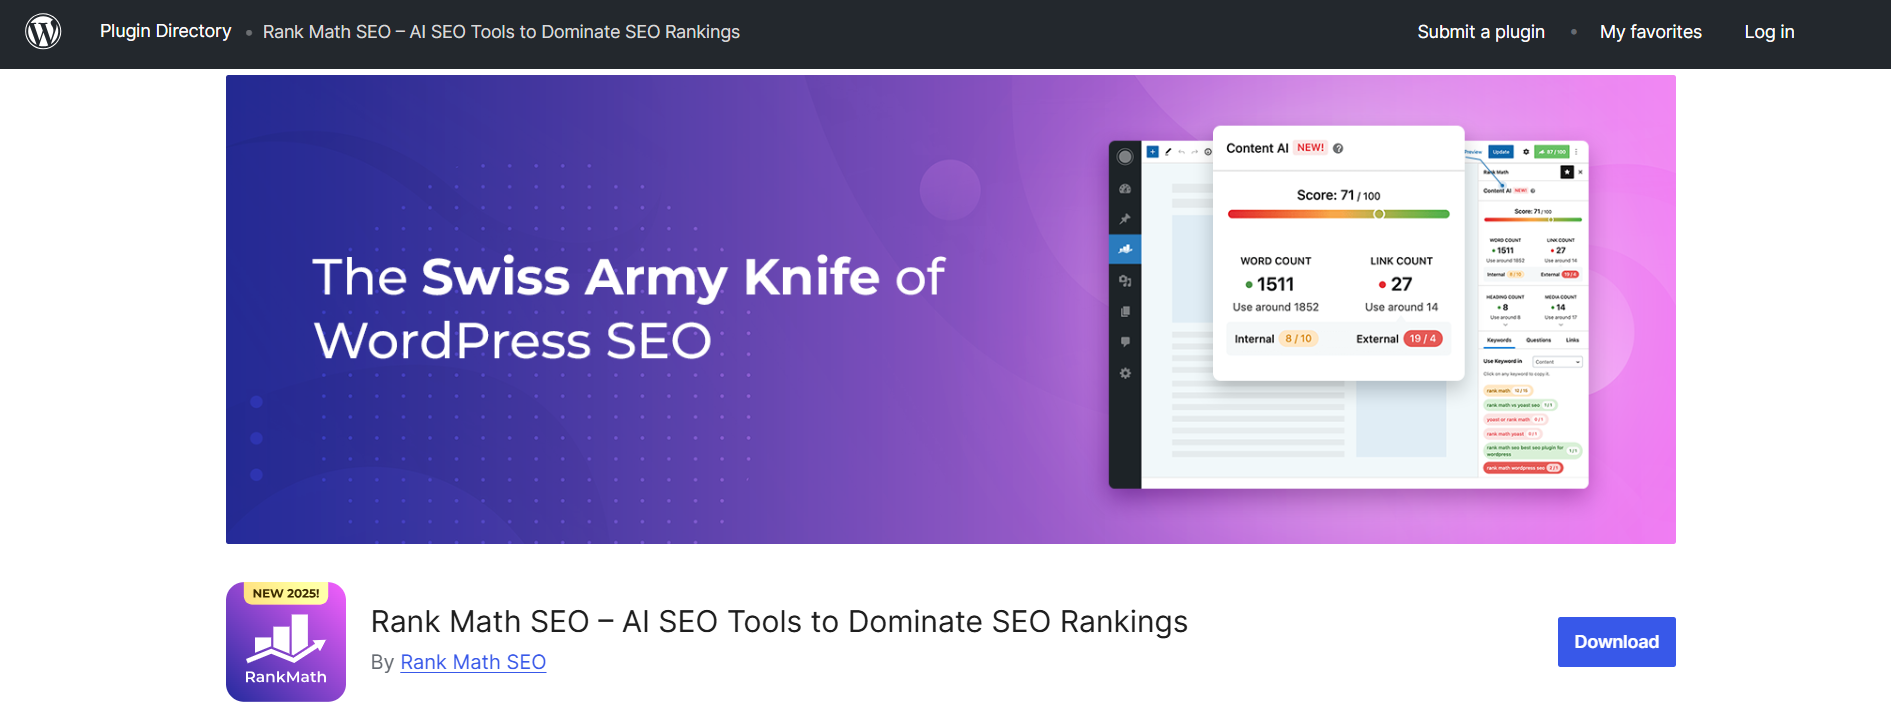
- RankMath: Second-best SEO plugin with high-end features.
— SEO WooCommerce Best Practices:
Product SEO:
- Optimize product titles with keyword-dense descriptive text (For example: Men’s Blue Denim Jeans – Best Price | Comfortable & Stylish).
- Write distinctive product descriptions.
- Optimize product images with alt tags.
- Construct SEO-friendly URLs (permalinks).
Category and Tag Optimization:
- Optimize category descriptions to entice.
- Optimize category names with keyword relevance.
- Optimize logical site structure.
Technical SEO:
- Activate XML sitemaps.
- Optimize page speed.
- Use structured data markup.
- Use a mobile-responsive design.
Step 10: Test Your Store Completely
Before going live with your store, test everything in detail to make sure all functions operate as required.
— Testing Checklist
Functionality Testing:
- Place test orders using different payment gateways
- Test checkout across different devices
- Test if email notifications are working
- Test shipping estimates for different locations
User Experience Testing:
- Browse your store like a customer
- Test search
- Test if all links work
- Test mobile responsiveness
Security Testing:
- Make sure the SSL certificate is live
- Test payment security
- Check customer data protection
Performance Testing:
- Test page load times
- Test under different internet connections
- Watch server response times
Step 11: Launch and Sell Your Store
Well done! Your store is finally ready to go live. Now it’s time to get the punters in and flog some merchandise.
— Pre-Launch Preparation
- Create social media accounts for your business.
- Set up Google Analytics & Google Search Console.
- Make launch marketing materials.
- Build an email list of leads.
— Marketing Strategies
- Content Marketing: Create useful blog posts about your products.
- Social Media Marketing: Sell and engage with customers.
- Email Marketing: Send newsletters and promotions.
- Paid Marketing: Leverage Google Ads or Meta (Facebook, Instagram) Ads for paid traffic.
- SEO: Continue to optimize for search.
Regular Maintenance and Optimization
Launching your WooCommerce store is only the first step. Regular maintenance ensures optimal performance, security, and customer satisfaction.
⇢ Essential Weekly Tasks
Security & Updates
Update WordPress core, WooCommerce, and all plugins weekly. Run security scans using Wordfence and monitor site uptime with tools like UptimeRobot.
Performance Monitoring
Check site speed using GTmetrix or Google PageSpeed Insights. Review error logs and test all payment gateways to ensure smooth operations.
⇢ Monthly Deep Maintenance
WooCommerce Database Updates
Navigate to WooCommerce > Status > Tools to check for database update prompts. Always create backups before running updates. Use WP-Optimize to clean expired transients, remove spam comments, and optimize database tables.
Performance Optimization
Compress product images with Smush, clear cache files, and remove unused plugins. Monitor database size growth and optimize large tables for better performance.
⇢ Performance Monitoring Tools
Set up Enhanced Ecommerce Google Analytics to track conversion rates and customer behavior. Use Google Search Console to monitor product page indexing. Install the Query Monitor plugin to identify slow database queries and server response issues.
Key Metrics to Track:
- Page load speed (target: under 3 seconds)
- Server response time (aim for under 200ms)
- Conversion rates and checkout completion
- Database query performance
⇢ Maintenance Schedule
- Weekly: Updates, security scans, speed checks, and payment gateway testing.
- Monthly: Database cleanup, performance audit, backup verification, analytics review.
- Quarterly: Security audit, business performance analysis, SEO optimization updates.
Regular WordPress site maintenance prevents major issues and ensures customers enjoy a seamless shopping experience.
Conclusion
Installing WooCommerce in WordPress offers great opportunities for your online business. We have guided you through all the steps that you need to set up a WooCommerce store in WordPress effectively in this WooCommerce step-by-step tutorial.
Never forget that it will require effort and time to establish a successful online business. Ensure that you offer excellent customer service, excellent merchandise, and excellent service. With the robust features of WooCommerce and your hard work, you will set out to initiate an ecommerce store on WordPress that can achieve success in this competitive age.
Your online business-building journey has officially begun. Take the first steps today, and soon you’ll be proudly operating a professional, fully functional WooCommerce web store online, ready to serve customers worldwide.
Ready to launch your online store? Start today with WooCommerce and create your e-commerce empire!